

1. Purpose
This document describes how to use CARL Touch, the mobility option of CARL Source.
CARL Touch should have been installed previously in accordance with the CARL Touch Installation Manual.
2. Prerequisites
The hardware must comply with CARL Berger-Levrault’s hardware recommendations.
-
CARL Source Version 7.7.0
-
CARL Admin Version 5.5
-
Smartphones and Tablets on Android™ 10 or higher or iOS 13 or higher
-
Have access to the Play Store and/or the App Store to download the version and updates.
3. Recommendations
3.1. Date and time on the mobile device
Time stamping of actions taken in CARL Touch is of the utmost importance for the correct operation of the application. Accordingly, to ensure that the date and time are set properly on smartphones and tablets, and to avoid the need to make adjustments for changes of time zone or summer/winter time, we recommend setting the date and time to automatic mode.
3.2. Management of technical attributes
The standard processes of CARL Touch are partly based on technical attributes stored in the database and not displayed by default in the forms of the CARL Touch or CARL Source applications. To ensure the proper functioning of the application, any modification, regardless of its form or method, is strictly discouraged.
4. Accessing CARL Touch
4.1. Introduction
If the CARL Touch version installed on your mobile device is not a version 7.1.0 or higher, you must uninstall and then download the version 7.1 available on the App Store or Play Store as indicated in the paragraphs iOS installation and Android™ installation.
You will also need to check the mobile devices registered in the CARL Touch Administration feature and remove obsolete versions. For this purpose, please follow this procedure:
From the CARL Touch Administration feature:
-
Select all records for which the version is different from 7.1.0 or higher,
-
Select the "Canceled" status from the status workflow button
 ,
, -
Confirm the change of status,
-
Remove all records in the ''Canceled" state.
4.2. iOS installation
To download CARL Touch iOS from their mobile device, users can go to the App Store and search for the CARL Touch app, or scan the QR Code below.
4.3. Android™ installation
To download CARL Touch Android™ from their mobile device, users can go to Google Play and search for the CARL Touch app, or scan the QR Code below.
4.4. Running the application
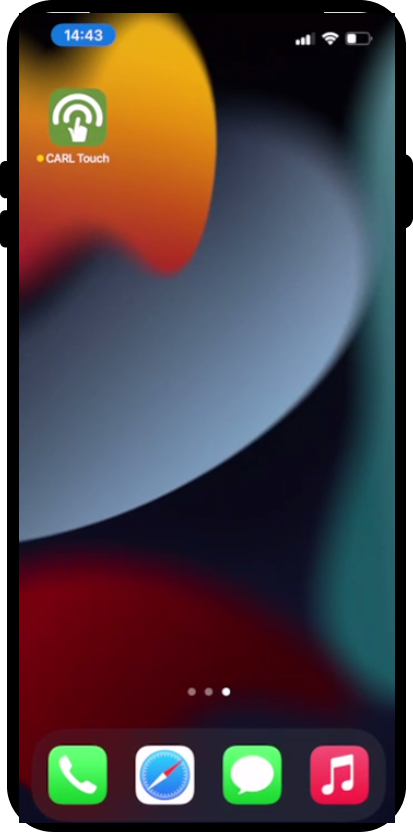
To start CARL Touch, select the «CARL Touch» icon from the list of applications on your mobile device (smartphone, tablet).
4.5. Configuration
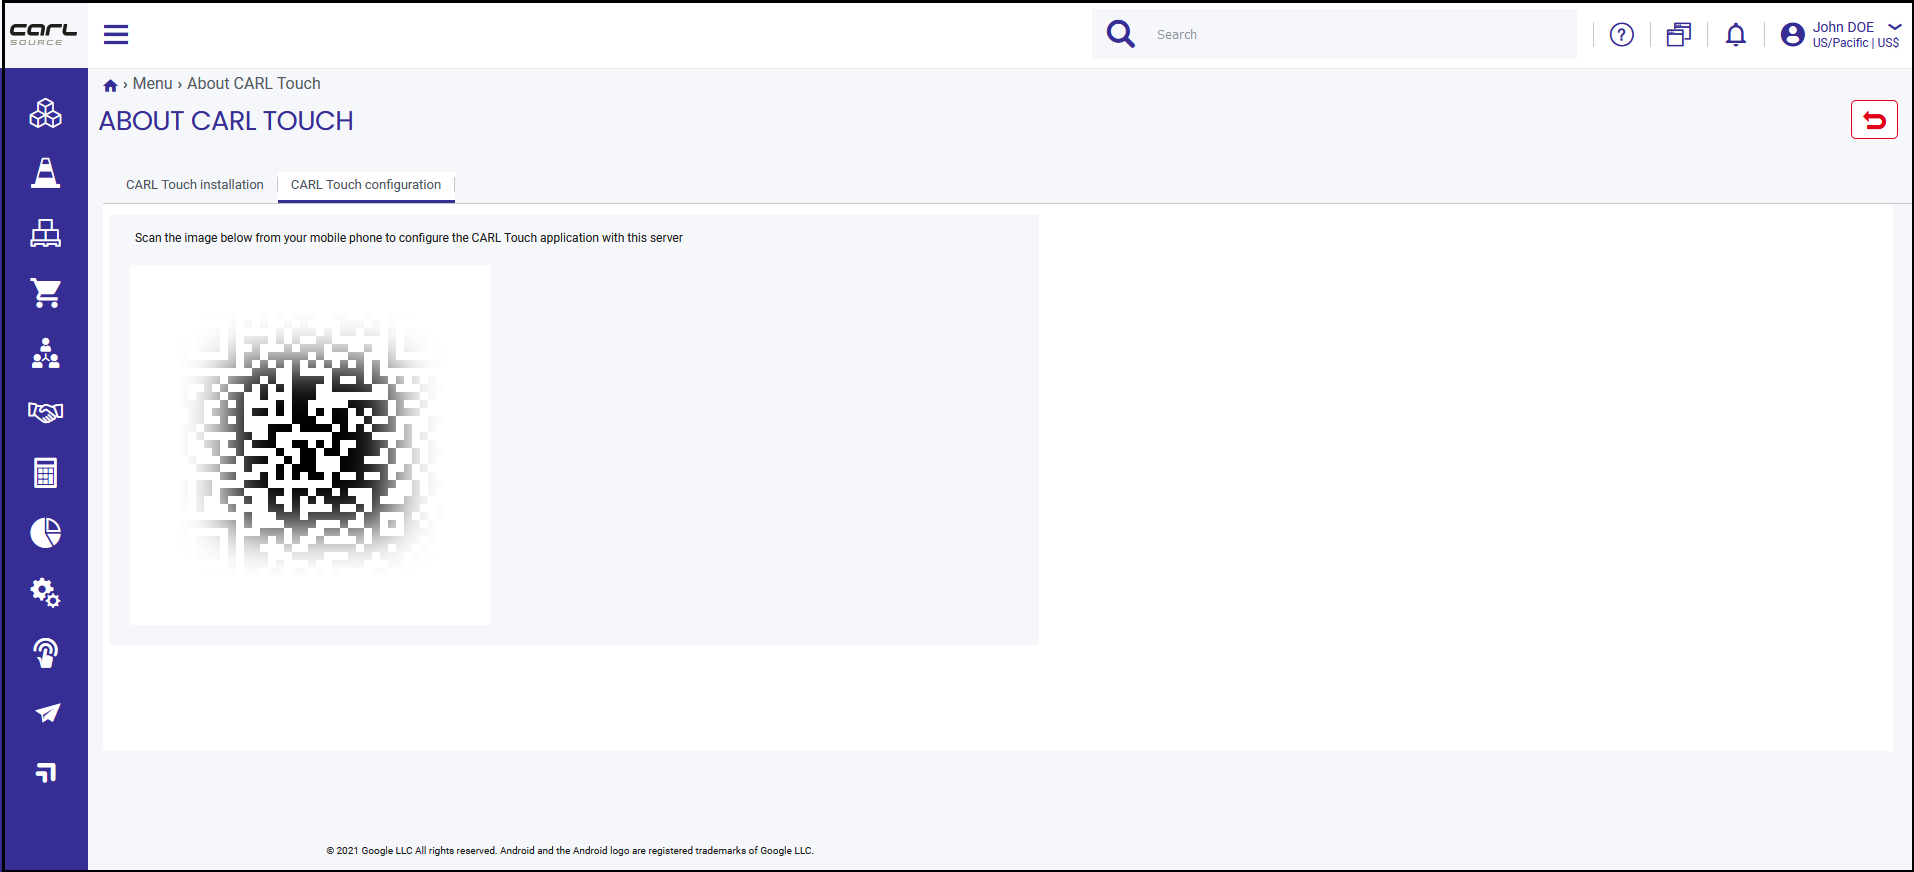
Once you have installed CARL Touch on your smartphone, you are asked to scan the configuration. The screen below will be displayed, enabling you to scan the configuration QR Code by selecting the "Scan configuration" button.
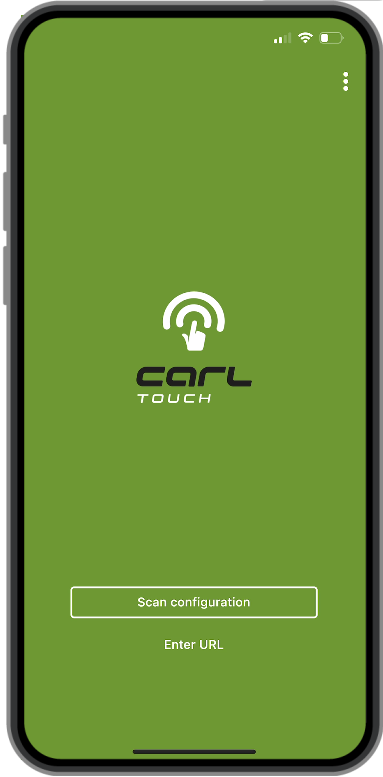
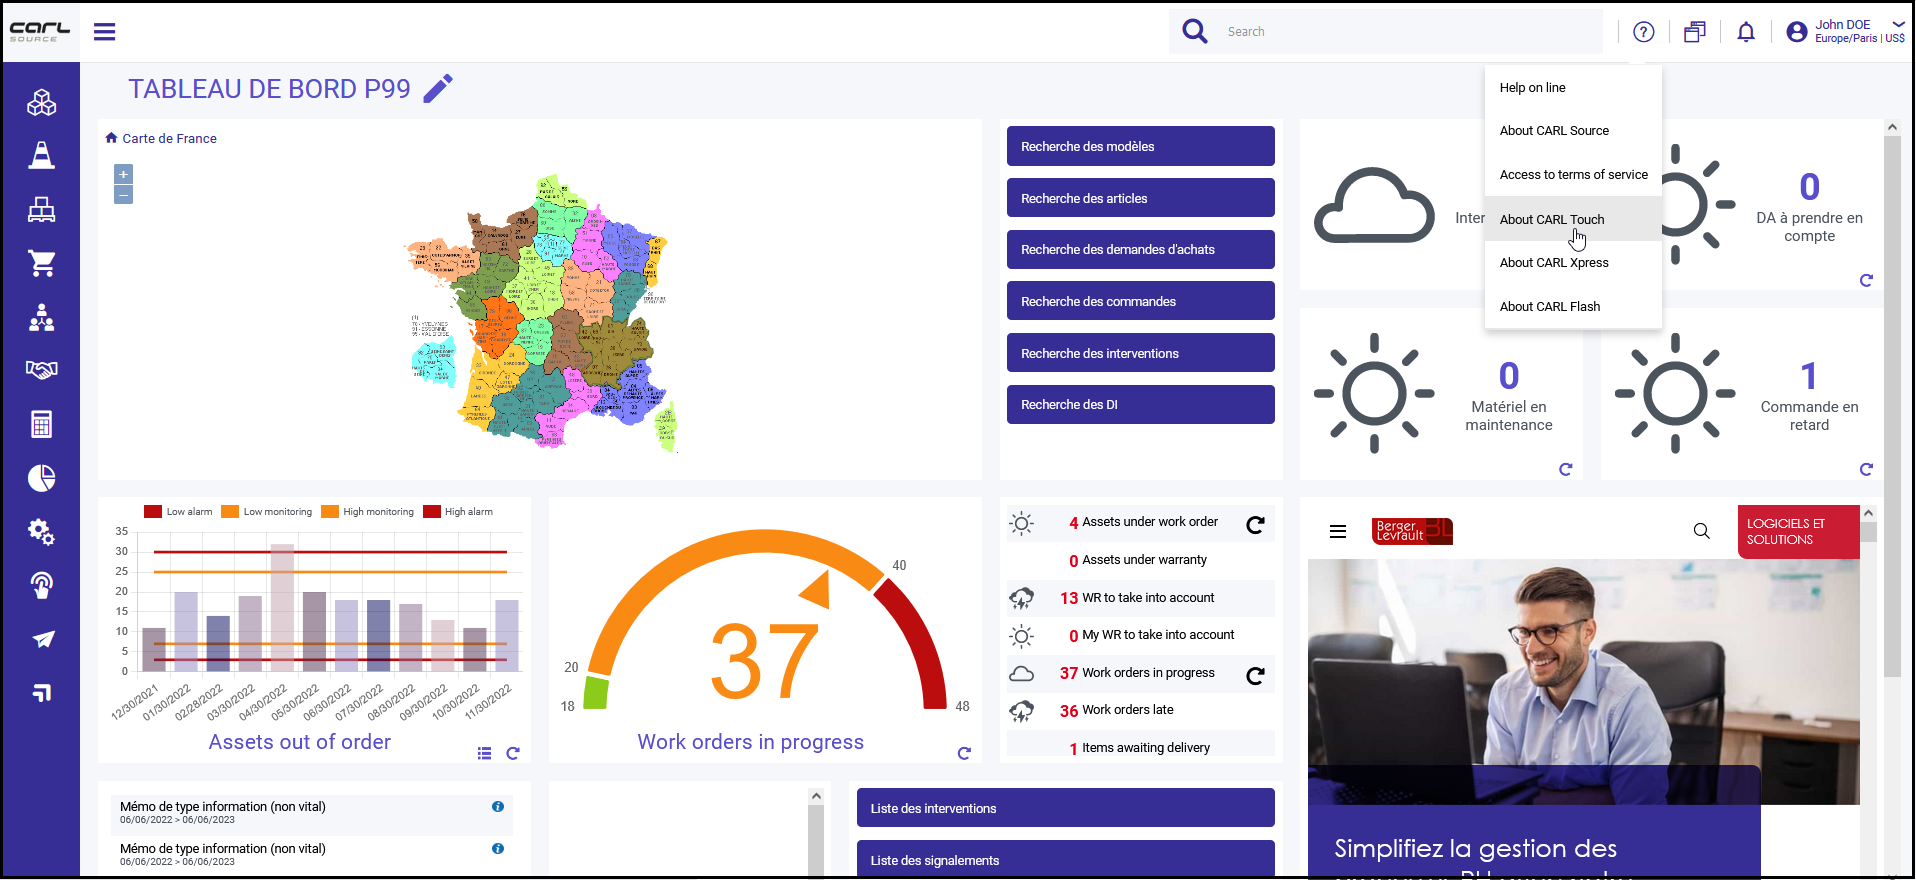
The configuration QR Code is located on the «About CARL Touch» form in CARL Source.
4.6. Authentication
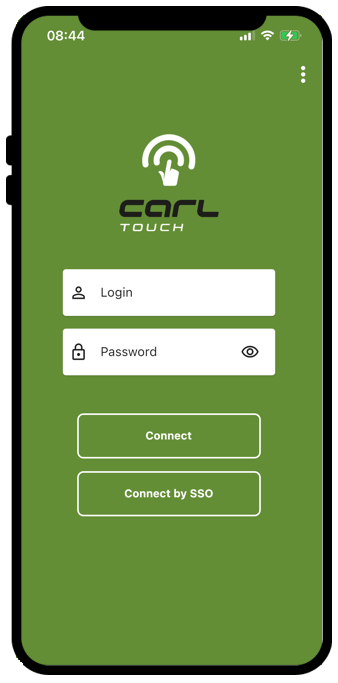
Once configuration is complete, CARL Touch displays the authentication form. This form enables users to enter:
-
Their username in the Identifier field.
-
Their password in the Password field.
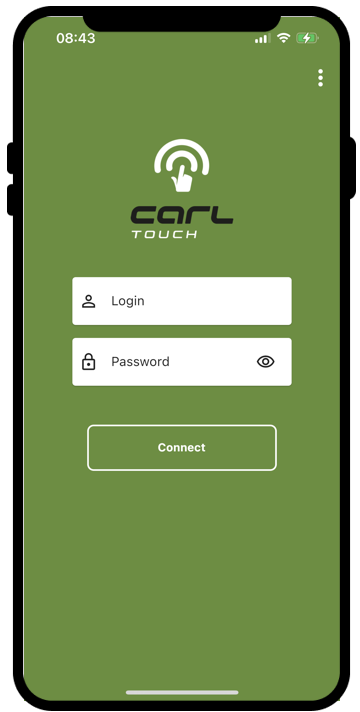
Users must confirm their authentication by selecting the "Login" button.
CARL Touch checks the user’s authentication with CARL Source and then loads the CARL Touch data.
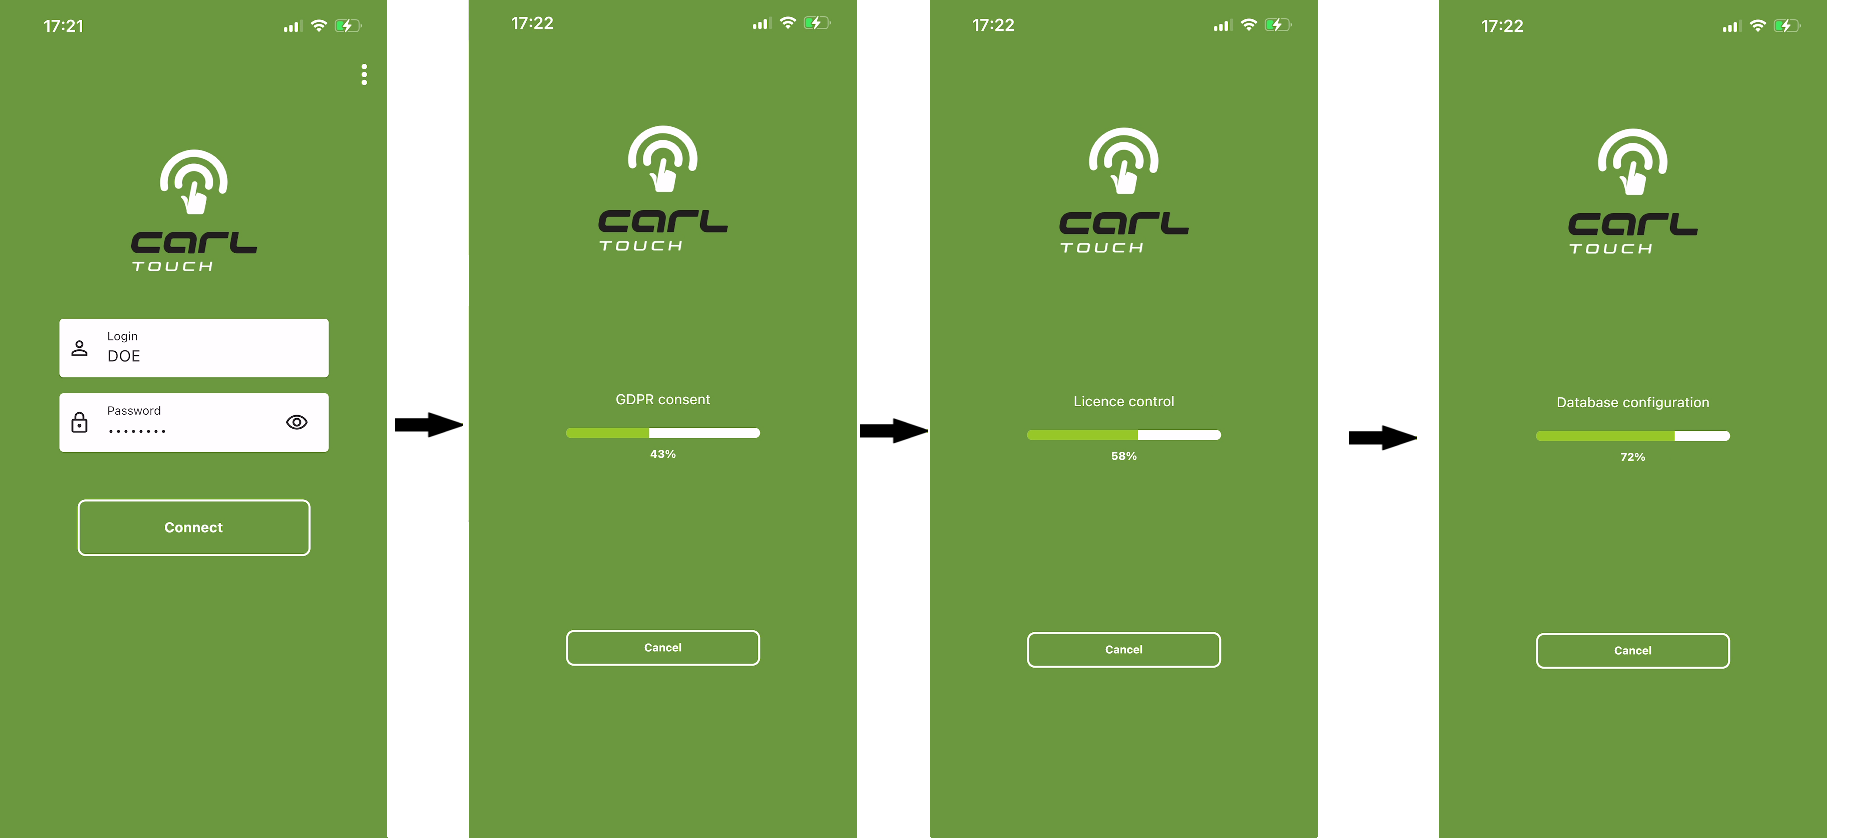
CARL Touch then displays the first function accessible from the menu.
If CARL Source is configured for SSO authentication in the authentication system settings, a  button is used to switch to your organization’s SSO portal.
After entering and confirming their user name and password, users are returned to CARL Touch and synchronization with the database is initiated.
If CARL Source is configured for mixed authentication in the authentication system settings, users can choose to log into CARL Touch:
-
either with their CARL Source user name and password
-
or with their SSO user name and password
A "SSO Login" button is added to the login page and allows them to switch to their organization’s SSO portal.
4.7. License checks
CARL Touch checks the licenses for each module. To determine whether user authentication is authorized, CARL Touch checks license availability depending on the synchronized modules deduced from the user’s profile.
-
Work module:
-
Synchronization of tasks: Work requests and/or Work orders
-
Synchronization of equipment: Locations and/or Main points and/or Assets and/or Templates
-
-
"Stock/Purchasing" module:
-
Synchronization of items
-
Synchronization of receipts
-
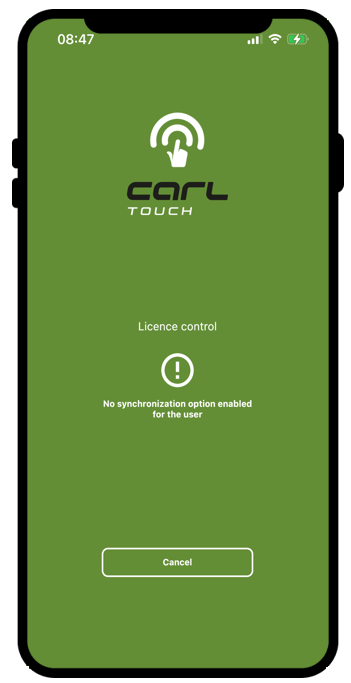
If the number of licenses per module has been reached, when a new synchronization request is made CARL Touch will display one of the following messages depending on the user’s profile:
-
No license available - The number of work licenses has been exceeded (For an Equipment/Work profile)
-
No license available - The number of stock licenses has been exceeded (For a Stock profile)
-
No license available - The number of licenses has been exceeded (For a full profile)
4.8. Reconnection if authentication has expired
The system setting «Authentication token validity time» can be used to set how long a session may last before it expires.
When a session expires:
-
Exchanges between CARL Touch and CARL Source are halted.
-
The user is automatically disconnected.
-
A popup is displayed, asking the user to authenticate. The password must be entered.
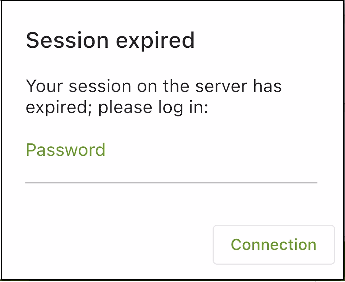
If not, the pane at the top of the main lists indicates «Session expired». Pull down the main list to display the authentication popup again.
The Knowledge Sheet (FDC) 006072 contains information to help diagnose certain errors.

|
This is not an exhaustive list of errors that can be returned. |
5. Ergonomics
5.1. Action bar
An action bar is shown at the top of each CARL Touch form.
Depending on the context, this action bar enables the user to:
-
Identify the current form.
-
See how many elements are displayed on the current form (e.g. number of tasks displayed in the «Tasks» list).
-
Perform actions on the current form (e.g. add records, search, geolocation).
-
Navigate between functions (see «Navigation menu» below).
5.1.1. Action bar contents
For the main functions, the action bar is displayed as follows:
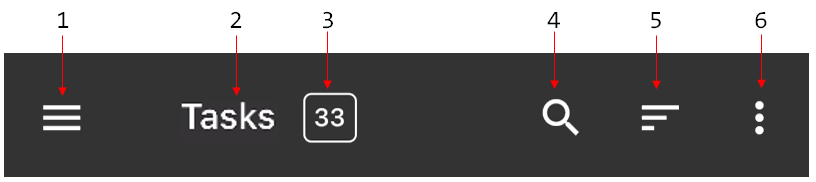
-
Access to the CARL Touch application menu.
-
Title of the current form (here, the tasks list).
-
Number of lines of results for the current function.
-
Button for accessing the search box.
-
Collapse/Expand button.
-
Button for accessing the actions menu.
5.1.2. Indicator: «Online mode»/«Offline mode»
If CARL Touch does not have a network connection (3G/4G, WiFi), a line is displayed just below the action bar to inform the user of the date and time of the last update with the CARL Source server:
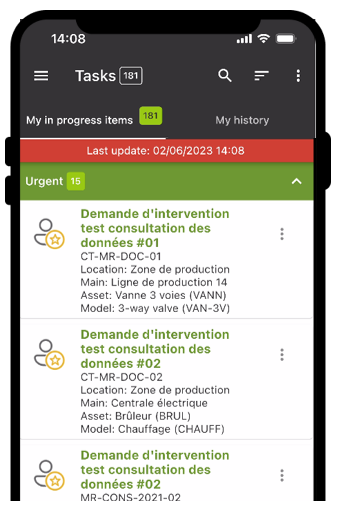
This line is hidden once CARL Touch has a network connection again and has synchronized with the CARL Source server.
This mechanism tells users at all times whether or not their CARL Touch device is able to communicate with the server.
5.2. Navigation menu

5.4. Functions menu
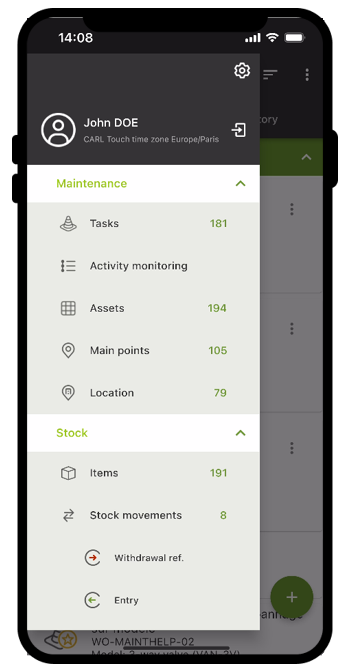
The menu is structured in three levels:
-> Level 1: Modules (e.g. Stock).
-> Level 2: Functions (e.g. Stock movements).
-> Level 3: Sub-functions (e.g. Withdrawal).
Certain level «3» elements are different in that they do not lead to functions but rather to wizards that provide users with step-by-step guidance in an operation (e.g. performing a stock entry).

|
Wizards are described in detail in section Wizards |
The composition of the navigation menu is dynamic and reflects the configuration set in the user profile: for instance, a person working only in Maintenance will never see functions relating to Stock, as these would serve no purpose.
Likewise, with careful use of profile rights, it is possible to configure the menu down to specific sub-functions.
A user who has chosen to synchronise data relating to stock will not necessarily have access to all stock sub-functions: if this user does not have access rights to withdrawals in CARL Source, the user will not have access to the Withdrawals sub-function in CARL Touch.
The composition of the navigation menu therefore reflects the profile rights set in CARL Source for the current user.
The navigation menu also directly shows the number of existing records for the main functions: number of current tasks, number of assets, number of location points, etc.
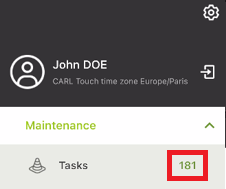
5.5. Actions menu
The actions menu  is used to access actions available for the current function or sub-function, as well the CARL Touch diagnostic.
The menu comprises:
-
Actions for which there is insufficient space to display the icons directly in the action bar.
-
an "Help" action providing access to the CARL Touch user guide.
-
a "Diagnostic" action allowing the saving of information for diagnosing problems.
5.6. Button actions
Certain buttons are used throughout CARL Touch and can therefore be found on various forms in the application.
| Button | Button action |
|---|---|
|
Confirm or save data entered. |
|
Cancel data entered. |
|
Select «Edit» mode for a form. |
|
Delete a field on a form. |
|
Edit a comment. |
|
Sort records. |
|
Search records. |
|
Collapse or Expand grouping blocks. |
|
On a list element (e.g. a task on the task list), this button displays the list of context-sensitive actions available. |
|
Scan a barcode, QR Code or Data Matrix. |
|
|
Scan using the RFID reader paired with the device. |
|
Ability to scan using the device’s physical laser scanner. |


5.7. Tabs
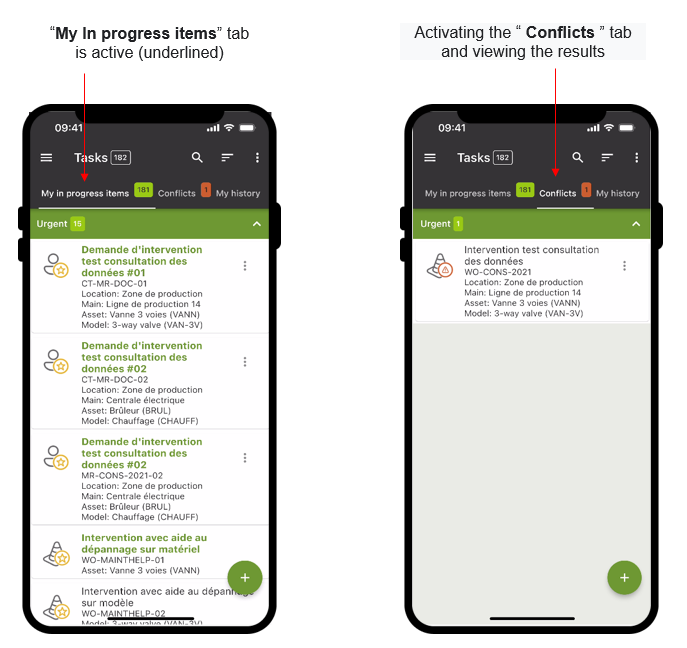
Depending on the context, a CARL Touch form can show information on tabs. If several tabs are displayed, the active tab is identified by a discreet underlining effect.
Each tab, regardless of whether or not it is active, always shows the number of result lines that it contains.
5.8. Sort criteria and grouping blocks
5.8.1. Applying a sort criterion and grouping results
As the list of results can potentially contain thousands of lines, it is important for the user to be able to easily organise the data by grouping according to a selected sort criterion.
The sorting and grouping feature is built into CARL Touch and implemented as follows.
By selecting the image button:../../resources/images/CXT-AA/image023.png[image,width=50,height=50] (or the Sort action in the actions menu), the user can modify the primary and secondary sort criteria to be applied to the current results list—here is an example with the sort criteria applicable to the task list:
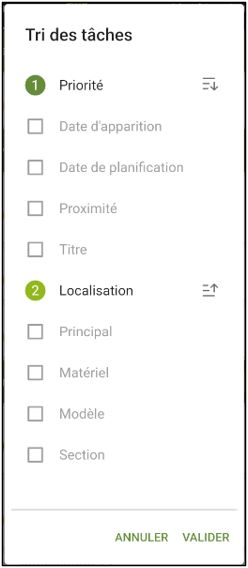
The  button is used to define whether the sorting is ascending or descending.
The sort criteria proposed are the main sort criteria listed in CARL Source settings, as well as all the fields displayed in the list.
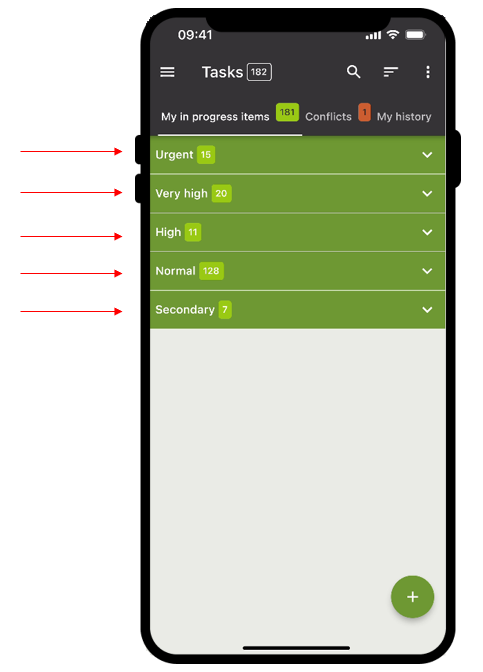
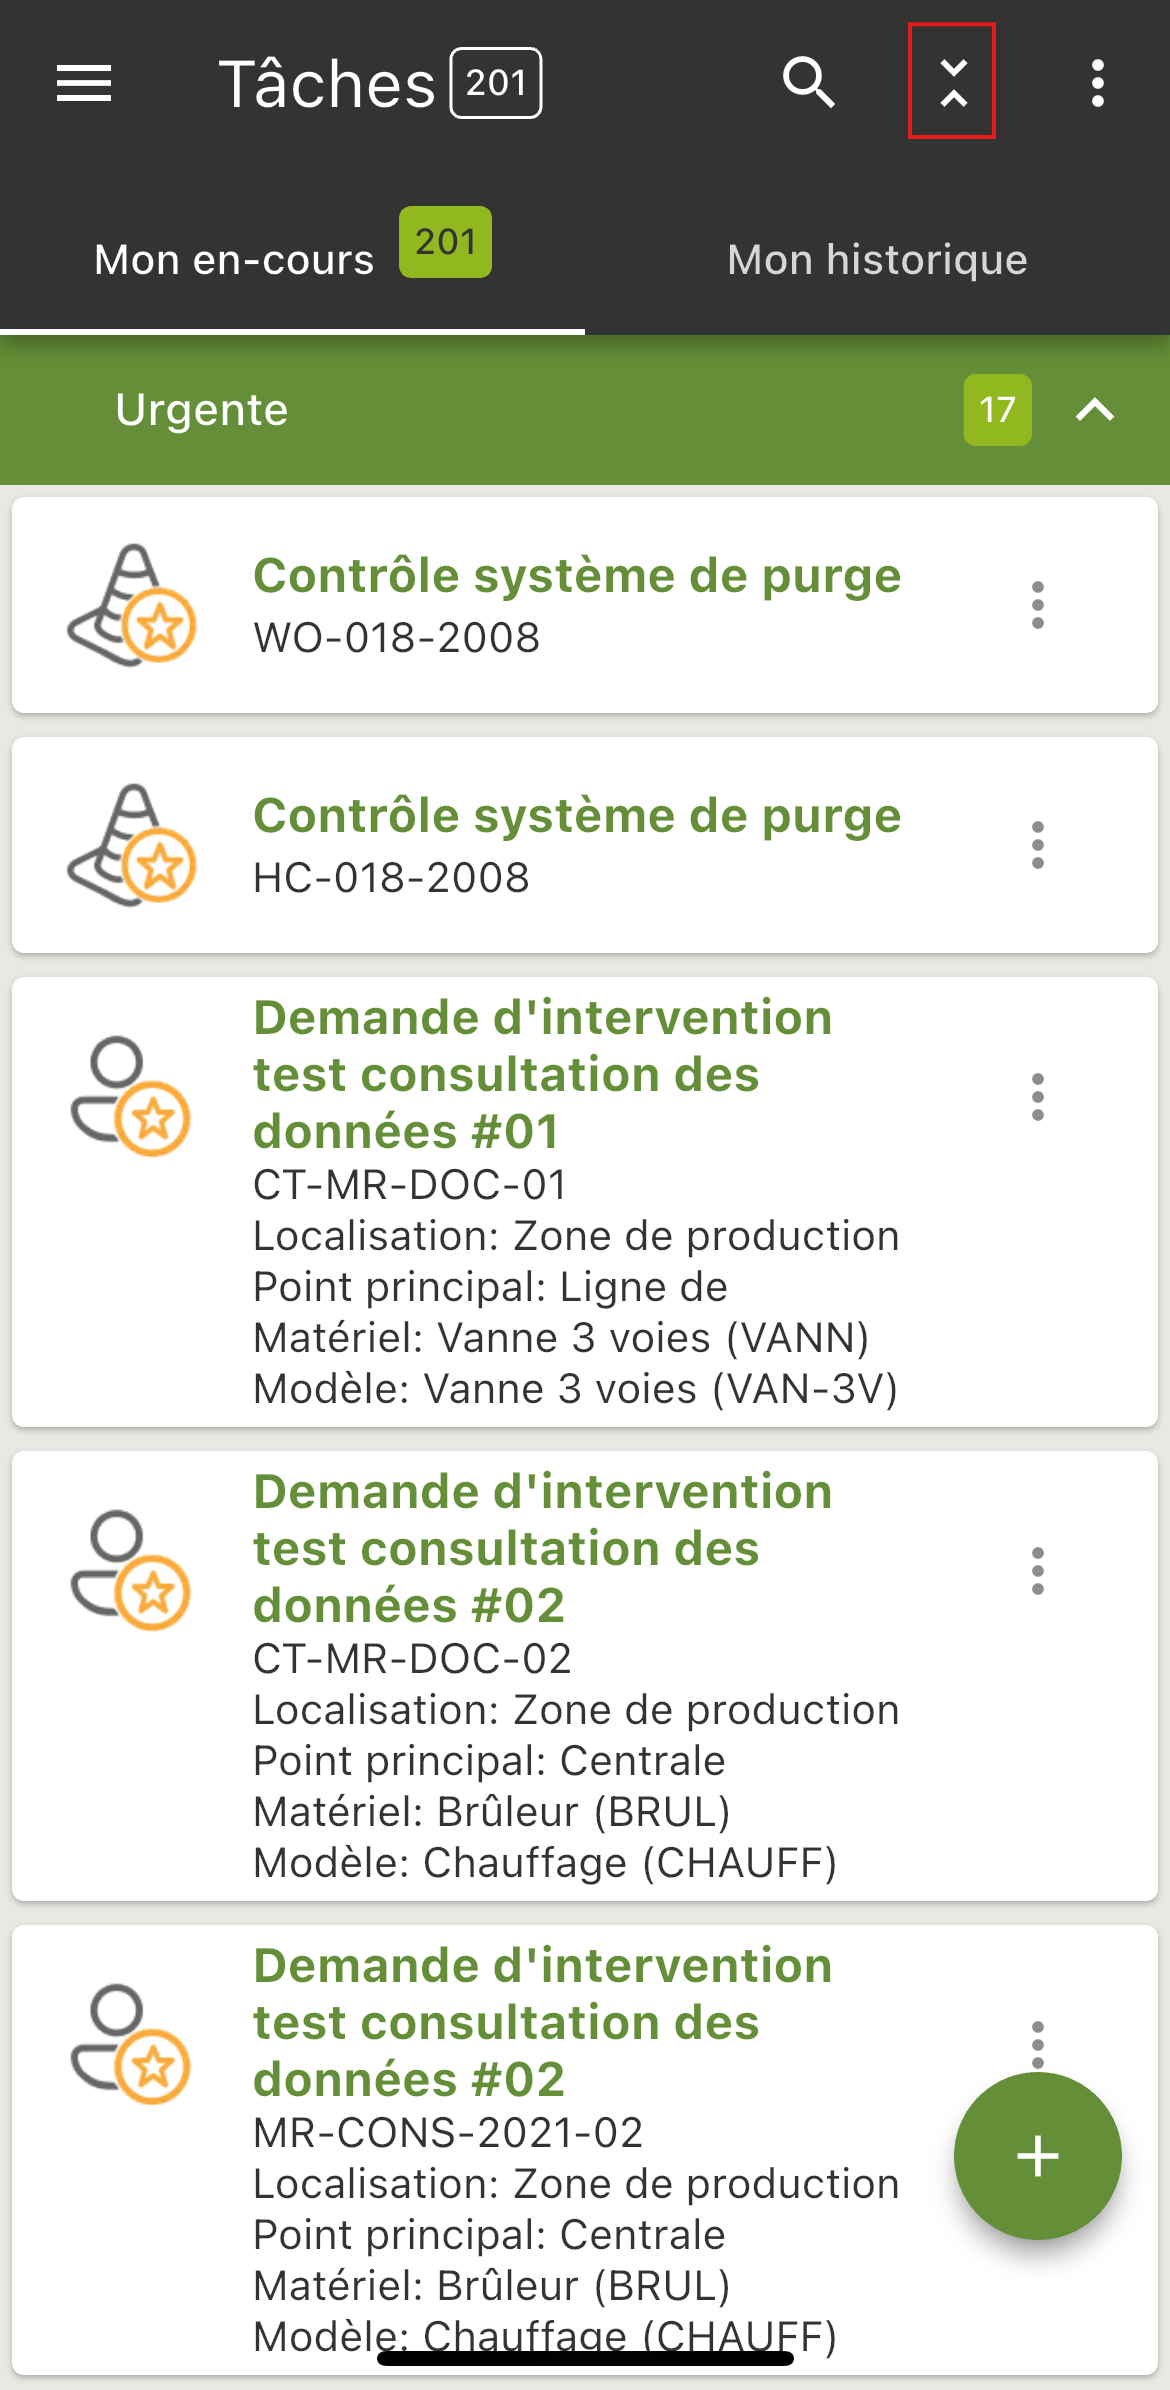
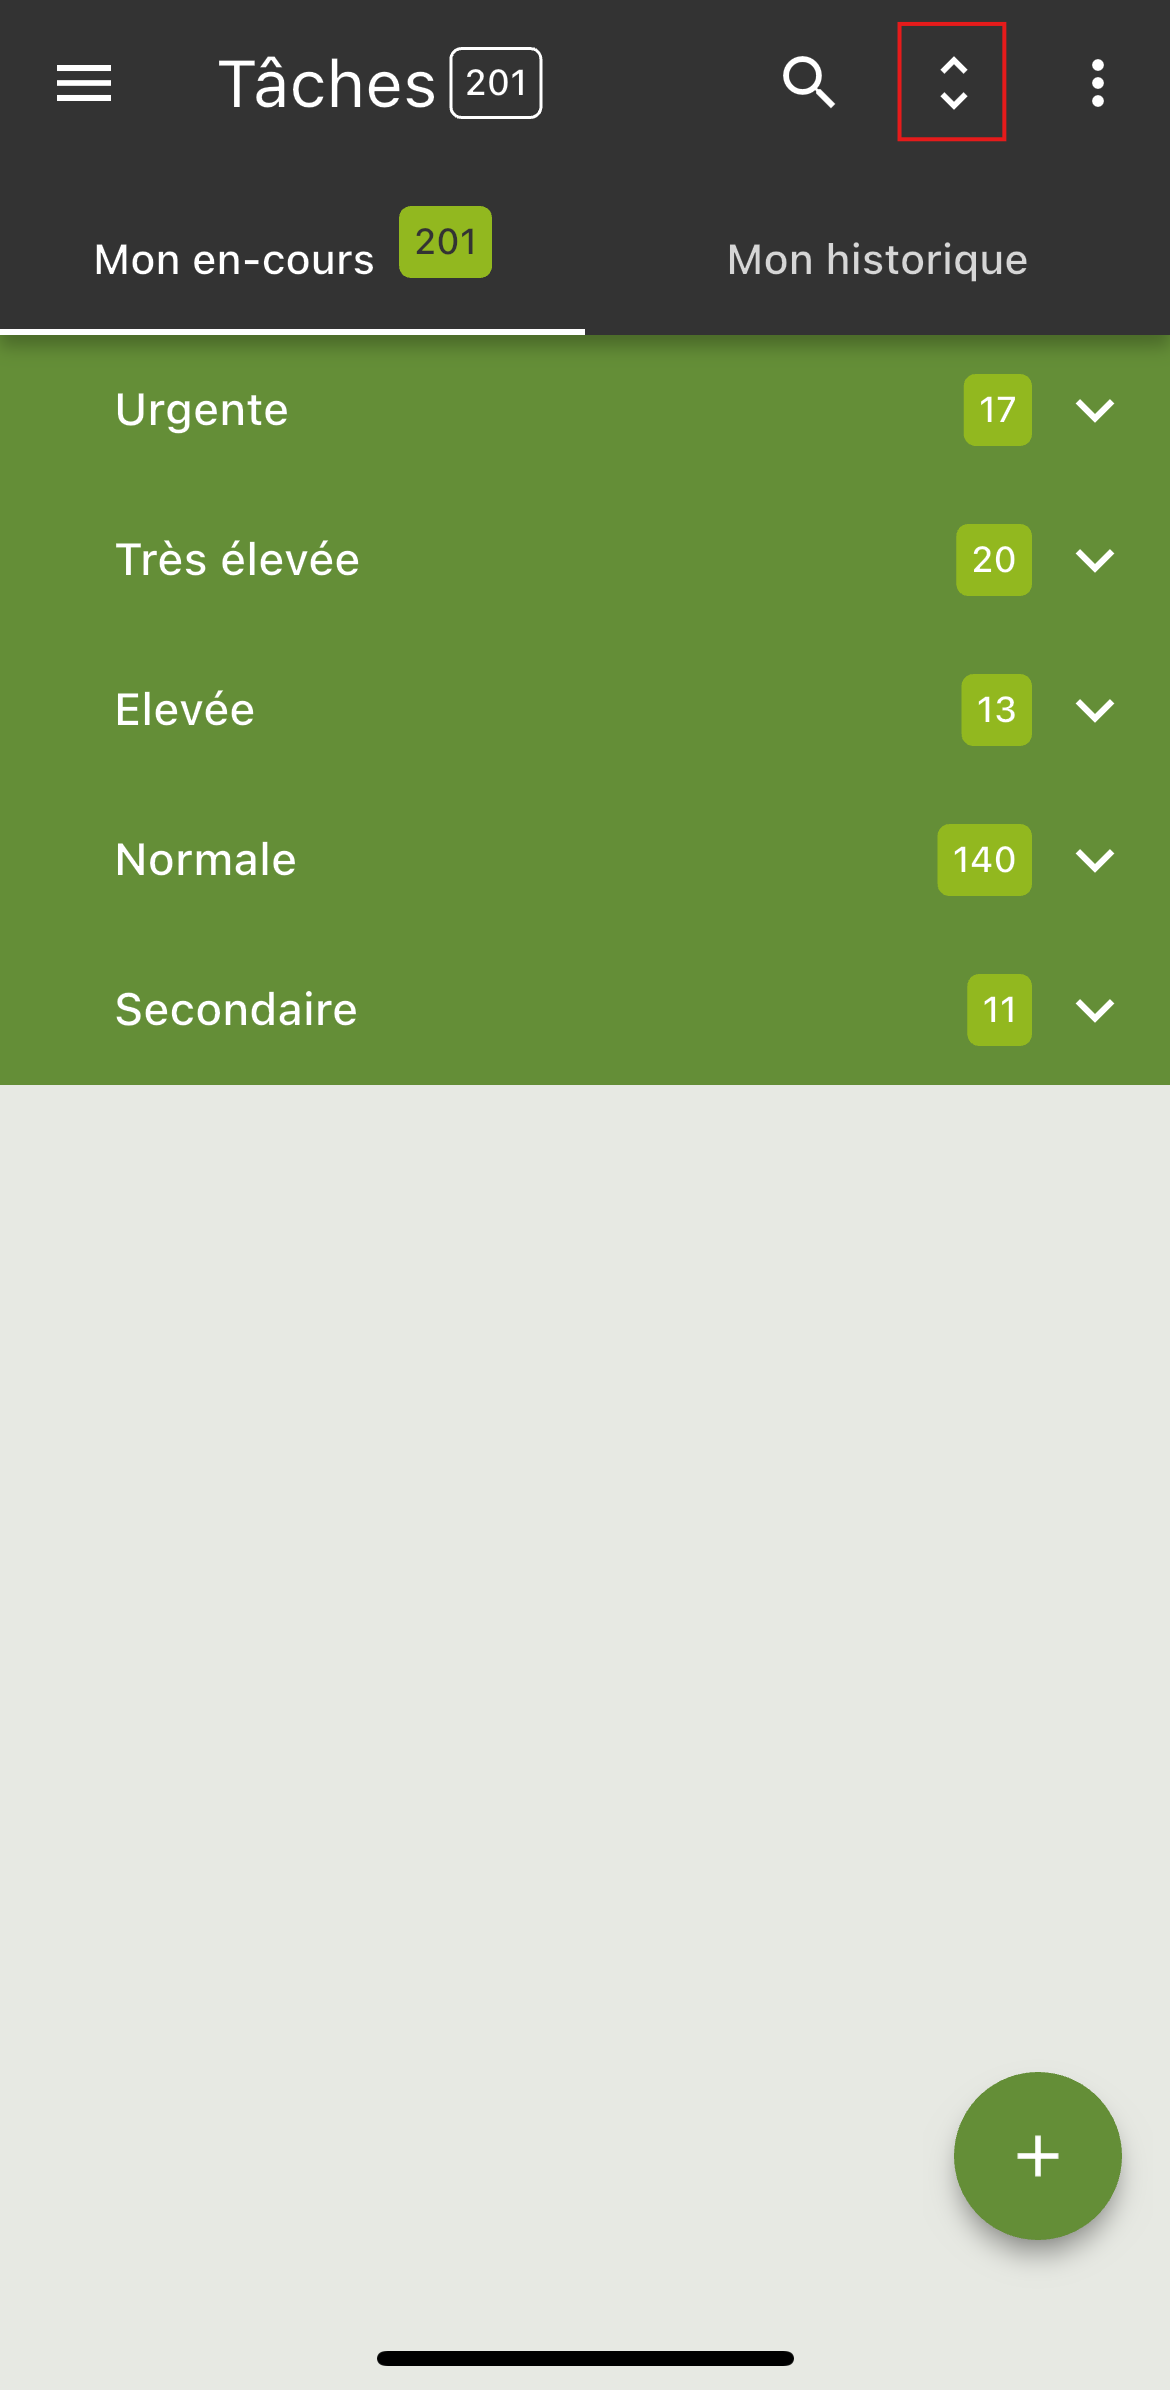
The selected sort criterion is applied to the current list, and the results are grouped in blocks: each grouping block displays both the title of the grouping criterion and a counter indicating the number of records in the block.
In the example below, tasks are grouped in blocks corresponding to the possible «Priorities» for a task – «Urgent», «Very high», «High», «Normal» or «Secondary»:






5.9. Detail blocks
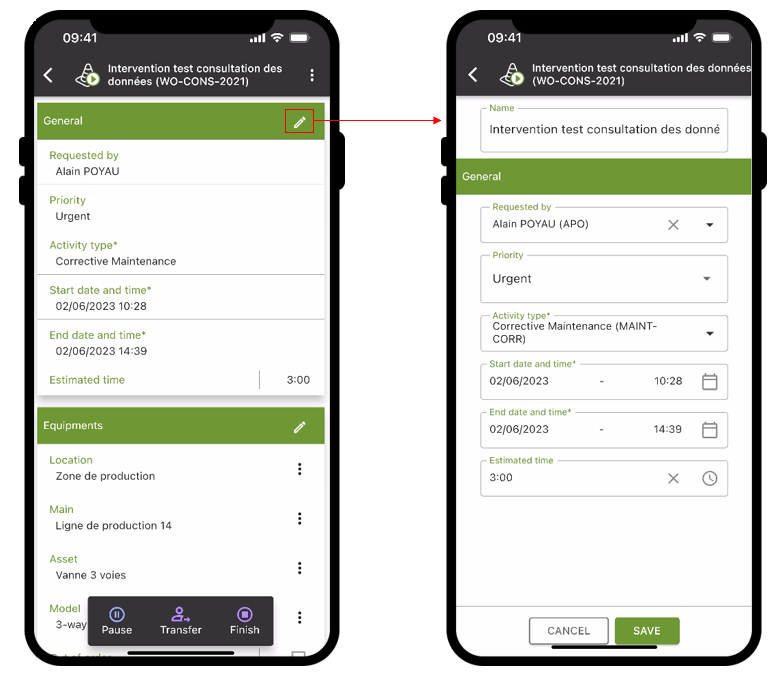
5.10. Summary blocks
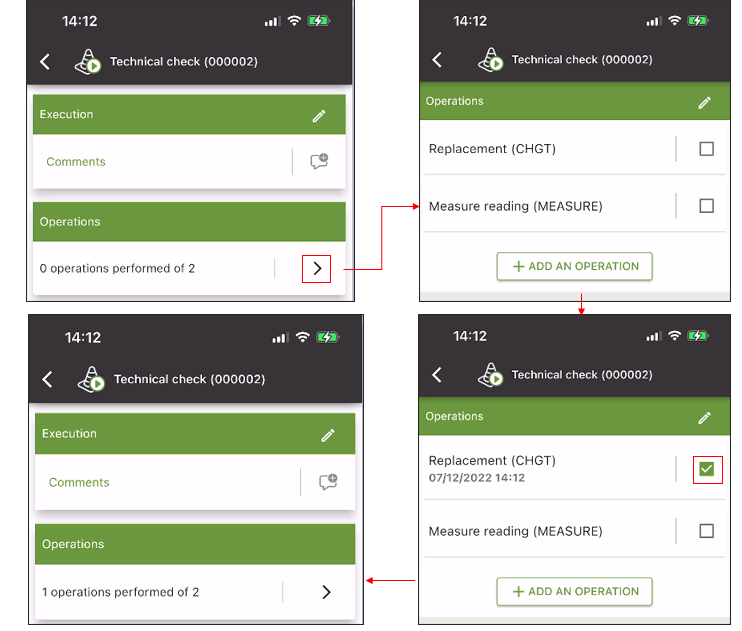
Summary blocks display messages and dynamic information for users: They can be recognized by their clickable  icon, which leads to a summary screen.
-
The user is on the detail form for a task: The «Operations» summary block indicates that « 0 operation(s) performed(s) out of 2.»
The user then clicks on the icon at the right of the summary block. -
The operations summary screen is then displayed.
The user can see that neither of the two operations displayed has been completed so far, and clicks on the icon of one of the tasks to indicate that it has been done.
 -
The task now has a check mark (
 icon).
 -
On returning to the task detail form, the message in the summary block has been updated and now states that « 1 out of 2 operations has been performed.»
5.11. Custom forms
CARL Touch forms can be customized down to the value of the customization attribute defined in the dictionary for the object concerned. This value is set in CARL Source. Conditional customization in CARL Touch forms can be applied to Info zone and list of value attributes.
This customization is available for work order, asset, location, item and prepared inventory entities, as well as for operations in a slightly different way.
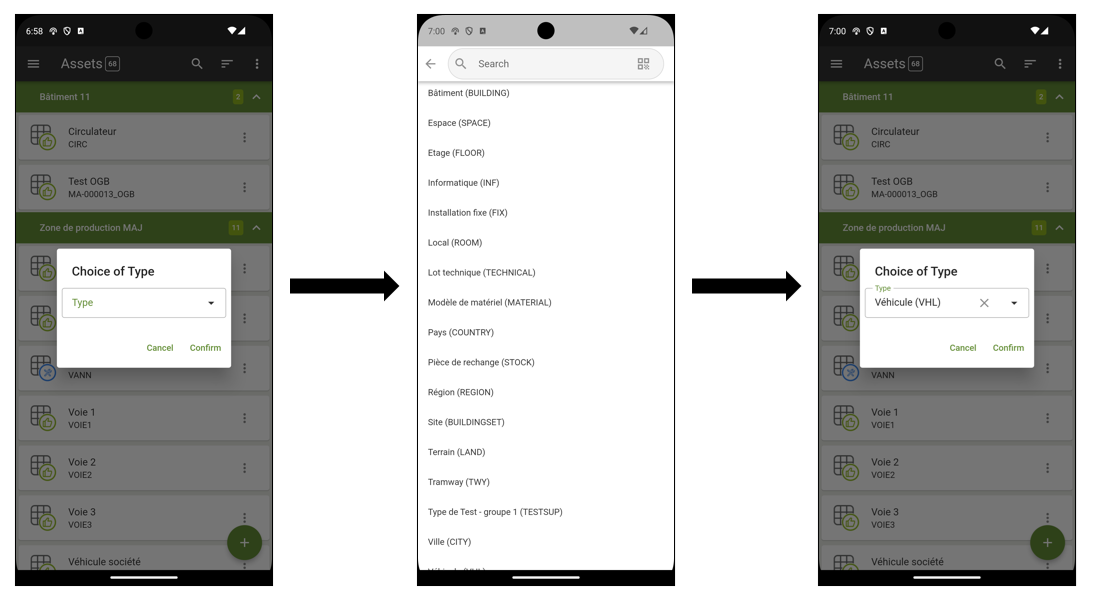
5.11.1. Behaviour when an object is created
When creating an object for which a number of possible custom forms exist depending on the various values of the customization attribute, a popup is displayed on the screen to enable the user to select the value of the attribute. Depending on the value selected, the corresponding form customization is applied.
5.11.2. Custom forms for operations
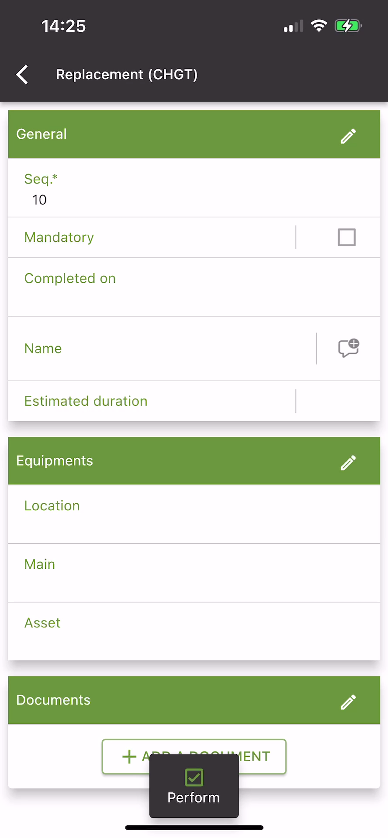
For operation details, the attribute that determines the custom form is the operation code. If a custom form exists for a given operation code value, this form is displayed. The behaviour is similar to that described above.
A number of custom forms are delivered as standard (but not enabled) for reading, diagnostics and standard operations.
5.12. Searching within a results list
Searching within a results list can be enabled using the following button: 
When searching is enabled, a search field is displayed in place of the action bar:
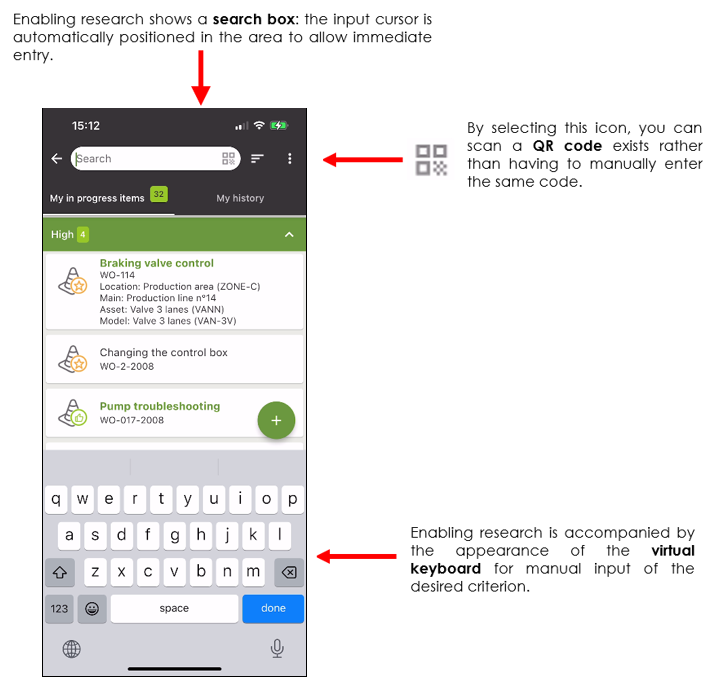
The virtual keyboard is displayed, enabling the user to enter a criterion in the search field: once the third character has been entered, CARL Touch adapts the results list to show only those matching the characters entered.
As an alternative to manual entry, the QR code button enables the mobile terminal’s camera to be used to scan an existing QR code and return its value in a "chip":
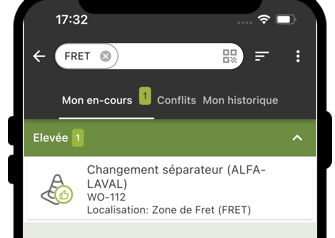
After manual entry, the search is performed in full-text on the list: it covers all alphanumeric attributes present in the list.
By scanning a QR Code, the search is carried out with an exact match: it covers all CODE attributes (and QR Code for equipment).
|
|
Activating the search on a tab: |
5.13. Searching within a results list
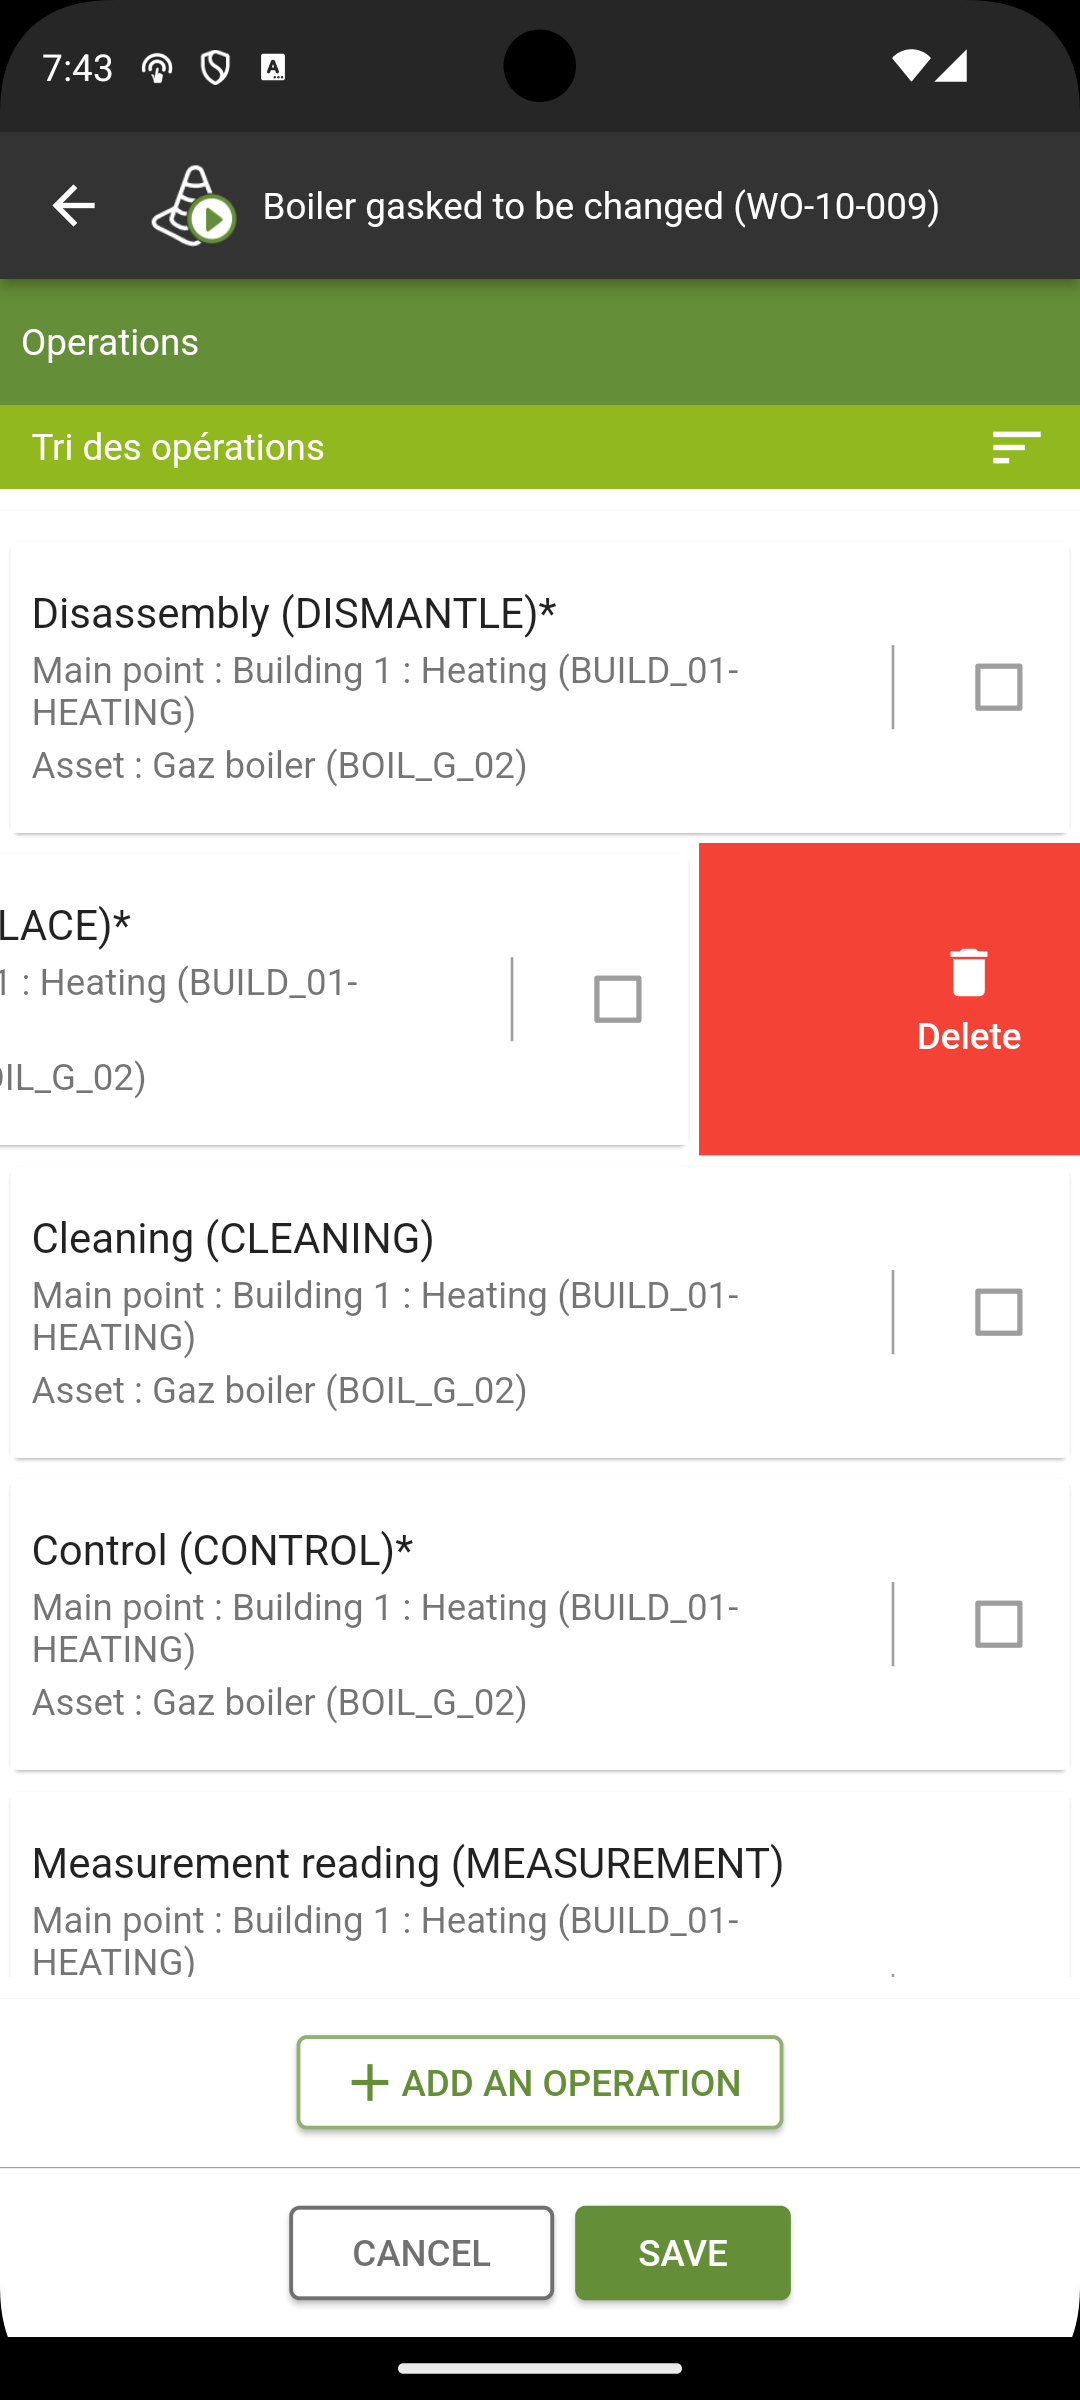
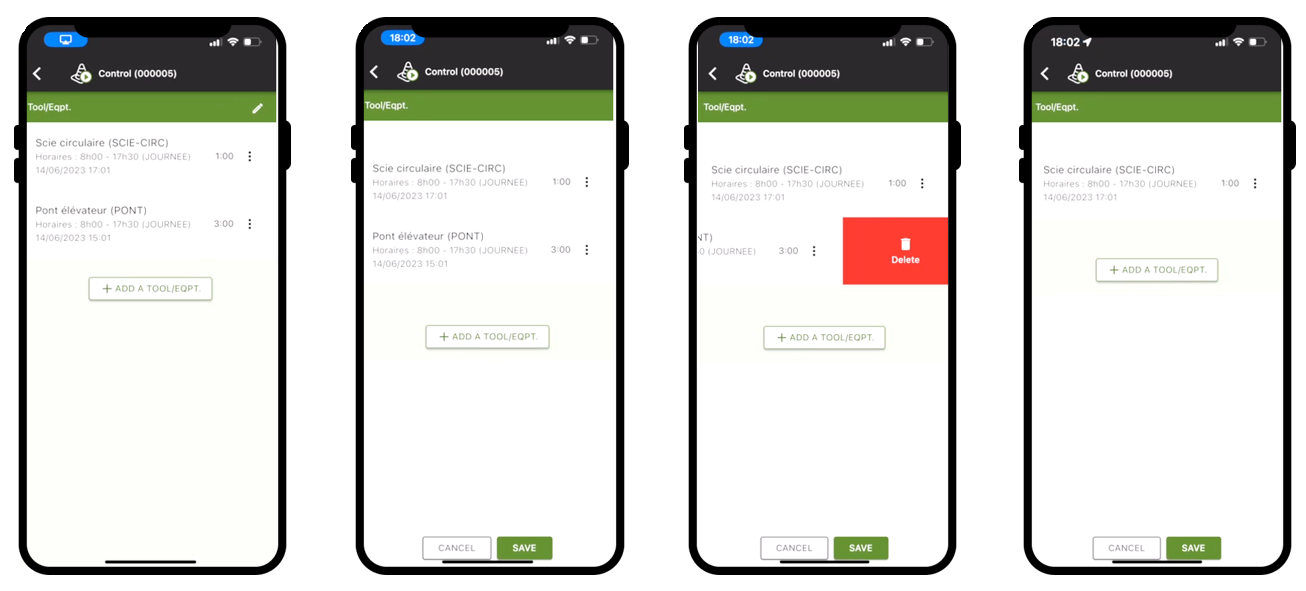
Deletions in a results list (Operations, Labor types) can be carried out in edit mode by sliding the line to the left, making the delete button appears.
The user can then press the button to delete the data.
5.14. Updating of data
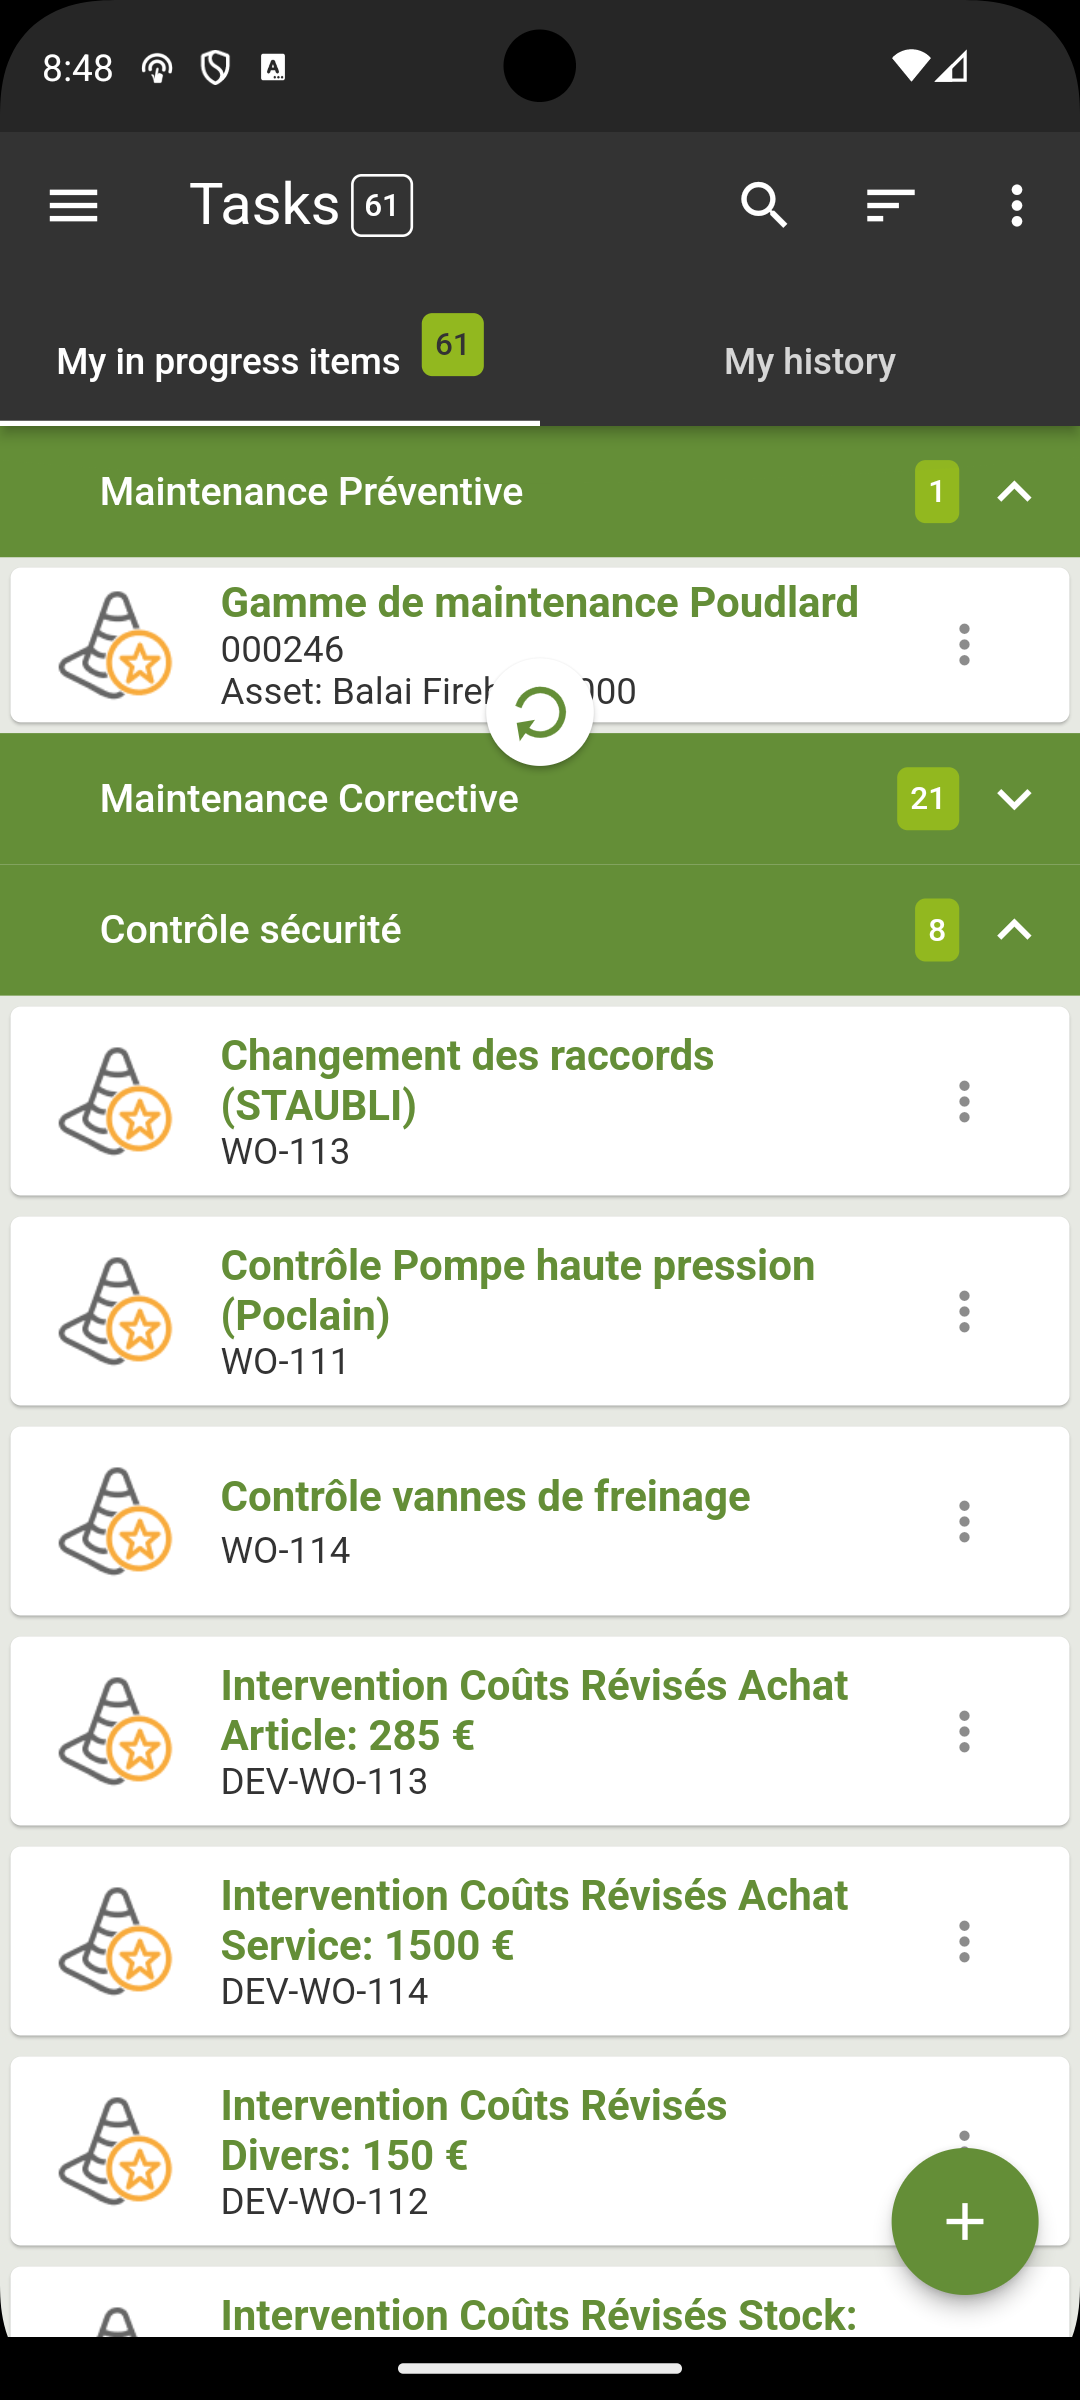
Data in CARL Touch is updated in real time («Push» mode).
This real-time update can, if required, be disabled via certain profile settings, requiring the user to manually update by simply dragging down the screen.
5.15. Time zones
CARL Touch can be used in an international environment, with users in different countries spanning multiple time zones.
When CARL Touch starts up, as default the user is associated with the terminal’s time zone. Two possibilities arise:
-
The terminal’s time zone is "known". This means that it is one of the time zones declared in CARL Source that can be used in CARL Touch. In this case, a message appears stating the time zone in which the user is connected:
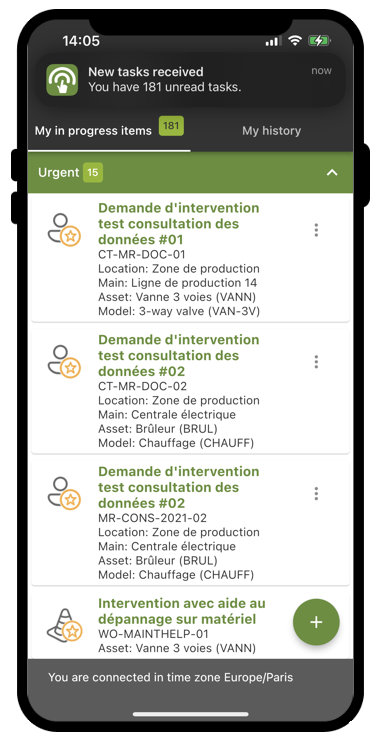
-
The terminal’s time zone is not "known". It is not one of the time zones declared in CARL Source and therefore cannot be used in CARL Touch. A dialogue box is therefore displayed, asking the user to select one of the «known» time zones:
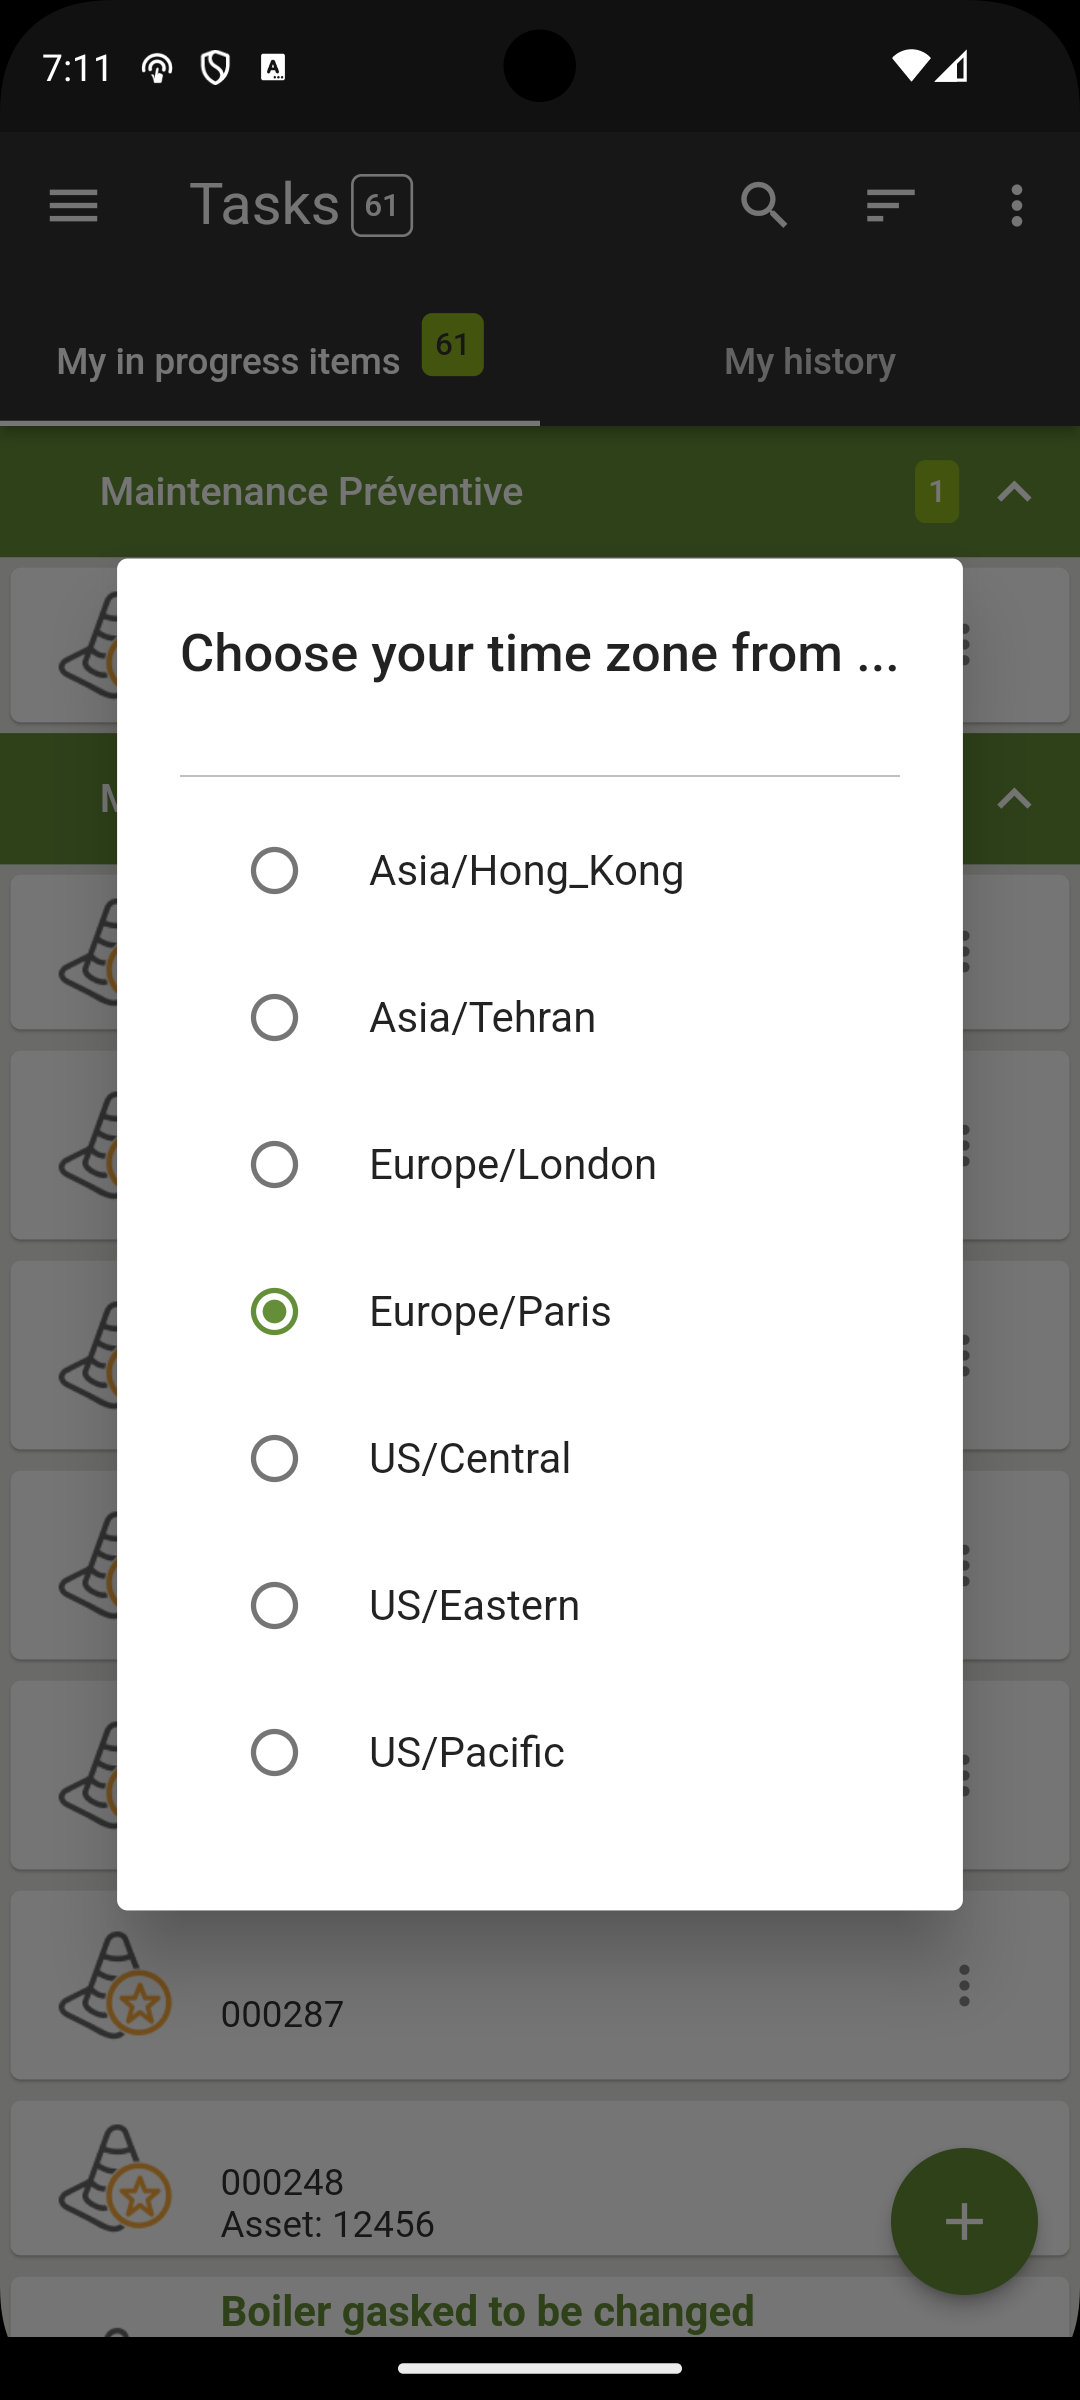
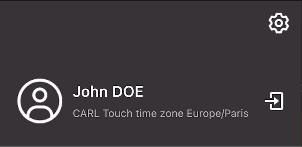
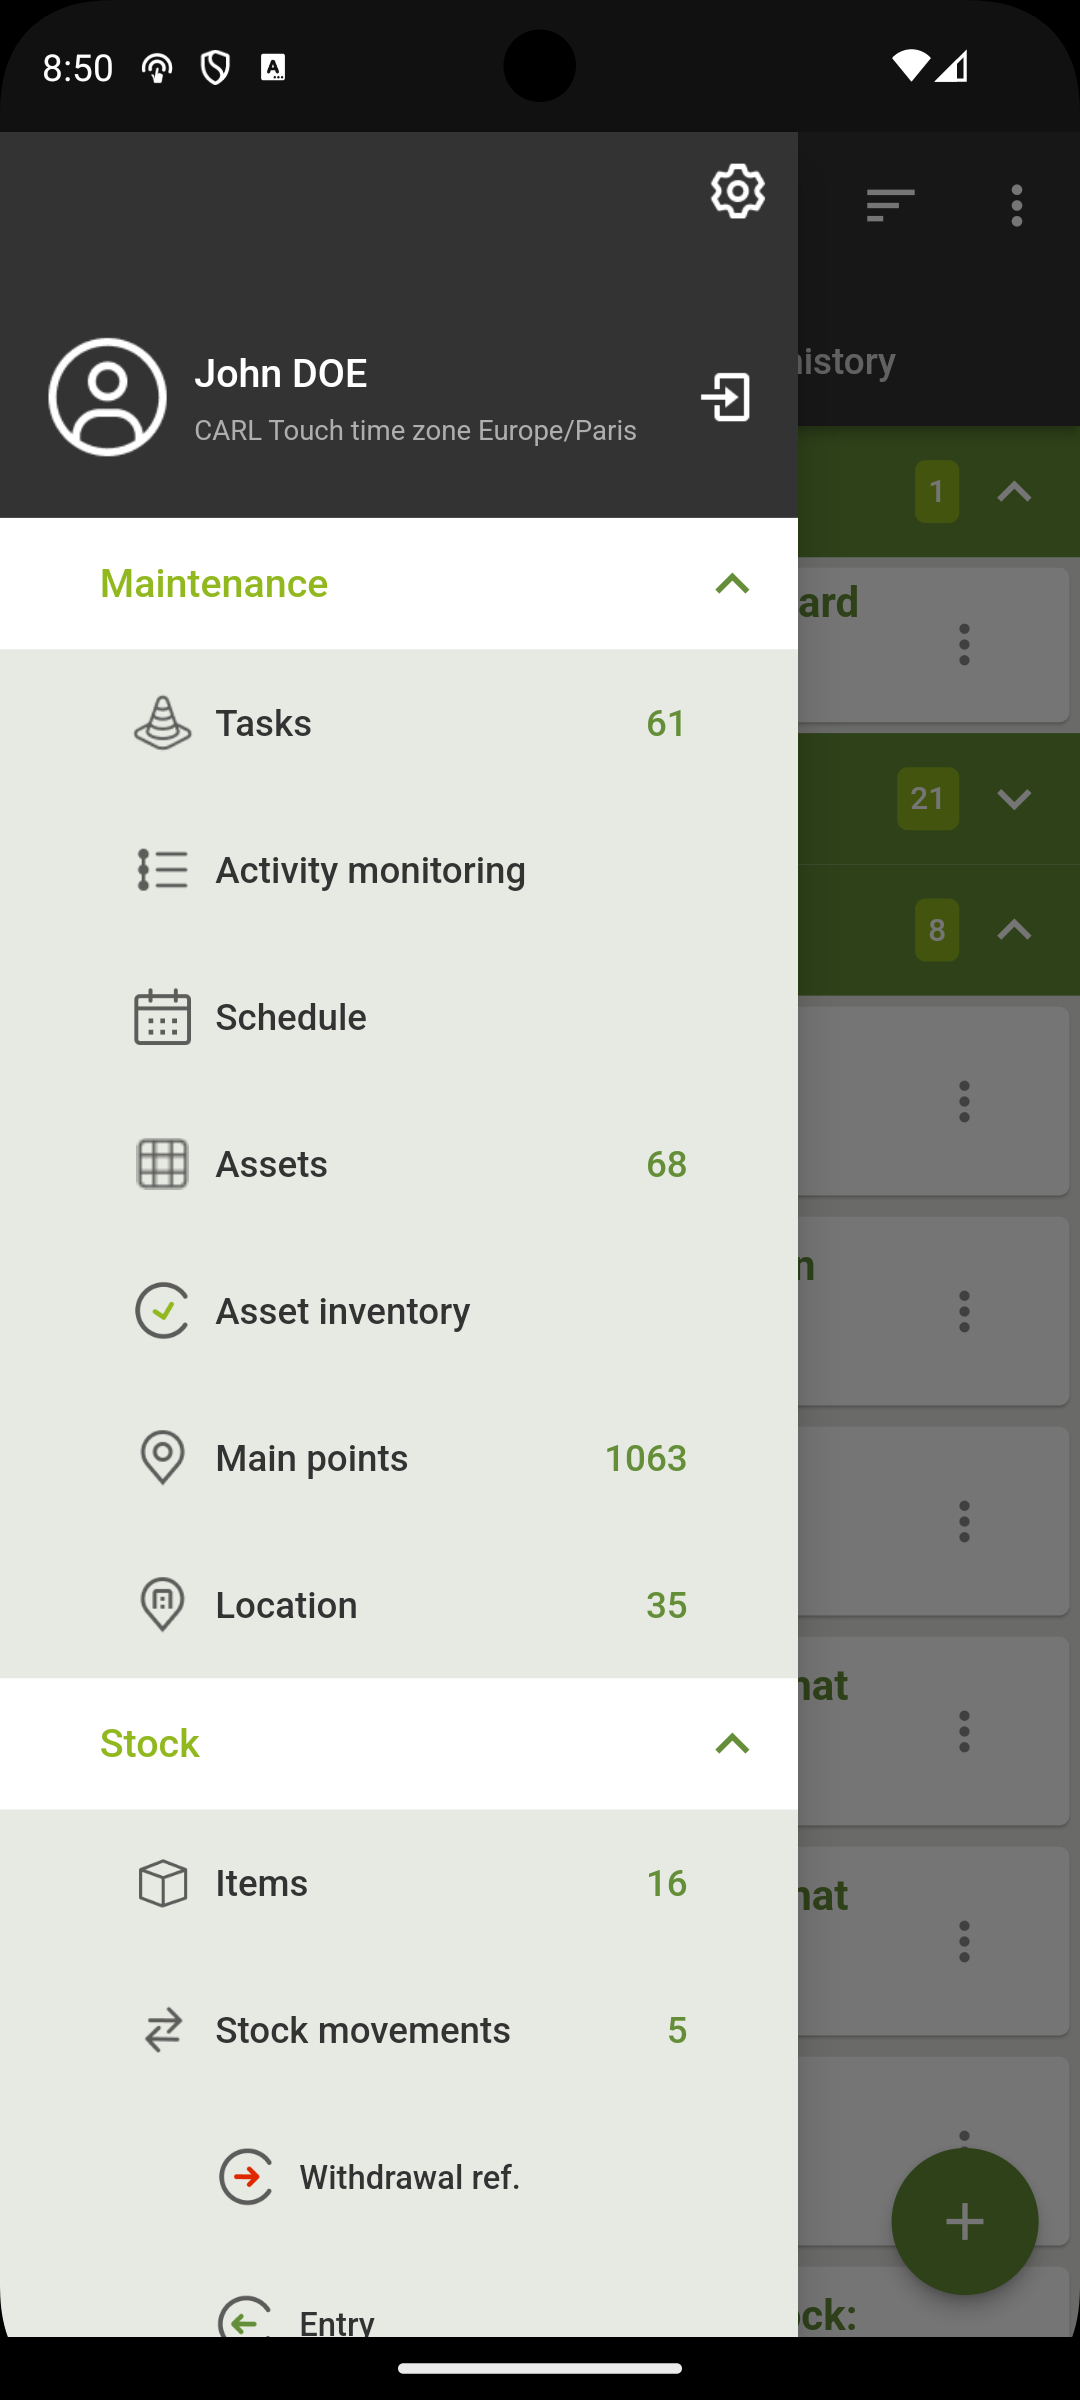
A reminder of the time zone used in CARL Touch is shown in the application menu:
Also, if the terminal’s time zone changes, either manually or automatically, CARL Touch detects the new time zone and displays:
-
Either the message «You are connected in time zone…», if the terminal’s time zone is declared in CARL Source;
-
Or the time zone selection dialogue box, if the terminal’s time zone is not declared in CARL Source.
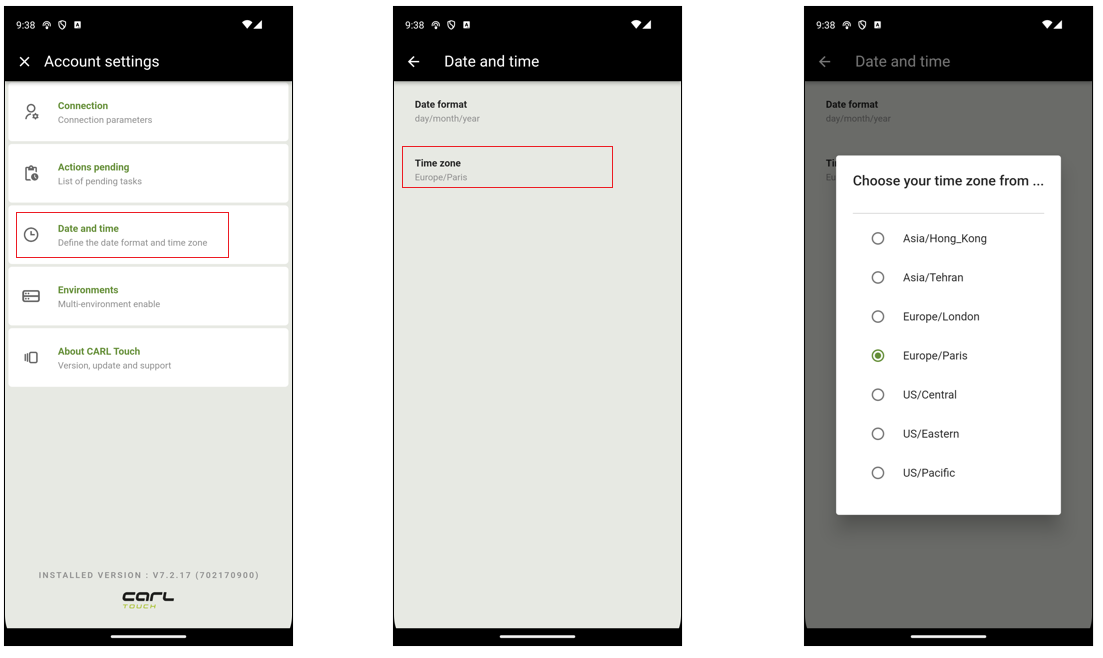
Depending on profile rights, the user can also change the CARL Touch time zone by going to the application connection settings, selecting «Date and time», then "Time zone» and then selecting another time zone:
Some general information about time zones is given below:
-
When a new task is created, it is automatically recorded in the CARL Touch time zone.
-
In lists, timestamped data is displayed in the entity’s time zone:
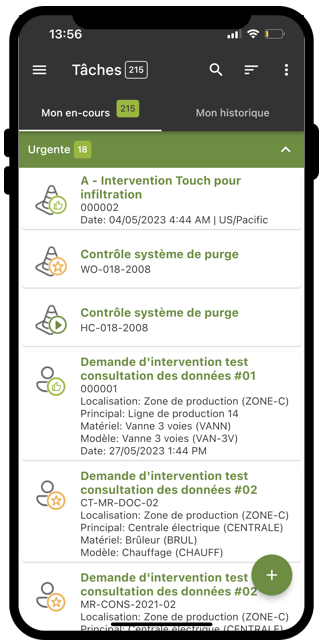
-
On the detail form for a reference entity (an item in the example below), timestamped data is displayed in the CARL Touch time zone.
-
On the detail form for a process entity (a task in the example below), timestamped data is displayed in the CARL Touch time zone:
-
The entity’s time zone may be identical to that of CARL Touch.
-
The entity’s time zone may be different from that of CARL Touch. In this case, a banner at the top of the form indicates the date and time in the entity’s time zone. In addition, the detail form is read-only and the fields cannot be changed.
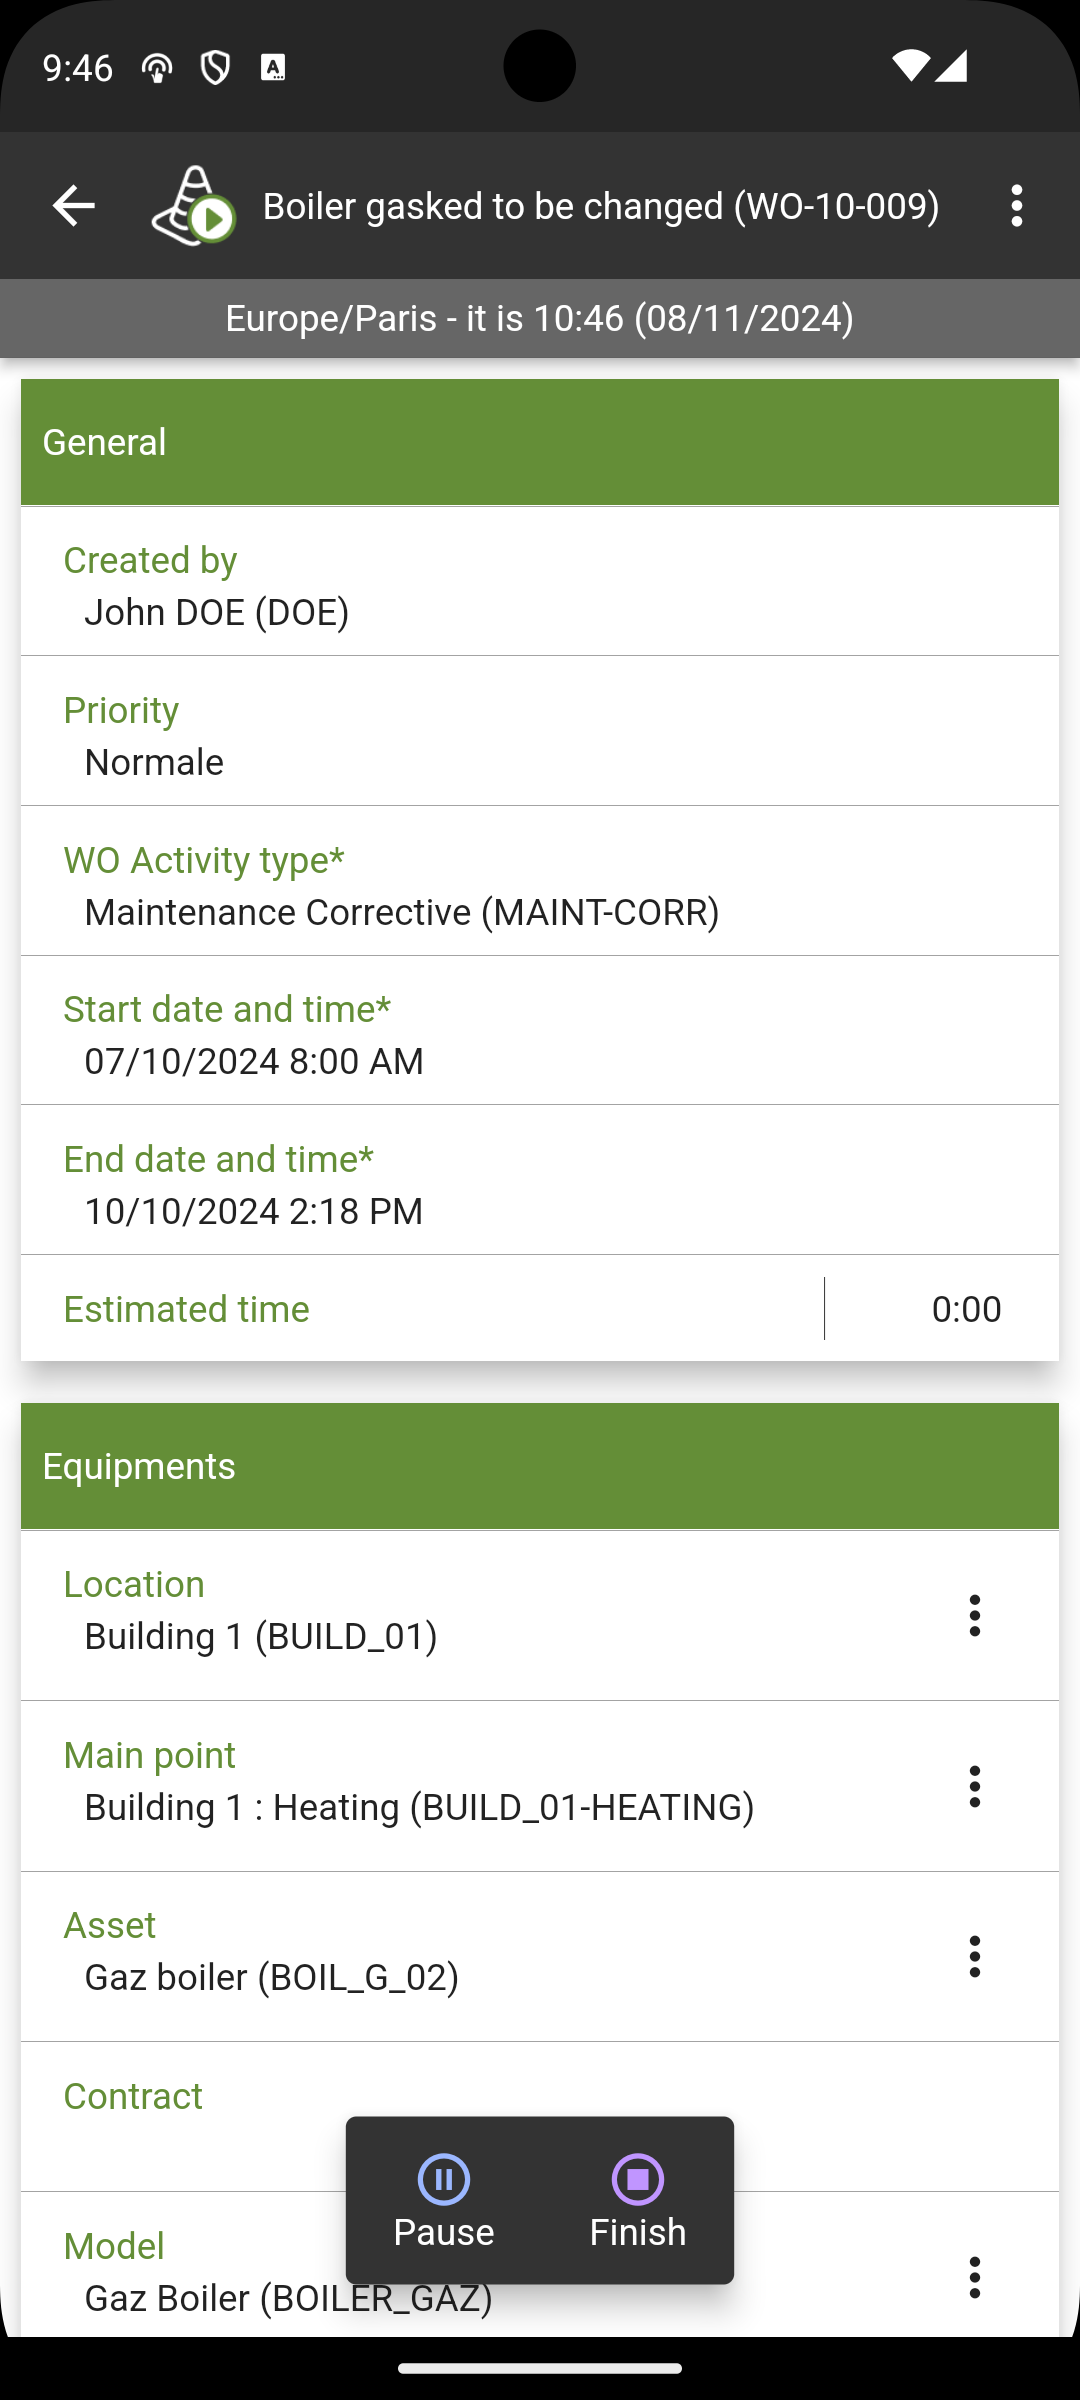
-
5.16. Entering data
General information about data entry:
-
Depending on the context, data can be entered in CARL Touch:
-
Via a virtual keyboard.
-
Or by scanning a QR Code.
-
-
Mandatory data fields on forms are preceded by a «*» character:
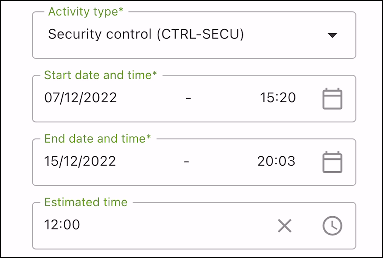
-
Dates and times are entered via standard components:
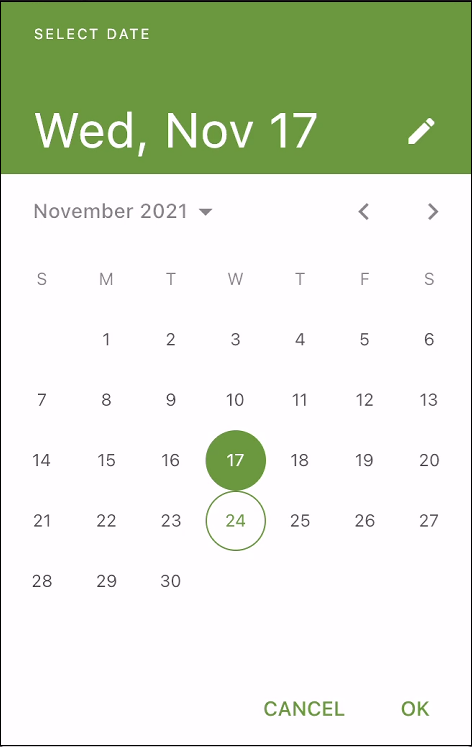
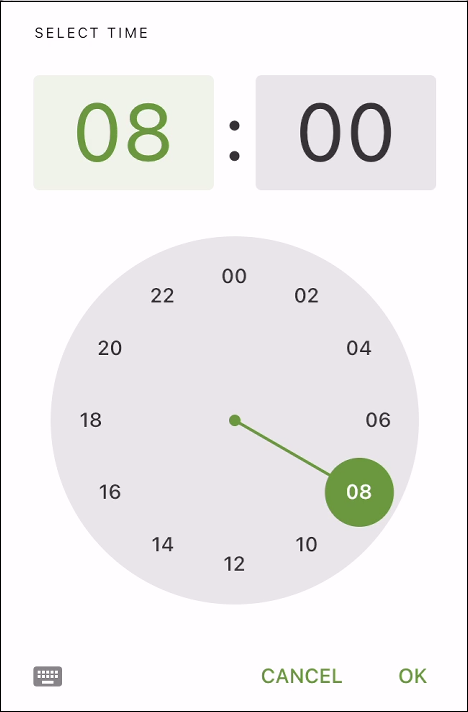
5.17. Entering and displaying comments
Comments are generally shown in detail blocks.
If the text of the comment is too long to be displayed fully in the detail block, it is truncated (and an ellipsis «…» is shown):
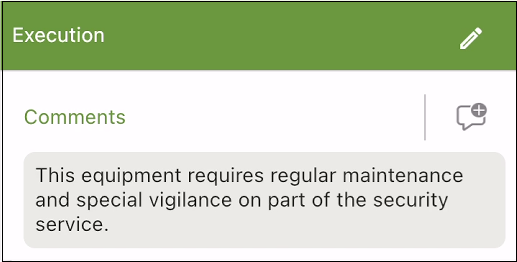
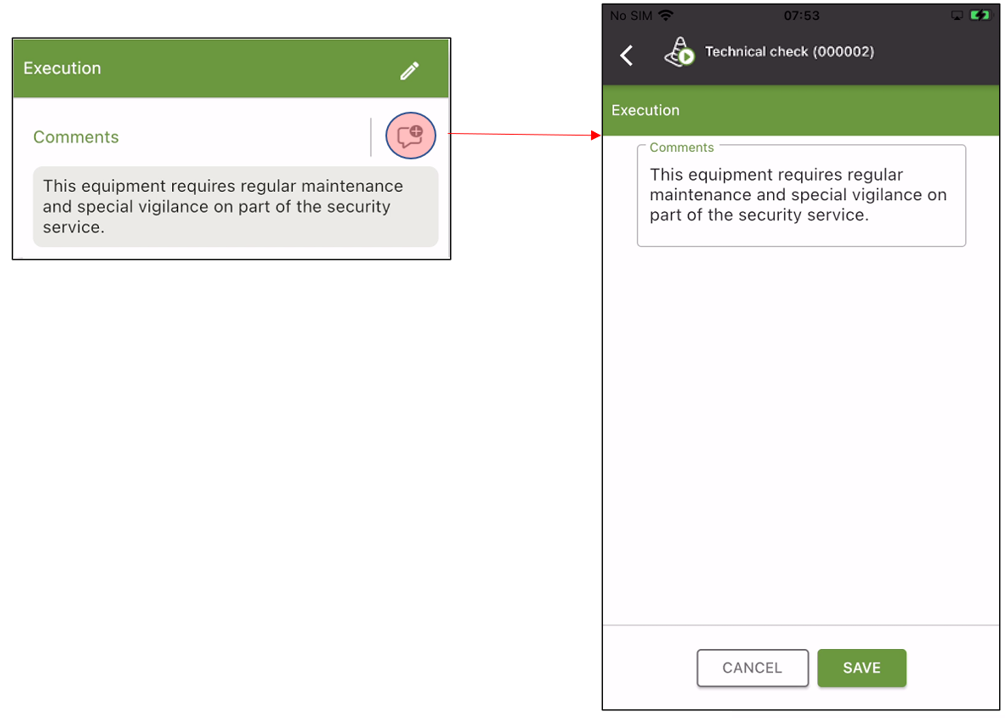
As can be seen in the diagram below, the user can then:
-
Either click on the comment text: this will display the entire comment on a new screen, in read only mode.
-
Or click on the
 button: this will display the entire comment in an input screen, enabling the user to change the comment and save the changes if desired.

|
Adding a comment is initially done using this same button |
5.18. Multi-environments
Users can set up several CARL Touch environments on their devices.
The enabling of the multi-environment mode is available in the Environments menu of the Settings menu.
In edit mode, users can create multiple environments defined by:
-
a logo
-
the environment name
-
the server address
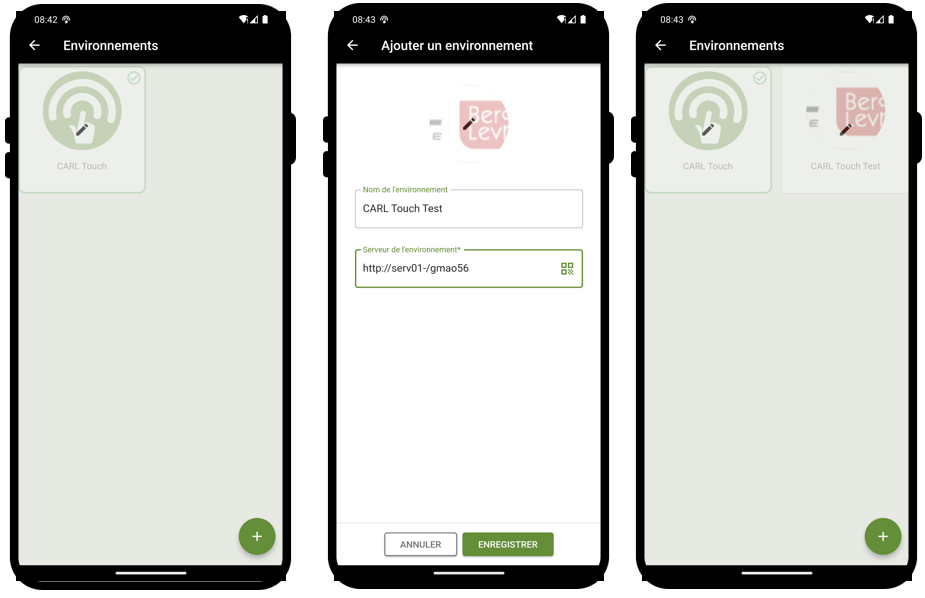
They can also rearrange environments, by making a long press on and then dragging the environment icon.
When users select a new environment, the login screen appears.
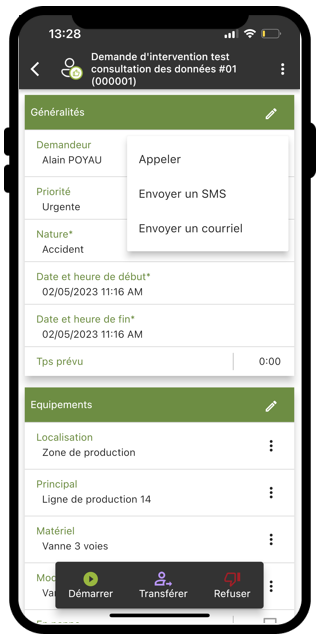
5.19. Actions on contacts
In the detail forms, a context-sensitive menu is proposed to the right of each agent field providing contact details (Mobile phone or Email).
Selecting this menu gives access to the following actions:
-
Send an SMS: Action available if the agent is associated with a "Mobile" number in CARL Source.
-
Call: Action available if the agent is associated with a "Mobile" number in CARL Source.
-
Send an e-mail: Action available if the agent is associated with an "Email" in CARL Source.
5.20. Wizards
5.20.1. Principle
Wizards are intended to facilitate the entry of certain data in CARL Touch by offering the user a sequence of steps.
These steps are shown visually via a « step pathway » comprising the number of the current step and its name – see the illustration below for entering a «Consumption»:
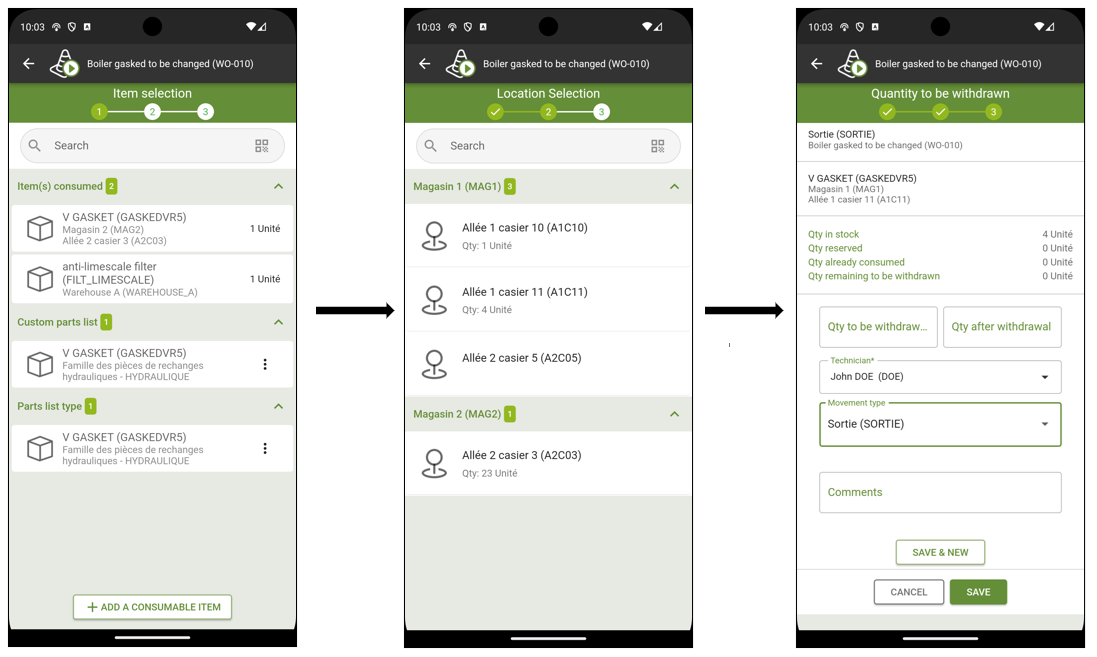
The number of steps offered by the wizard varies depending on the data to be entered (Entry, Withdrawal, Consumption on a task, Reading operation, etc.).
Likewise, the wizard adapts to the current context so as to offer only the steps that are relevant and thus avoid unnecessary data entry.
The «Withdrawal» process comprises three steps:
-
Select an item to be withdrawn.
-
Select the location from which to withdraw the item.
-
Enter the quantity to be withdrawn.
=> During this process, if the wizard finds that the item is included in one location only, it will take the user directly from Step 1 to Step 3 (as it would be pointless to make the user select the location if only one is available).
=> This mechanism is known as the « Skip a step » concept.
5.21. Managing linked documents
In CARL Touch, linked documents are managed using the «Documents» summary block on a detail form.
When the user clicks on the « Add media document » button from the document summary screen, CARL Touch displays the list of available options:
| Button | Button action |
|---|---|
Browse |
Used to select a file on the mobile device. |
Audio recording |
Used to record an audio message via the microphone on the mobile device. |
Photo |
Used to take a photo via the camera on the mobile device. |
Library |
Used to select an element from the «Library» on the mobile device (e.g. access photos stored on the device). |
Text |
Used to create, edit and save a text file. |
Video |
Used to record a video via the camera on the mobile device. |
When a document is created, it is displayed in the documents summary screen with:
-
An icon corresponding to the document type (see table below).
-
Its name, which as default comprises the document type and creation date.
-
Its creation date and time.
| Icon | Associated file type | ||
|---|---|---|---|
|
File (e.g. file stored on the mobile device). |
||
|
Audio file. |
||
|
Photo file.
|
||
|
Text file. |
||
|
Video file.
|


=> Documents created, changed and deleted are synchronized with CARL Source.
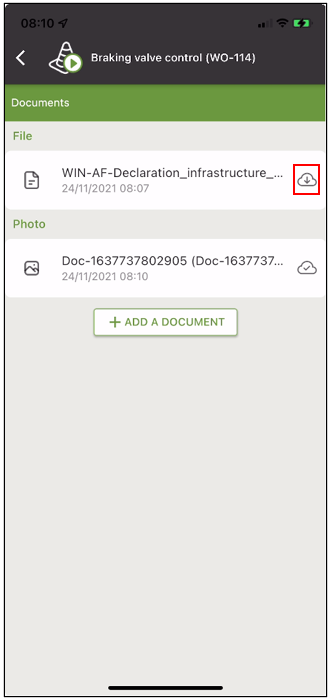
To avoid transferring excessively large files, a profile setting by function can be used, if necessary, to limit the size of documents transferred to CARL Touch terminals.
In the case of an overly large document, the document still appears on the list of documents, but the user can only view it by first downloading it onto their terminal.
|
|
This document size limit applies only to documents that were not created by the connected CARL Touch user. |
5.22. Tablet mode
5.22.1. User interface principles
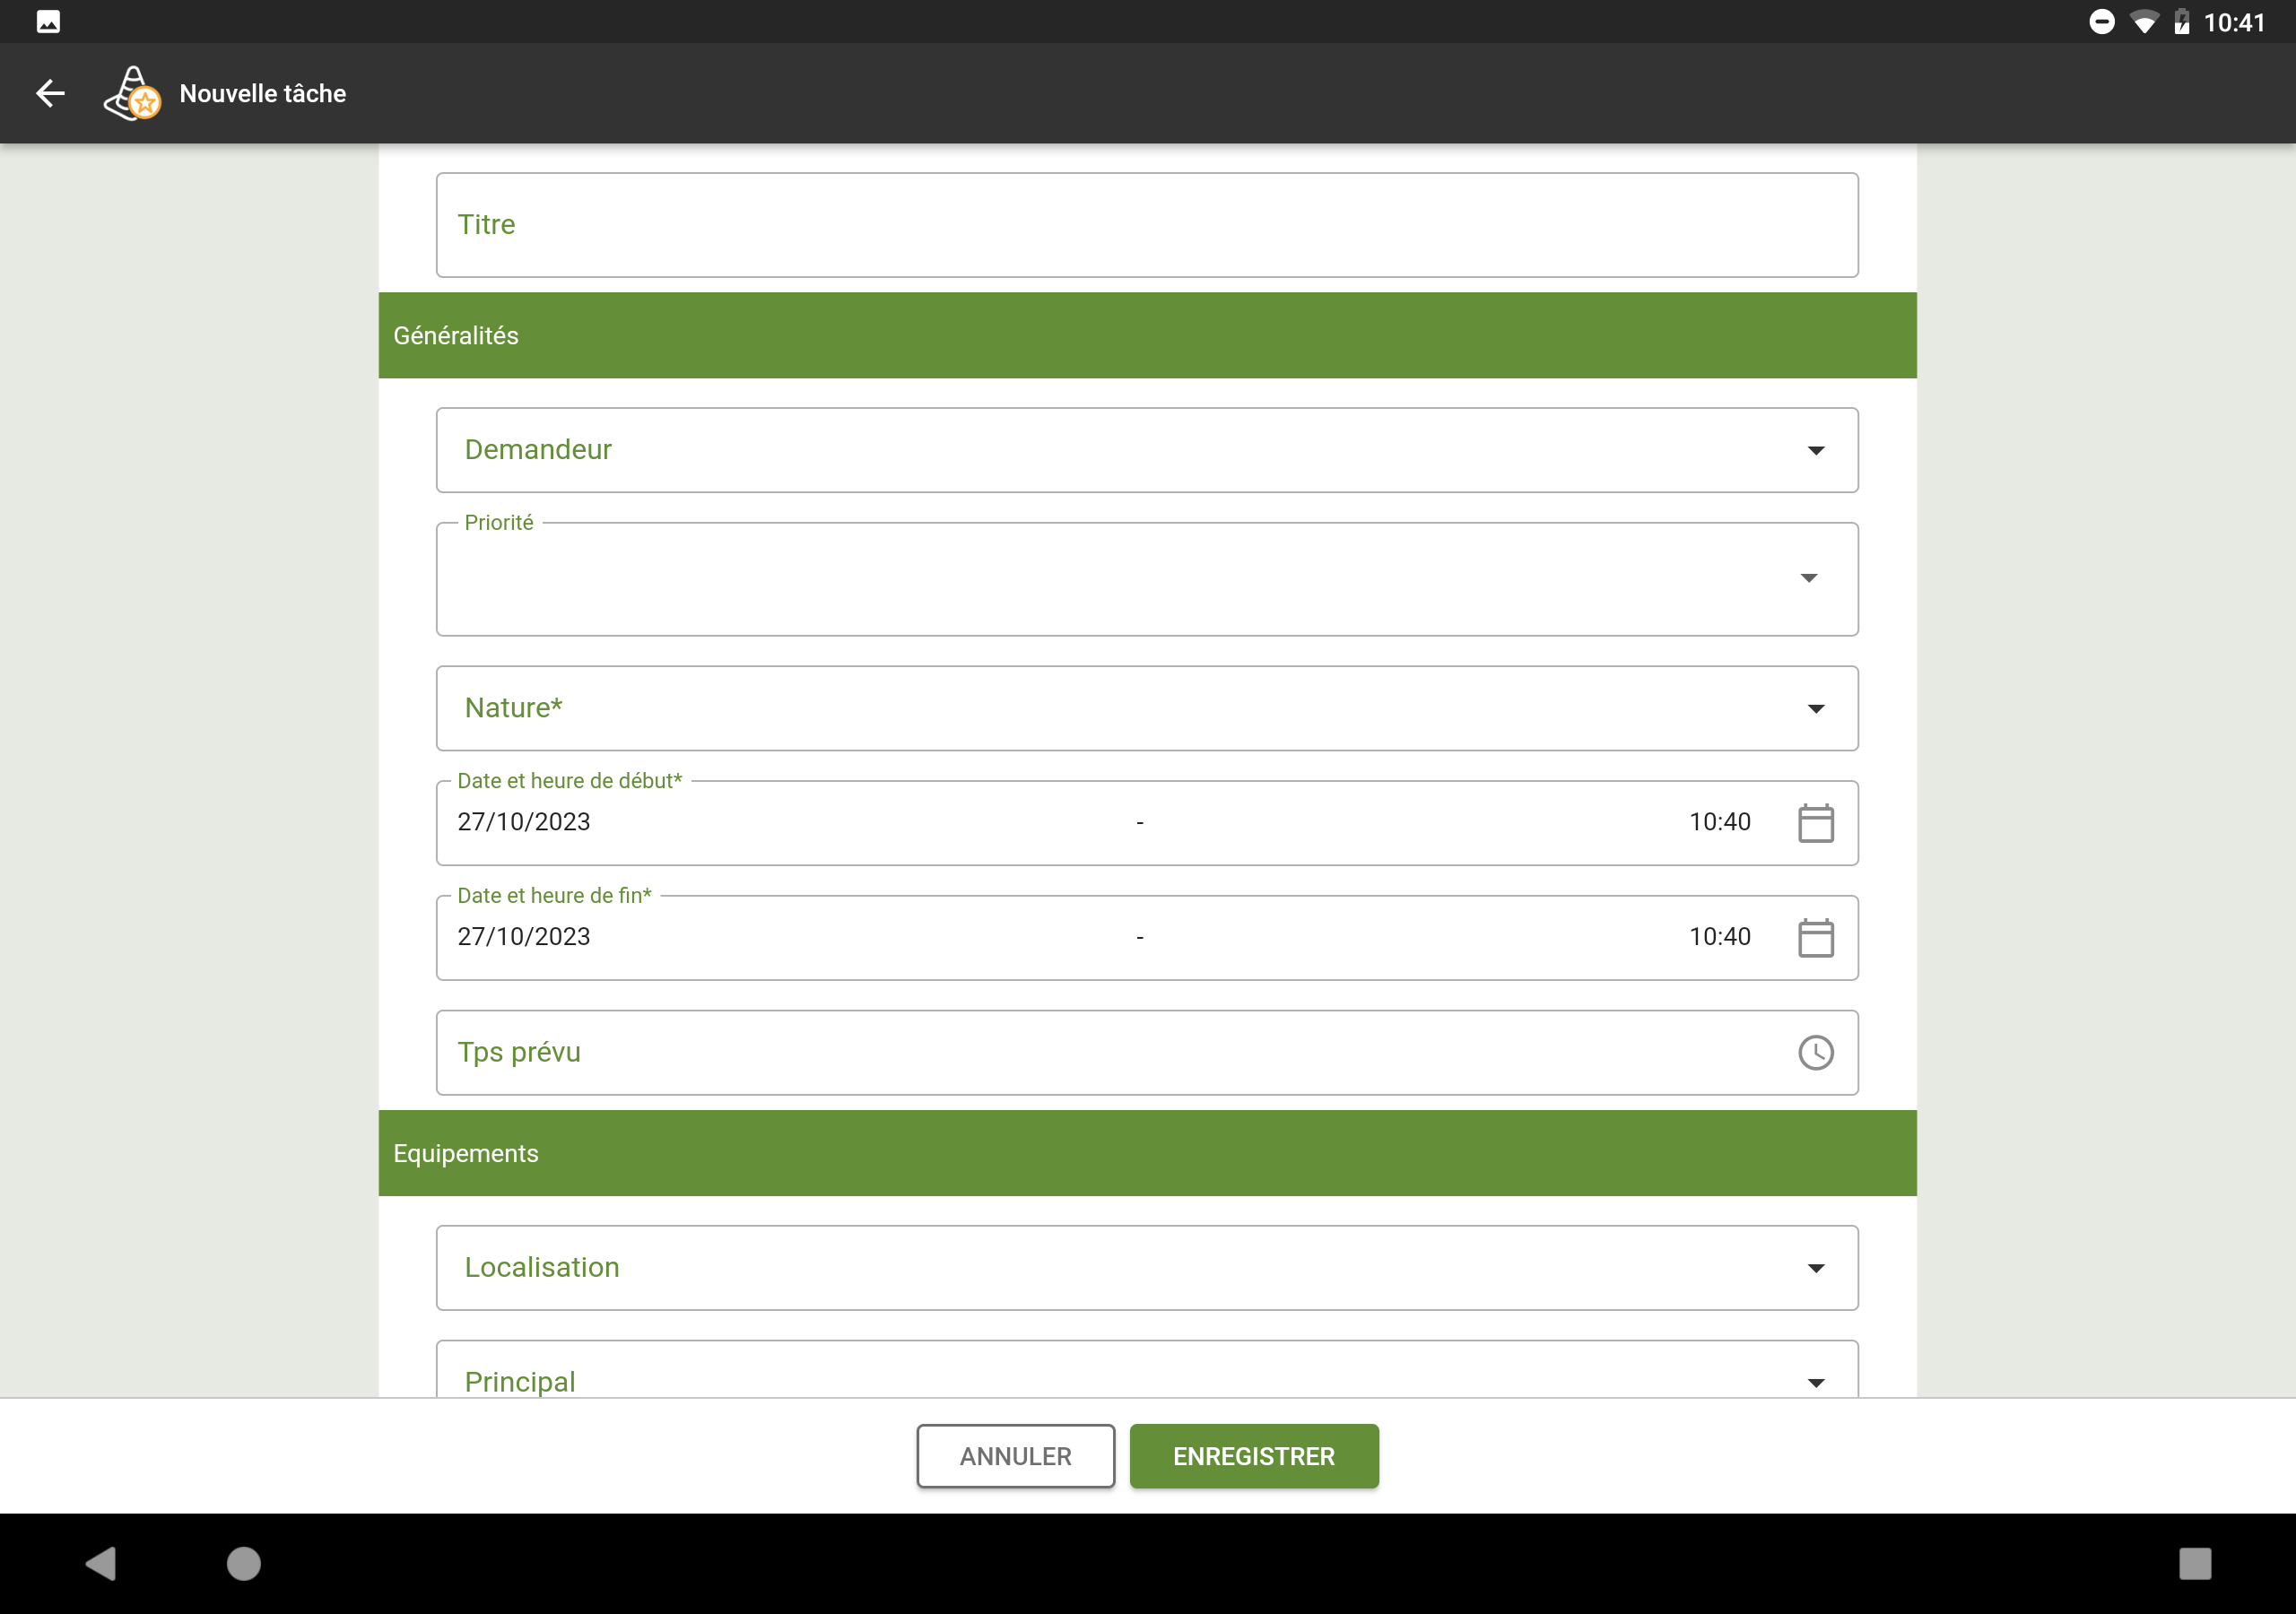
When the diagonal screen dimension of a mobile device (smartphone or tablet) is greater than 8 inches, the CARL Touch user interface adapts to offer a «Tablet mode» in landscape orientation.
When this mode is enabled, information is laid out as follows:
-
One third of the screen is reserved for the presentation of information in «list» mode.
-
Two thirds of the screen are used to present the details of the line selected from the list.
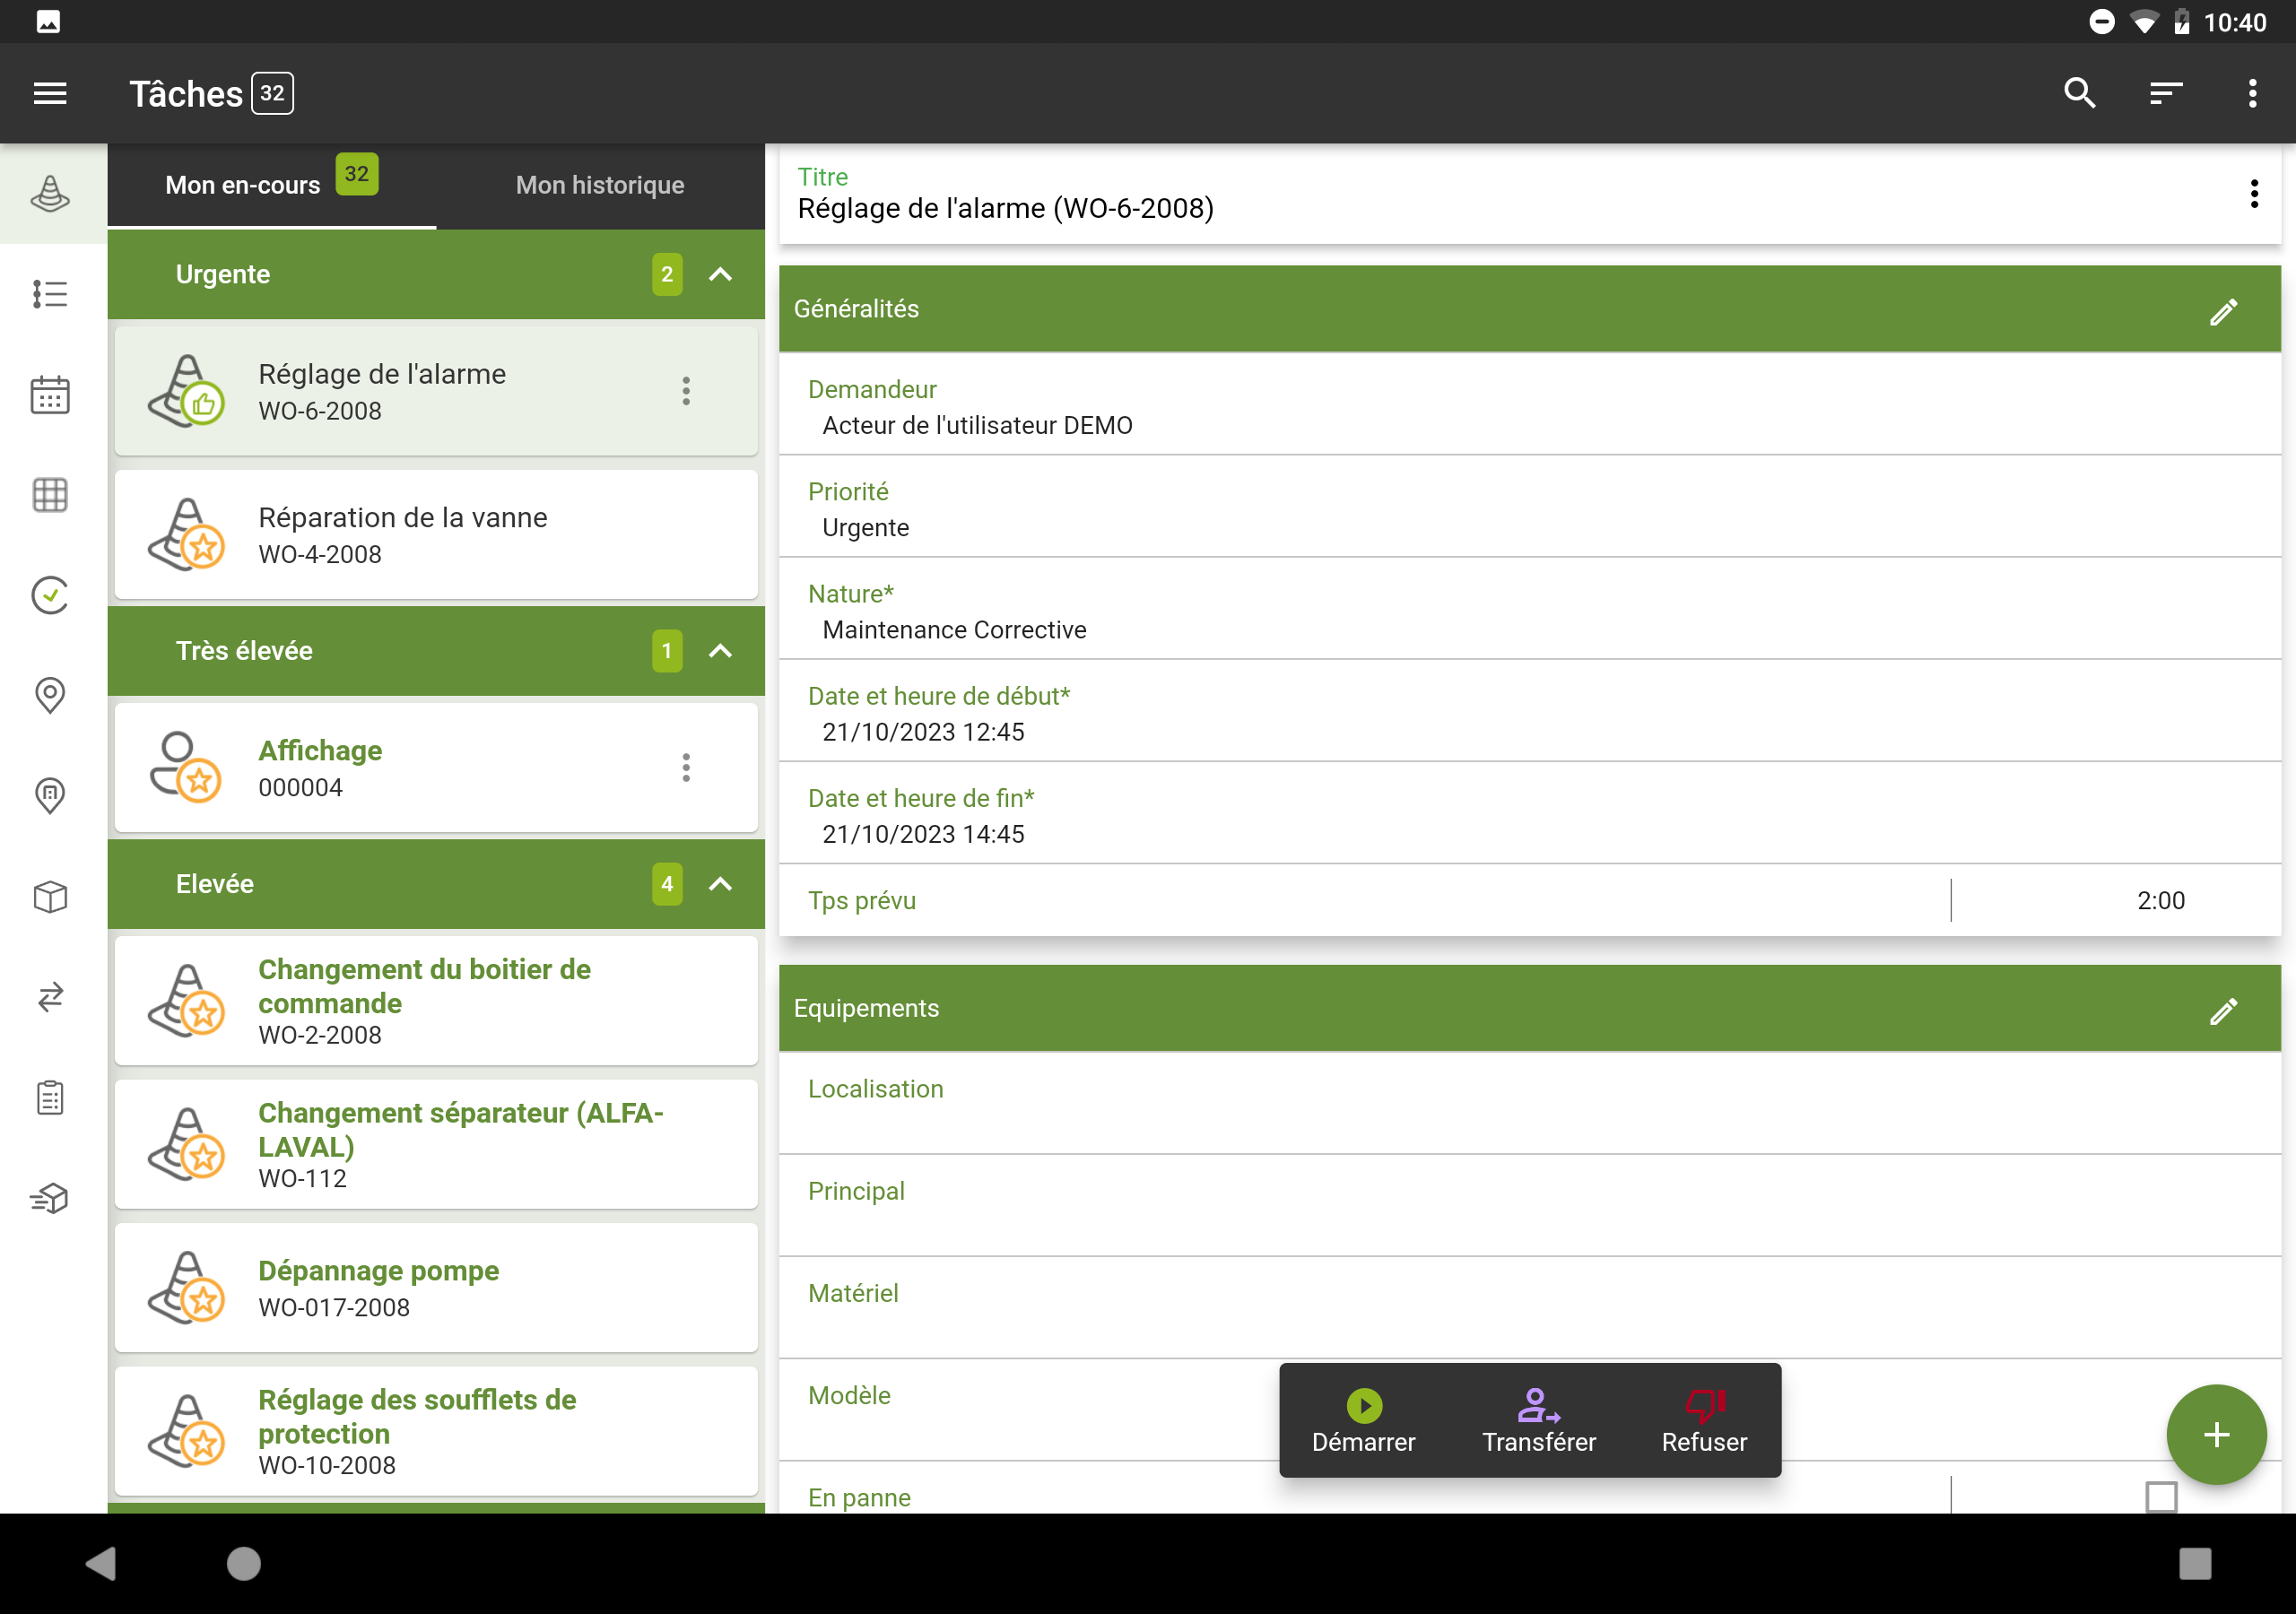
=> All these ergonomic principles will always be applied to the main functions (e.g. Tasks, Assets, etc.).
=> Note that tab management is also incorporated in this display mode.
=> The general menu is located on the left of the screen in the form of icons. These features can also be accessed via the burger menu.
6. Widgets
Two widgets are included with the CARL Touch application. These widgets can be added to the Android™ desktop for easy access to the application and provide succinct information without opening the application.
|
|
The CARL Touch widgets may be resized by the user if desired. |
6.1. Indicator widgets
6.1.1. Principle
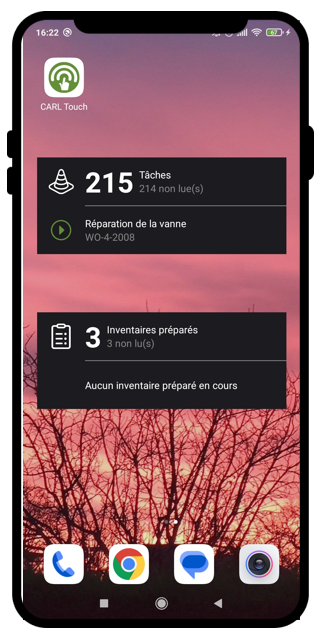
The indicator widget can be used to display real-time information about tasks or prepared inventories on the smartphone or tablet’s home screen.
6.1.2. Operation
The first line of the widget displays:
-
The number of tasks or prepared inventories included in the user’s work-in-process.
-
The number of unread elements.
Pressing this line opens the application on the list of the corresponding entity (tasks or prepared inventories).
The second line contains the following information:
-
The title of the current task or prepared inventory (empty if none is current).
-
The status icon for the entity (accepted, started, paused, etc.).
Pressing this line opens the application on the detail form of the corresponding entity.
6.1.3. Installation
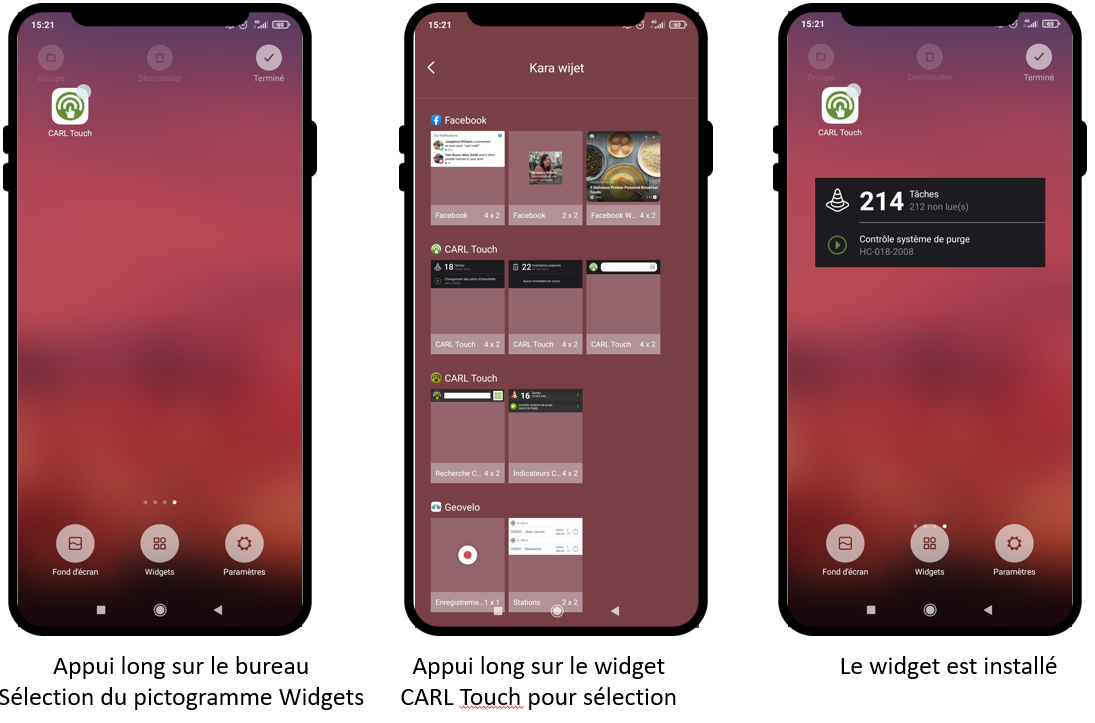
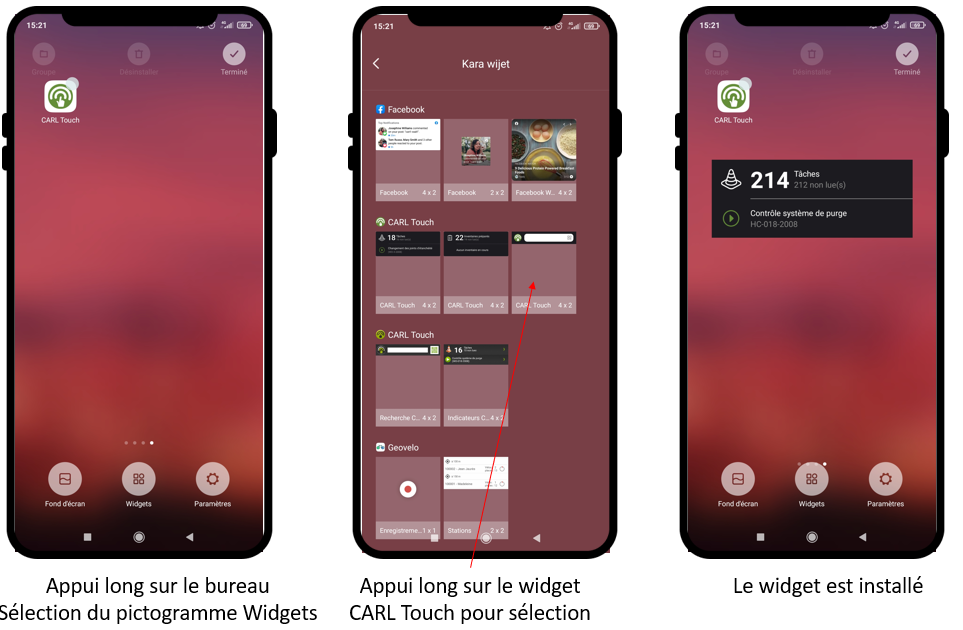
Users install the widget on their Android™ device like any other Android™ widget.
Once the widget is dropped on the Android™ desktop, a configuration window is displayed on the screen allowing users to choose the type of entity assigned to the indicator widget. Once the entity type is chosen, the widget is added to the Android™ desktop and updated.
6.2. Quick access widget
6.2.1. Principle
This widget gives quick access to the main CARL Touch user actions by scanning an element (QR Code, NFC label, 1D bar code).
6.2.2. Installation
The CARL Touch 'Actions' Widget installs like a generic Android™ Widget. No prior configuration is needed.
6.2.3. Operation
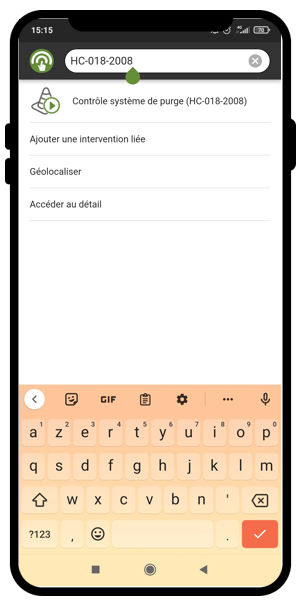
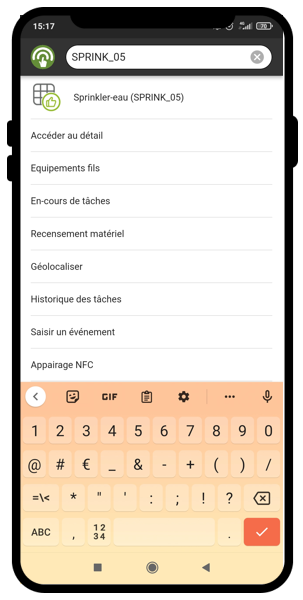
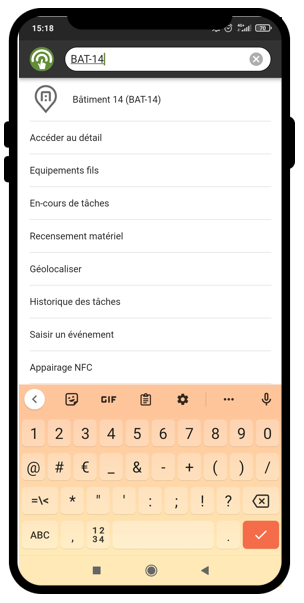
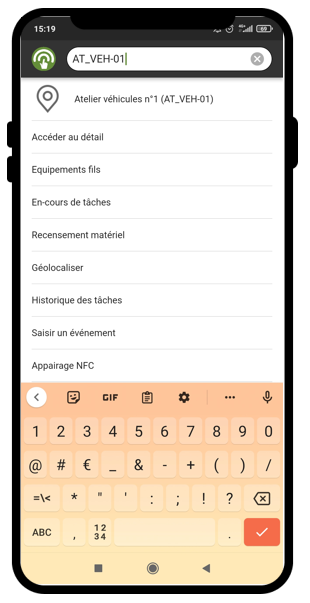
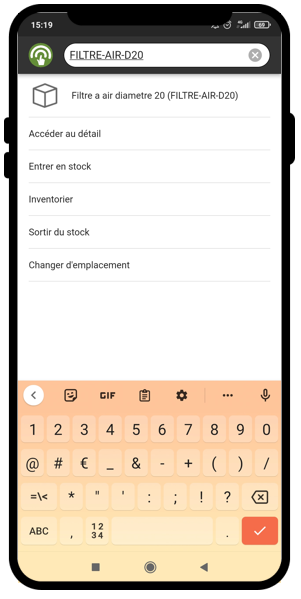
The user presses the CARL Touch Actions widget. A window is displayed. Users can scan the label:
-
Either using the device’s camera, by selecting the scan button.
-
Or by using the device’s physical scanner (if it has one).
-
Or by using contactless NFC technology.
If the label scanned corresponds to an element in the CARL Touch database, the possible actions on the element are displayed. The user can then choose an action to be performed on the element identified, in which case the CARL Touch application is opened directly on the appropriate form for the selected action.
|
|
|
|
|
|
|
|
|
|
|
|
|
If only one action is available, CARL Touch performs it automatically without displaying a list. |
7. Tasks function
7.1. Purpose
The «Tasks» function of CARL Touch is used to cover all that a mobile user may need to do in terms of managing work orders and work requests when in the field:
-
Presentation of all available tasks for the current user.
-
Synchronization with CARL Source (work orders and work requests), creation of new tasks, searching for existing tasks.
-
Access to details of a task (task-specific information, direct access to item sheets).
-
Possibility of accepting, rejecting, starting and stopping tasks.
-
Managing operations and task-related documents directly from the mobile device.
-
Geolocation, calculation of the « User ←→ Task » distance, display on the map.
-
Behavior suited to «off-line» contexts (when the mobile device does not have a 3G/4G or WiFi connection to the network).
7.2. Tasks list
The tasks list enables the user to browse through available tasks and immediately identify their status and main information.
7.2.1. Meaning of icons
The icons on the task list identify both:
-
The origin of the task: «Work order» or «Work request».
-
The status of the task: «New», «Taken into account», «Started», etc.
| Work order icon | Meaning | Work request icon | Meaning |
|---|---|---|---|
|
New task with «Work order» origin. |
|
New original task |
|
Task «Taken into account.» |
|
Task with WR origin |
|
Task «Rejected». |
|
Task with WR origin |
|
Task «Started». |
|
Task with WR origin |
|
Task «Paused». |
|
Task with WR origin |
|
Task «Finished». |
|
Task with WR origin |
|
Task «With conflict». |
|
Task with WR origin |


7.2.2. Data displayed
For each task in the task list, CARL Touch displays as default the following data subject to availability (i.e. a line is displayed only if the associated data has been entered).
-
Title of the work order (WO) or work request (WR) from which the task originates.
-
Code of the WO or WR.
-
Start date of the WO or WR.
-
Name and code of the asset affected by the WO or WR.
-
Name and code of the geographic point associated with the WO or WR.
-
Name and code of the customer associated with the WO or WR.
-
Distance from the work order location.
-
First line of the detailed comment for the task.
-
Additional field xtraTxt01 (customizable field).
-
Additional field xtraTxt02 (customizable field).
-
Address of the work order
|
|
Appearance of the Distance information in relation to the work order location requires that the mobile device has been able to determine its geolocation as well (i.e. has GPS coordinates or an address). The GPS coordinates of a task are initialized automatically with the coordinates of the equipment selected in the task (requires a connection to the CARL Source server). |
|
|
The task list is customizable, you can add some fields by customizing the task form. |
7.2.3. Actions
CARL Touch proposes general actions on the tasks list form.
| Button | Button action |
|---|---|
|
Search within the tasks list. |
|
Add a new task: Work order / Report / WR |
|
Collapse or Expand grouping blocks. |
|
Sort the tasks. |
Tasks of my team. |
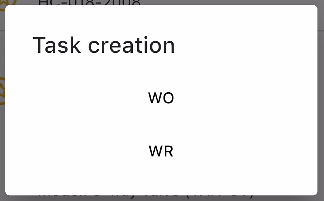
Context-sensitive actions available for a task
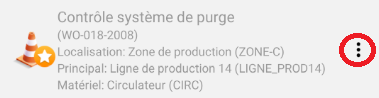
Context-sensitive actions specific to a task are accessible via the button to the right of the task:
| Button | Button action |
|---|---|
Geolocate |
Geolocate the current task (using GPS). |
Display on map |
If the current task (or the asset associated with the current task) is geolocated (i.e. has GPS coordinates) or has an address, this action displays its position on a map. |
7.2.4. Task list tabs
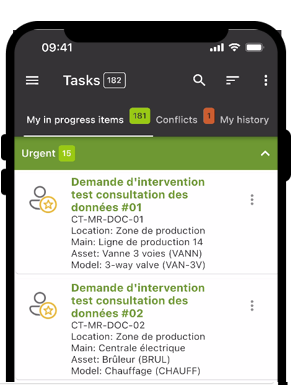
As default, there are no tabs on the tasks list: it displays the list of current tasks. However, depending on the context, up to three tabs may be displayed:
-
«MY IN-PROGRESS ITEMS» tab: This tab is shown only if another tab («History» or «Conflicts») is displayed. It contains the list of current tasks.
-
«MY HISTORY» tab: this tab contains tasks that have been «Completed» or «Rejected» by users until they have reset the data. This tab is always cleared with each initial synchronization.
-
«CONFLICTS» tab: This tab contains tasks for which a conflict has been detected.
|
|
The conflict display mechanism is described in section Managing conflicts. |
7.2.5. Focus on the "Tasks of my team"
From the tasks list form, the user can consult the tasks of their team using the action button .
|
|
The "My team’s tasks" action is only available if the user is associated with a Technician code (see User detail form in CARL Source). |
Selecting this action gives access to a new tasks list containing two tabs:
-
"CURRENT" tab: this tab contains the current tasks of the technician’s team.
-
"HISTORY» tab: this tab contains the "Completed" tasks of the technician’s team.
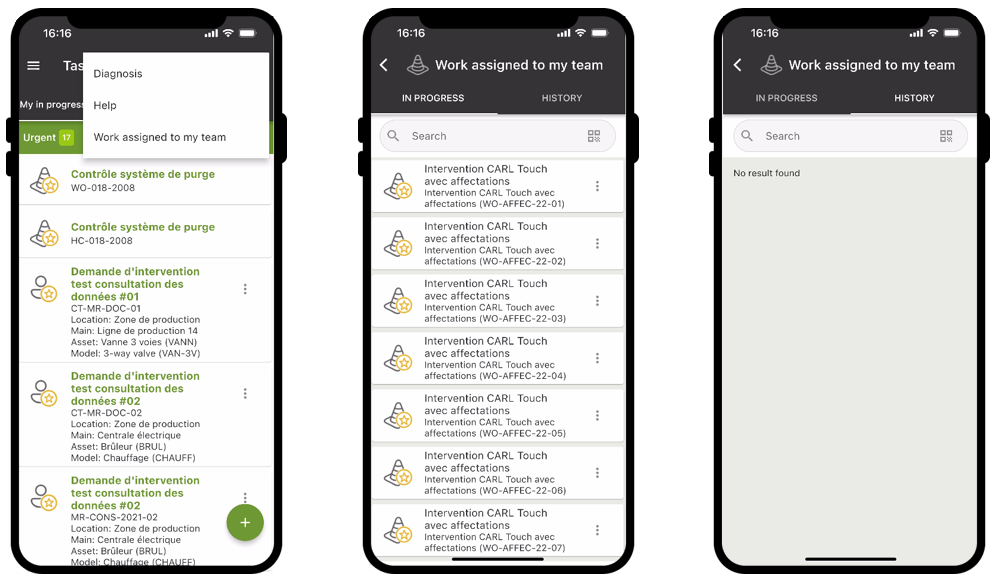
Conditions for displaying tasks linked to the user’s team.
Selecting the "Tasks of my team" action proposes all tasks assigned to the technicians of the connected user’s work team.
This concerns tasks assigned to:
-
The user’s team in the planned resources (Labor tab)
-
The user’s team (General tab)
-
An agent on the user’s team (General tab)
-
An agent in the user’s team in the planned resources (Labor tab)
|
|
Tasks that are not assigned to the user are read only. |
|
|
This action requires a connection network to the server. If this is not the case when this action is called up, the action will not return any data. |
7.3. Task details – Work order
7.3.1. Presentation
The task details form provides quick, structured access to the information comprising a task, and enables these fields to be changed if necessary.
7.3.2. Data displayed
|
|
The data listed below corresponds to the structure of the «standard» form. |
The task details form contains the following:
«General» block
-
Requestor of the work order (WO) or work request (WR) from which the task originates.
-
Priority of the task.
-
Nature of the task.
-
Start date of the task.
-
End date of the task.
-
Forecast time for the task.
«Equipment» block
-
Location: location point for the task.
-
Functional: functional point for the task.
-
Asset affected by the task.
-
Template affected by the task.
-
Failed: failure indicator (Yes/No).
-
Stoppage time: stoppage time for the equipment affected by the task.
«Diagnosis» block
-
Symptom.
-
Cause.
-
Remedy.
|
|
|
«Performance» block
-
WR comment: comment available if the task originates from a WR.
-
Comment: comment available if the task originates from a WO.
|
|
The |
«Operations» block
-
Number of operations performed/Total number of operations planned.
|
|
The |
«Documents» block
-
Number of documents relating to the task.
|
|
The |
«Consumption» block
-
Add a consumption: this button is used to add a consumption to the task.
-
If the current task has one or more consumption records, the block shows the following information for each:
-
Name and code of the item consumed.
-
Warehouse for the item consumed.
-
Location for the item consumed.
-
Quantity of items consumed – this button shows the number of units consumed and enables the quantity to be changed if necessary.
-
|
|
Further details about consumptions are given in section «Consumption» detail block. |
7.3.3. Actions
CARL Touch proposes general actions on the task detail form, as well as actions specific to the fields of a task.
Actions available on the task detail form (via the button)
| Button | Button action |
|---|---|
Add a linked work order |
Create a new task linked to the current task. The link is not hierarchical. If this new work order is created with its status set to «In preparation», it is not displayed in the list of current tasks once it has been saved, but CARL Source sends a notification to CARL Touch to inform the user that the work order «Code - Title» has been saved properly. |
Geolocate |
Geolocate the current task (using GPS). |
Display on map |
If the current task (or the asset associated with the current task) is geolocated (i.e. has GPS coordinates) or has an address, this action displays its position on a map. |
Context-sensitive actions available for task fields
Context-sensitive actions specific to task fields are accessible via the button to the right of the field.
| Field | Button available | Button action |
|---|---|---|
All fields in the «Equipment» block |
Show details |
Displays the detail screen for the selected element. |
NFC pairing |
Pairs the selected element. |
|
Geolocate * |
Geolocates the current element (using GPS). |
|
Display on map * |
If the selected element is geolocated (i.e. has GPS coordinates) or has an address, this action displays its position on a map. |
|
Tasks in progress |
Displays tasks in progress for the selected element. |
|
Task history |
Displays the history of tasks for the selected element. |
|
Child equipment |
Consults child links for the selected element. |
|
Asset survey |
Allows you to perform an asset survey for the selected element. |
|
Entering an event |
For entering an event for the selected element - See Entering an event. |
|
Parts list |
Displays the individual parts list of the selected element (Action only available for the asset field). |
|
Create a task |
Creates a new task based on the selected element (action only available for the asset field). |
|
Create report |
Creates a new report based on the selected element (action only available for the asset field). |
* Button available only if the profile setting «Authorize geolocation of equipment for a task» is enabled.
Actions available on the task detail form
The actions below are shown at the bottom of the screen when the task detail form is displayed:
| Button | Name | Button action | ||
|---|---|---|---|---|
|
"Take" |
The task is taken into account by the user.
|
||
|
«Reject» |
The task is rejected by the user.
|
||
|
«Start» |
The task is set to «Started.» |
||
|
«Pause» |
The task is set to «Paused».
|
||
|
«Finish» |
The task is set to «Finished».
|
||
|
«Transfer» |
The task is transferred. The possible addressees depend on the configuration of the transfer action.
|
||
|
«Restart» |
The stored task is restarted.
|


7.3.4. «Diagnosis» block
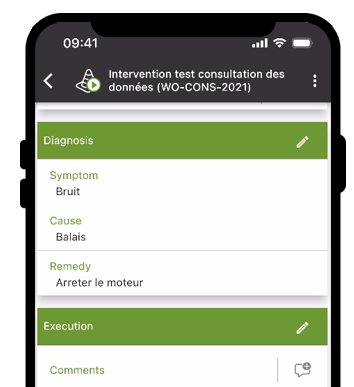
Task diagnosis information is managed in the «Diagnosis» block of the task.
This block comprises three fields: symptom, cause, and remedy.
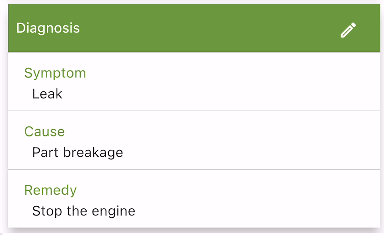
To change these three fields, users must select the «Edit» mode on the Diagnosis block.
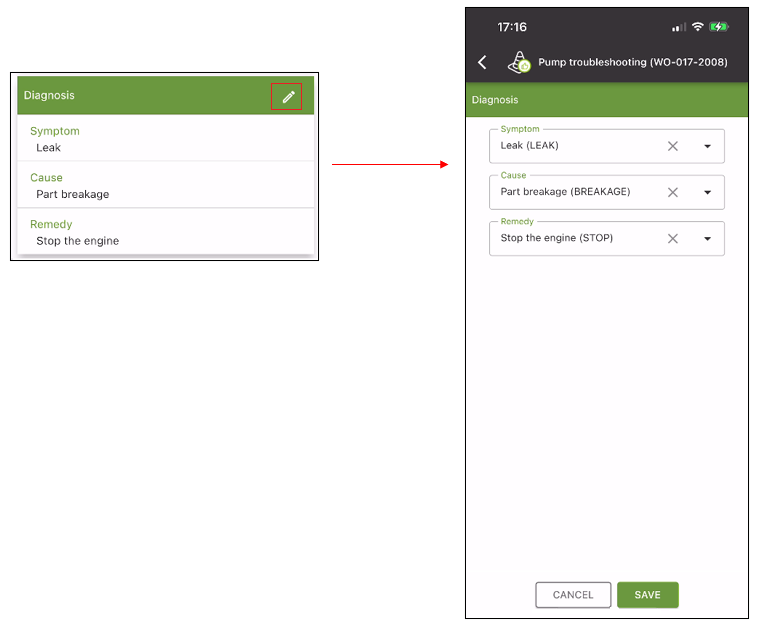
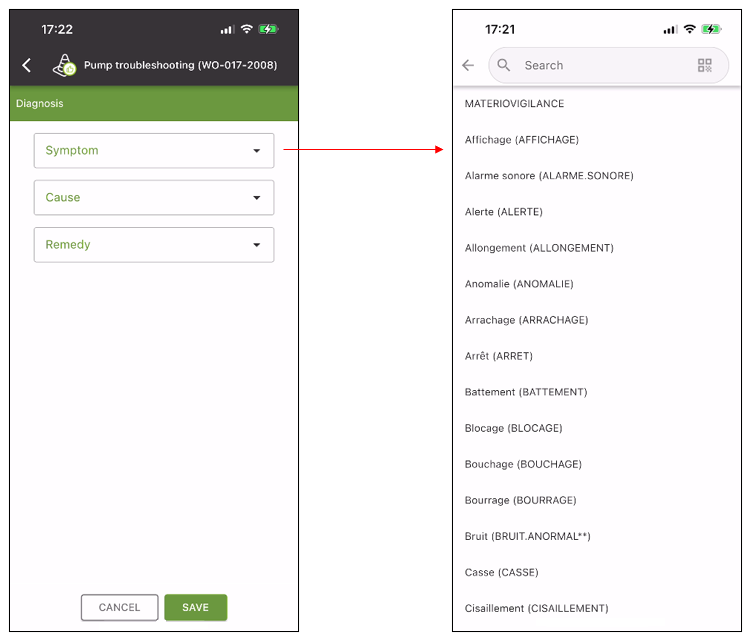
When the lists of symptoms, causes and remedies are called up, the troubleshooting assistance for the asset or model to which the task relates is taken into consideration.
If the asset specified on the task has troubleshooting assistance, CARL Touch will initially propose only known symptoms for the task asset (or the task model if the asset does not have a failure tree).
The user can then select a known symptom for the asset if it matches the observed symptom, or can request the full list of symptoms by selecting the «Add a symptom» button".
Selecting a symptom
CARL Touch will initially show the user the symptoms from the troubleshooting assistance for the asset specified on the task, or the model specified on the task if there is no failure tree for the asset.
If neither the asset nor the model have troubleshooting assistance, CARL Touch will directly show the full list of symptoms.
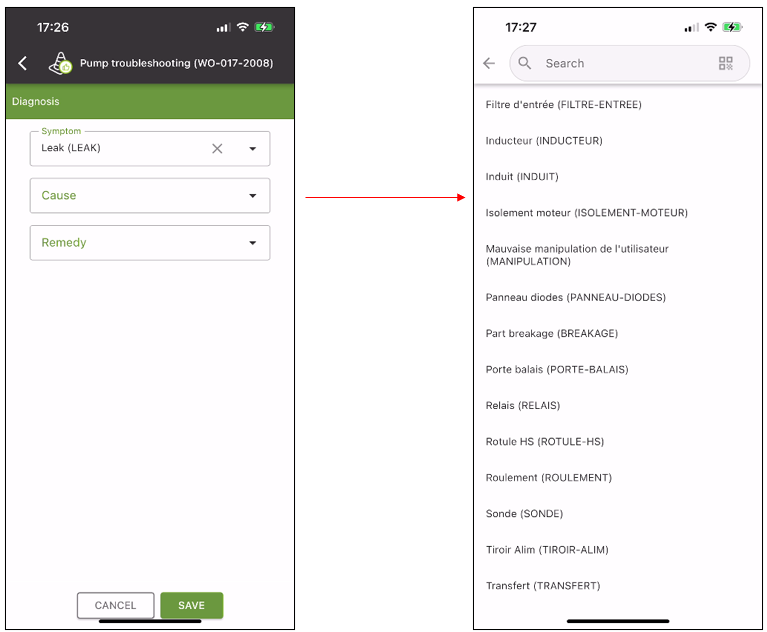
Selecting a failure cause
CARL Touch will initially show the user the known failure causes for the symptom selected, taken from troubleshooting assistance for the asset specified on the task or the model specified on the task if there is no failure tree for the asset.
If there is no known cause for the symptom selected, CARL Touch will directly show the full list of failure causes.
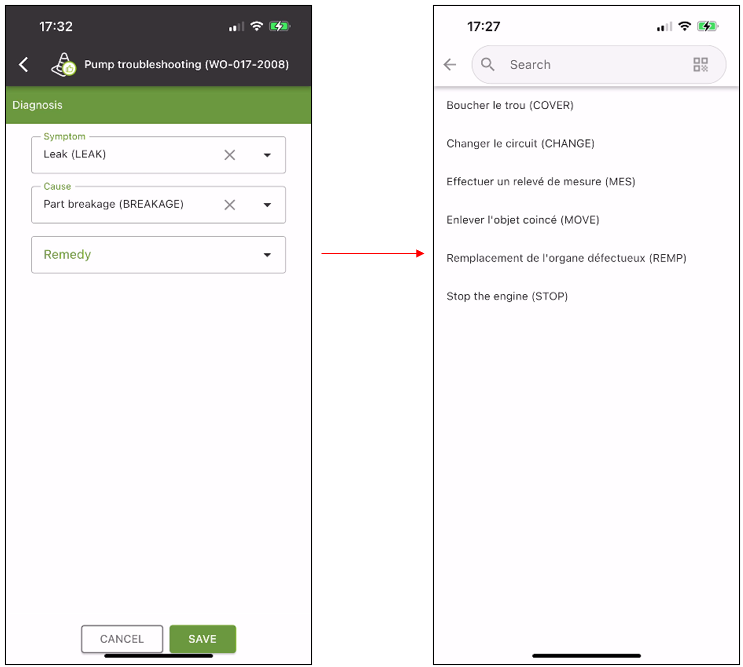
Selecting a remedy
CARL Touch will initially show the user the known remedies for the symptom and cause selected, taken from troubleshooting assistance for the asset specified on the task or the model specified on the task if there is no failure tree for the asset.
If there is no known remedy for the symptom and cause selected, CARL Touch will directly show the full list of remedies.
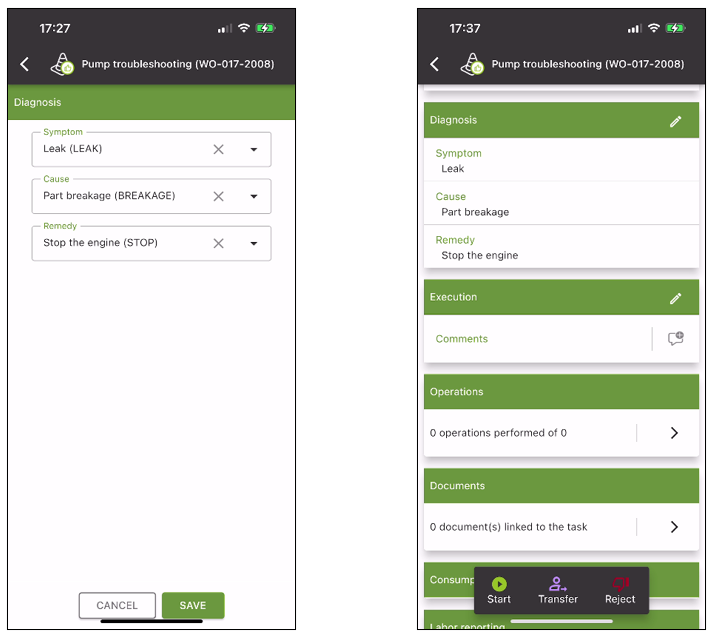
The diagnostic information is stored on the task.
|
|
Lists of symptoms, causes and remedies as well as asset and template fault trees are continuously available: i.e. with or without a network connection. |
|
|
The "Impose a strict failure tree" profile setting blocks the entry of a symptom code, cause, or remedy outside of troubleshooting assistance predetermined by the back-office. In this case, the buttons for accessing the complete list of values are not present. |
7.3.5. «Safety» block
The safety guidelines can be consulted in the «Safety» block for a task.
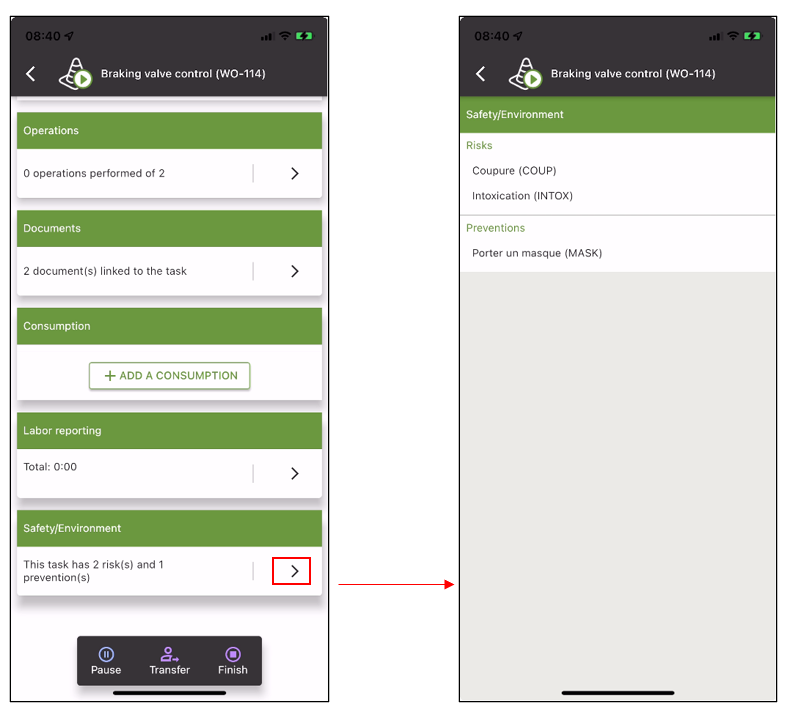
The lists of risks and preventive measures cannot be changed in CARL Touch; the risks and preventive measures displayed are those from the «Safety» tab of the CARL Source work order.
7.3.6. «Operations» summary block
Operations are managed using the «Operations» block of the task details screen.
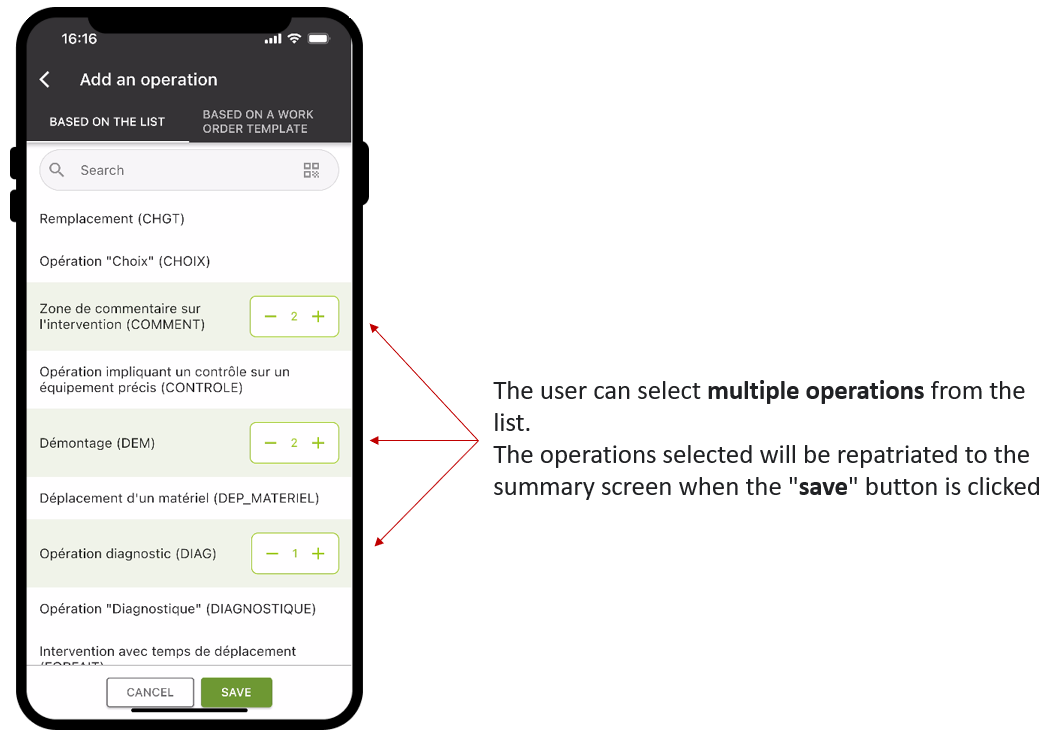
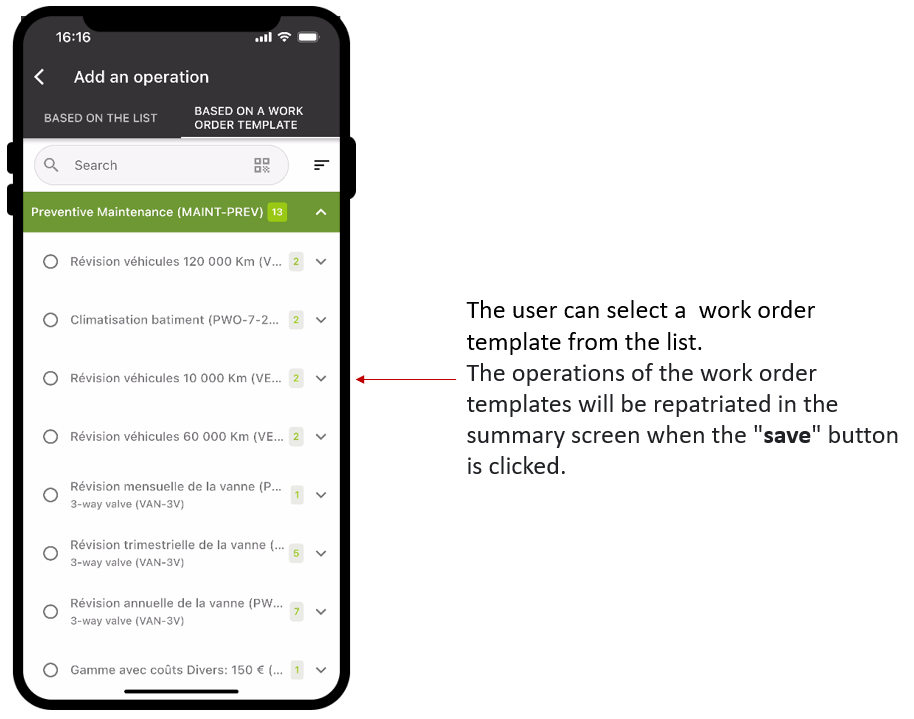
When the user clicks on the «Add operation» button from the operations summary screen (accessible via the button), CARL Touch displays the list of available operations on the first tab and the list of available work order templates on the second tab. It is important to note that:
-
The list of operations and work order templates are available off-line (and are downloaded when the mobile device data is initialized).
-
The list of operations enables multiple operations to be selected: the user can select one or more operations from the list – the selected operations will be automatically retrieved, in the selected order, when the screen is confirmed.
-
The list of work order templates allows you to copy the work order template operation: the user can select a work order template from the list – the operations of the selected work order template will be automatically retrieved when the screen is confirmed.
-
A QR Code corresponding to the operation code can be scanned from this list to select an operation.
|
|
The operations returned are sorted in the order in which they were selected on the selection list. |
There are several types of operations:
-
"Simple" operations of "check" type: the procedure is considered to be either ‘Performed' or ‘Not performed'. "Simple" operations are defined in CARL Source by the "Standard" category.
-
"Diagnostic" type operations: the technician completes the operation and makes an assessment. "Diagnostic" operations are defined in CARL Source by the "Diagnostic" category.
-
Operations of the "reading" type: the technician selects a reading point from the list of available reading points and enters the reading value. «Reading» operations are defined in CARL Source by the «Reading» category.
-
"Asset movement" operations: there are three possible movements: installation, removal, or replacement. "Asset movement" operations are defined in CARL Source by the "Asset movement" category.
-
"Choice" type operations: the technician completes the operation and selects a value from the proposed list. "Select" operations are defined in CARL Source by the "Select" category.
|
|
Standard screens are provided for customizing operations depending on the type of operation. |
7.3.7. Details of an operation
Presentation
The detail form for an operation can be displayed by selecting the operation description in the list of operations for the work order.
Details of operation data
|
|
The data listed below corresponds to the structure of the «standard» form. |
Operations forms can be customized for each individual operation. See the «General tab» section for further details.
The operation details form contains the following:
«General» block
-
Performed: Date on which the operation is performed.
-
Comment: Comments on the operation.
-
Expected duration: Estimated time to perform the operation.
«Equipment» block
-
Location: Location point for the operation.
-
Main: Main point for the operation.
-
Asset affected by the operation.
«Diagnosis» block
-
Assessment: Location point for the operation.
-
Reservation number: Main point for the operation.
«Reading» block
-
Reading point: Reading point at which a reading is to be taken.
-
Old value: Old value of the reading.
-
Value read: Value read at the reading point.
-
Correction reading: If the reading a correction reading?
«Documents» block
-
List of documents: documents relating to the operation.
-
« * *Add a media document » button: Used to add a document to the operation
7.3.8. «Consumption» detail block
The «Consumption» detail block is used to identify the reference(s) of consumable items used while performing the task, and record new consumption of items for the task. Item reservations are also shown.
Item consumption is entered in three steps.
|
|
the operating principles for wizards are set out in section Wizards. |
Step 1: Select a stored item to be consumed
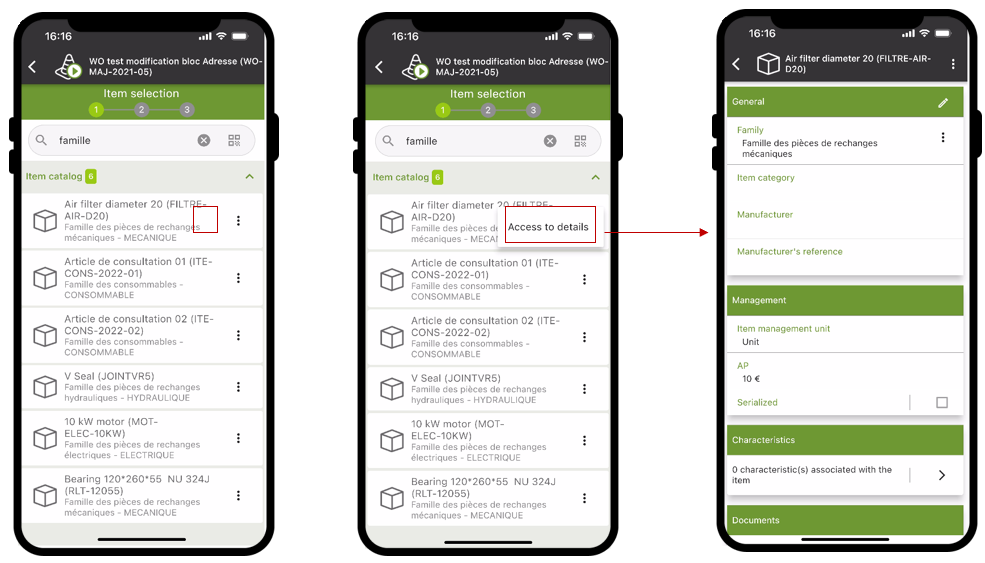
When the «Add a consumption» button is pressed, Step 1 of the stock withdrawals wizard is displayed, i.e. the list of stored items.
This list has the following special features:
-
The list displays the names and codes of stored items.
-
The items are shown in grouping blocks:
-
Custom parts list: these are stored items taken from the custom parts list for the asset affected by the task.
-
Standard parts list: items from the parts list for the model associated with the task.
-
Item catalog: all stored items in the catalog.
-
-
The user can search for an item by entering its code or name in the search pane or by directly scanning a QR Code.
-
Press the
icon to display the « Access to details » option, which offers direct access to the item detail sheet:
-
The selection of an item from the list (by clicking on the item) triggers the next stage in the consumption process, i.e. access to Step 2.
|
|
The list of stored items enables users to select one item at a time for each consumption (i.e. the list does not allow multiple items to be selected). |
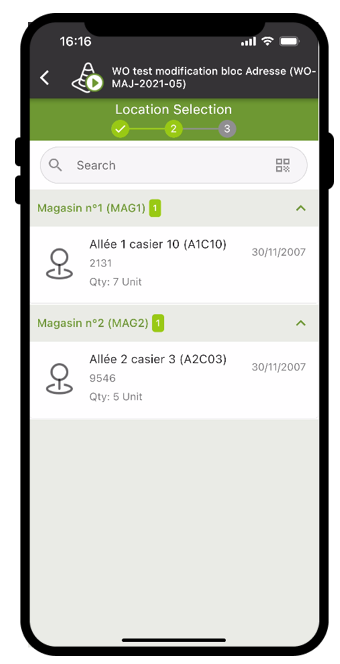
Step 2: Select the batch affected by stock withdrawal: warehouse and location
When an item is selected from the list of items (see previous step), a screen is displayed for selecting the batch affected by stock withdrawal. CARL Touch then displays the storage details for the selected item.
There are two possible scenarios if the stock module has not been synchronized:
-
If the mobile device has a network connection: CARL Touch queries CARL Source and retrieves all the item storage information.
-
If the mobile device does not have a network connection: CARL Touch allows the user to select a warehouse and location for the consumption. However, as the item storage information is not stored locally in off-line mode, the item may not be physically located in the selected warehouse and location.
Each storage detail line for the selected item displays the following information where available:
-
Name and code of the storage warehouse.
-
Name and code of the storage location.
-
Batch number (for a batch-managed item).
-
Asset name and code (for serialized items).
-
Quantity in stock of the item for the current batch.
-
When a line is selected, CARL Touch displays a window for entering the quantity consumed – see next step.
Step 3: Enter the quantity consumed
CARL Touch displays a window summarizing the item name and code, and the quantity in stock for the warehouse, location and batch selected during the previous step.
The user can then enter a quantity consumed, expressed in the storage unit for the item:
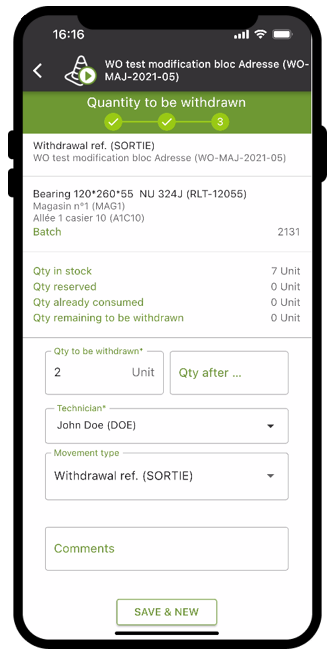
-
The user can now either:
-
cancel their entry: in which case the consumption is lost.
-
confirm it by "Save": In this case, CARL Touch displays a summary window for consumption confirmation - see next step.
-
1. Update consumption on the task
After the consumption is confirmed, CARL Touch updates the information in the «Consumption» block on the task detail to show the consumption.
=> Regardless of the number of item entry/reinstatement movements, this screen shows a precise summary view of consumption for a task.
7.3.9. Focus on «Signature» block
The «Signature» block allows the client to add a handwritten signature directly on the touch screen on the device (tablet, smartphone), such as to indicate that the task has been completed by the technician.
1. Prerequisites
The «Signature» block is not part of the blocks displayed as default in the detail form of a task.
Consequently, in order to display and edit the Signature data, proceed as follows:
-
Go to the Form customization function in the CARL Touch module in CARL Source,
-
Duplicate the «Details of a task» TASK-DET-DEFAULT form (see section Duplicating a form), then customise it by displaying the following attributes and making them editable («Displayed» and «Editable» columns):
-
BLOCK13 *
-
signature
-
signatory
-
email
-
commentSign
-
signatureDate
-
|
|
* Comments on the BLOCK13 attribute
|
2. Statuses on which the signature is conditional
Signature is authorized with some task status values but not others.
Signature is authorized with the following status values:
-
Task « Started » originating from a Work order
 or WR
or WR .
. -
Task « Paused » originating from a Work order
 or WR
or WR .
.
Signature is not authorized with the following status values:
-
Task being created or New task received originating from a Work order
 or WR
or WR  .
. -
Task « Taken into account » originating from a Work order
 or WR
or WR .
. -
Task « Rejected » originating from a Work order
 or WR
or WR .
. -
Task « Completed » originating from a Work order
 or WR
or WR  :
:-
The task can no longer be signed.
-
Once a signature has been added, it can no longer be changed.
-
3. Data displayed in the «Signature» block
-
Signature: touch area for signing with a finger.
-
Signing party: last name and first name of the person signing.
-
Email: email address of the work order report addressee.
-
Signature comment: area for a comment by the signatory so that any reservations or additional information can be mentioned.
-
Signature date: date and time automatically entered when the signature is applied.
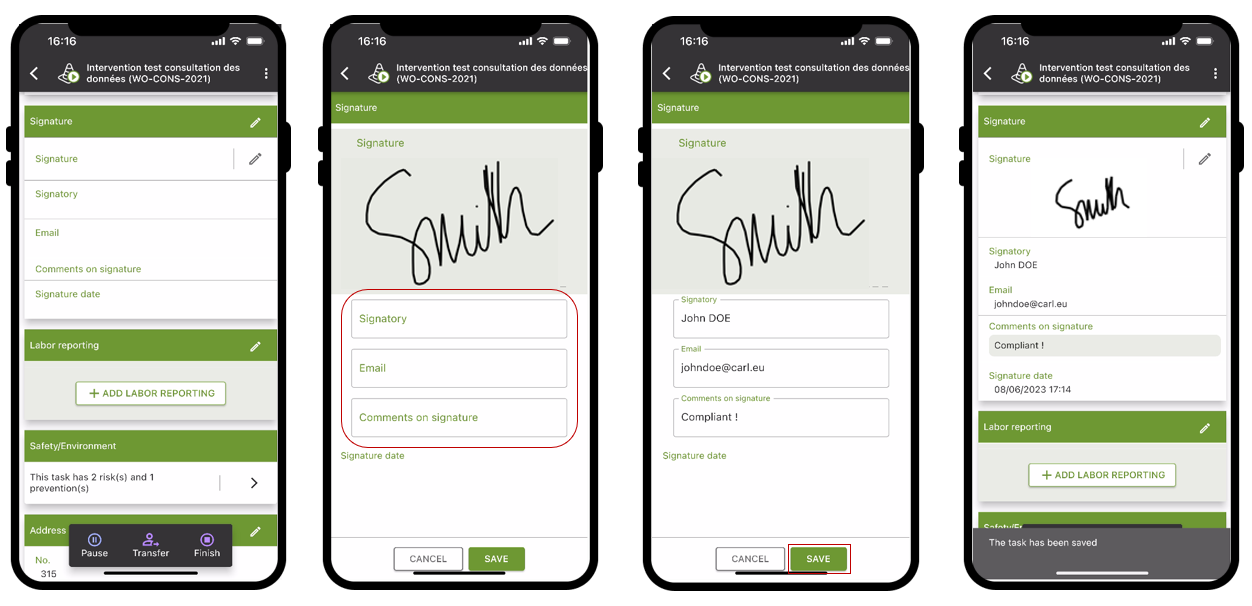
4. Illustration of the signature input process
-
The technician clicks on the
 icon.
icon. -
The client adds a handwritten signature.
-
The client enters their last name/first name (or the email address of the Work order recipient) and a comment if desired.
-
Once the data has been entered, the following options are available:
-
Cancel: the «Signature» block is reset,
-
or Save: CARL Touch automatically applies a date/time stamp to the signature recording - the «Signature» block displays the signature in miniature and the corresponding data.
-
|
|
|

5. Contextual action: Reset signature
The « Reset signature » action associated with a task already signed is accessible via the button located in the upper right of the form.
| Button | Button action |
|---|---|
Reset signature |
Displays the message « This reset deletes the signature and its corresponding data. Are you sure? ». => «Yes»: the «Signature» block is reset, |
6. Special case: A signature is required for work acceptance on a work order.
If «Acceptance of work» is requested for a work order in CARL Source, the corresponding task in CARL Touch can be finished only:
-
if it has been signed («Signature» field),
-
and the name of the signatory has been filled in («Signatory» field).
7. Status correspondence between CARL Touch and CARL Source
When the user finishes a task («Finish» button) in CARL Touch, the status of the corresponding work order (and potentially the WRs having originated the work order) is automatically updated in CARL Source according to the following table:
| Is «Acceptance of work» requested in CARL Source? | Has a signature been added in CARL Touch? | Status automatically updated in CARL Source |
|---|---|---|
Yes |
No (signature not displayed) |
=> "Completed" status |
Yes |
Yes |
=> "Closed" status |
No |
No |
=> "Closed" status |
No |
Yes |
=> "Closed" status |
|
|
=> Then the status of the WRs and the work order is set to «Closed» in CARL Source. |
7.3.10. «Labor» block
The «Labor» block is used to manage the labor types consolidated on the task.
Labor types for tracking activity time are also managed automatically (see Activities).
There are three different modes for the management of labor types (see Labor management mode).
-
Automatic mode:
Labor types are deduced automatically by CARL Source using data sent by CARL Touch when a task is paused, transferred or closed. -
Semi-automatic mode
This mode suggests to CARL Touch users a labor type deduced from their activity in CARL Touch. This mode enables users to amend their labor type before sending it to CARL Source and to add other technicians who worked on the same work order. -
Manual mode:
This mode enables users themselves to declare labor types for a task. There is a data entry wizard for the manual addition of labor types. In manual mode, no labor types are calculated automatically.
Each of the three modes is described in detail below:
1. Automatic mode
In automatic labor mode, the consolidation of labor types on a task is carried out seamlessly for CARL Touch users. For the following steps of a task workflow: "Paused", "Transfer", or "Finish", CARL Touch transfers the data needed to automatically create a labor type in CARL Source.
-
The labor is created for the technician associated with the CARL Touch user agent.
-
The labor is assigned to the technician’s default time type.
-
The labor duration is equal to the time between pausing, transferring or closing the task and the date/time that the task was started or restarted. The minimum duration of a labor type is one minute.
2. Semi-automatic mode
In semi-automatic mode, CARL Touch offers users a form to confirm the calculated labor types.
For the following steps of a task workflow: "Paused", "Transfer", or "Finish", CARL Touch offers the following form:
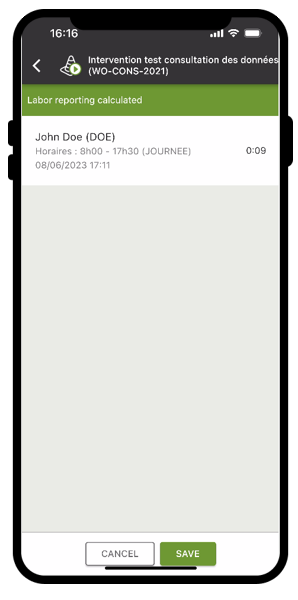
The following data is displayed:
-
The name and code of the technician.
-
The name and code of the technician’s default time type.
-
The date and time of the labor.
-
The duration of the labor.
-
The labor type (optional: depends on the labor type entered).
-
The comment associated with the labor.
Actions available on this form
The following actions are available on the labor validation form:
-
Add a labor type: This action is used to declare a labor type for one or more additional technicians. A labor type is added by means of a wizard.
-
Clicking on « Save » creates the labor type(s) on this form on the CARL Source work order.
-
Clicking on « Cancel » results in the data entered being discarded.
Add a labor type
A labor type can be added by means of a three-step data entry wizard.
Step 1 – Selecting the technician
In Step 1, the list of «active» technicians is displayed. A connection to the CARL Source server is required to initialise this list.
If the network is not available, users can enter or scan the code for the technician for whom the labor is to be created.
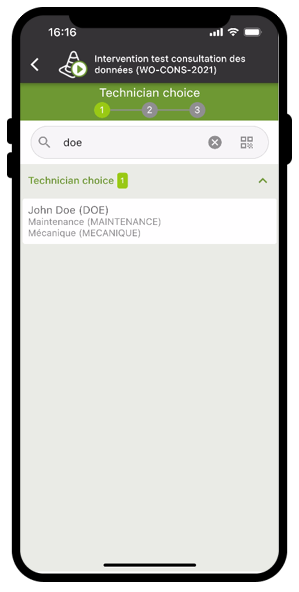
Users must select the technician from the list offered. CARL Touch then moves to step 2 of the data entry wizard.
Step 2 – Selecting the time type
Step 2 enables users to select the labor time type from the time types defined for the selected technician.
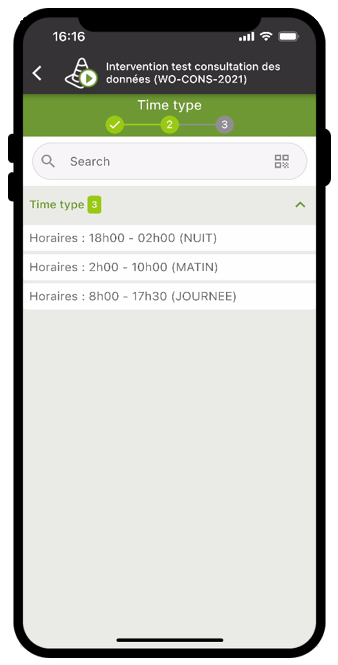
If the user has a default time type or has only one time type, step 2 is skipped and the wizard passes directly to step 3.
Step 3 – Entering the labor time
Step 3 enables users to finalise the addition of a labor type. The labor type is initialized with the same date/time and duration as the labor type calculated by CARL Touch.
However, users can change the date, time and duration of the labor, and the nature if needed, using the buttons associated with each of these fields.
Users can also enter a comment using the  button.
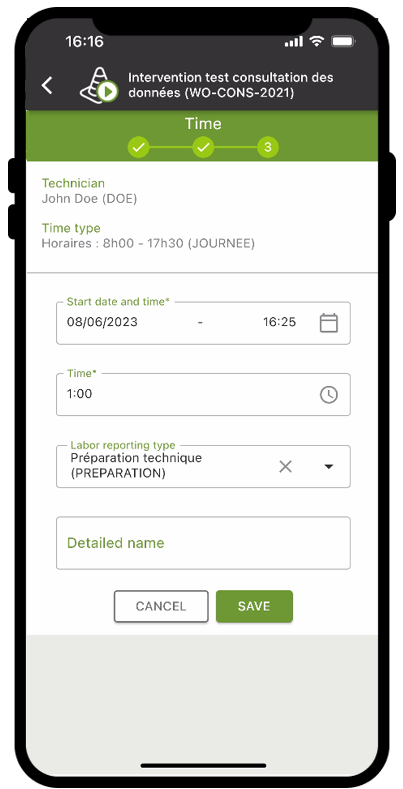
Actions available on the form for this step
The following actions are available on the labor validation form:
-
Clicking on « Confirm » results in the labor being added to the list of labor types calculated by CARL Touch.
-
Clicking on « Cancel » results in the labor data entered being discarded.
3. Manual mode
In manual mode, no labor types are deduced or proposed to users. The CARL Touch users must manage task labor types themselves.
To do so, they must select the «Labor» block for the task.
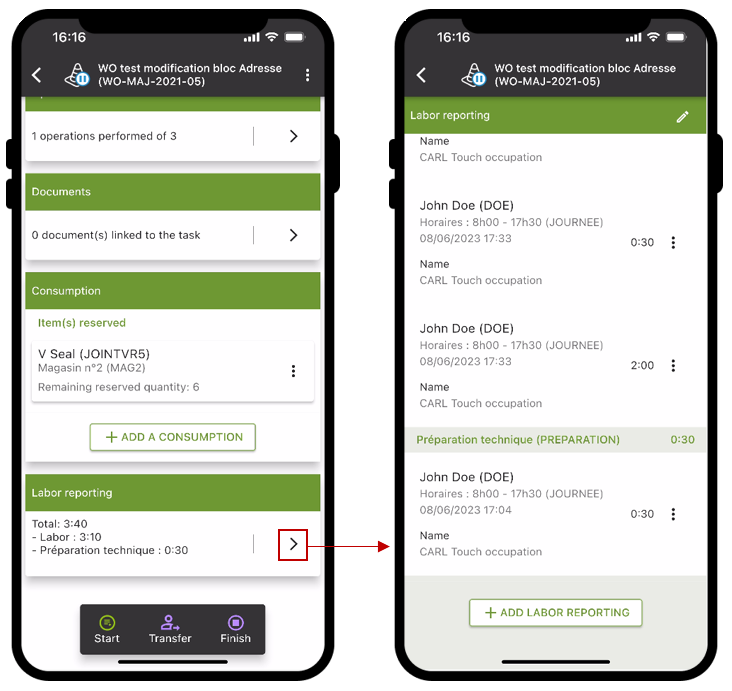
From the «Labor» block, users can:
-
Edit a labor type
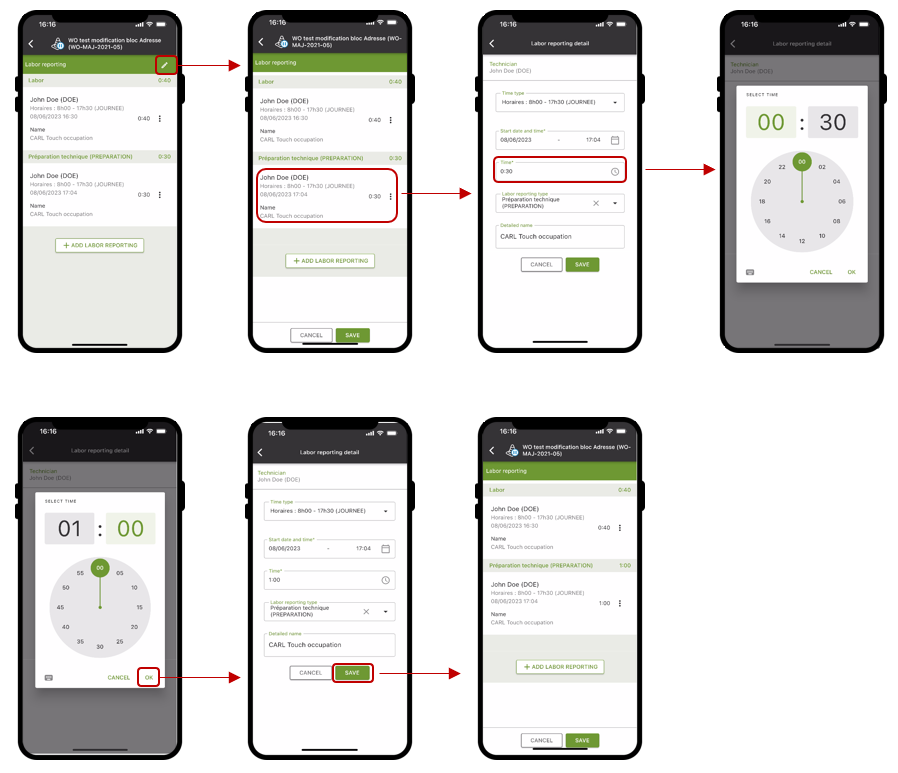
-
Add a labor type
The principle of adding a labor type is described in section entitled Semi-automatic labor mode.
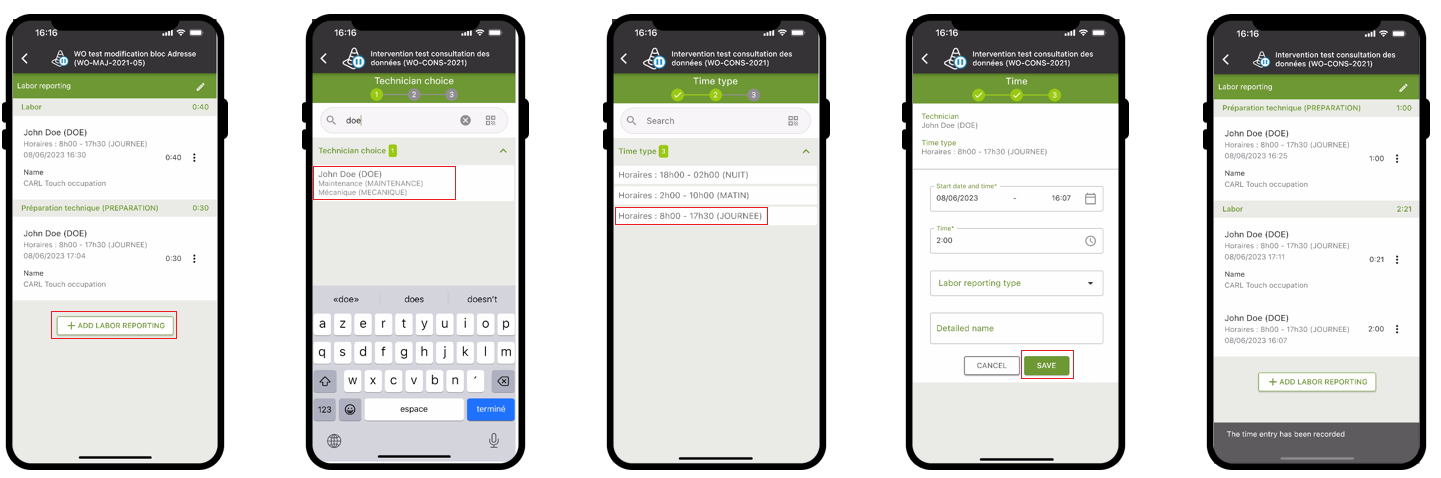
-
Delete a labor type
To delete a labor type , users must edit the «Labor» block, then slide to the left the labor to be deleted and then press the Delete button.
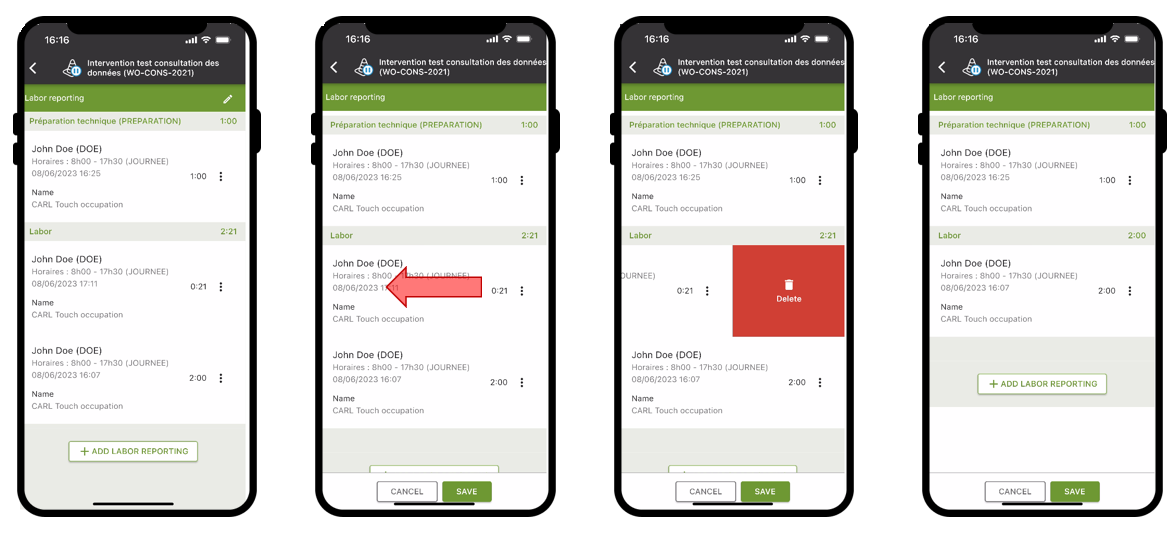
Context-sensitive actions available for labor fields
Context-sensitive actions specific to labor fields are accessible via the button to the right of the field.
| Field | Button available | Button action |
|---|---|---|
All fields in the «Labor» block |
Copy for another technician |
Copy the current element. |
7.3.11. «Material resources» block
The «Material resources» block is used to manage the labor types of material resources for the task.
To do so, the task’s «Material resources» block must be accessed.
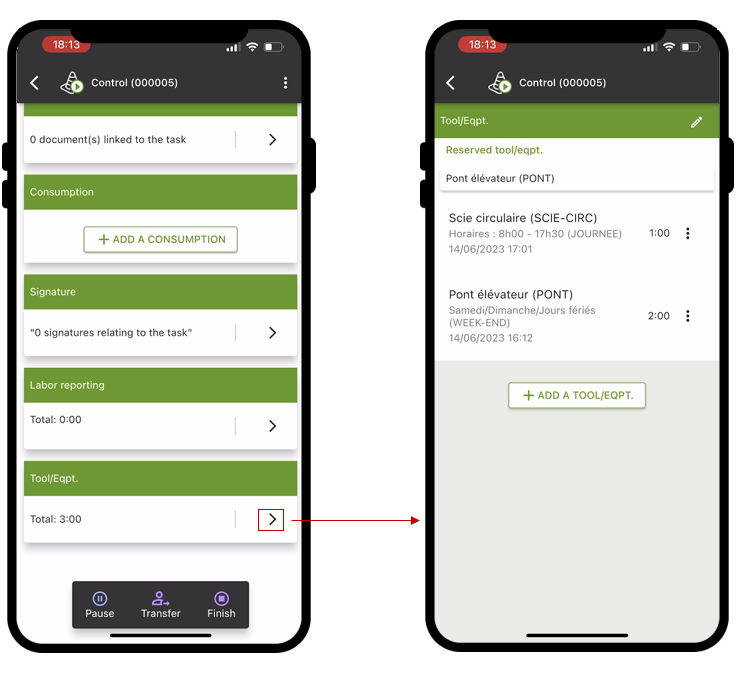
From the «Material resources» block details, users can:
-
Edit a labor type of a material resource
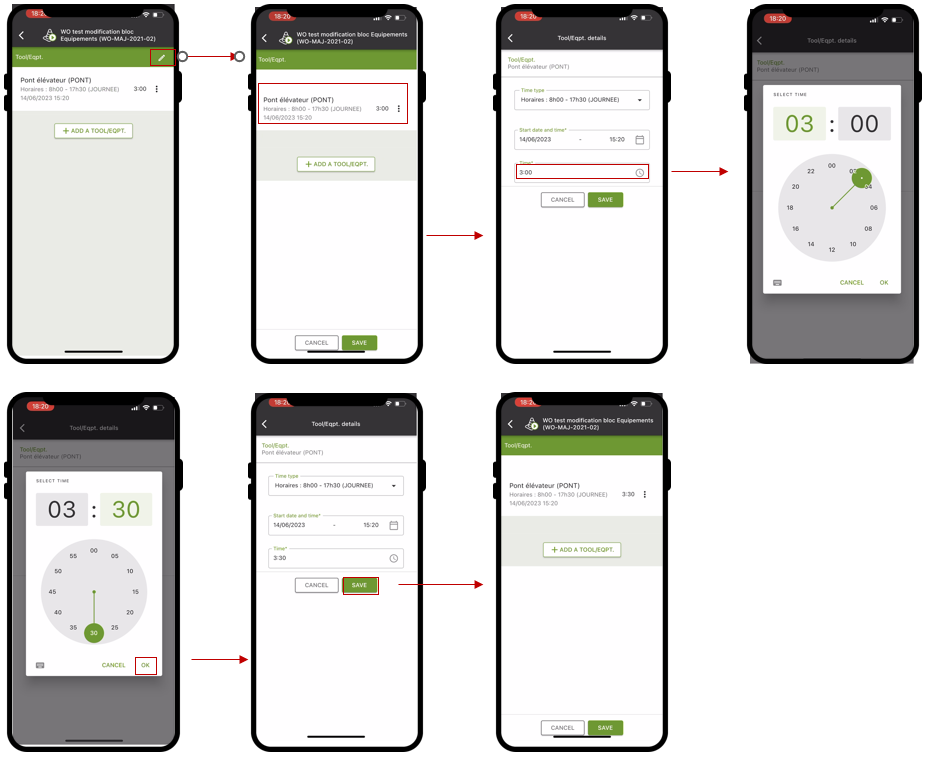
-
Adding a labor type of a material resource
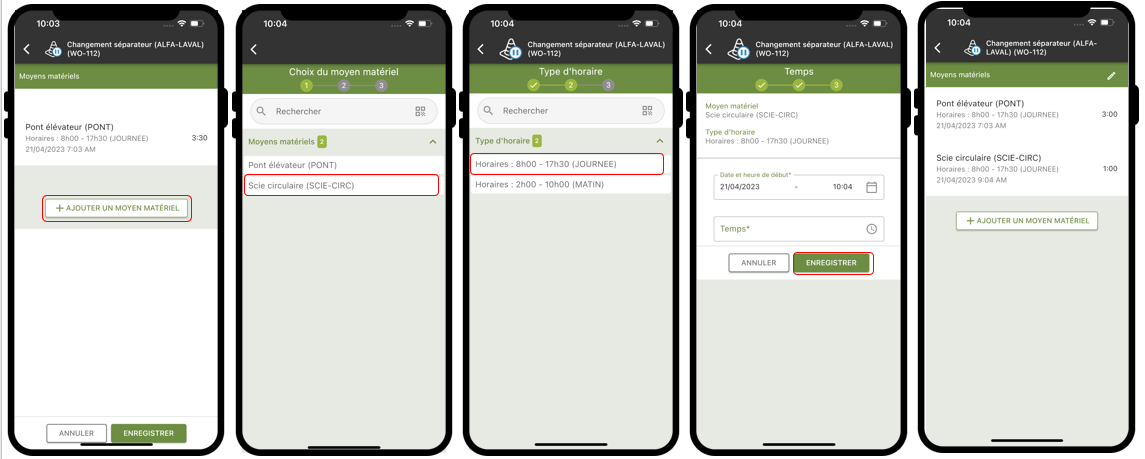
A labor type of a material resource is added by means of a three-step data entry wizard.
Step 1 - Select a material resource
Step 1 displays the list of «Active» material resources. A connection to the CARL Source server is required to initialise this list.
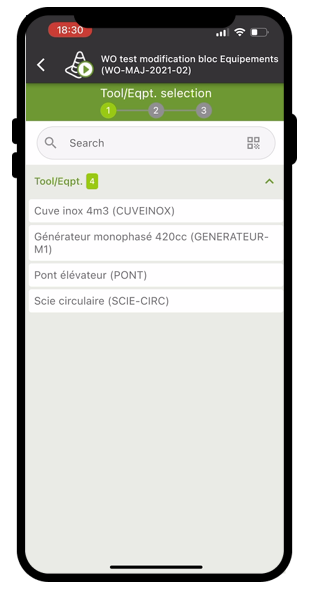
The user must select the desired material resource from the proposed list. CARL Touch then moves to Step 2 of the data entry wizard.
Step 2 – Selecting the time type
Step 2 selects the labor time type of the material resource from the time types defined for the selected material resource.
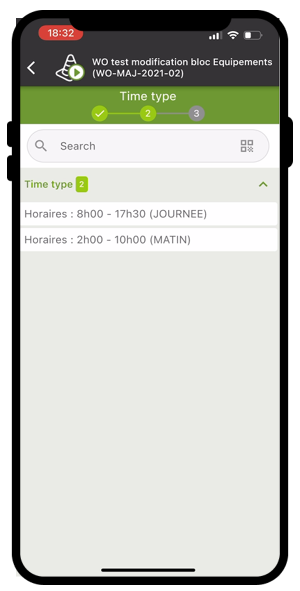
If the material resource has a default time type or has only one time type, Step 2 is "skipped" and the wizard proceeds directly to Step 3.
Step 3 – Entering the labor time of the material resource
Step 3 enables users to finalise the addition of a labor type.
The user can edit the date and time by selecting the buttons associated with each of these fields.
The user must also enter the labor duration in the same way.
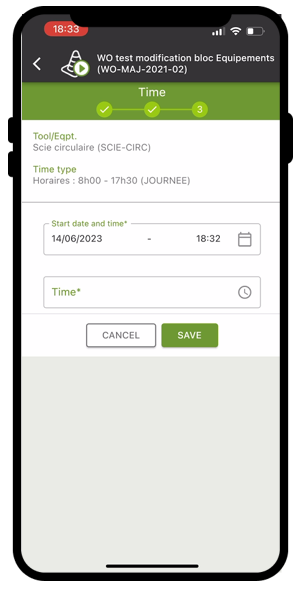
Actions available on the form for this step
The form actions available on this validation screen of a material resource’s labor are as follows:
-
The Validate action is used to add a material resource labor type.
-
Clicking on Cancel results in the labor data entered being discarded.
-
Deleting a labor type of a material resource
To delete a labor type of a material resource, users must edit the «Material resource» block, then slide to the left the labor line to be deleted and then press the Delete button.
Context-sensitive actions available in material resource labor fields
Context-sensitive actions associated with the fields of a material resource labor are accessible via the button to the right of the field.
| Field | Button available | Button action |
|---|---|---|
All fields in the «material resource» block |
Copy for another material resource |
Copy the current element for another material resource. |
7.4. Task details – Work request
7.4.1. Presentation
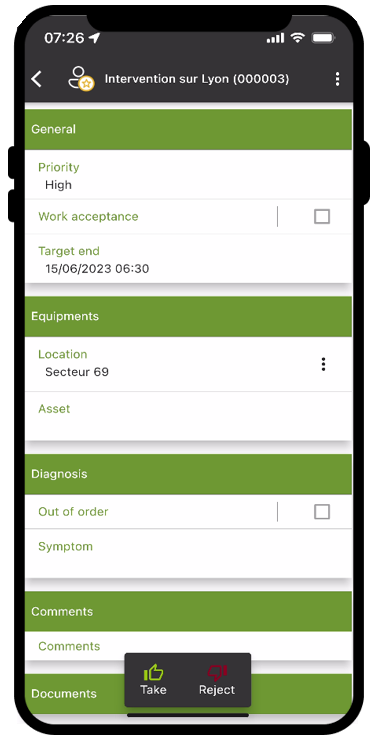
A task may be either a work order or a work request. Work requests have their own form:
7.4.2. Data displayed
|
|
The data listed below corresponds to the structure of the «standard» form. |
The WR details form contains the following:
«General» block
-
Priority of the work request.
-
Acceptance of work indicator: does work need to be accepted (Yes/No).
-
Desired end date for the work request.
«Equipment» block
-
Location: Location point for the work request.
-
Asset affected by the task.
«Diagnosis» block
-
Failed: failure indicator (Yes/No).
-
Symptom.
|
|
|
"Comment" block
-
Comment.
|
|
Further details about the comment entry mechanism are given in section Entering and displaying comments. |
«Documents» block
-
Number of documents relating to the task.
|
|
The |
7.4.3. Notifications
When a new work request is stored, CARL Source sends a notification to CARL Touch to inform the user that the work request «CODE-Title» has been stored. The work request then disappears from CARL Touch, because it needs to be addressed in CARL Source:
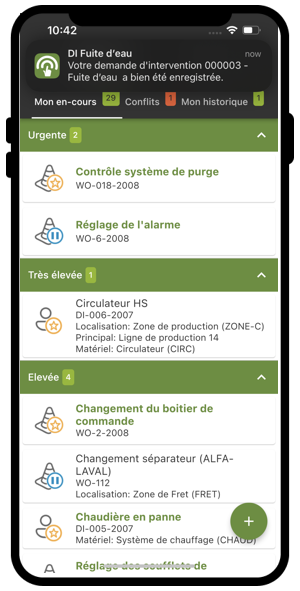
For a task of WR origin to be accessible again in CARL Touch, the following is required in CARL Source:
-
Change it to a status of "Waiting to be taken into account" if the WR was created with a status of "In preparation".
-
Change it to a status of "Pending completion" if the WR was created with a status of "Waiting to be taken into account".
7.5. Transfer
7.5.1. General
This function is subject to a profile right.
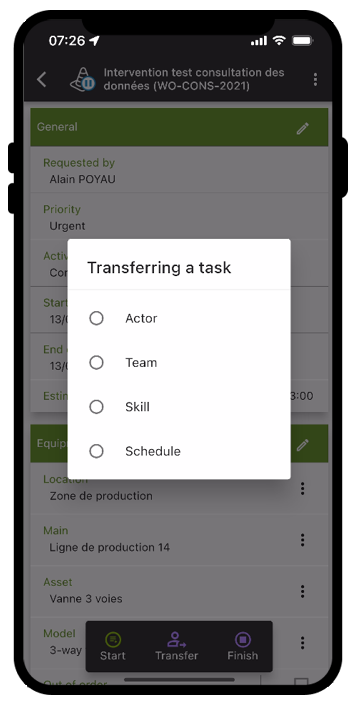
As default, users can transfer a task to an Agent.
By configuring this transfer action, they can also transfer tasks to:
-
A Skill.
-
A Team.
-
Scheduling: the «To be scheduled» check box will automatically be checked on the corresponding work order in CARL Source.
7.5.2. Details
If several transfer types are available, clicking on the [Transfer] button brings up a dialog box for choosing the desired transfer type.
Once the transfer type has been selected, CARL Touch allows the user to select an agent, a team or a skill, and to enter a comment if needed.
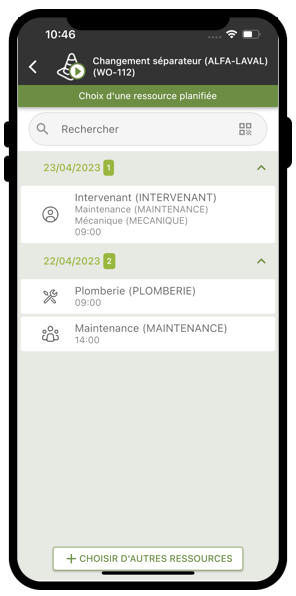
If the assignment management module is active, and there are assignments on the task (other than assigned to the logged-in user), an intermediate step is displayed to select the users, teams or specialties assigned to the task.
7.6. Activities
7.6.1. General
This function is subject to a profile right.
An activity time (such as travel, for example), distinguished from working time, can be automatically calculated by the application, in order to give details of a task’s labor time.
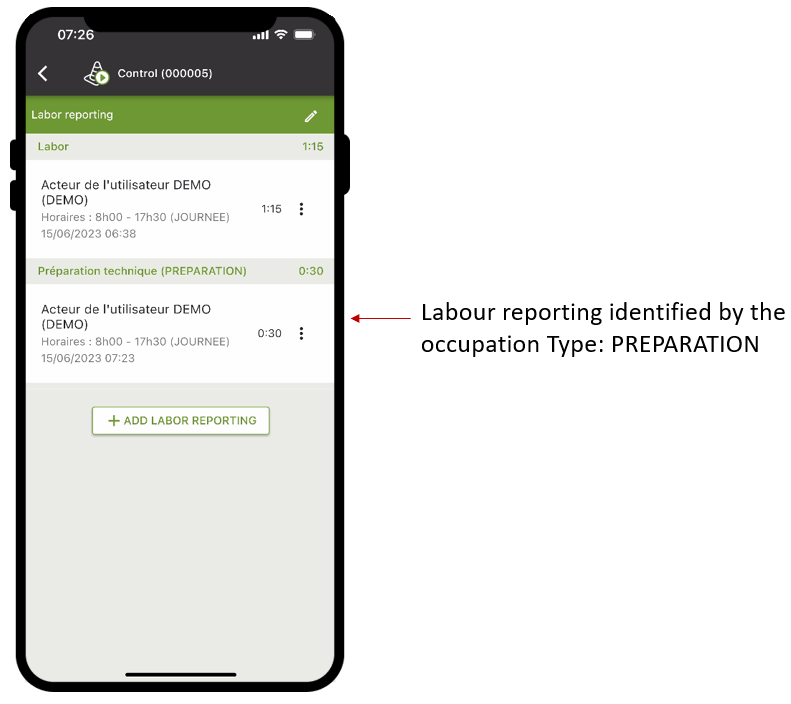
This time is recorded on a task as labor types with a specific nature.
7.6.2. Details
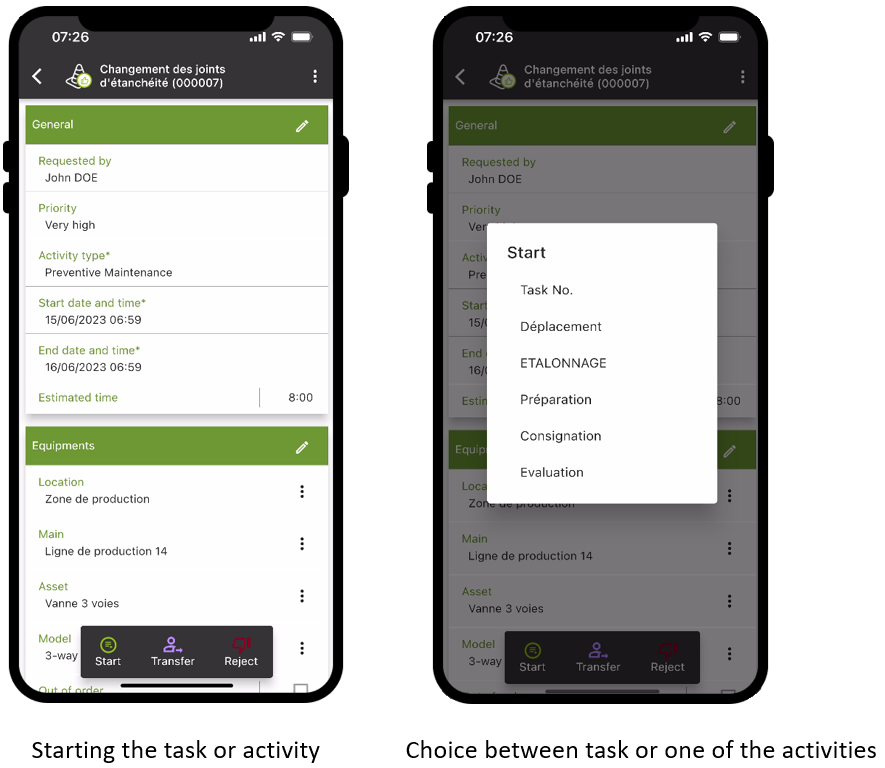
On a task that has been taken into account, the user can report the start of an activity with the "Start" action.
As soon as the user declares the end of the activity with the "Stop" action, a labor type of the selected nature is added to the work order. The work order status automatically changes to «Paused».
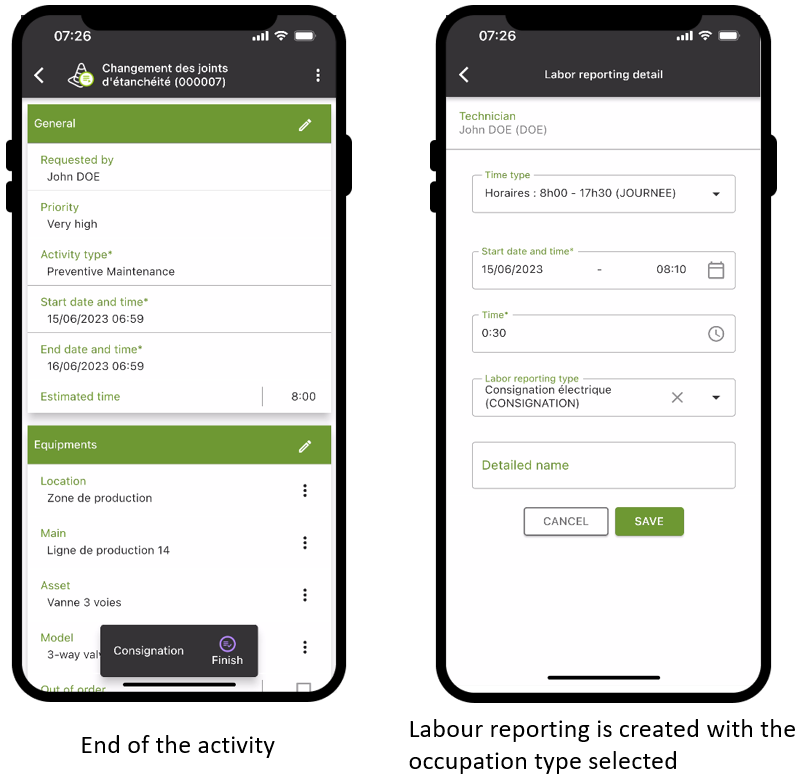
A default labor type for each activity may be entered in the configuration of activities.
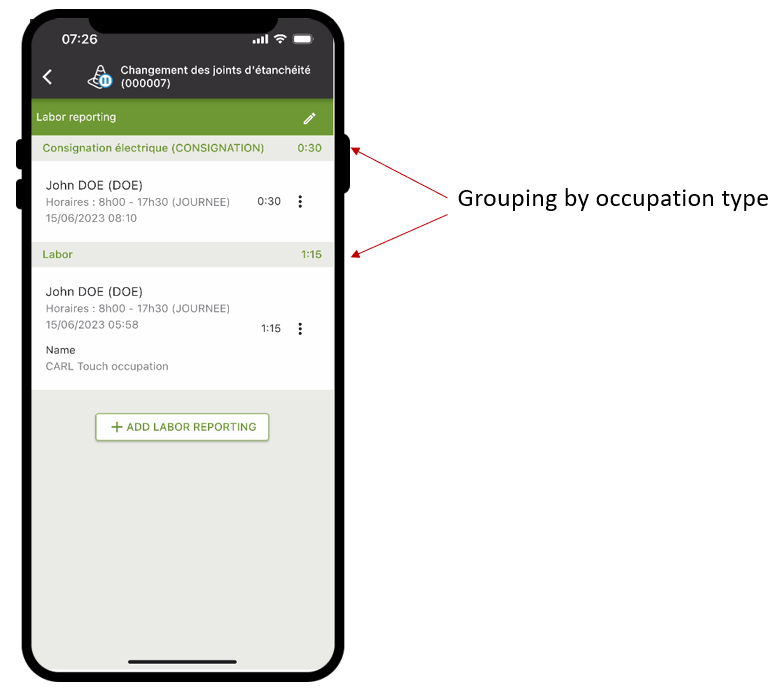
If labor types are defined, the labor types on a task are presented grouped by nature.
7.7. Presence checks
7.7.1. General
This function, available depending on a profile right, requires users to scan an NFC chip to confirm that they are physically present at the work order location.
Presence checks on a task may be disabled, made possible but optional, or required before a task can be finalized.
7.7.2. Details
A presence check code can be linked to any asset or location and comprises an alphanumeric character string.
On a task that has been started if a presence check code exists for a piece of equipment affected by the task (location point or asset), the application displays an orange bar (at the top of the work order details), requiring the technician to scan a code in order to prove that they were present at the equipment’s location.
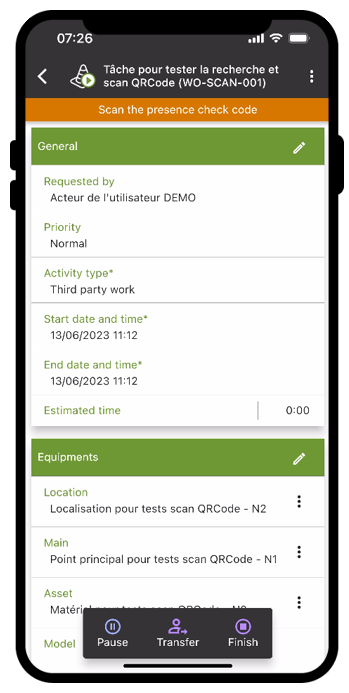
This presence check code, linked to the work order and to be scanned by the technician when performing the work order, is determined by the server when the work order is created, as follows (by order of priority). It comprises:
-
The presence check code for the asset affected by the work order.
-
Or the presence check code for the first asset found in the tree structure above the asset being worked on.
-
Or the presence check code for the location.
-
Or the presence check code for the first location found in the tree structure above the location of the work order.
If no presence check codes are found on the equipment affected by the task, the technician is not required to complete a presence check.
|
|
If the equipment affected by the work order is changed from CARL Touch, the presence check code is automatically recalculated by the CARL Source server. When the code is scanned, the application determines whether or not the code is correct. If it is incorrect, the user must re-scan the correct code. |
7.7.2.1. Optional presence check
The user can scan the NFC chip of the equipment of the work order in progress when the presential scan banner is displayed.
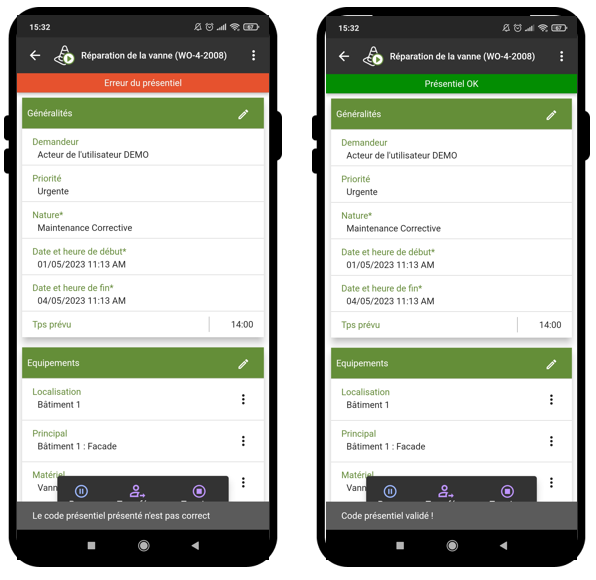
If the code scanned is correct, this is shown in the bar, which turns green before disappearing from the screen.
The task can also be closed without scanning the presence check code.
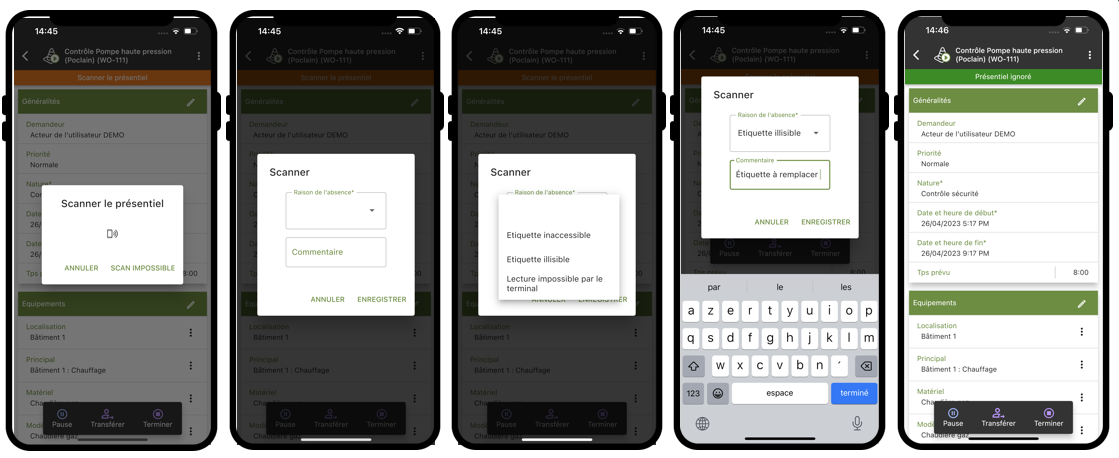
7.7.2.2. Mandatory presence check.
When the presence check bar is displayed, the user can press the button for the QRCode scan and scan the code on the equipment affected by the current work order. If the symbol for the NFC or physical scanner are displayed, the user can (directly from the task detail form), use the physical scanner or bring the smartphone up against the NFC chip on the equipment to be scanned.
If the code scanned matches that expected by the application, this is shown in the bar, which turns green before disappearing from the screen.
The task cannot be closed without scanning the presence check code. If the user is unable to scan the presence check code at the work order location, they can choose to override the check, using a secondary action or the QRCode scan pop-up to state that scanning is impossible.
In this case, a reason and a comment must be entered, so that the lack of proof of presence at the work order site can subsequently be identified.
7.7.2.3. Other actions
At any time, even if the scan has been ignored, the user can request a new scan of a presence check code. If this is done, the bar reappears.
In NFC mode, if the user is on the detail form for a task with a presence check that has already been completed, and the device is brought up against the NFC chip on a piece of equipment, the code is checked again.
7.8. Usage case: Creating a new task
While most tasks initially originate from synchronization with CARL Source, the user can also create new tasks directly from CARL Touch:
1. From the task list, the user clicks on the  icon.
icon.
2. The user chooses the task type: Work order, Report or Work request.
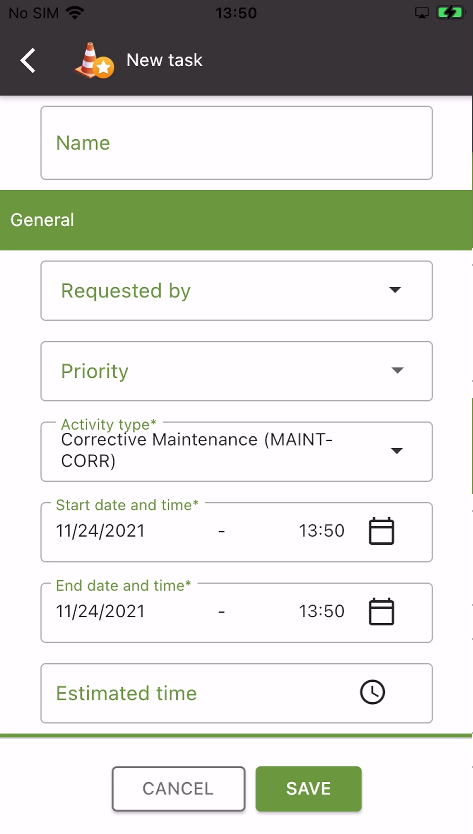
3. The task creation form is displayed: the fields comprising the task can be entered directly.
|
|
Only fields preceded by a « * » character are mandatory. |
4. The creation screen shows two main actions:
| Button | Button action |
|---|---|
|
Cancel creation of a task. |
|
Save the new task. |
7.9. Usage case: Changing an existing task
The procedure for changing an existing task depends on the context:
-
Task with «Work request» origin
-
Task with «Work order» origin
7.9.1. Task with «Work request» origin
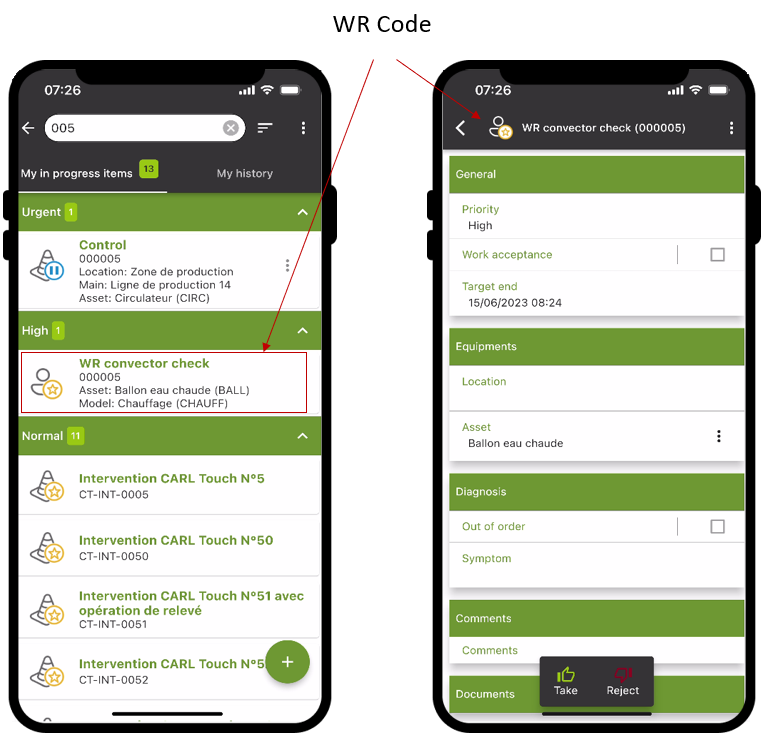
1. If the user considers a task with «Work request» origin, the task is identified by the WR code (from CARL Source):
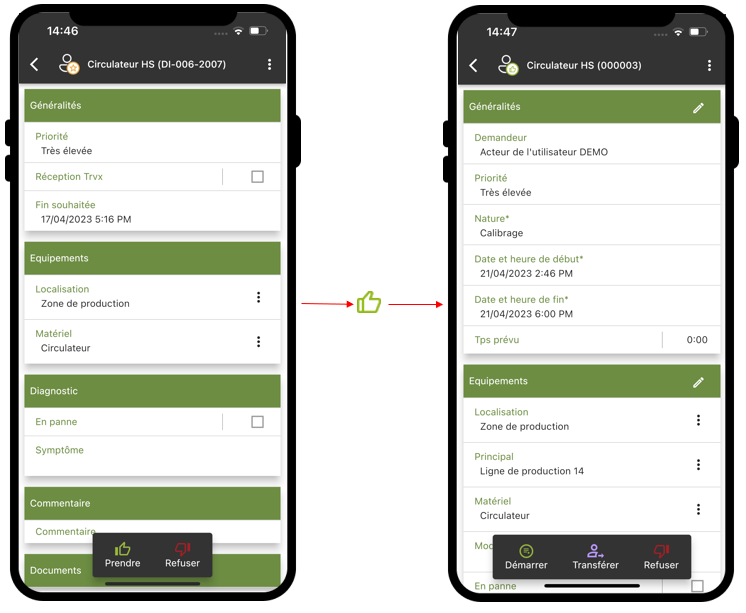
2. When the user takes this task into account via the « I accept » action on the task detail form, they are asked to choose a work order type from a list proposed by CARL Touch:
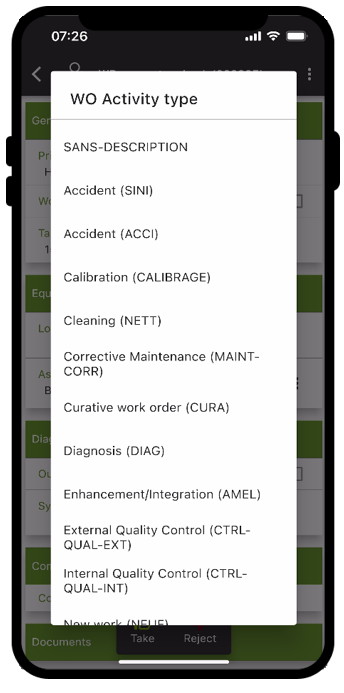
3. Selecting a work order type marks the transition from a «Work request» context to a «Work order» context per se.
This is reflected in CARL Touch by displaying the «Work order» code for the task (instead of the «Work request» code previously):
|
|
After a task is taken into account, the user can access the following action buttons:
|
4. As the user is now dealing with a «Work order», the remainder of the procedure is similar to that described below for a task with Work order origin.
7.9.2. Task with «Work order» origin
1. When the user takes into account a task of «Work order» origin via the «I accept» action on the task detail form, they have access to the following action buttons:
-
"Start".
-
"Reject".
2. The user chooses to "Start" the task: on the CARL Source side, the associated work order changes to the "In progress" status.
3. Once the task has been started, the user has access to the following actions:
-
"Pause".
-
"Finish".
|
|
The "Pause" or "End" actions have a direct impact on the labor types on the CARL Source side: indeed, these actions automatically generate one or more labor types for the default time type of the technician associated with the current user. |
4. If the user chooses to « Pause » the task, the status of the associated work order in CARL Source is set to «Paused».
To restart the task, the user can click « Start » again.
5. If the user chooses to transfer the task to another CARL Touch user, the «Transfer» action must be selected.
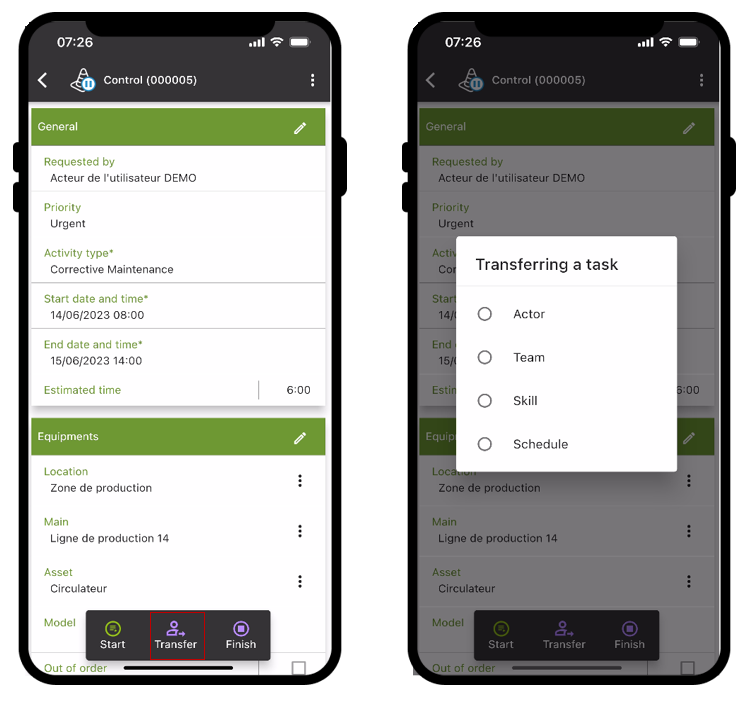
=> Once the task has been transferred, it is no longer displayed in the tasks list.
6. If the user selects « Finish », the status of the associated work order in CARL Source is set to «Completed» or «Closed» depending on the «Acceptance of work» setting for the work order.
|
|
A "Completed" task can no longer be changed via CARL Touch: it can only be restarted via the CARL Source backoffice. |
7.10. Rules for distributing tasks between users
When a new work order (or work request) is created in CARL Source, it is dispatched to the CARL Touch users.
The following rules determine which user(s) receive the new task on their mobile device:
When a new work order is created in CARL Source, it is dispatched in the following order of priority *:
-
To nobody, when the work order is to be rescheduled.
-
To the addressees of the work order assignment: To the « mobility » agent or to all agents associated with the skill or the team defined in the « AssignedTo », « AssignedSkill » or « AssignedTeam » fields of the work order.
|
|
These fields are not displayed in the standard version – to access them, it is necessary to add them to the form through customization. Warning, it is strongly recommended to set them as non-editable. They must remain read-only. Otherwise, the standard processes of CARL Touch could be rendered inoperative.) |
OR if not (i.e. if no « mobility » agent, skill or team is specified in the « Assigned to » field of the work order):
-
To the « mobility » agent entered in the « Person in charge » field of the work order.
OR if not (i.e. if no « mobility » agent, skill or team is specified in the « Assigned to » fields of the work order and no mobility manager is specified):
-
To scheduled «mobile» resources defined for the work order in the labor tab.
OR if not (i.e. if no «mobility» agent, skill or team is specified in the « Assigned to » fields of the work order, no mobility manager is specified in the « Person in charge » field of the work order, and there are no « mobility » agents among the resources scheduled for the work order):
-
To « mobility » agents whose manager is the «non-mobile» agent in charge of the work order.
OR if not (i.e. if no «mobility» agent, skill or team is specified in the « Assigned to » fields of the work order, no mobility manager is specified in the « Person in charge » field of the work order, and there are no « mobility » agents among the resources scheduled for the work order and there is no mobility agent whose manager is the non-mobility agent responsible for the work order):
-
If the person in charge of the work order is not assigned to any user, then the work order will not be assigned to anyone.
-
Otherwise, the work order will be sent to all « mobile » agents[red]* whose user profiles allow them to receive unassigned work orders.
|
|
* A « mobility » agent is an agent that is linked to a user and for which the « Mobility » box is checked. We assume here that each user has at least the right to change the work order. |
|
|
Initial synchronization: Two profile settings for the tasks function can be used to exclude work orders that are too late or too early:
These two settings only have an impact on initial synchronization. Once the initial synchronization has been carried out, a simple change made to any of the fields in these work orders (late or early) will break them down "as they happen" in CARL Touch. |
When a new work request is created in CARL Source, it is dispatched in the following order of priority:
-
To the « mobility » agent specified in the « Assigned to » field of the work request.
OR if not (i.e. if no «mobility» agent is specified in the «Assigned to» field of the work request):
-
To the « mobility » agent specified in the « Addressee » field of the work request.
OR (i.e. if no «mobility» agent is specified in the «Assigned to» field of the work request and no mobility addressee is specified):
-
To the «mobility» agents, set as «WR addressees», whose manager is the «non-mobile» agent to whom the work request is addressed.
OR (if the addressee is not entered):
-
To all mobility users set as «WR addressees» whose user profile authorises the transmission of non-assigned work requests.
8. Activity tracking function
8.1. Purpose
The CARL Touch "Activity tracking" function allows users to see the labor types on a calendar thereby allowing them to edit them or create new ones.
8.2. Activity tracking access rights
General information about activity tracking access rights:
-
If the CARL Touch user is a member of a restricted data access group and/or an organizations group, the corresponding consultation and modification rights are applied in CARL Touch.
-
Consultation rights are managed in CARL Source.
-
Labor modification rights are transferred to CARL Touch, as appropriate for the CARL Touch user.
-
Labor deletion rights are transferred to CARL Touch, as appropriate for the CARL Touch user.
8.3. List of labor types
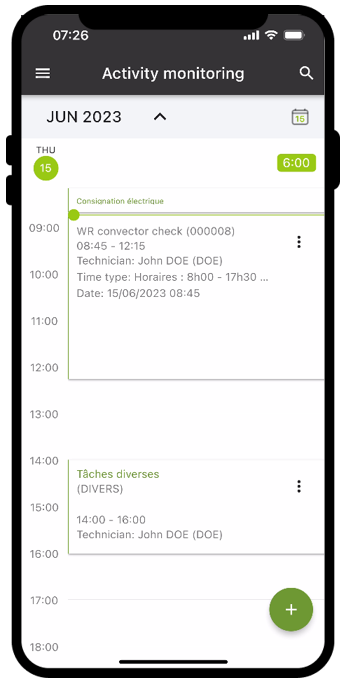
Activity tracking provides a calendar view of the labor types entered for tasks, as well as the labor types for the connected technician.
8.3.1. Data displayed
|
|
The data listed below corresponds to the structure of the «standard» form. |
As part of activity tracking, and for each labor type, CARL Touch displays the following data subject to availability (i.e. a line is displayed only if the associated data has been entered) and the space available in the calendar:
-
Labor type
-
Work order
-
Labor start and end time
-
Duration of the labor
-
Technician
-
Time type
When the user presses and holds down the labor type, a modal window is displayed allowing the user to view all the information listed above.
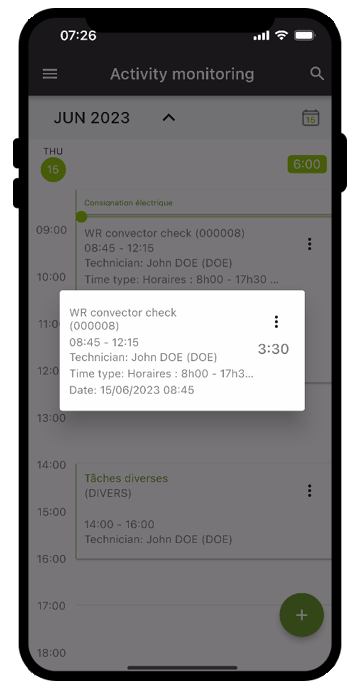
When the user presses briefly on the labor type or on the modal window, the details of the labor type are displayed, allowing the user to view and change the labor type.
8.3.2. Actions
CARL Touch offers general actions for the activity tracking form, as well as task-specific actions.
Actions available on the activity tracking form
| Button | Button action |
|---|---|
|
Search within the list of labor types. |
|
Monthly view. The dots allow you to quickly see which days have labor types entered. |
|
Add a new different labor using the data entry wizard described in «Labor» block |

Context-sensitive actions available for a labor type
The context-sensitive actions specific to a labor type are accessible via the button
| Button | Button action |
|---|---|
Copy for another technician |
Displays the copy wizard of a labor type. |
Work order details * |
This action displays the task’s details. |
Edit |
Displays the labor details (if the technician has edit rights). |
Delete |
Deletes the labor (if the technician has delete rights). |
* Button available only for work order labor types.
8.4. Labor details
8.4.1. Presentation
The labor details form is described in section «Labor» block.
9. Scheduling function
9.1. Purpose
CARL Touch’s "Scheduling" feature allows users to view scheduled work orders on a calendar:
-
For their technician.
-
For their specialty.
-
For their team.
9.2. Access rights to scheduling
General information about access rights to scheduling:
-
If the CARL Touch user is a member of a restricted data access group and/or an organizations group, the corresponding consultation rights are checked in CARL Touch.
-
Consultation rights are managed in CARL Source.
-
Work order change rights are transferred to CARL Touch, as appropriate for the CARL Touch user.
9.3. List of work orders
The scheduling is a calendar view of the scheduled work orders for the connected technician.
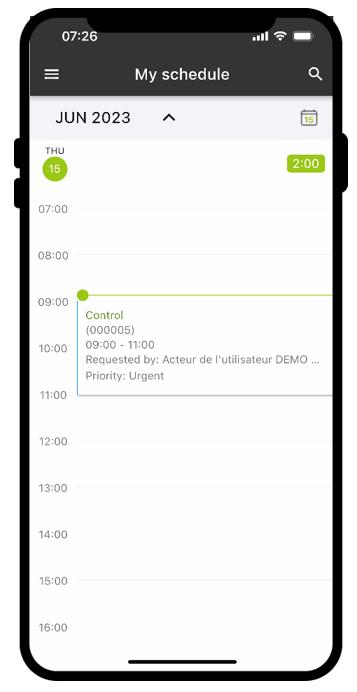
9.3.1. Data displayed
|
|
The data listed below corresponds to the structure of the «standard» form. |
For each work order in the schedule, CARL Touch displays the following data subject to availability (i.e. a line is displayed only if the associated data has been entered) and the space available in the calendar:
-
Work order
-
Scheduling start and end time
-
Requested by
-
Priority
When the user presses and holds down the work order, a modal window is displayed allowing the user to view all the information listed above.
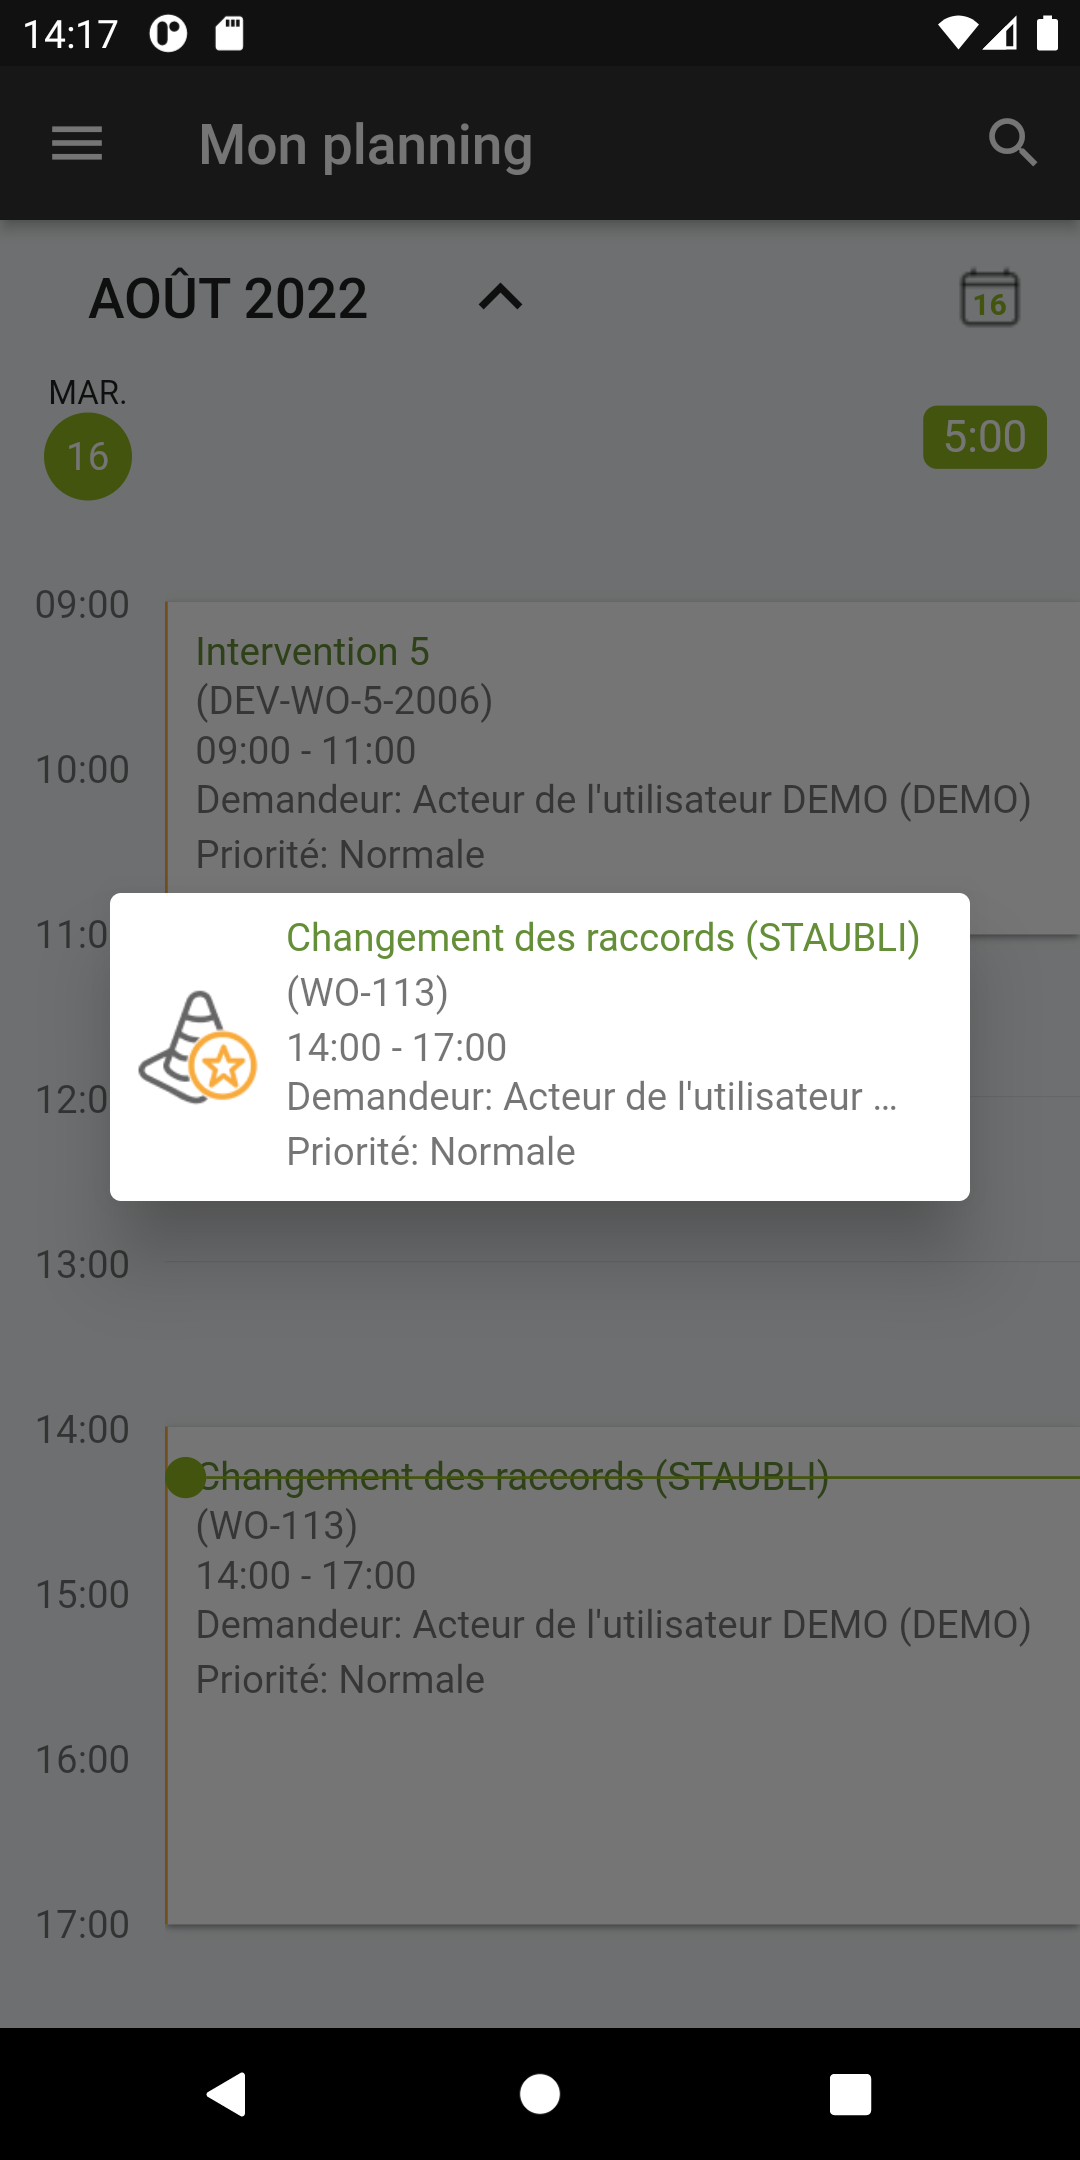
When the user presses briefly on the work order or on the modal window, the details of the work order are displayed, allowing the user to view and change the work order.
If the work order has already been started by another user, a banner informs the user. The work order will not be able to be changed by the user.
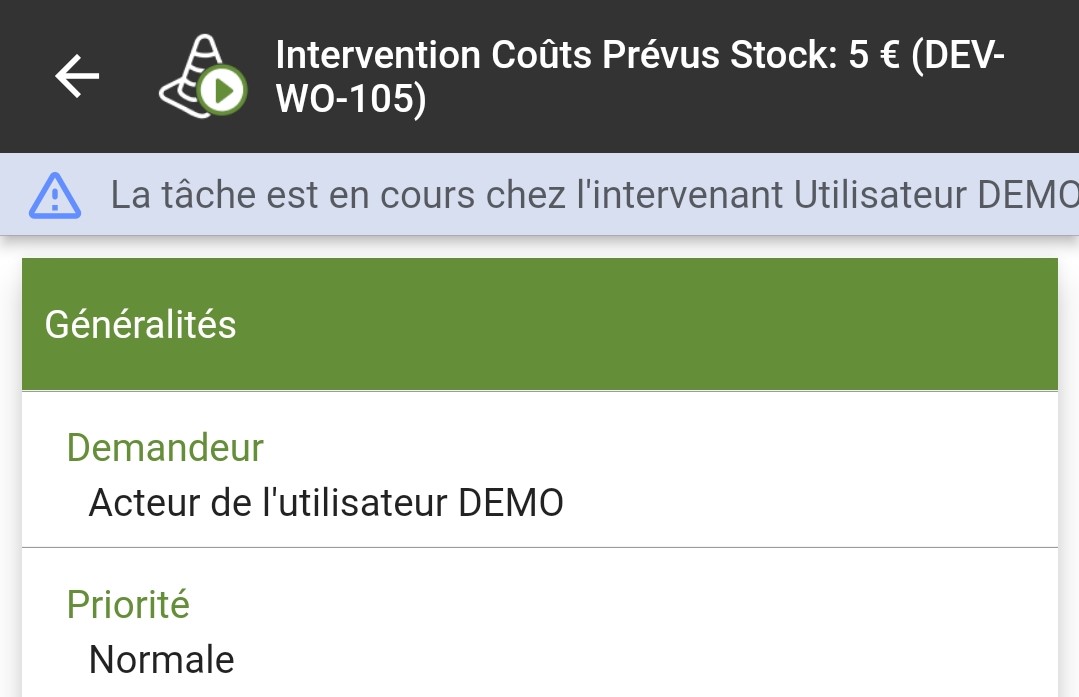
9.3.2. Actions
CARL Touch offers general actions for the scheduling form, as well as actions specific to a work order.
Actions available on the scheduling form
| Button | Button action |
|---|---|
|
Search within the list of work orders. |
|
Monthly view. The dots allow you to quickly view the days when work orders are scheduled. |
9.4. Work order details
9.4.1. Presentation
The work order details form is described in section Task details – Work order.
10. Assets function
10.1. Purpose
The «Assets» function in CARL Touch gives users access to the asset detail form and enables them to consult information such as:
-
General information about the asset.
-
Equipment links for the asset.
-
Characteristics of the asset.
-
Documents linked to the asset.
-
History of work orders on the asset.
10.2. Access rights to assets
General information about access rights to assets:
-
If the CARL Touch user is a member of a restricted data access group and/or an organizations group, the corresponding consultation and modification rights are applied in CARL Touch.
-
Consultation rights are managed in CARL Source.
-
Asset modification rights are transferred to CARL Touch for each asset, as appropriate for the CARL Touch user.
-
An asset is sent to CARL Touch for a given user only if the user has at least the right to consult the asset.
-
Deletion: Assets cannot be deleted with CARL Touch.
10.3. List of assets
The list of assets enables users to browse through and consult a set of referenced assets.
10.3.1. Meaning of icons
The various icons that may be found on a list of assets are:
| Icon | Meaning |
|---|---|
|
Asset «Validated». |
|
Asset «With conflict». |
|
Asset «Out of order». |
|
Asset «Being serviced». |
|
Asset «Scrapped». |


10.3.2. Data displayed
For each asset on the list of assets, CARL Touch displays the following data subject to availability (i.e. a line is displayed only if the associated data has been entered):
-
Asset name.
-
Asset code.
-
Asset model.
-
Asset type.
-
Asset location.
-
Asset serial number.
-
Proximity of the asset relative to the CARL Touch user’s smartphone or tablet.
-
Main address of the asset
|
|
If the Proximity information appears, the mobile terminal needs to be able to determine its geolocation, and the asset also needs to be geolocated (i.e. have GPS coordinates). |
10.3.3. Actions
CARL Touch proposes general actions on the asset list form, as well as asset-specific actions.
|
|
If the available actions for a form cannot all be shown directly on the action bar, additional actions are accessible via the button: |
Actions available on the asset detail form
| Button | Button action |
|---|---|
|
Search within the list of assets. |
|
Add a new asset. |
|
Sort the assets. |
Filter the assets – see Assets function for further information about filtering assets. |
Context-sensitive actions available for an asset
Context-sensitive actions specific to an asset are accessible via the button to the right of the asset:

| Button | Button action |
|---|---|
NFC pairing |
For pairing the selected asset. |
RFID Pairing |
Enables pairing of selected assets. |
Geolocate * |
Geolocates the current asset (using GPS). |
Display on map * |
If the selected asset is geolocated (i.e. has GPS coordinates or an address), this action displays its position on a map. |
Tasks in progress |
Displays tasks in progress for the selected asset. |
Task history |
Displays the history of tasks for the selected asset. |
Child equipment |
Consults child assets for the selected asset. |
Parts list |
Displays the individual parts list of the selected asset. |
Asset survey |
Allows you to start a survey for the selected asset - See Asset survey. |
Take a reading |
Allows you to take a reading for the selected asset - See Reports. |
Entering an event |
For entering an event for the selected asset - See Entering an event. |
Add to Inventory |
Allows you to perform an "Item entry" inventory transaction (if the asset model is a serialized item and the asset is not in stock). |
Change Location |
Allows you to perform a "Change Location" stock movement (if the asset model is a serialized item and the asset is in stock). |
Withdrawal from Stock |
Allows you to perform a "Withdrawal" stock movement (if the asset model is a serialized item and the asset is in stock). |
10.3.4. Asset list tabs
As default, there are no tabs on the list of assets. However, if a conflict is detected, up to two tabs may be displayed:
-
«ASSETS» tab: this tab is shown only if the «Conflicts» tab is displayed. It contains the list of assets.
-
«CONFLICTS» tab: this tab contains assets for which a conflict has been detected.
|
|
The conflict display mechanism is described in section Managing conflicts. |
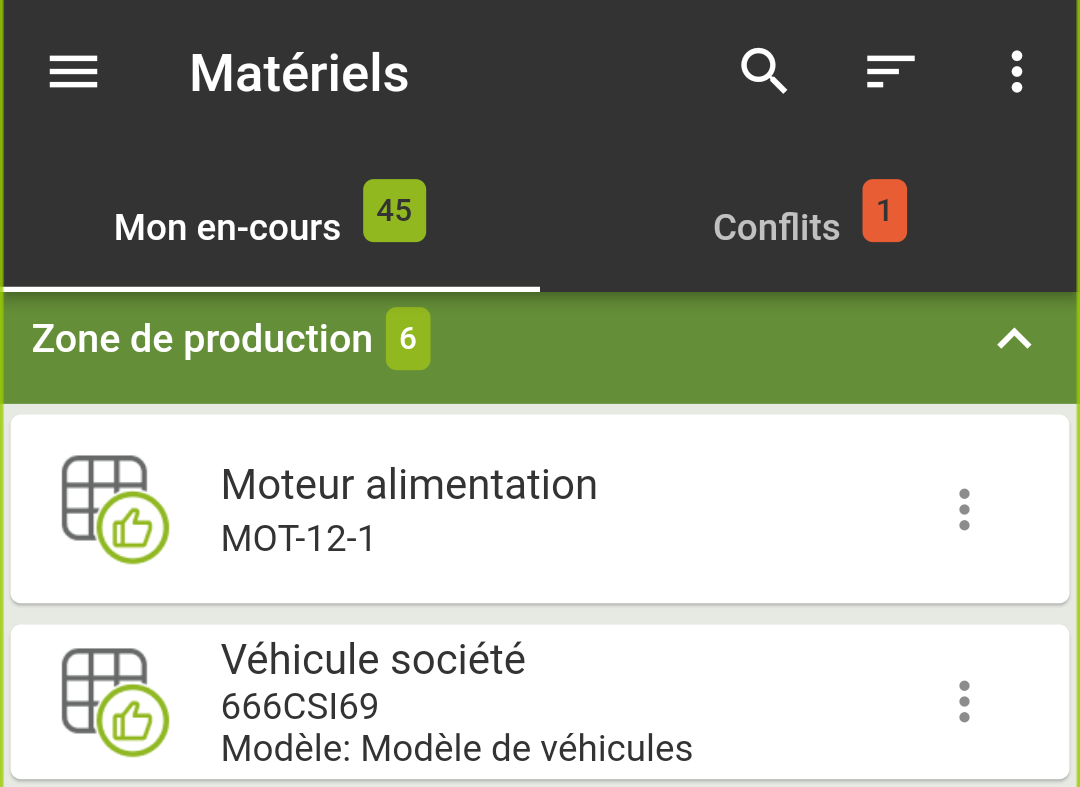
10.4. Asset details
10.4.1. Presentation
The asset details form provides quick, structured access to the information comprising an asset, and enables these fields to be changed if necessary.
10.4.2. Access
An asset’s details form can be accessed from the «Assets» function, via the list of assets.
10.4.3. Data displayed
|
|
The data listed below corresponds to the structure of the «standard» form. CARL Touch forms are customizable, implying that the form structure may be different in your context. |
The asset details form contains the following:
«General» block
-
Asset model.
-
Asset family.
-
Asset type.
-
Asset brand.
-
Asset serial number.
-
Asset criticality.
-
Reference (Yes/No flag).
|
|
When creating an asset, entering the Model automatically initialises certain fields on the asset form:
Note that initialization of data from the model is also possible in off-line mode. |
«Links» block
-
Asset location.
-
Main parent of the asset.
-
Parent asset of the asset.
«Comments» block
-
Comment: comment associated with the asset.
|
|
Note that the Further details about the comment entry mechanism are given in section Entering and displaying comments. |
«Characteristics» block
-
Number of characteristics assigned to the asset.
|
|
Note that the Further details about characteristics are given in section «Characteristics» summary block. |
«Documents» block
-
Number of documents linked to the asset.
|
|
Note that the Further details about document management are given in section Managing linked documents. |
10.4.4. Actions
CARL Touch proposes general actions on the asset detail form, as well as actions specific to an asset’s fields.
Actions available on the asset detail form (via the button)
| Button | Button action |
|---|---|
NFC pairing |
For pairing the current asset. |
RFID Pairing |
Enables the pairing of standard assets. |
Geolocate |
Geolocates the current asset (using GPS). |
Display on map |
If the selected element is geolocated (i.e. has GPS coordinates or an address), this action displays its position on a map. |
Task history |
Displays the task history of the current asset. |
Tasks in progress |
Displays the tasks in progress for the current asset. |
Create a task |
Used to create a task on the current asset. |
Child equipment |
Consults the child assets of the current asset. |
Parts list |
Displays the individual parts list for the current asset. |
Asset survey |
Allows you to start a survey for the current asset - See Asset survey. |
Take a reading |
Allows you to take a reading for measurement or inspection for standard assets - See Reports. |
Entering an event |
For entering an event for the current asset - See Entering an event. |
Add to Inventory |
Allows you to perform an "Item entry" inventory transaction (if the asset model is a serialized item and the asset is not in stock). |
Change Location |
Allows you to perform a "Change Location" stock movement (if the asset model is a serialized item and the asset is in stock). |
Withdrawal from Stock |
Allows you to perform a "Withdrawal" stock movement (if the asset model is a serialized item and the asset is in stock). |
CARL Touch offers specific actions for asset fields.
Context-sensitive actions available for asset fields
Context-sensitive actions specific to asset fields are accessible via the button to the right of the field.
| Field | Button available | Button action |
|---|---|---|
Template |
Access to details |
Displays the detail screen for the selected model. |
Tasks in progress |
Displays the tasks in progress for the selected model. |
|
Task history |
Displays the history of tasks for the selected model. |
|
Parts list |
Displays the individual parts list for the selected model. |
|
Family |
Task history |
Displays the history of tasks for the selected family. |
All fields in the «Links» block |
Access to details |
Displays the detail screen for the selected element. |
NFC pairing |
Pairs the selected element. |
|
Geolocate |
Geolocates the current element (using GPS). |
|
Display on map |
If the selected element is geolocated (i.e. has GPS coordinates) or has an address, this action displays its position on a map. |
|
Tasks in progress |
Displays tasks in progress for the selected element. |
|
Task history |
Displays the history of tasks for the selected element. |
|
Child equipment |
Consults child links for the selected element. |
|
Asset survey |
Allows you to start an asset survey for the selected element - See Asset survey. |
|
Entering an event |
For entering an event for the selected element - See Entering an event. |
|
Parts list |
Displays the individual parts list of the selected element (Action only available for the asset field). |
10.4.5. «Characteristics» summary block
The characteristics of an asset are managed via the asset detail «Characteristics» block.
|
|
Locations and models also have a «characteristics» block that operates on the same principle. |
When an asset is created, if it is associated with a model, the «copyable» characteristics from the model are automatically transposed to the asset.
The user can also add, change or delete characteristics on an asset directly from CARL Touch.
When the user clicks on the « Add characteristic » button from the characteristics summary screen (accessible via the button), CARL Touch displays the characteristics selection screen. This screen has two tabs: the available characteristics list and the available characteristics sheets. It is important to note that:
-
The characteristics list and characteristics sheets is available off-line (it is downloaded when the mobile device data is initialized).
-
The list of characteristics enables multiple characteristics to be selected: the user can select one or more characteristics from the list – the selected characteristics will be automatically retrieved when the screen is confirmed.
-
The characteristics sheets list allows the selection of a characteristics sheet: the user can select a characteristics sheet with one or more characteristics. The characteristics associated with the characteristics sheet will be automatically retrieved when the screen is confirmed, together with any initialization values.
|
|
CODE domain characteristics are not managed in CARL Touch. |
Adding a characteristic to an existing asset
1. The user is on the detail form for an asset: the "Characteristics" summary block indicates: "0 characteristic(s) associated with the asset".
The user then clicks on the icon at the right of the summary block.
2. The characteristics summary screen is displayed. The user clicks on the « Add a characteristic » button.
3. The list of available characteristics is displayed: the user selects a characteristic (e.g. «Purchase price») and confirms this choice.
4. On returning to the summary screen, the new characteristic is displayed but does not yet have a value.
5. The user clicks on the characteristic itself.
6. A window allows users to enter the value they want to save: the user enters a value and confirms with 'OK'.
7. On returning to the summary screen, the characteristic now has the value entered in the previous step.
Deleting a characteristic
1. Switch to change mode on the «Characteristics» block using the following icon. .
2. Slide the line of the desired characteristic to the left.
3. Delete the characteristic by selecting the associated  icon.
icon.
10.4.6. Entering an event
It is possible to declare a symptom for an equipment item using the "Enter an event" action.
This action is available from the detail form of an equipment item via the button or from the context-sensitive actions of an equipment field via the button.
Selecting this action starts a two-step wizard:
Step 1 - Choosing the symptom.
This step allows users to choose a symptom code.
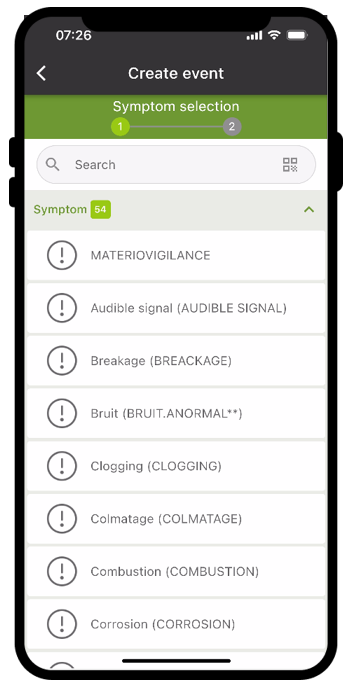
CARL Touch will initially show the user the symptoms from the troubleshooting assistance for the asset specified on the task, or the model specified on the task if there is no failure tree for the asset.
If neither the asset nor the model have troubleshooting assistance, CARL Touch will directly show the full list of symptoms.
Step 2 - Event.
This step allows users to complete the entry.
This step presents the following data:
-
Equipment: Code and name of the selected equipment (this field cannot be changed).
-
Symptom: Code and name of the symptom selected in step 1 (this field cannot be changed)
-
Date and time when the event is declared.
-
Comment associated with the event.
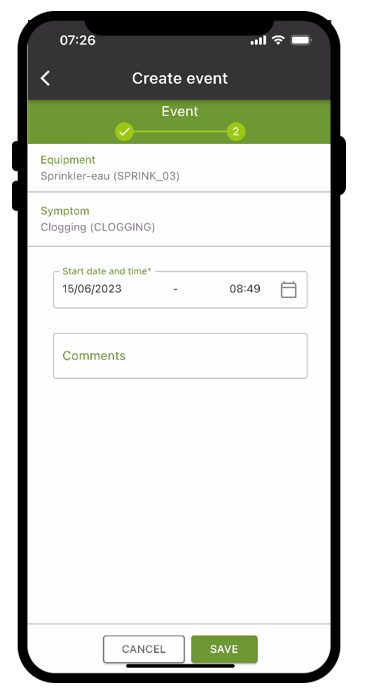
|
|
Upon confirmation of the entry, the data is saved and sent to CARL Source. There is no function in CARL Touch allowing events to be viewed. |
10.5. Assets filter
The "Filter" feature is available by clicking on the  .
.
Selecting this action opens a Filter form, displaying the search criteria specific to the "Asset" feature.
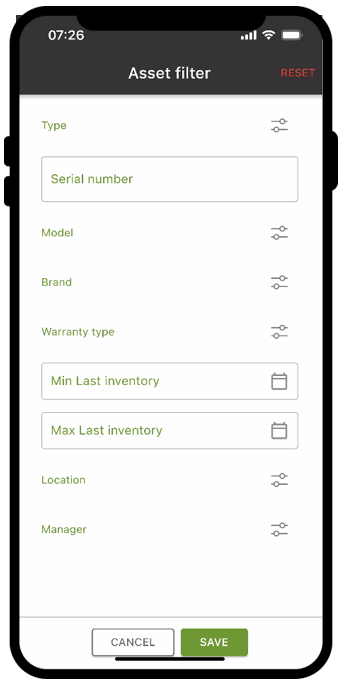
|
|
This form can be customized via the "Search for Assets" form. |
The assets filter has the following specific features:
-
Search criteria relating to attributes associated with values lists enable a search based on several values.
-
Values can be selected from a list by multiple selection:
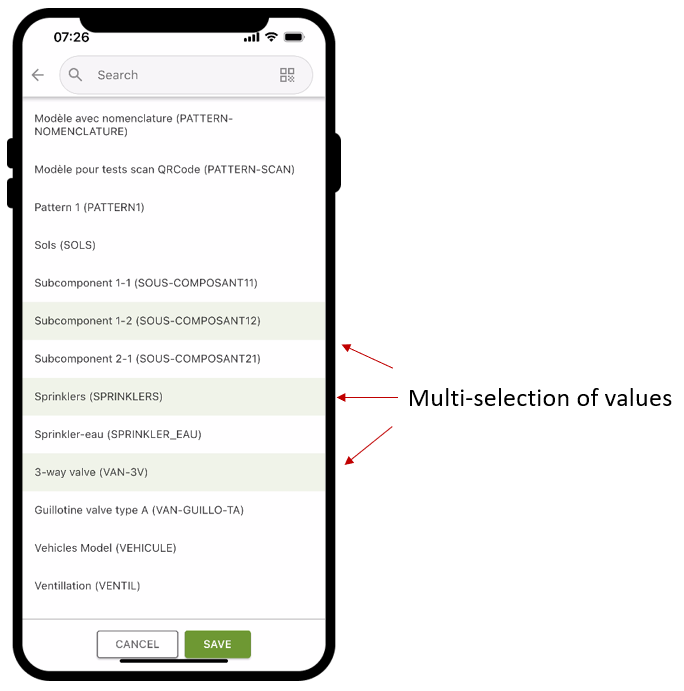
When the selection is confirmed, the values selected by the user are displayed.
If users want to delete a value, they can press the  icon:
icon:
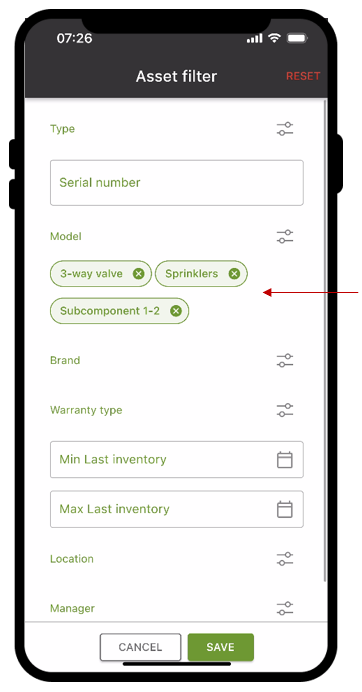
The « Save » button is used to initiate a search based on the sort criteria and return to the asset list form.
The information bar displays the criteria that have been entered as well as the number of values entered for each.
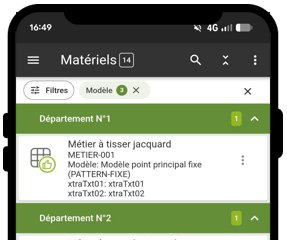
Only two operations can reset the filter:
-
Pressing the « Reset » button (see above).
-
Reinitializing the data of the CARL Touch application.
10.6. Usage case: Creating an asset
While most assets initially originate from synchronization with CARL Source, the user can also create new assets directly from CARL Touch:
1. From the asset list, the user clicks on the icon.
2. The asset creation form is displayed: the fields comprising of the asset can be entered directly.
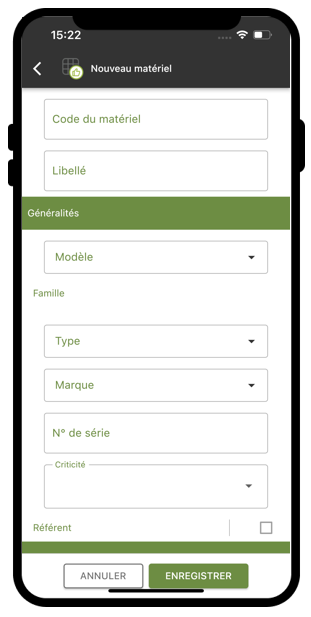
|
|
Only fields preceded by a « * » character are mandatory. |
3. The button, to the right of the « Asset code » field,  can be used to scan a bar code or QR Code using the mobile device’s camera: the code scanned is then automatically inserted into the « Asset code » field, avoiding the need to type it in manually.
This function is particularly useful when entering new assets which are already identified with barcodes or QR Codes (e.g. on identification labels).
4. When creating an asset, entering a « Model » automatically initialises certain fields on the asset form: the model name, type and characteristics (if these are specified as «copyable» in the model in CARL Source).
|
|
This initialization of data from the filled in model is also possible in off-line mode. |
5. The creation screen shows two main actions:
| Button | Button action | ||
|---|---|---|---|
|
Cancel the creation of an asset. |
||
|
Save the new asset.
|
11. Asset survey
11.1. Purpose
CARL Touch’s "Asset survey" function allows the user to carry out an equipment survey based on a location or a main point.
It is presented in the form of a wizard that guides users step-by-step through the asset survey process.
The asset survey is also accessible from an asset’s details, a location or a main point.
11.2. Access
This sub-function can be accessed:
-
directly from the navigation menu (« Asset survey").
-
or via the "Location" function (selection of the "Asset survey" action),
-
or via the "Main points" function (selection of the "Asset survey" action),
-
or via the "Assets" function (selection of the "Asset survey" action),
11.3. Step '1' – Equipment to be inventoried
11.3.2. Data displayed
This step presents a values list field allowing you to select the type of equipment to be inventoried:
-
Location
-
Main point
-
Asset
After selecting the equipment type, the equipment list is updated.
Each line of this list presents the following information:
-
Name and code of the equipment to be inventoried.
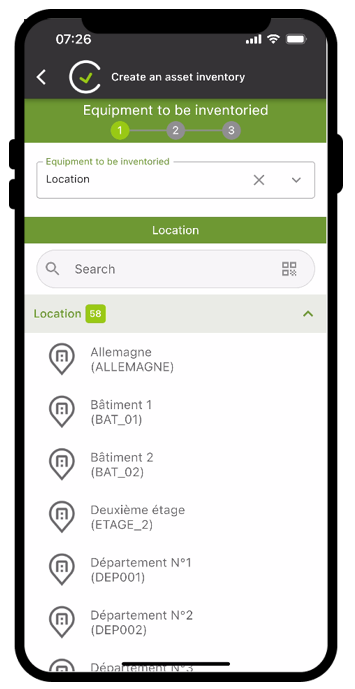
11.4. Step ‘2' – Details of the equipment to be inventoried
11.4.1. Presentation
This step allows the user to make a cross-selection between the device selected in the first step and a second device.
11.4.2. Data displayed
This step presents a values list field allowing you to select the type of equipment to be inventoried. The equipment type selected in step 1 is no longer selectable.
After selecting the equipment type, the equipment list is updated.
Each line of this list presents the following information:
-
Name and code of the equipment to be inventoried.
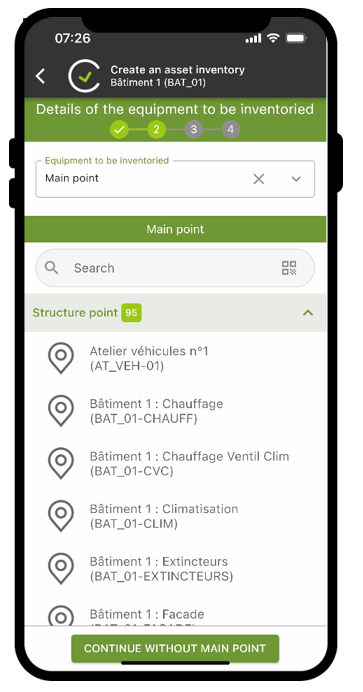
11.5. Step ‘3' – Carry out the survey
Selecting one or two devices allows you to make a cross-selection to initialize the list of assets to be surveyed.
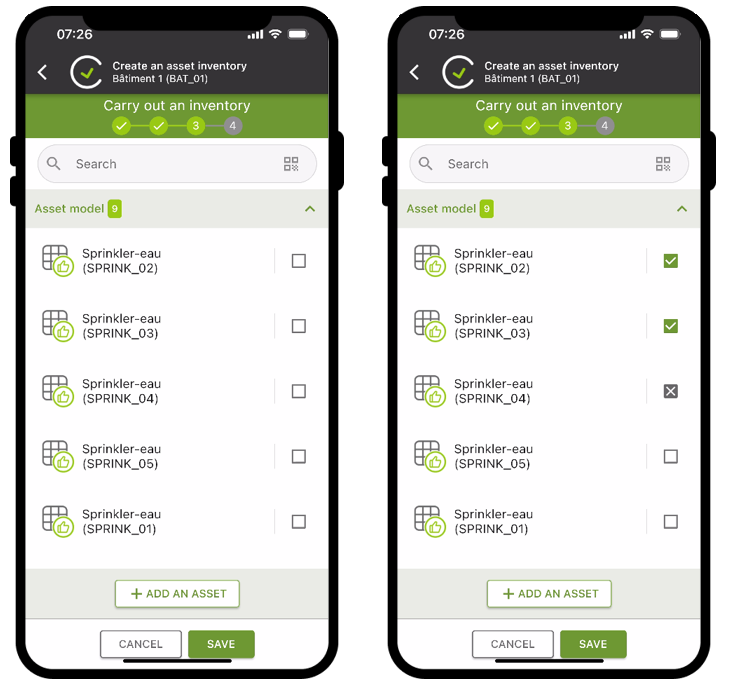
The data displayed on this list is as follows:
-
Name and code of the asset to be surveyed.
The user can:
-
Confirm the presence of a device by the presence of a tick
-
Invalidate the presence of a device by the presence of a cross (by clicking twice on the checkbox)
-
Not indicate anything for the device. This will have no impact on the saving of the survey.
By clicking on the asset line, users can view the details of the survey line and declare r problem if necessary.
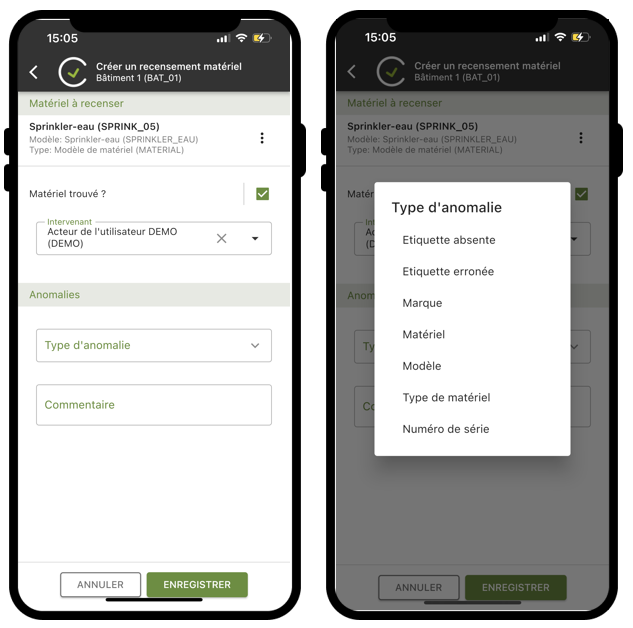
|
|
The "Add an asset" button allows you to list a new asset in the equipment selected in the first step. |
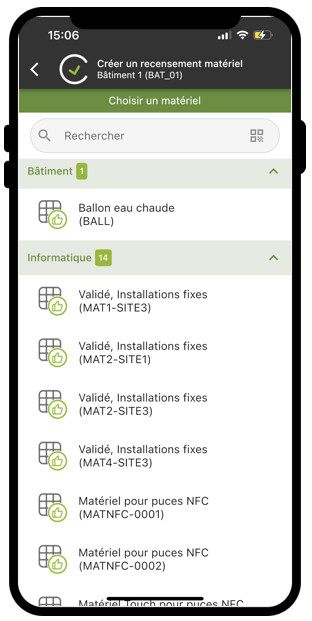
11.6. Step ‘4' – Confirmation
To finalize the survey, users must Save the asset survey report.
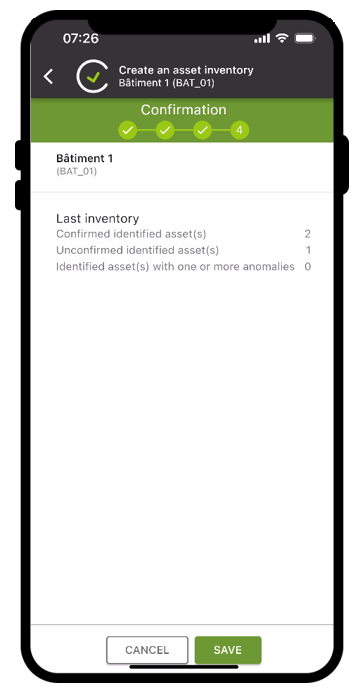
Saving the survey lines updates the parent equipment links in CARL Source. The asset’s last inventory date is also updated.
Once the survey is saved, the history can be viewed in the CARL Source "Survey history".
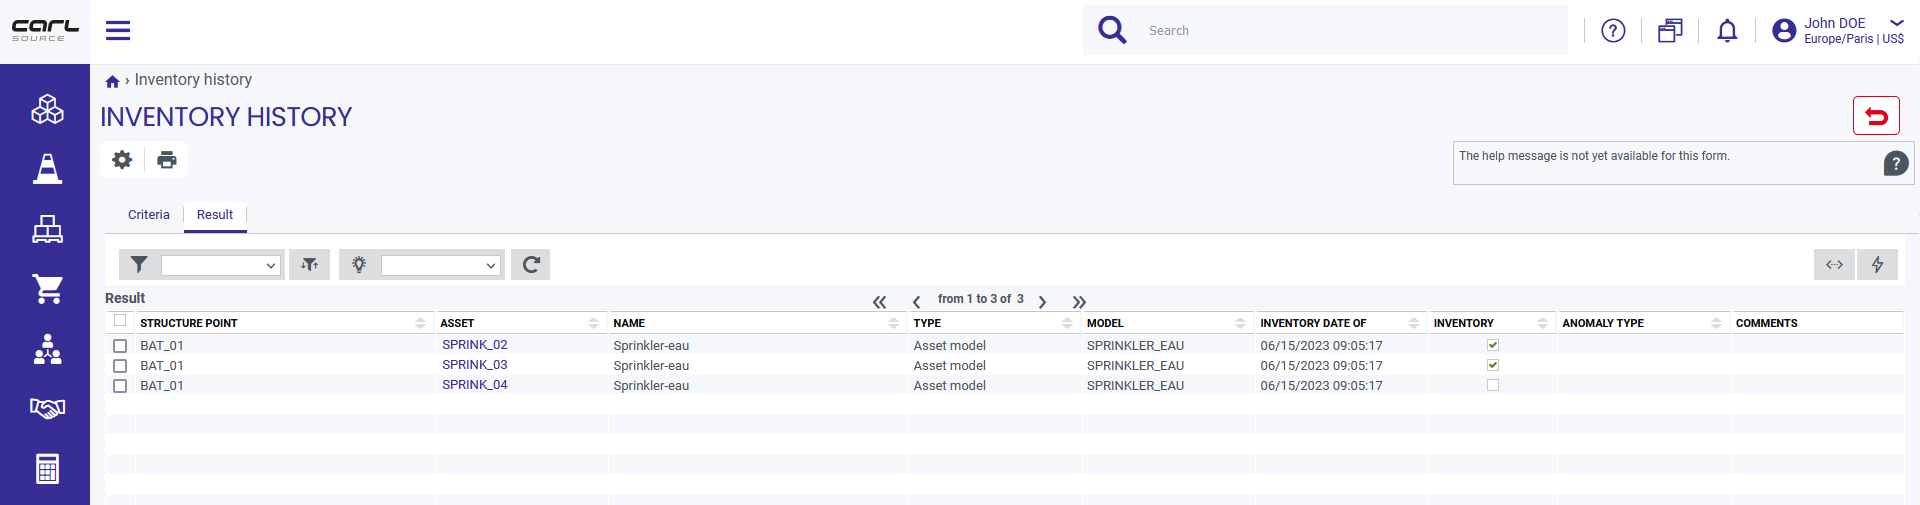
12. Locations function
12.1. Purpose
A location in CARL Touch represents a location structure point.
The «Locations» function enables users to view the information for these structure points, including:
-
General information.
-
Information relating to «Surfaces».
-
Documents relating to a given location.
12.2. List of locations
The list form displays various information about location points.
12.2.1. Meaning of icons
The various icons that may be found on the list of locations are:
| Icon | Meaning |
|---|---|
|
Location «Validated». |
|
Location «With conflict». |


12.2.2. Data displayed
For each location on the location list, CARL Touch displays the following data subject to availability (i.e. a line is displayed only if the associated data has been entered):
-
Location name.
-
Location code.
-
Location type.
-
Location organization.
12.2.3. Actions
CARL Touch proposes general actions on the location list form, as well as location-specific actions.
|
|
If the available actions for a form cannot all be shown directly on the action bar, additional actions are accessible via the button: |
Actions available on the location list form
| Button | Button action |
|---|---|
|
Search within the list of locations. |
|
Add a new location. |
|
Sort the locations. |
Context-sensitive actions available for a location
Context-sensitive actions specific to a location are accessible via the button to the right of the location:
| Button | Button action |
|---|---|
NFC pairing |
For pairing the selected location. |
Geolocate |
Geolocates the current location (using GPS). |
Display on map |
If the selected location is geolocated (i.e. has GPS coordinates or an address), this action displays its position on a map. |
Tasks in progress |
Displays the tasks in progress of the selected location. |
Task history |
Displays the history of tasks for the selected location. |
Child equipment |
For consulting locations, main points, and child assets for the selected location. |
Asset survey |
Allows you to start a survey for the selected location - See Asset survey. |
Take a reading |
Allows you to take a reading for the selected location - See Reports. |
Entering an event |
For entering an event for the selected location - See Entering an event. |
12.2.4. Location list tabs
As default, there are no tabs on the list of locations. However, if a conflict is detected, up to two tabs may be displayed:
-
«LOCATIONS» tab: this tab is shown only if the «Conflicts» tab is displayed. It contains the list of locations.
-
«CONFLICTS» tab: this tab contains locations for which a conflict has been detected.
|
|
The conflict display mechanism is described in section Managing conflicts. |
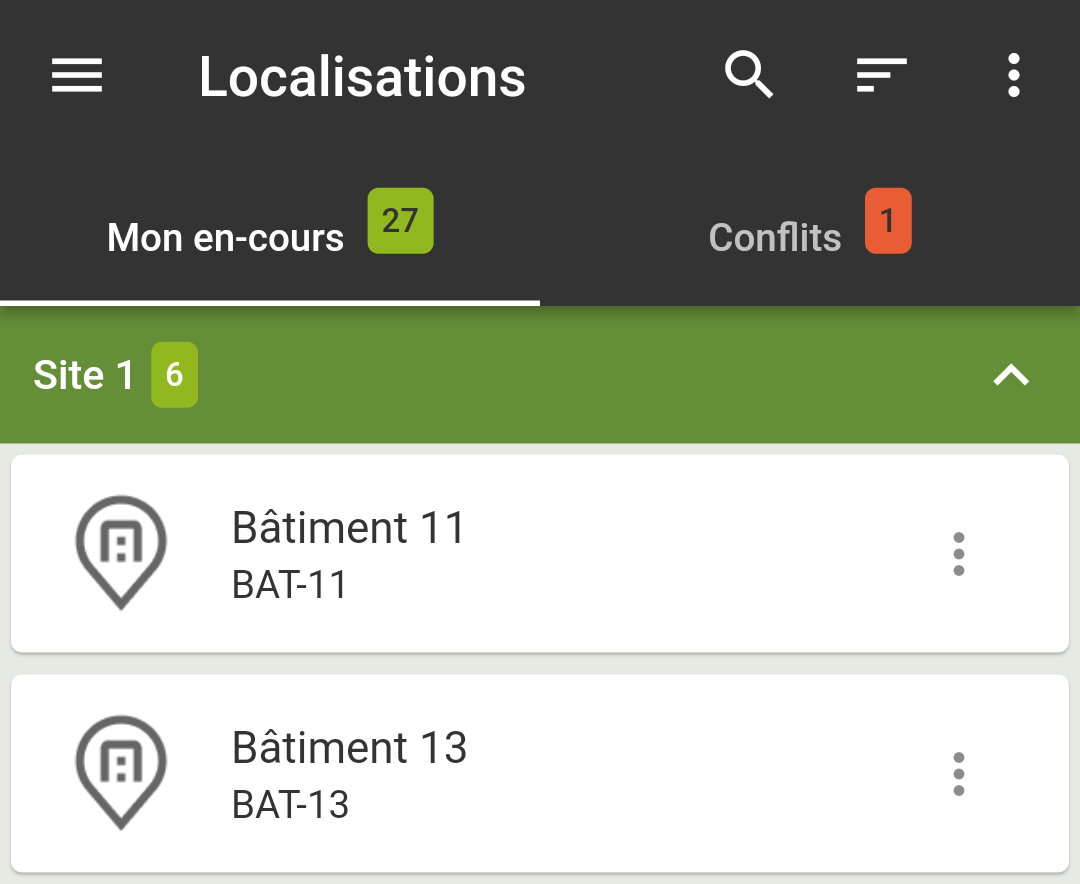
12.3. Details of a location
12.3.1. Presentation
The location details form provides quick, structured access to the information comprising a location, and enables these fields to be changed if necessary.
12.3.2. Access
The location detail form is accessible:
-
from the task detail form (via the location of a task),
-
from the asset detail form (via the parent location),
-
from the main point detail form (via the parent location),
-
from the «Locations» function, via the list of locations.
12.3.3. Data displayed
|
|
The data listed below corresponds to the structure of the «standard» form. CARL Touch forms are customizable, implying that the form structure may be different in your context. |
The location details form contains the following:
«General» block
-
Location model.
-
Location equipment type.
-
Work order authorized (Yes/No flag).
|
|
When creating a location, entering a Model automatically initialises certain fields on the location form: the model name, equipment type and characteristics (if these are specified as «copyable» in the model in CARL Source). Note that initialization of data from the model is also possible in off-line mode. |
«Links» block
-
Parent location of the location.
«Comments» block
-
Comment: comment associated with the location.
|
|
Note that the Further details about the comment entry mechanism are given in section Entering and displaying comments. |
«Characteristics» block
-
List of characteristics associated with the location.
|
|
Characteristics are managed in the same way as for assets: the principle of operation is explained in section «Characteristics» summary block. The only significant difference between the two contexts is the way information is presented on the detail form:
|
«Documents» block
-
Number of documents relating to the location.
|
|
Note that the Further details about document management are given in section Managing linked documents. |
12.3.4. Actions
CARL Touch proposes general actions on the location detail form, as well as actions specific to the fields of a location.
Actions available on the detail form of a location (via the button)
| Button | Button action |
|---|---|
NFC pairing |
For pairing the current location. |
Geolocate |
Geolocates the current location (using GPS). |
Display on map |
If the selected element is geolocated (i.e. has GPS coordinates or an address), this action displays its position on a map. |
Task history |
Displays the task history for the current location. |
Tasks in progress |
Displays the tasks in progress for the current location. |
Create a task |
Creates a task for the current location. |
Child equipment |
For consulting child locations, main child points, and child assets of the current location. |
Asset survey |
Allows you to start a survey for the current location - See Asset survey. |
Perform an inventory |
Allows you to take a measurement or inspection reading for the current location - See Reports. |
Entering an event |
For entering an event for the current location - See Entering an event. |
Context-sensitive actions available for location fields
Context-sensitive actions specific to location fields are accessible via the button to the right of the field.
| Field | Button available | Button action |
|---|---|---|
Template |
Access to details |
Direct access to the detail screen of the selected model. |
Tasks in progress |
Displays the tasks in progress for the selected model. |
|
Task history |
Displays the history of tasks for the selected model. |
|
Parts list |
Displays the individual parts list of the selected model. |
|
Parent location |
Access to details |
Direct access to the detail screen of the selected parent location. |
NFC pairing |
Direct access to the detail screen of the selected parent location. |
|
Geolocate |
Geolocates the parent location (using GPS). |
|
Display on map |
If the parent location is geolocated (i.e. has GPS coordinates or an address), this action displays its position on a map. |
|
Tasks in progress |
Displays the tasks in progress for the selected parent location. |
|
Child equipment |
Displays the child locations, main child points and child assets of the selected parent location. |
|
Task history |
Displays the history of tasks for the selected parent location. |
|
Asset survey |
Allows you to start a survey for the selected parent location - See Asset survey. |
|
Entering an event |
For entering an event for the selected parent location - See Entering an event. |
12.4. Usage case: Creating a location
While most locations initially originate from synchronization with CARL Source, the user can also create new locations directly from CARL Touch:
1. From the location list, the user clicks on the icon.
2. The location creation form is displayed: the fields comprising a location can be entered directly.
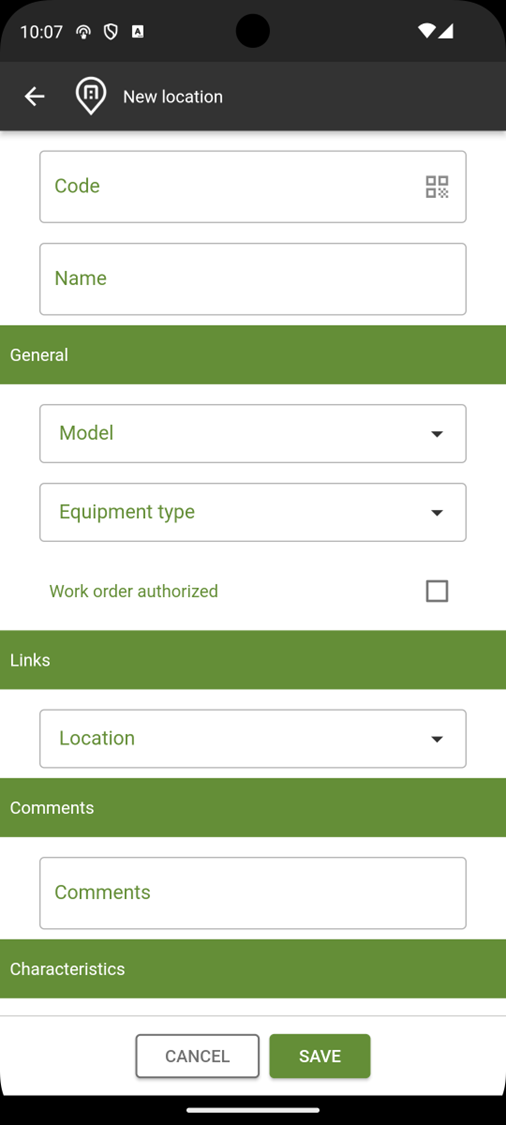
|
|
Only fields preceded by a « * » character are mandatory. |
3. The button, to the right of the « Code » field, can be used to scan a bar code or QR Code using the mobile device’s camera: the Code scanned is then automatically inserted into the «Code» field, avoiding the need to type it in manually.
This function is particularly useful when entering new locations which are already identified with bar codes or QR Codes (e.g. on identification labels).
4. When creating a location, entering a « Model » automatically initialises certain fields on the location form: the model name, equipment type and characteristics (if these are specified as «copyable» in the model in CARL Source).
|
|
Note that initialization of data from the model is also possible in off-line mode. |
5. The creation screen shows two main actions:
| Button | Button action | ||
|---|---|---|---|
|
Cancel the creation of a location. |
||
|
Save the new location. Automatic return to the list of locations: the created location can be seen immediately in the list.
|
13. Main points function
13.1. Purpose
The «Main points» function enables users to view the information for these structure points, including:
-
General information.
-
Documents relating to a given main point.
13.2. List of main points
The list form displays various information about main points.
13.2.1. Meaning of icons
The various icons that may be found on the list of main points are:
| Icon | Meaning |
|---|---|
|
Main point «Validated». |
|
Main point «With conflict». |


13.2.2. Data displayed
For each main point on the list of main points, CARL Touch displays the following data subject to availability (i.e. a line is displayed only if the associated data has been entered):
-
Main point description.
-
Main point code.
-
Parent location of the main point.
-
Main point type.
-
Main point organization.
13.2.3. Actions
CARL Touch proposes general actions on the main point list form, as well as actions specific to a main point.
|
|
If the available actions for a form cannot all be shown directly on the action bar, additional actions are accessible via the button: |
Actions available on the list of main points form
| Button | Button action |
|---|---|
|
Search within the list of main points. |
|
Add a new main point. |
|
Sort main points. |
Context-sensitive actions available for an main point
Context-sensitive actions specific to a main point are accessible via the button to the right of the main point:
| Button | Button action |
|---|---|
NFC pairing |
For pairing the selected main point. |
Geolocate |
Geolocates the current main point (using GPS). |
Display on map |
If the selected main point is geolocated (i.e. has GPS coordinates or an address), this action displays its position on a map. |
Tasks in progress |
Displays the tasks in progress for the selected main point. |
Task history |
Displays the history of tasks for the main point. |
Child equipment |
For consulting the main points and child assets for the selected main point. |
Asset survey |
Allows you to start a survey for the selected main point - See Asset survey. |
Take a reading |
Allows you to take a measurement or inspection reading for the selected main point - See Reports. |
Entering an event |
For entering an event for the selected main point - See Entering an event. |
13.2.4. List of main points tabs
As default, there are no tabs on the list of main points. However, if a conflict is detected, up to two tabs may be displayed:
-
«MAIN POINTS» tab: this tab is shown only if the «Conflicts» tab is displayed. It contains the list of main points.
-
«CONFLICTS» tab: this tab contains the main points for which a conflict has been detected.
|
|
The conflict display mechanism is described in section Managing conflicts. |
13.3. Details of a main point
13.3.1. Presentation
The main point detail form provides quick, structured access to the information comprising a main point, and enables these fields to be changed if necessary.
13.3.2. Access
The detail form for a main point is accessible from the "Main points" function, from the list of main points.
13.3.3. Data displayed
|
|
The data listed below corresponds to the structure of the «standard» form. CARL Touch forms are customizable, implying that the form structure may be different in your context. |
The main point detail form contains the following:
«General» block
-
Main point model.
-
Main point equipment type.
-
Work order authorized (Yes/No flag).
«Links» block
-
Parent location of the main point.
«Comments» block
-
Comment: comment associated with the main point.
|
|
The Further details about the comment entry mechanism are given in section Entering and displaying comments. |
«Characteristics» block
-
List of characteristics associated with the main point.
|
|
Characteristics are managed in the same way as for assets: the principle of operation is explained in section «Characteristics» summary block. The only significant difference between the two contexts is the way information is presented on the detail form:
|
«Documents» block
-
Number of documents linked to the main point.
|
|
The Further details about document management are given in section Managing linked documents. |
13.3.4. Actions
CARL Touch proposes general actions on the main point detail form, as well as actions specific to the fields of a main point.
Actions available on a main point detail form (via the button)
| Button | Button action |
|---|---|
NFC pairing |
For pairing the current main point. |
Geolocate |
Geolocates the current main point (using GPS). |
Display on map |
If the selected element is geolocated (i.e. has GPS coordinates or an address), this action displays its position on a map. |
Task history |
Displays the task history for the current main point. |
Tasks in progress |
Displays the tasks in progress for the current main point. |
Create a task |
Creates a task for the current main point. |
Child equipment |
For consulting the child main points and child assets of the current main point. |
Asset survey |
Allows you to start a survey for the current main point - See Asset survey. |
Perform an inventory |
Allows you to take a measurement or inspection reading for the selected main point - See Reports. |
Entering an event |
For entering an event for the current main point - See Entering an event. |
Context-sensitive actions available for main point fields
Context-sensitive actions specific to main point fields are accessible via the button to the right of the field.
| Field | Button available | Button action |
|---|---|---|
Template |
Show details |
Displays the detail screen for the selected model. |
Tasks in progress |
Displays the tasks in progress for the selected model. |
|
Task history |
Displays the history of tasks for the selected model. |
|
Parts list |
Displays the individual parts list for the selected model. |
|
All fields in the «Links» block |
Show details |
Displays the detail screen for the selected element. |
NFC pairing |
Pairs the selected element. |
|
Geolocate |
Geolocates the current element (using GPS). |
|
Display on map |
If the selected element is geolocated (i.e. has GPS coordinates) or has an address, this action displays its position on a map. |
|
Tasks in progress |
Displays tasks in progress for the selected element. |
|
Task history |
Displays the history of tasks for the selected element. |
|
Child equipment |
Consults child links for the selected element. |
|
Asset survey |
Allows you to start a survey for the selected element - See Asset survey. |
|
Entering an event |
For entering an event for the selected element - See Entering an event. |
13.4. Usage case: Creating a main point
While most main points initially originate from synchronization with CARL Source, the user can also create new main points directly from CARL Touch:
1. From the list of main points, the user clicks on the icon.
2. The main point creation form is displayed: the fields comprising a main point can be entered directly.
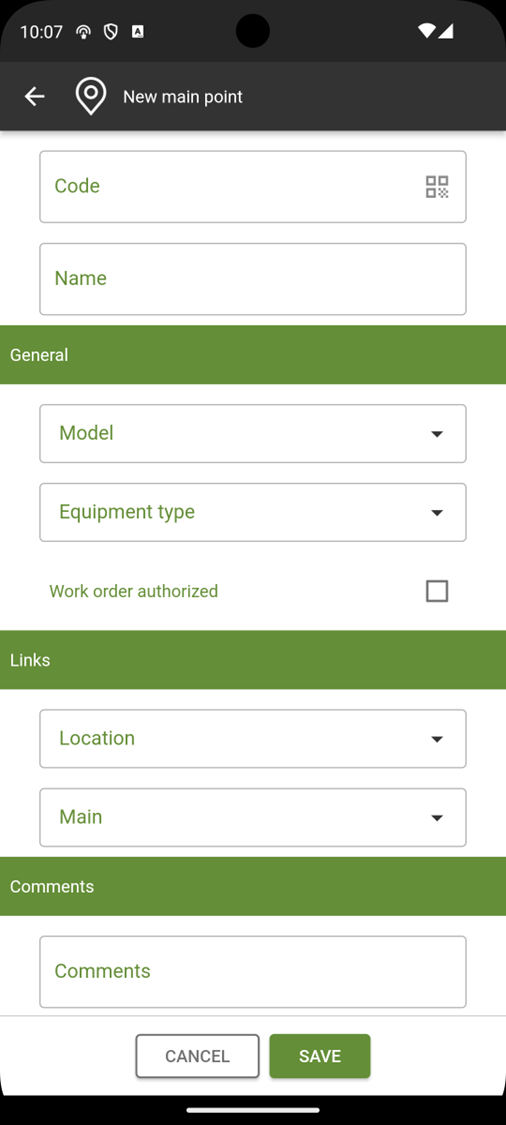
|
|
Only fields preceded by a « * » character are mandatory. |
3. The button, to the right of the « Code » field, can be used to scan a bar code or QR Code using the mobile device’s camera: the Code scanned is then automatically inserted into the «Code» field, avoiding the need to type it in manually.
This function is particularly useful when entering new main points which are already identified with barcodes or QR Codes (e.g. on identification labels).
4. When creating a main point, entering a « Model » automatically initialises certain fields on the main point form: the model name, equipment type and characteristics (if these are specified as «copyable» in the model in CARL Source).
|
|
Note that initialization of data from the model is also possible in off-line mode. |
5. The creation screen shows two main actions:
| Button | Button action | ||
|---|---|---|---|
|
Cancel the creation of a main point. |
||
|
Save the new main point.
|
14. Model detail form
14.2. Access
The model detail form is accessible:
-
from the task detail («Model» field),
-
from the asset detail («Model» field),
-
from the location detail («Model» field).
14.3. Representation of a model (icon)
The icon used to represent a model is as follows:
| Icon | Element represented |
|---|---|
|
Template. |

14.4. Data displayed
|
|
The data listed below corresponds to the structure of the «standard» form. CARL Touch forms are customizable, implying that the form structure may be different in your context. |
The model details form contains the following:
«General» block
-
Model family.
-
Model brand.
-
Model manufacturer.
-
Model equipment type.
«Characteristics» block
-
Number of characteristics assigned to the model.
|
|
The
|
«Documents» block
-
Number of documents linked to the model.
|
|
The Further details about document management are given in section Managing linked documents. |
14.5. Actions
CARL Touch proposes general actions on the model detail form, as well as actions specific to the fields of a model.
Actions available on the model detail form (via the button)
| Button | Button action |
|---|---|
Tasks in progress |
Displays the tasks in progress for the selected model. |
Task history |
Displays the history of tasks for the selected model. |
Parts list |
Displays the individual parts list for the selected model. |
Context-sensitive actions available for model fields
Context-sensitive actions specific to model fields are accessible via the button to the right of the field.
| Field | Button available | Button action |
|---|---|---|
Family |
Task history |
Displays the history of tasks for the selected family. |
15. Reports
15.1. Objective
The "Reports" feature in CARL Touch allows users to view, search, and sort all reports generated from the CARL Touch application.
It also allows users to record readings and checkpoints.
15.2. Access
This sub-feature is available:
-
either directly from the navigation menu (“Reports”).
-
either via the "Location" feature (select the "Take a reading" action),
-
either via the “Key Points” feature (select the “Perform an Inspection” action),
-
either via the “Equipment” feature (select the “Take an inventory” action),
15.3. List of reports
The list of reports allows the user to browse and view all reports generated from the mobile device.
15.3.1. Data displayed
Within the list of reports, and for each report, CARL Touch displays the following data:
-
Item description and {code} associated with the report.
-
Value of the reading.
-
Date and time of the reading.
15.3.2. Actions
CARL Touch offers global actions on the list of readings form.
|
|
When all available actions for a form cannot be displayed directly on the action bar, additional actions are accessible via the button: |
Actions available on the list of readings form
| Button | Button action |
|---|---|
|
Search within the list of records. |
|
Creating a work order. |
|
Sorting of reports. |
Contextual actions available on a line in the report
Contextual actions specific to a line in the report are accessible via the button:../../resources/images/CXT-AA/image381.png[image,width=50,height=50], located on the right side of the report:
| Button | Button action |
|---|---|
Take reading again |
Create a new reading at the same location. |
15.4. Details of a work order
15.4.1. Overview
The work order detail form provides quick access to the information contained in a work order. This information is view-only.
15.4.2. Data displayed
The structure of the detail form for a work order depends on the item type.
These various forms are described in the chapters corresponding to the following topics:
-
for reading: see Data displayed for a reading.
-
for inspection reports: see Data displayed for an inspection report.
15.5. Creating a work order
It takes the form of a wizard that guides the user step-by-step through the inspection process.
Metric entry is also accessible from the details of an asset, a Location, or a Main point.
15.5.1. Step 1 – Data to be recorded
15.5.1.2. Data displayed
This step features a drop-down list from which you can select the type of equipment to be recorded:
-
Location
-
Main point
-
Asset
After selecting the equipment type, the equipment list is updated.
Each line in this list displays the following information:
-
Equipment description and {code} to be recorded.
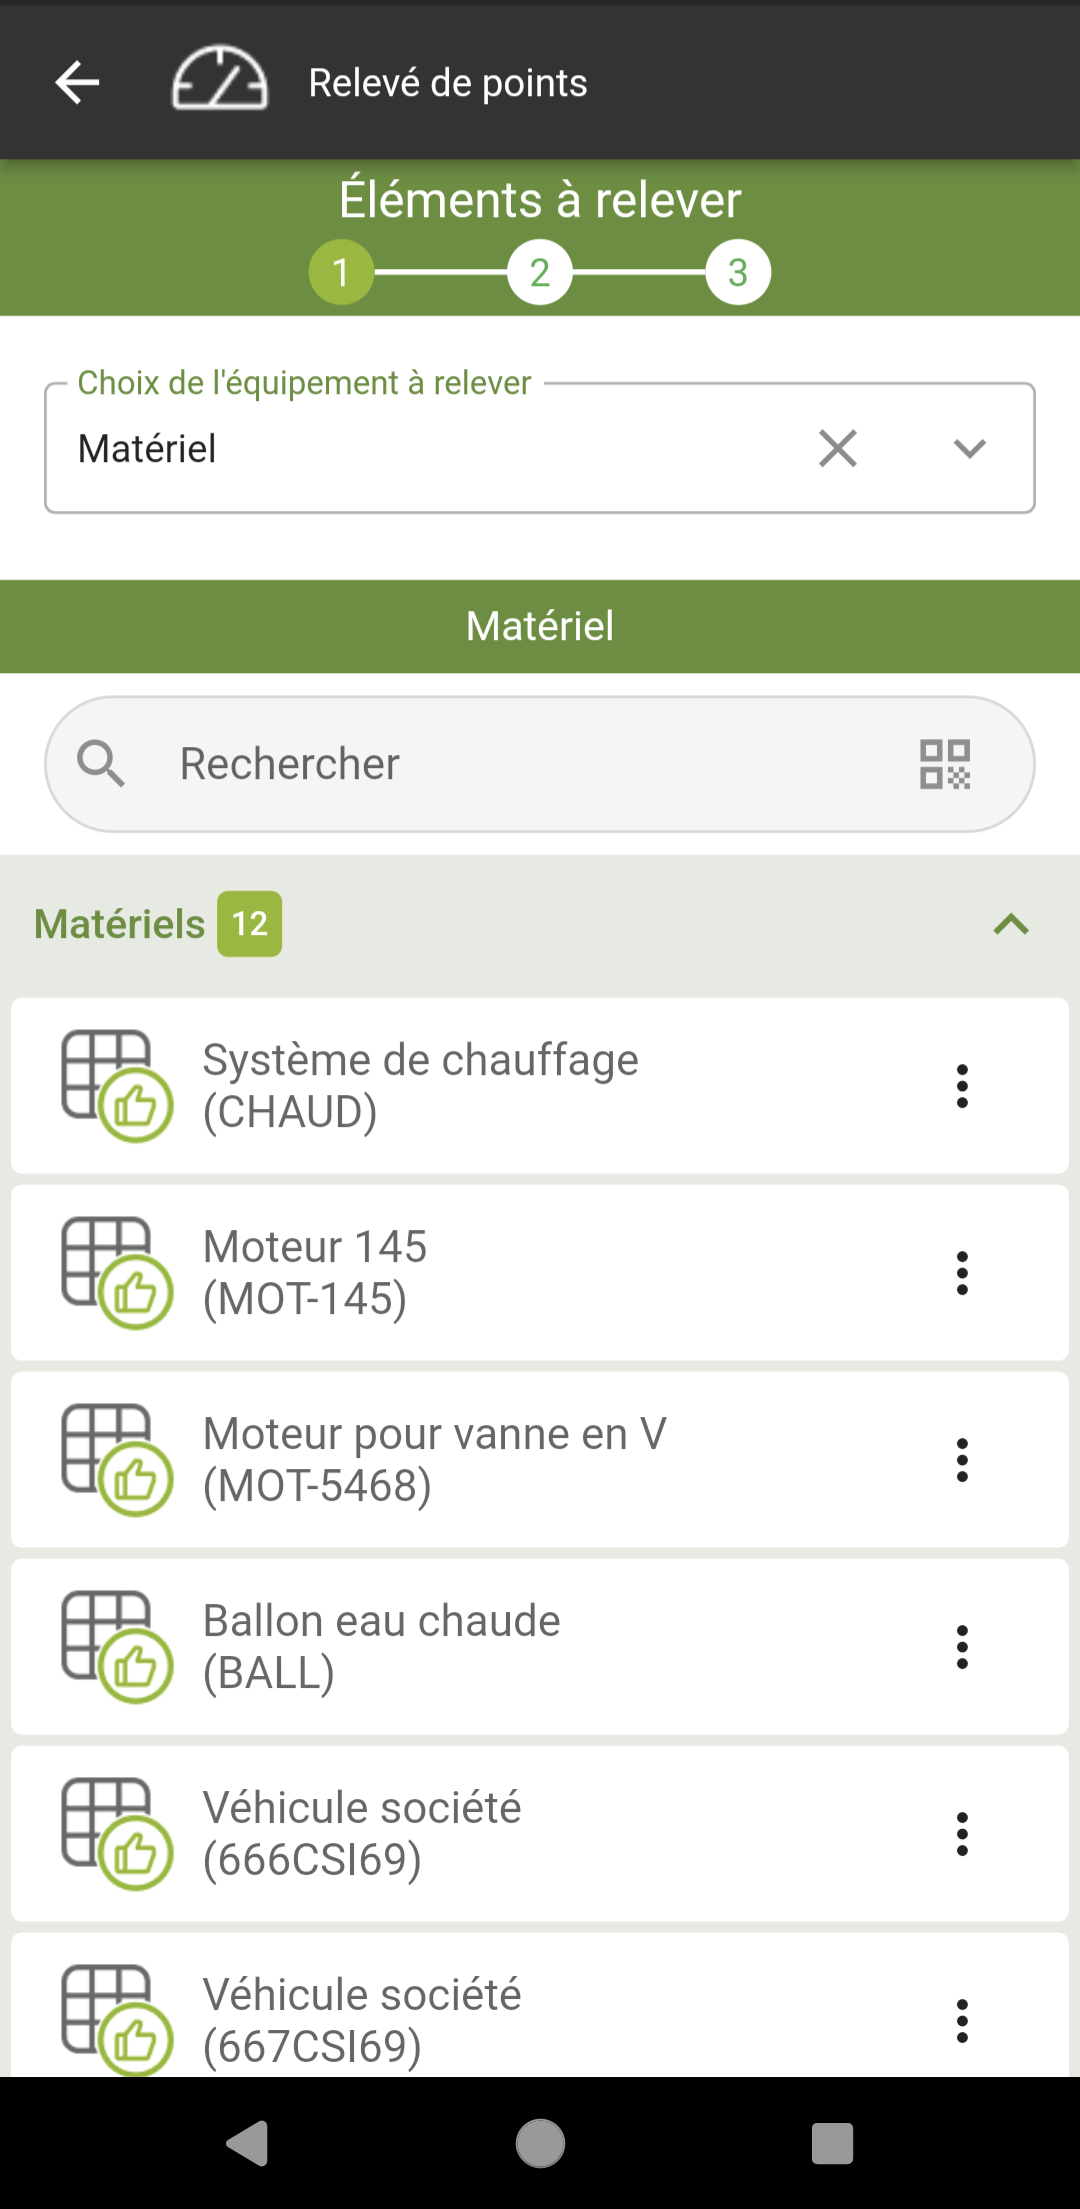
15.5.2. Step 2 – Key Point
15.5.2.1. Overview
This step allows the user to select the reading point or inspection point to be recorded.
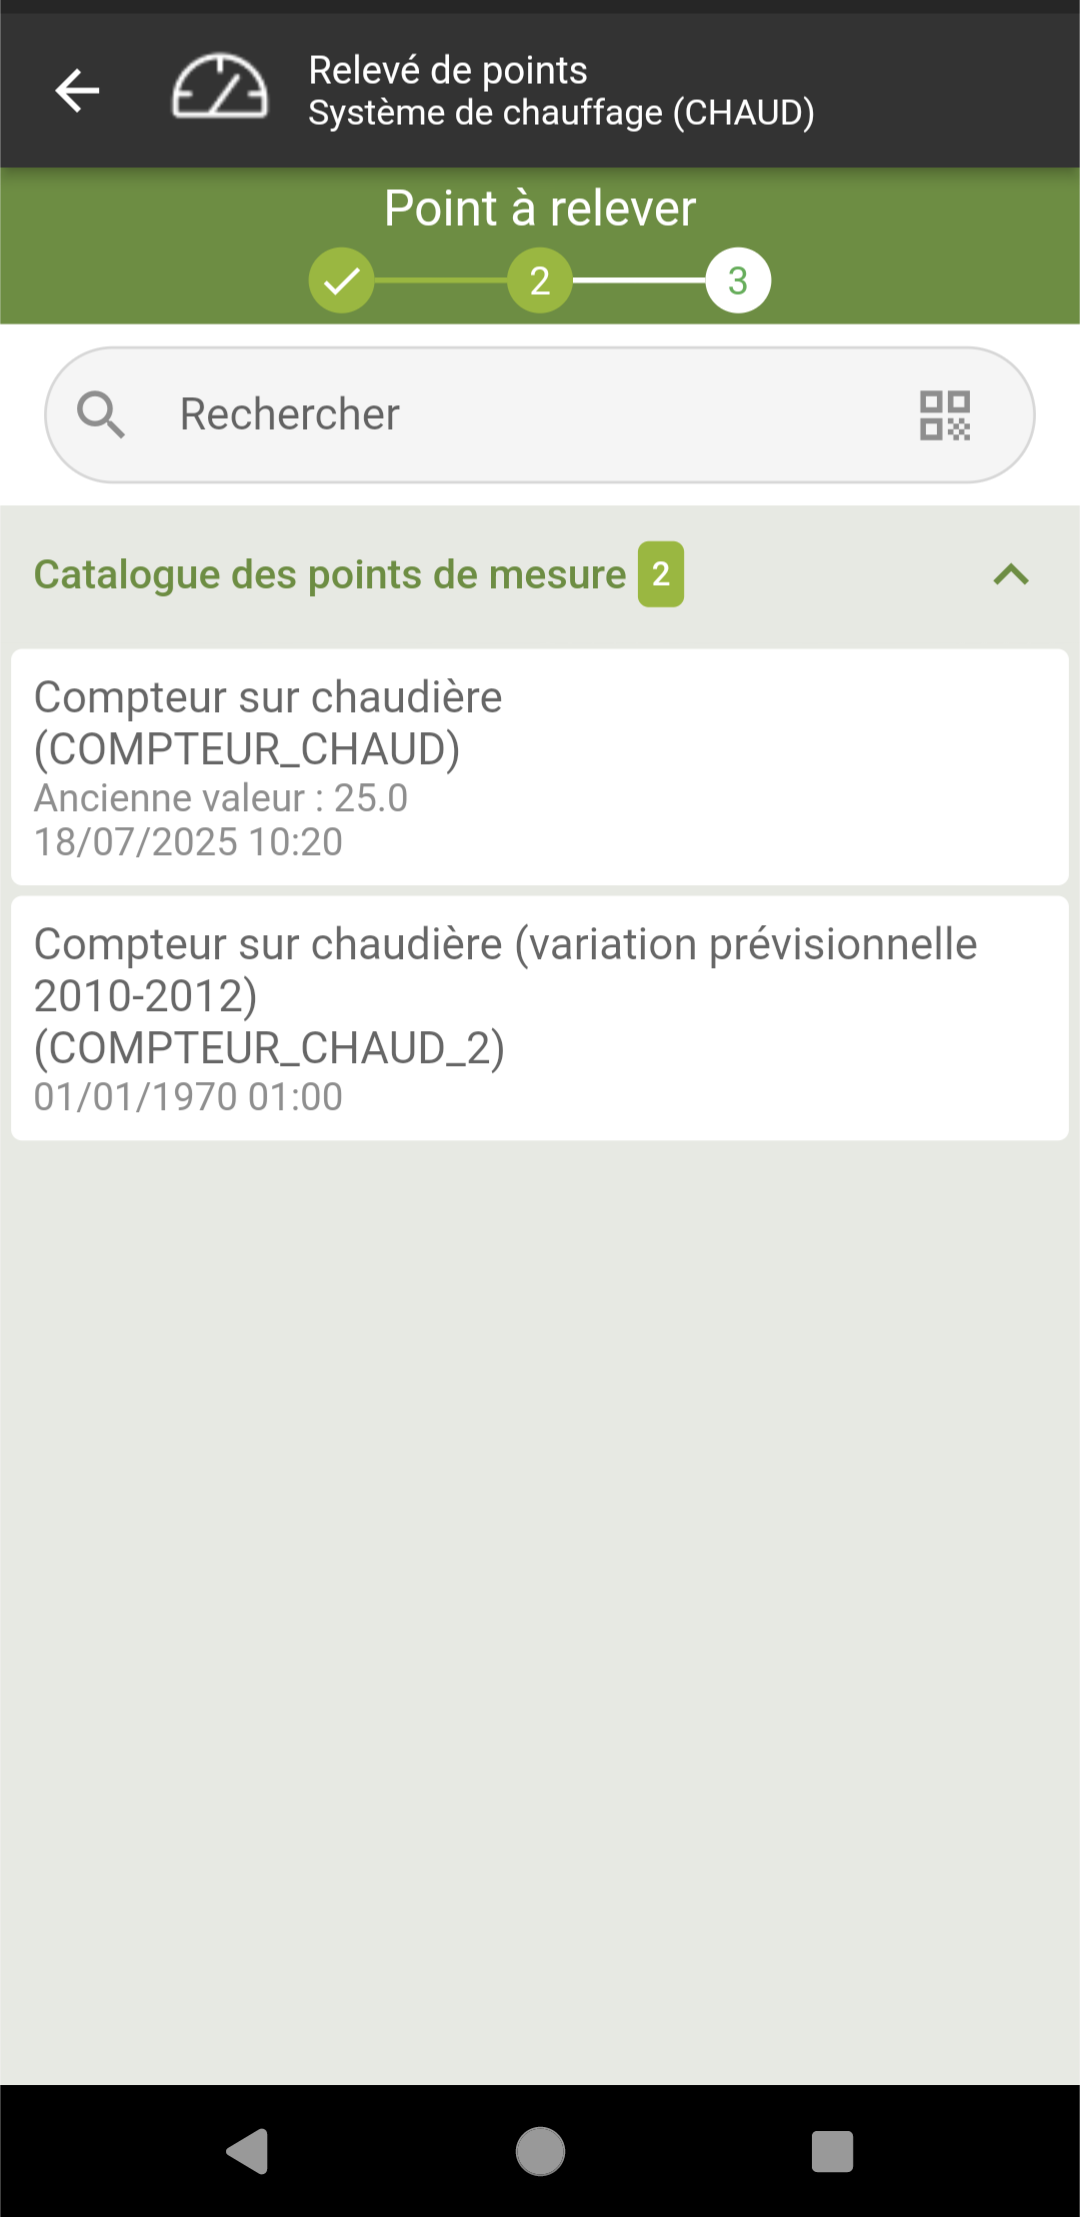
15.5.3. Step '3' - Entering the report
15.5.3.1. Overview
This step allows the user to enter the recorded value, either at a reading point or at a checkpoint. The information displayed varies depending on the type of item.
15.5.3.2. Data displayed for a reading
This step displays the reading information:
-
Equipment: Equipment associated with the reading point.
-
Reading point: A reading point for which a reading is requested.
-
Regression: Indicates whether regressions are permitted at this reading point.
-
Minimum value: Information on the minimum allowed value at this reading point.
-
Max Value: Information on the maximum allowed value at this Reading point.
-
Previous value: Previous value from the reading.
-
Reading Date: Date of the previous reading.
-
New value: Value recorded at the reading point.
-
Variation in reading: Variation observed at the reading point.
-
Correction: Information indicating whether the reading is a correction.
-
Comment: Optional comment.
15.5.3.3. Data displayed for an inspection report
This step displays the inspection report information:
-
Equipment: Equipment associated with the Checkpoint.
-
Checkpoint: A checkpoint for which a reading is requested.
-
Previous value: Previous value from the inspection report.
-
Date of previous reading: Date of the previous inspection reading.
-
Reading Value: Value recorded at the Checkpoint. A list of values associated with the Checkpoint is provided.
-
Comment: Optional comment.
16. Items function
16.1. Purpose
The «Items» function in CARL Touch allows users to consult item catalogs, gives them access to the item detail form and enables them to familiarize themselves with information such as:
-
General information about items.
-
Item storage details.
-
Item equipment links.
-
Item characteristics.
-
Documents linked to an item.
16.2. List of items
The list form displays various information about items.
16.2.1. Meaning of icons
The various icons that may be found on the list of items are:
| Icon | Element represented |
|---|---|
|
Item. |
|
Item «With conflict» |


16.2.2. Data displayed
For each item on the item list, CARL Touch displays the following data subject to availability (i.e. a line is displayed only if the associated data has been entered):
-
Item description.
-
Item code.
-
Item manufacturer.
-
Manufacturer’s reference for the item.
16.2.3. Actions
CARL Touch proposes general actions on the item list form.
|
|
If the available actions for a form cannot all be shown directly on the action bar, additional actions are accessible via the button: |
Actions available on the item list form
| Button | Button action |
|---|---|
|
Search within the list of items. |
|
Sort the items. |
16.2.4. Item list tabs
As default, there are no tabs on the list of items. However, if a conflict is detected, up to two tabs may be displayed:
-
«ITEMS» tab: this tab is shown only if the «Conflicts» tab is displayed. It contains the list of items.
-
«CONFLICTS» tab: this tab contains items for which a conflict has been detected.
|
|
The conflict display mechanism is described in section Managing conflicts. |
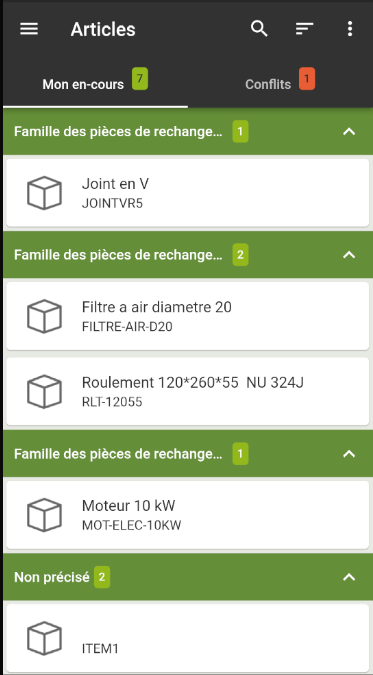
16.3. Item details
The item detail form is accessible from the list of items.
16.3.1. Representation of an item (icon)
The icon used to represent an item is as follows:
| Icon | Element represented |
|---|---|
|
Item. |
16.3.2. Data displayed
|
|
The data listed below corresponds to the structure of the «standard» form. CARL Touch forms are customizable, implying that the form structure may be different in your context. |
The model details form contains the following:
«General» block
-
Item family.
-
Item category.
-
Item manufacturer.
-
Manufacturer’s reference for the item.
«Management» block
-
Item management unit.
-
AP for the item.
-
Serialized: indicator (Y/N).
«Characteristics» block
-
Number of characteristics associated with the item.
|
|
The Characteristics are managed in the same way as for assets: the principle of operation is explained in section «Characteristics» summary block. |
«Documents» block
-
Number of documents relating to the item.
|
|
The Further details about document management are given in section Managing linked documents. |
«Storage details» block
-
Stock lines by warehouse
|
|
Stock lines contain the following information:
If there is no stock, the list is not empty: a "No stock" message is displayed. |
16.4. Actions
CARL Touch offers global actions on the item detail form.
Actions available on an item’s detail form (via the button)
| Button | Button action |
|---|---|
Change location |
For changing the location of the current item. |
Enter in stock |
For entering an input for the current item. |
Perform inventory |
For entering an inventory movement for the current item. |
Withdraw from stock |
For entering a withdrawal for the current item. |
Context-sensitive actions specific to item fields are accessible via the button to the right of the field.
| Field | Button available | Button action |
|---|---|---|
Family |
Task history |
Displays the history of tasks for the selected family. |
17. Stock movements function
17.1. Purpose
The «Stock movements» function is used to view, search and sort all stock movements generated from the CARL Touch application.
It also provides access to the sub-functions for creating new stock movements.
17.2. List of stock movements
The list of stock movements enables users to browse and view all movements generated from the mobile device.
Depending on the context, these movements are displayed in one of the three tabs available for this list – see List of stock movements tabs.
|
|
«Prepared inventories» stock movements do not appear on this list. These movements can be viewed only via the «Prepared inventories» function - see section Prepared inventories function. |
17.2.1. Meaning of icons
The following icons may be displayed in the list of stock movements:
| Icon | Meaning |
|---|---|
|
"Withdrawal" movements. |
|
"Entry" movements. |
|
"Change of location" movements. |
|
« Spontaneous inventory » movements. |
|
« Withdrawal » movements with a conflict. |
|
« Entry » movements with a conflict. |
|
« Change of location » movements with a conflict. |
|
« Spontaneous inventory » movements with a conflict. |


17.2.2. Data displayed
For each movement on the stock movements list, CARL Touch displays the following data subject to availability (i.e. a line is displayed only if the associated data has been entered):
-
Movement type name (i.e. "Withdrawal", "Entry", etc.).
-
Movement date.
-
Name and code of the item associated with the movement.
-
Name and code of the warehouse associated with the movement.
-
Name and code of the location associated with the movement.
-
Name and code of the item’s destination location.
-
Batch number or Asset name and code.
-
«Quantity» button: this displays the quantity processed in the stock movement.
|
|
|
17.2.3. Actions
CARL Touch proposes general actions on the list of stock movements form.
|
|
If the available actions for a form cannot all be shown directly on the action bar, additional actions are accessible via the button: |
Actions available on the list of stock movements form
| Button | Button action |
|---|---|
|
Search within the list of stock movements. |
|
Create a stock movement (by means of the associated sub-function):
|
|
Sort stock movements. |
17.2.4. List of stock movements tabs
As default, there are no tabs on the list of stock movements: the display shows the list of movements that have been synchronized with CARL Source and that have not resulted in a rejection. However, depending on the context, several tabs may be displayed:
-
«MY IN-PROGRESS ITEMS» tab: this tab is shown only if another tab is displayed.
It contains the list of stock movements -
«CONFLICTS» tab: this tab contains stock movements for which a conflict has been detected.
|
|
The conflict display mechanism is described in section Managing conflicts. |
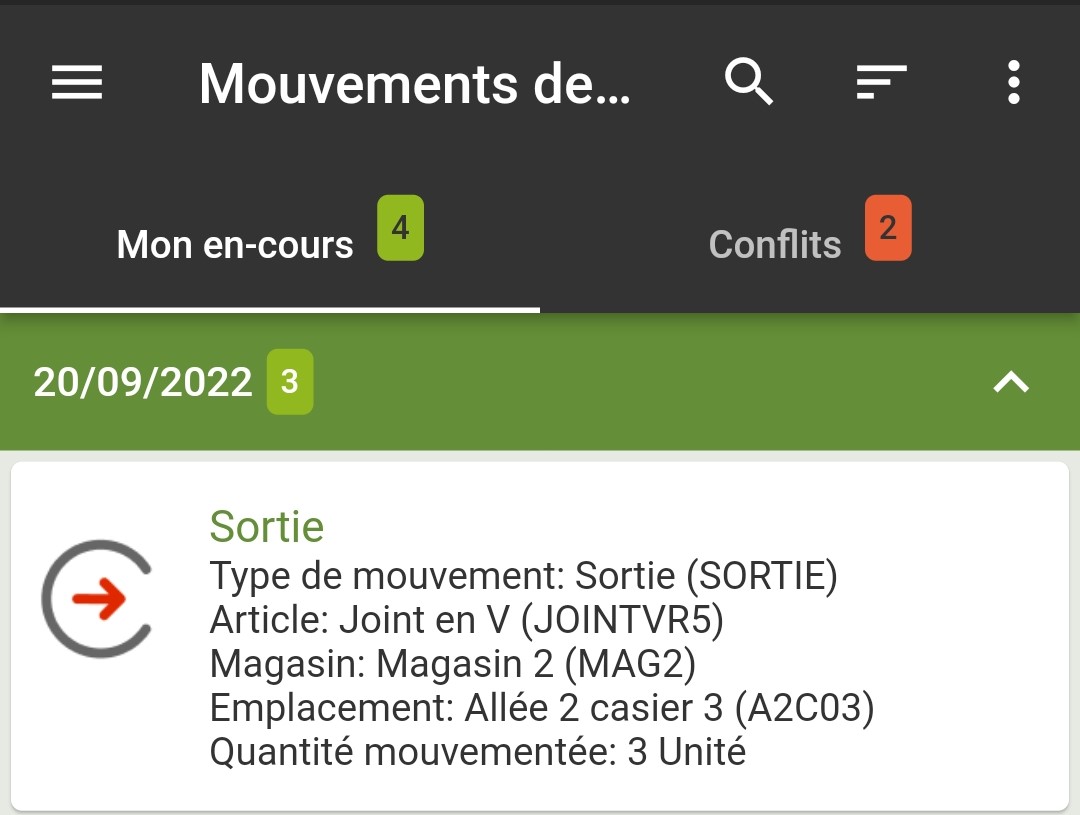
17.3. Details of a stock movement
17.3.1. Presentation
The stock movement detail form provides quick, structured access to the information comprising a movement, and enables these fields to be changed if necessary.
17.3.2. Data displayed
The structure of the stock movement detail form depends on the type of movement (e.g. «Withdrawal», «Entry», etc.).
These various forms are described in the sections corresponding to the sub-functions:
-
for a «Withdrawal» movement: see Sub-function: Withdrawal.
-
for an «Entry» movement: see Sub-function: Entry.
-
for a «Change of location» movement: see Sub-function: Change of location.
-
for a «Spontaneous inventory» movement: see Sub-function: Spontaneous inventory.
18. Sub-function: Withdrawal
18.1. Presentation
The «Withdrawal» sub-function is associated with the «Stock movements» function and enables users to carry out a stock withdrawal from CARL Touch.
It is presented in the form of a wizard that guides users step-by-step through the withdrawal process.
|
|
The operating principles for wizards are set out in section Wizards |
18.2. Access
The «Withdrawal» sub-function is accessible:
-
from the "Stock movements" function (click on the
icon and select the "Withdrawal" option), -
from the main CARL Touch navigation menu (« Withdrawal").
18.3. Step 1: allocation selection
This step enables users to select the allocation. In this step, users must:
-
choose the type of allocation from those proposed by CARL Touch,
-
then specify the allocation element to which the item withdrawal will be allocated.
|
|
This allocation is specified from a list proposed by CARL Touch (the contents of the list depends on the type of allocation):
|
-
Once the user has selected an allocation element from one of these lists, the wizard moves on to the next step.
18.4. Step 2 – Select an item to be withdrawn
18.4.1. Presentation
This step enables users to select the reserved item to be withdrawn from the warehouse.
In the event of a withdrawal for a work order, users can also add an item to be withdrawn from stock for the work order, by means of a list of items in stock unrelated to the work order.
18.4.2. Data displayed
This step presents a list of items (the content varies depending on the context).
In the event of a withdrawal for a «work order» allocation, CARL Touch will propose in the first instance:
-
Items already consumed for the work order.
-
Items reserved for the work order.
-
Items from the individualized parts list for the asset associated with the work order.
-
Items from the standard parts list for the work order template.
-
All items in the catalog.
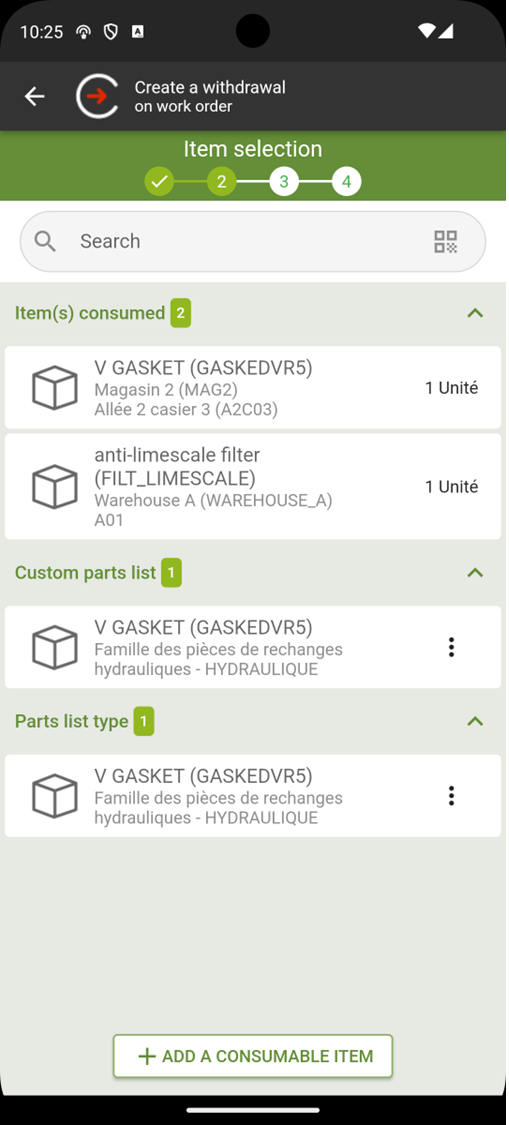
In the event of a withdrawal for an «asset allocation, CARL Touch will propose in the first instance:
-
Items from the individualized parts list for the asset.
-
Items from the standard parts list for the model associated with the asset.
-
All items in the catalog.
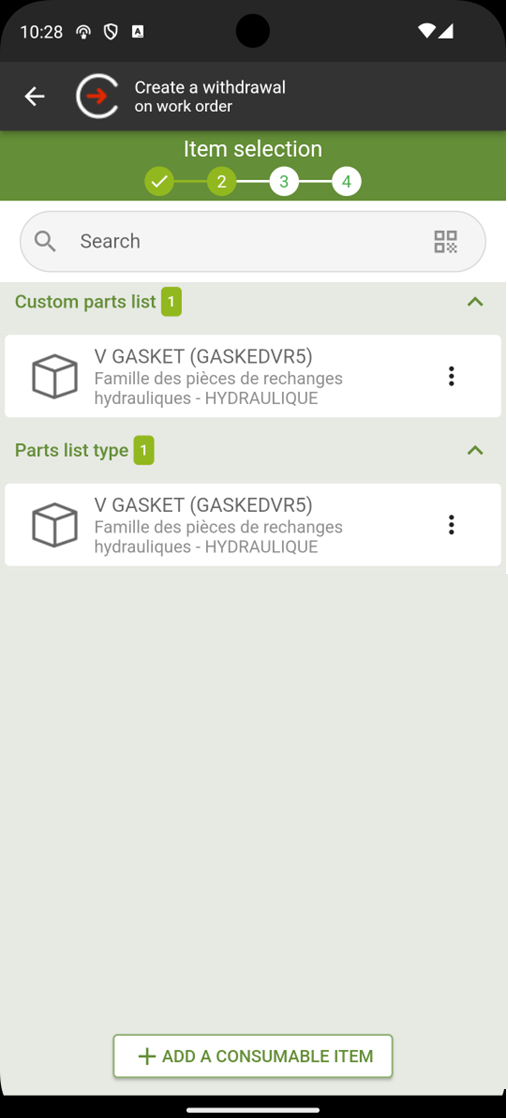
In the event of a withdrawal for a «structure point» allocation, CARL Touch will propose in the first instance:
-
Items from the standard parts list for the structure point.
-
All items in the catalog.
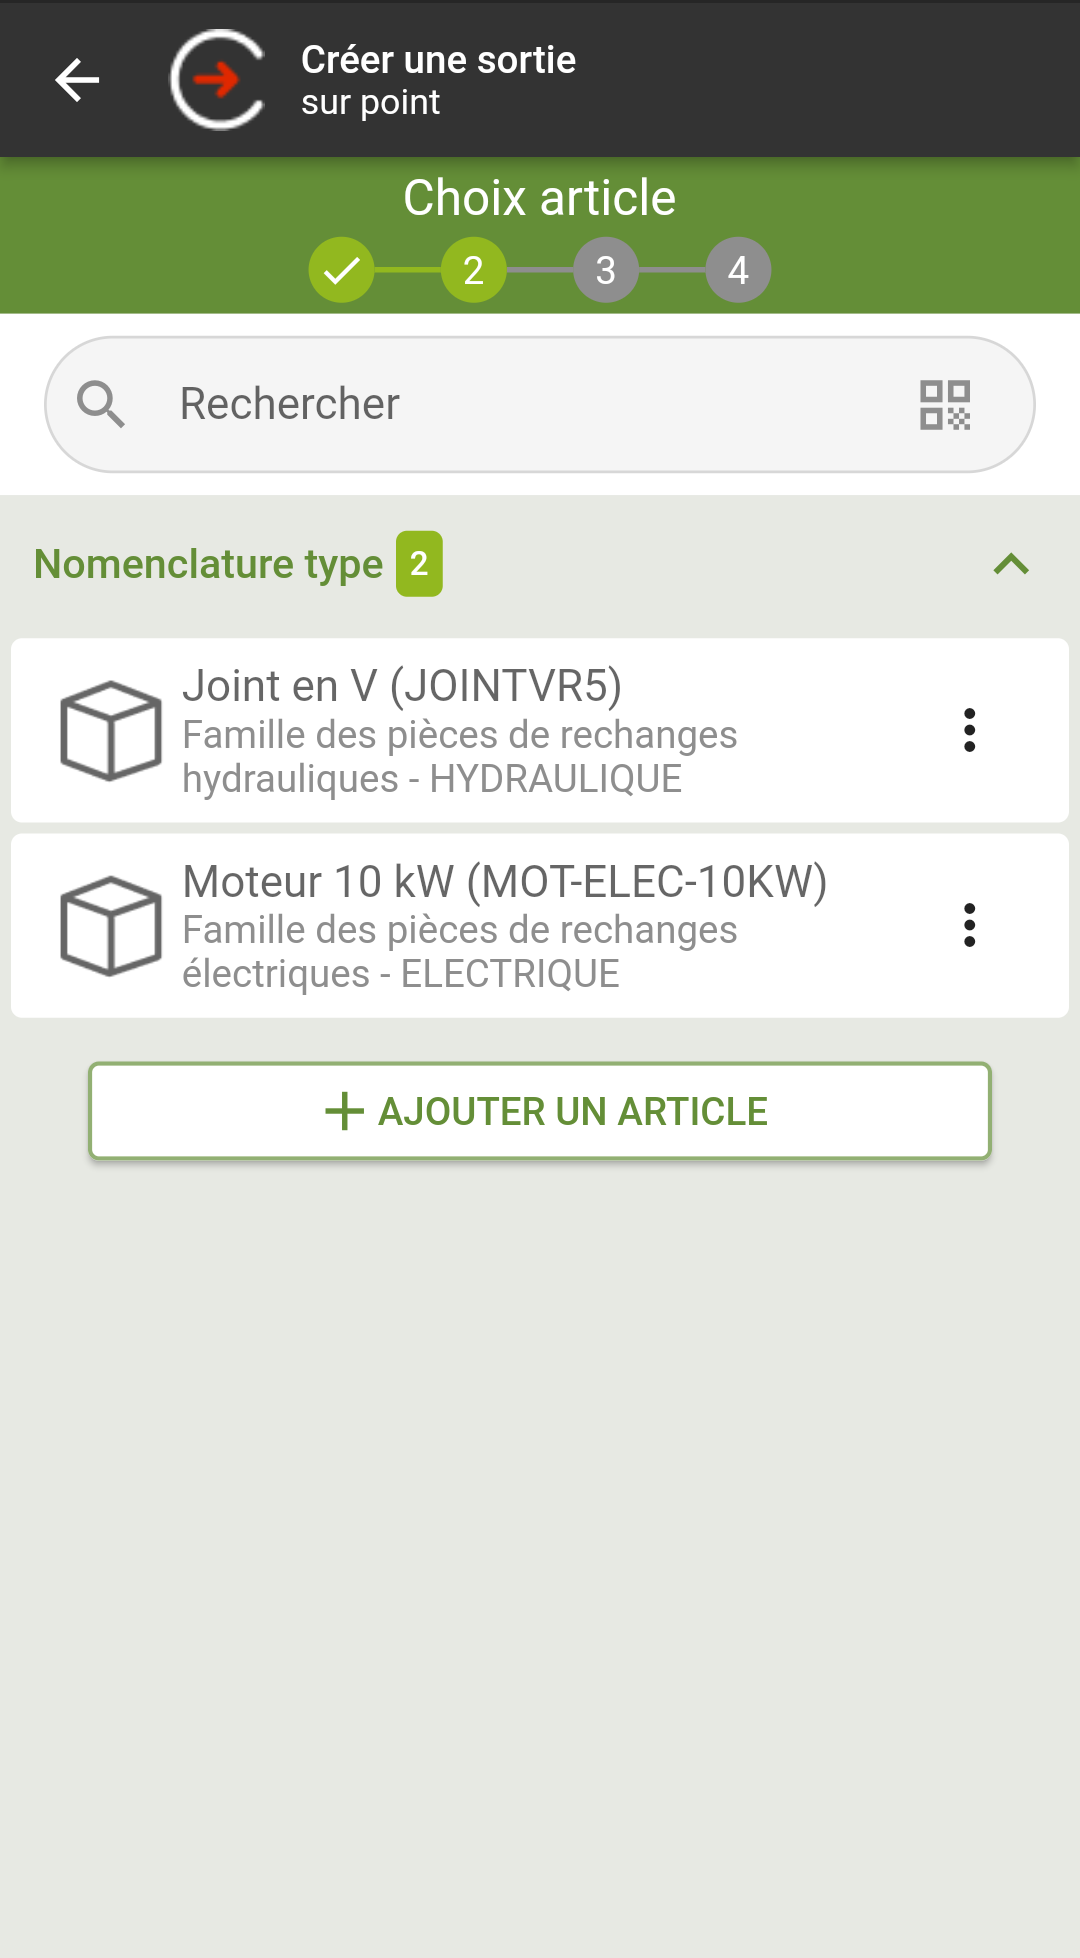
In the event of a withdrawal for a «cost center» or with «no allocation», CARL Touch will propose all items in the catalog from the outset.
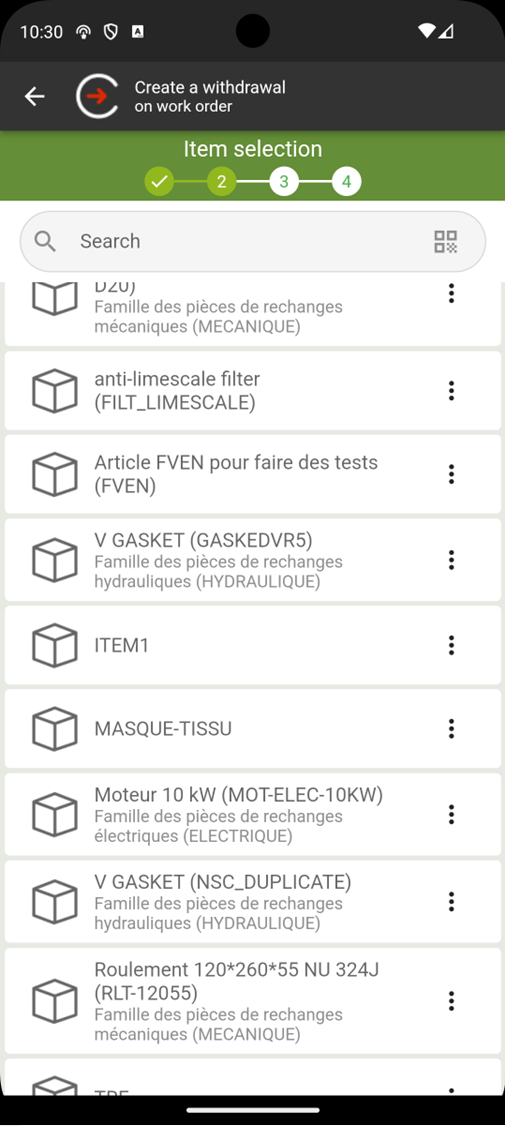
Each line of this list presents the following information:
-
Name and code of the item to be withdrawn.
-
Name and code of the family of the item to be withdrawn.
18.4.3. Actions
Next step in the wizard
-
The wizard moves on to the next step once an item has been selected from the list.
Context-sensitive actions available on an item line
Context-sensitive actions specific to an item line are accessible via the button to the right of the item:
| Button | Button action |
|---|---|
Access to details |
Displays the detail form for the selected item. |
18.5. Step 3 – Select the item location
18.5.1. Presentation
This step enables users to select the location at which the item selected in the previous step will be consumed (withdrawn).
|
|
This step may be « skipped » (i.e. automatically omitted by passing directly to the next step in the wizard – see Wizards) if the selected item is included in only one location, in order to avoid unnecessary data entry. |
18.5.2. Data displayed
This step proposes a list of locations containing the item selected in Step 1.
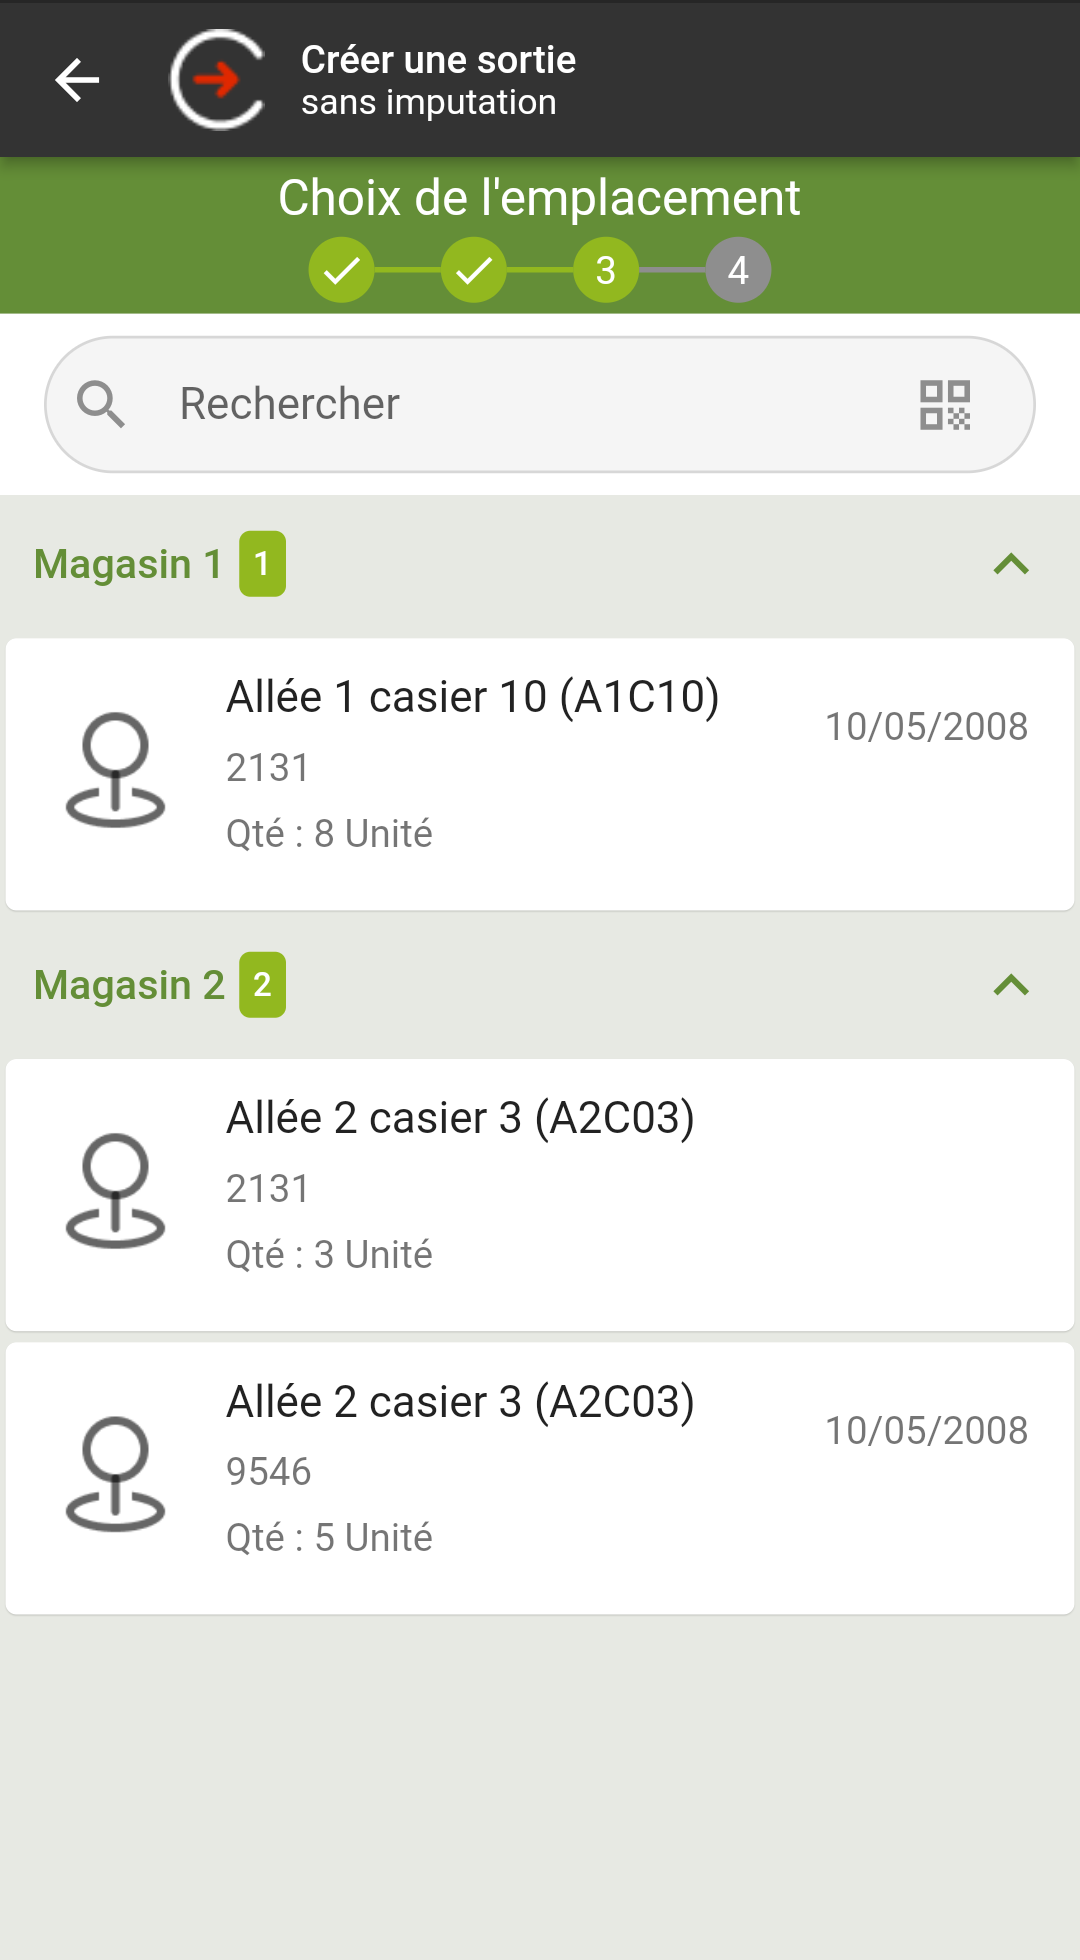
Each line of this list presents the following information:
-
Name and code of the warehouse in which the item is present (grouping block).
-
Name and code of the location in which the item is present.
-
Batch number (for batch-managed item).
-
Name and code of the asset (for a serialized item).
-
Use-by date (for a batch-managed or serialized item).
-
Quantity in stock at this location.
18.6. Step 4 – Enter the quantity to be withdrawn
18.6.1. Presentation
This step enables users to enter the details of the item withdrawal to be carried out.
18.6.2. Data displayed
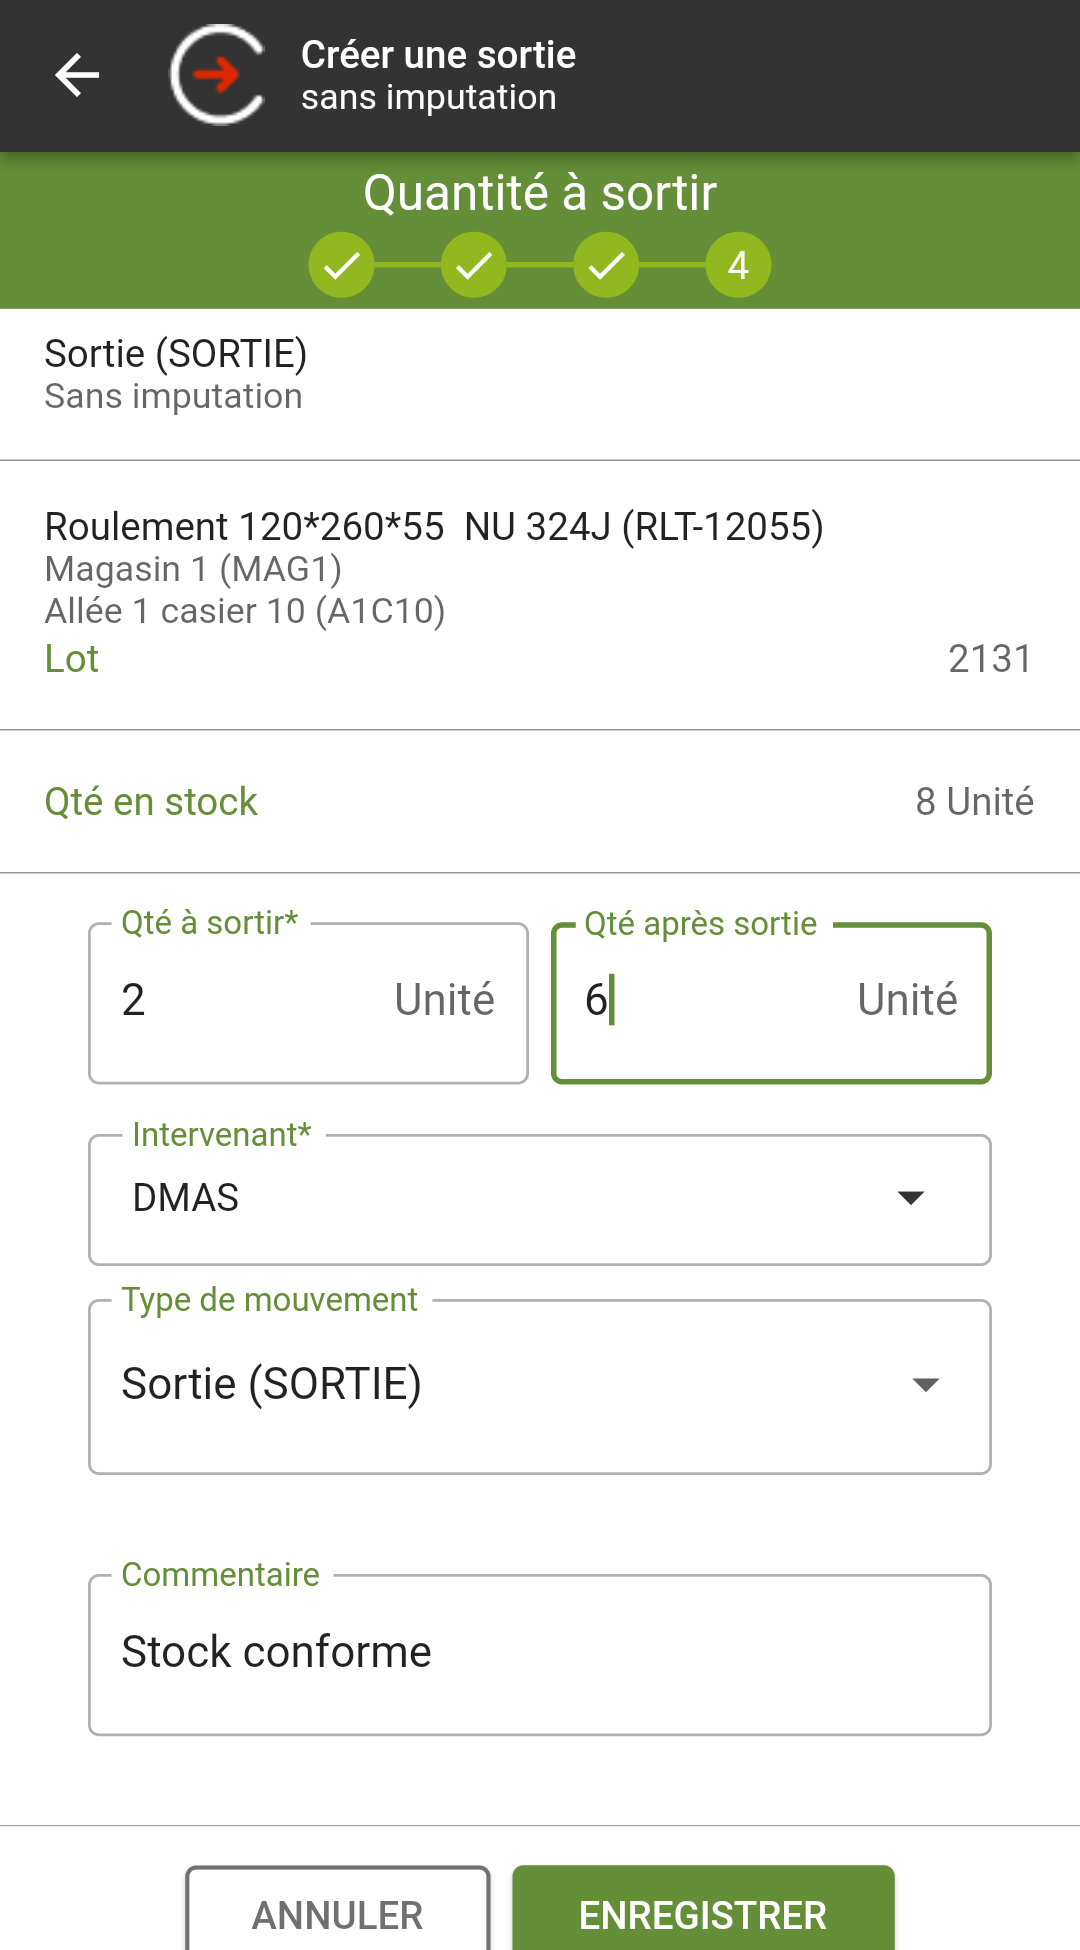
This step presents the following data:
-
Name and code of the item to be withdrawn.
-
Name and code of the warehouse - Name and code of the location from which the withdrawal is to be carried out.
-
Batch number (for batch-managed item).
-
Name and code of the asset (for a serialized item).
-
Use-by date.
-
Quantity in stock at this location.
-
Reserved quantity (only for a «work order» allocation).
-
Quantity already consumed (only for a «work order» allocation).
-
Remaining quantity to be withdrawn (only for a «work order» allocation).
-
Quantity to be withdrawn.
-
Quantity remaining after withdrawal: Enables users to state the remaining quantity of the item after the withdrawal has been carried out. (Hidden for serialized items).
-
Type of withdrawal.
-
Technician carrying out the withdrawal.
-
Comment.
18.6.3. Actions
Context-sensitive actions available on the form fields
Context-sensitive actions specific to form fields are accessible via the button to the right of the field.
| Field | Button action | ||
|---|---|---|---|
Type of withdrawal |
Displays the list of «Withdrawal» movements.
|
||
Technician |
Displays the list of «active» agents.
|
Actions available on the form for this step
The actions available on the form at this stage correspond to the generic wizard actions (see Actions).
-
Confirmation of the screen using the "Save" or "Link" buttons creates the withdrawal movement for the selected item.
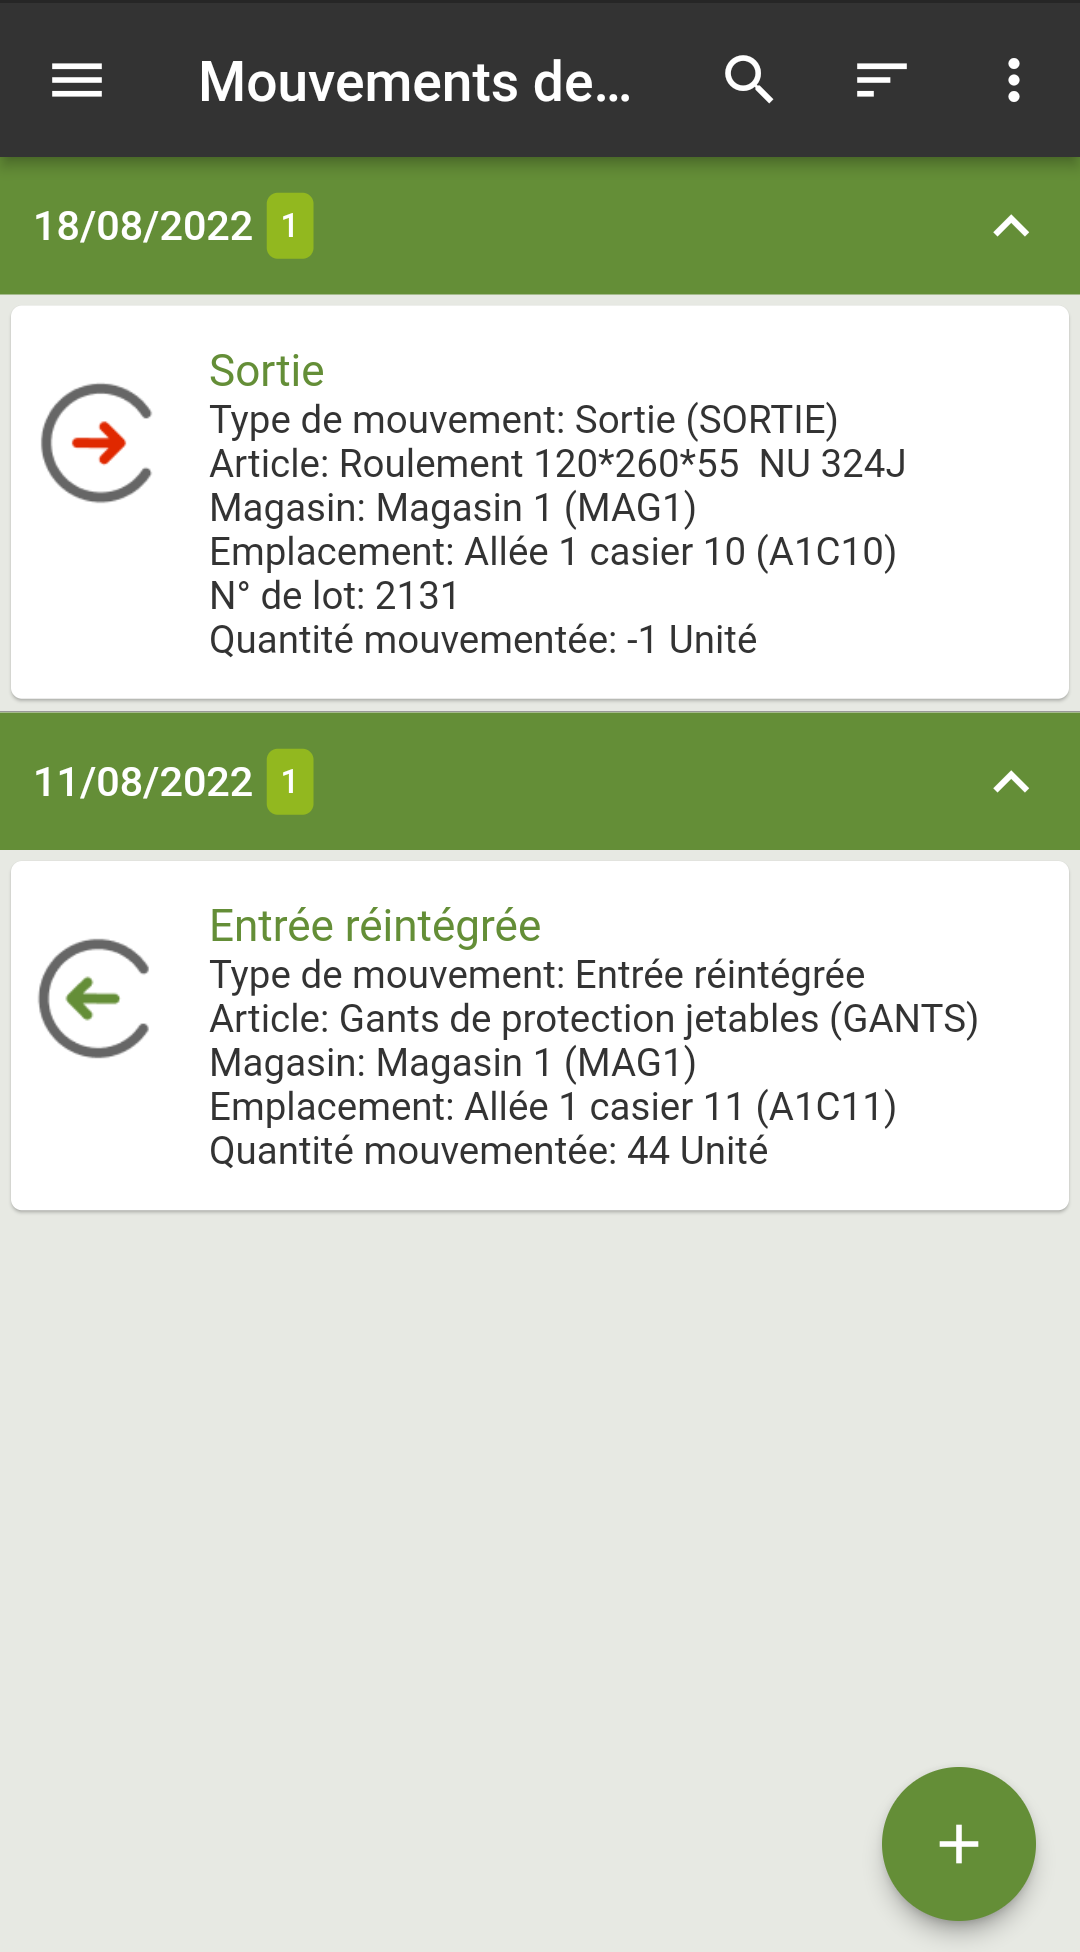
-
The « Cancel » action is used to discard the withdrawal movement data entered (after confirmation).
19. Sub-function: Entry
19.1. Presentation
The «Entry» sub-function is associated with the «Stock movements» function and enables users to carry out a stock entry from CARL Touch.
It is presented in the form of a wizard that guides users step-by-step through the entry process.
|
|
The operating principles for wizards are set out in section Wizards. |
19.2. Access
The «Entry» sub-function is accessible:
-
from the "Stock movements" function (click on the
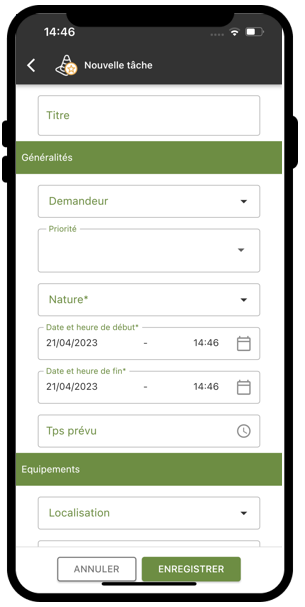 icon and select the "Entry" option),
 -
from the main CARL Touch navigation menu (« Entry").
19.3. Step 1: allocation selection
This step allows you to select the allocation. In this step, users must:
-
choose the type of allocation from those proposed by CARL Touch,
-
then specify the allocation element to which the item entry will be allocated.
|
|
This allocation is specified from a list proposed by CARL Touch (the contents of the list depends on the type of allocation):
|
-
Once the user has selected an allocation element from one of these lists, the wizard moves on to the next step.
19.4. Step 2 – Select an item to be entered
19.4.2. Data displayed
This step presents a list of items (the content varies depending on the context).
The data displayed for Step 1 of a stock entry follows the same rules as for the initialization of Step 1 of a stock withdrawal (see Data displayed).
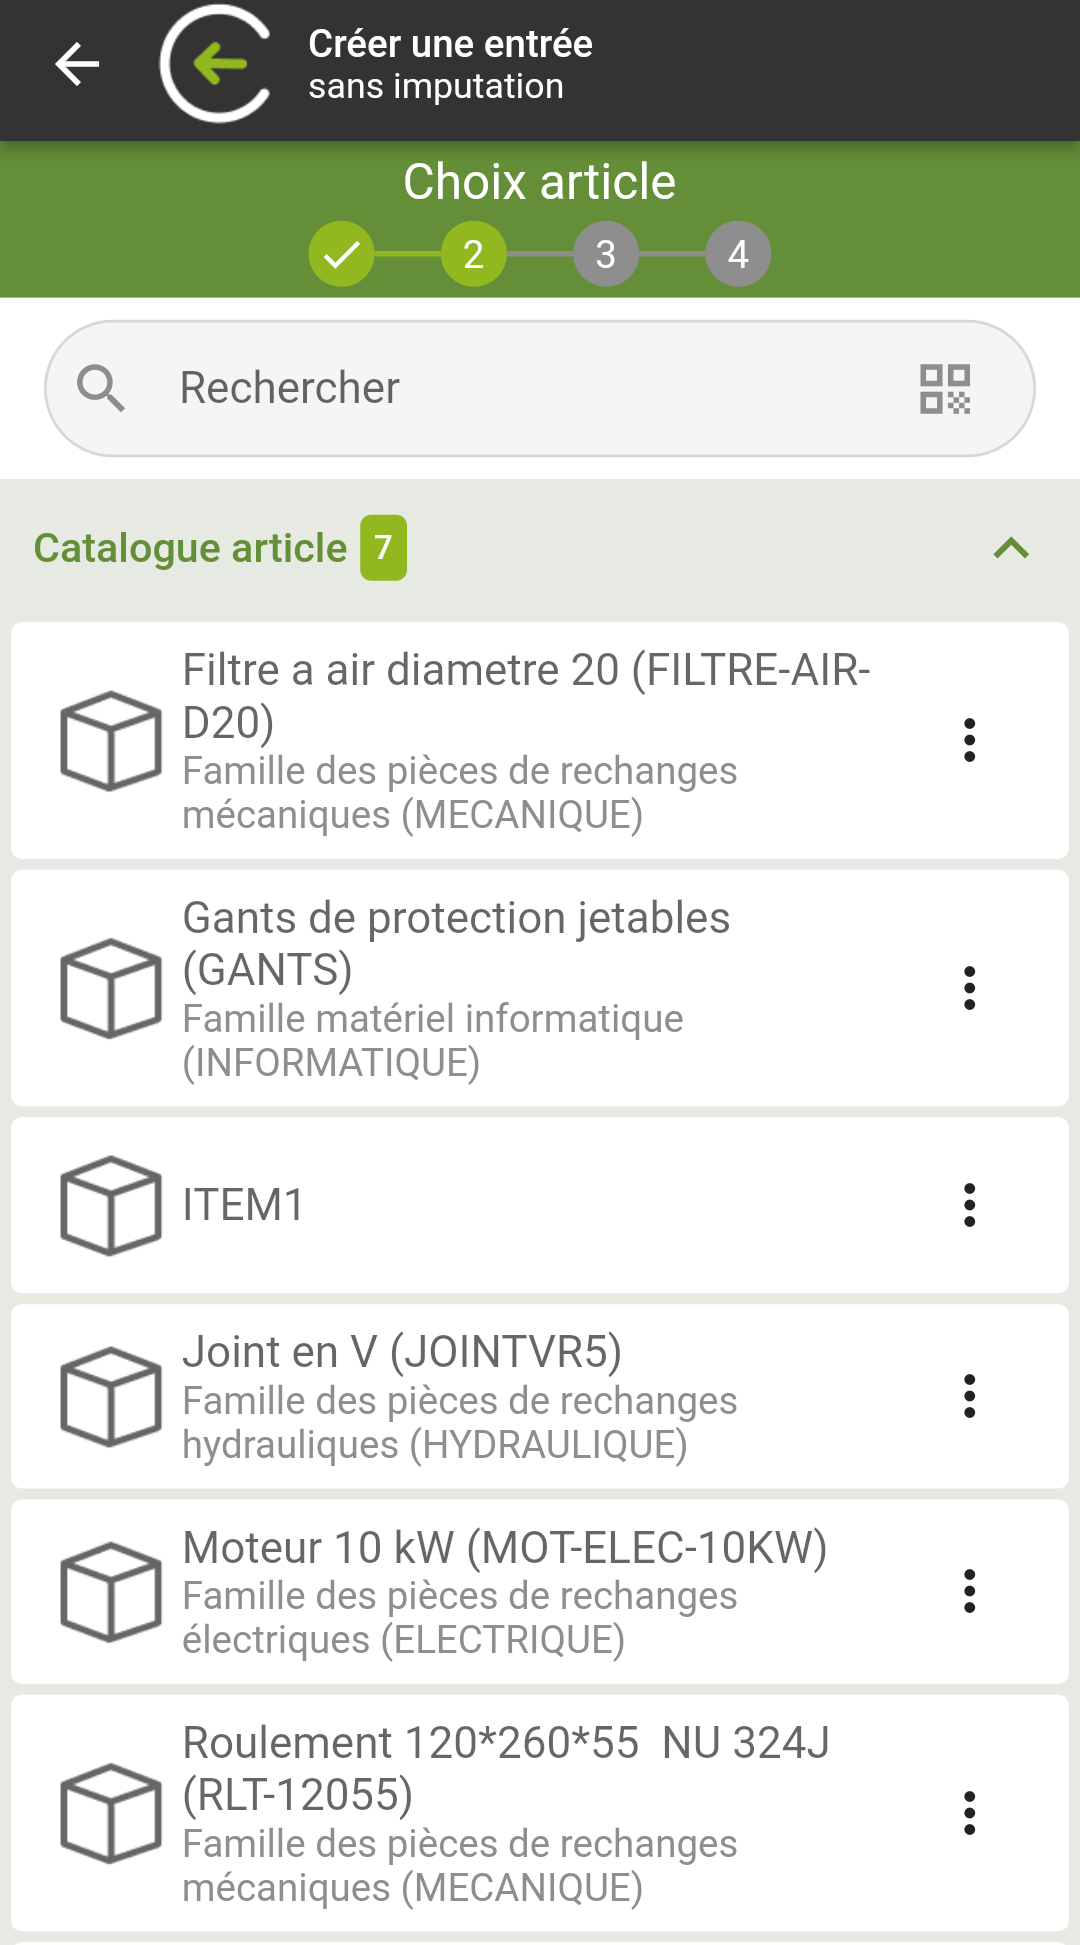
19.4.3. Actions
Next step in the wizard
-
The wizard moves on to the next step once an item has been selected from the list.
Context-sensitive actions available on an item line
Context-sensitive actions specific to an item line are accessible via the button to the right of the item:
| Button | Button action |
|---|---|
Access to details |
Displays the detail form for the selected item. |
19.5. Step 3 – Select the item location
19.5.1. Presentation
This step enables users to select the location at which the item selected in the previous step will be entered.
|
|
This step may be « skipped » (i.e. automatically omitted by passing directly to the next step in the wizard – see Principle) if the selected item is included in only one location, in order to avoid unnecessary data entry. |
19.5.2. Data displayed
This step proposes a list of locations containing the item selected in Step 2.
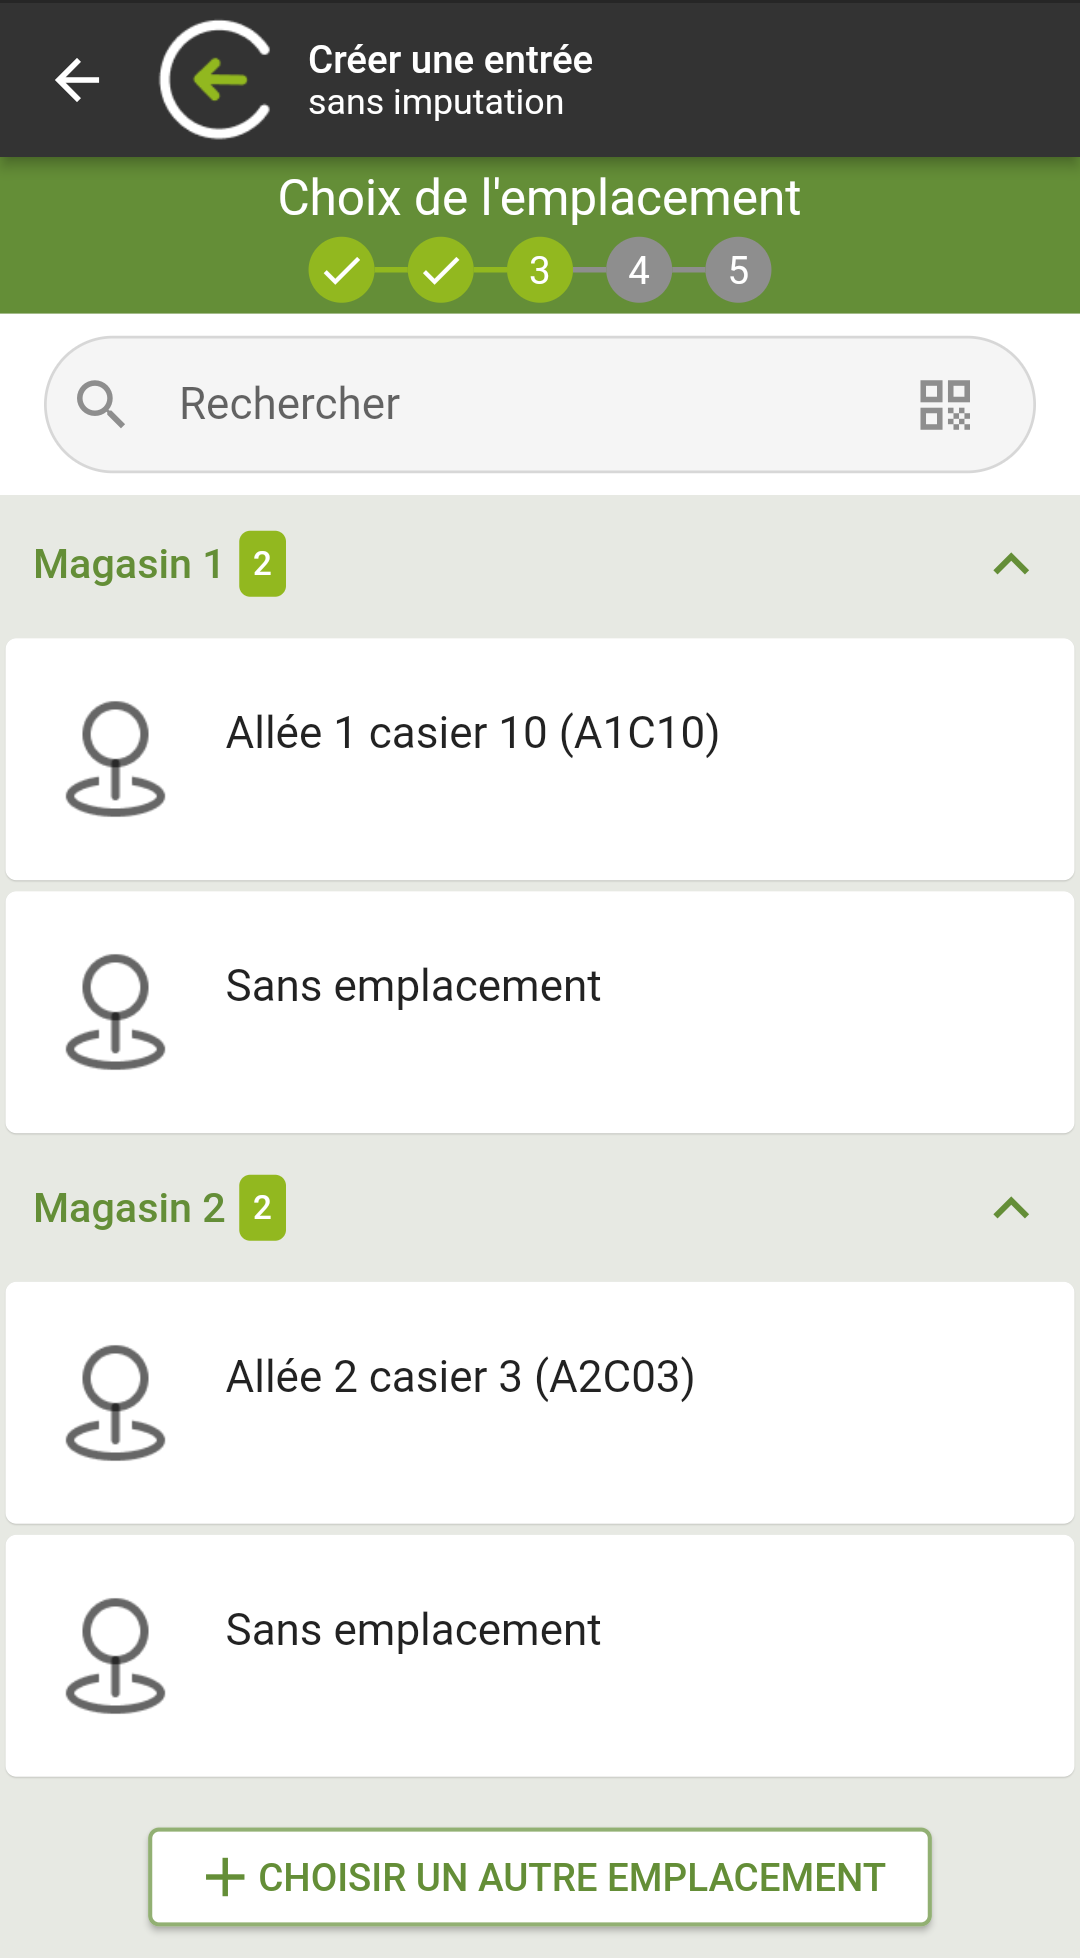
Each line of this list presents the following information:
-
Name and code of the warehouse in which the item is present.
-
Name and code of the location in which the item is present.
-
Batch number (for batch-managed item).
-
Name and code of the asset (for a serialized item).
-
Use-by date (for a batch-managed or serialized item).
-
Quantity in stock at this location.
19.6. Step 4 – Select the item batch
19.6.1. Presentation
This step enables users to select the batch number of the item affected by the stock entry.
|
|
This step is proposed only for entry of a batch-managed item and excluding transfer entries. For ordinary items or serialized items, the wizard proceeds directly to the «Quantity to be entered» step. |
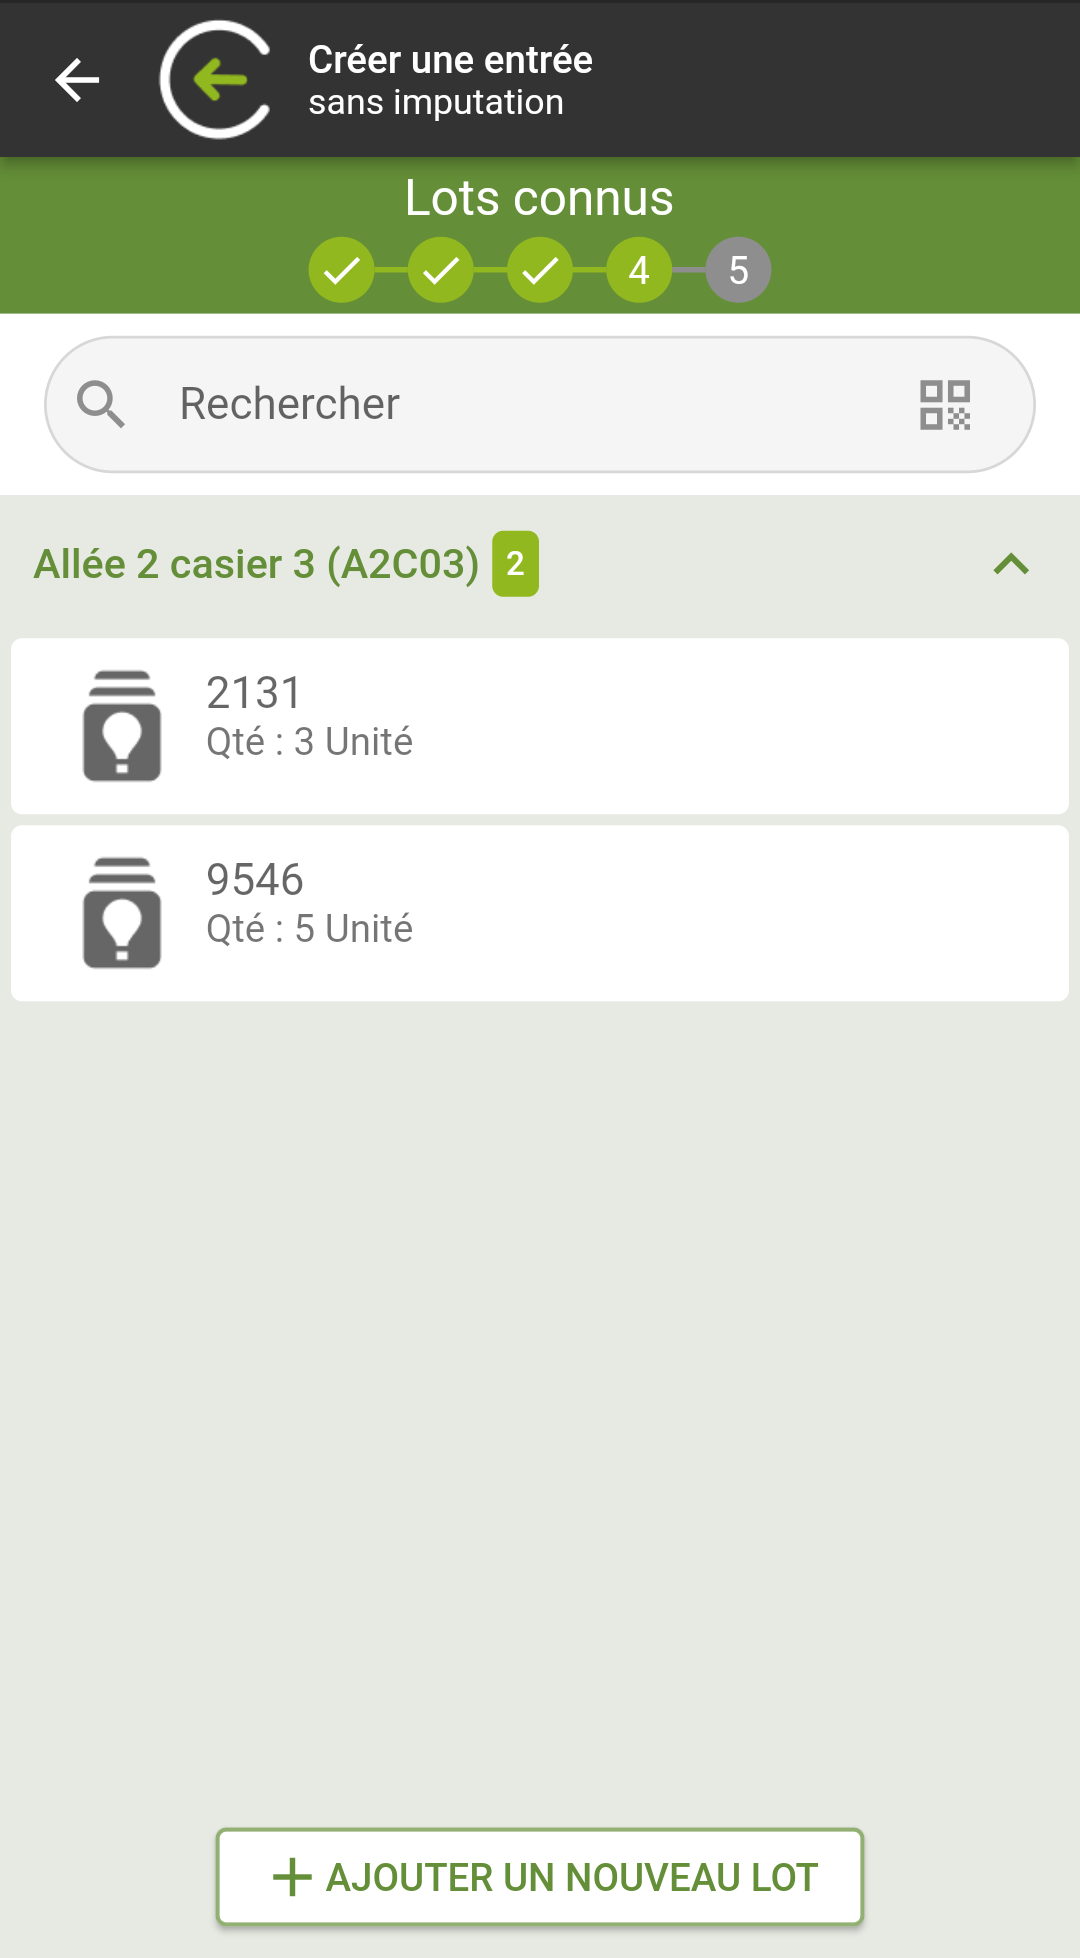
19.7. Step 4 – Enter the quantity to be entered
19.7.1. Presentation
This step enables users to enter the details of the item entry to be carried out.
|
|
When entering batch-managed items, and excluding transfer entries, into stock, this is Step 5. |
|
|
In the case of the transfer entry:
|
19.7.2. Data displayed
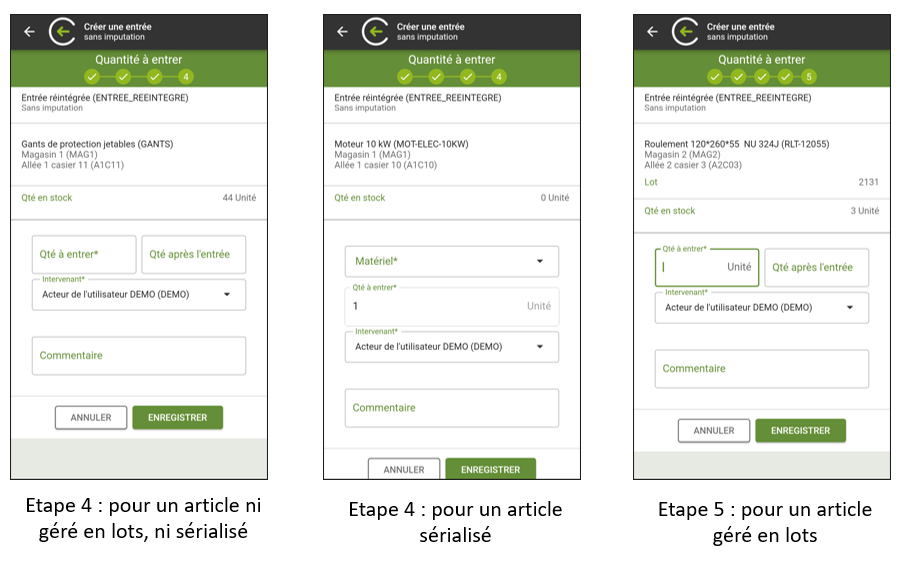
This step presents the following data:
-
Name and code of the item to be entered.
-
Name and code of the warehouse in which the entry is to be carried out.
-
Name and code of the location in which the entry is to be carried out.
-
Batch number (for batch-managed item).
-
Name and code of the asset (for a serialized item).
-
Use-by date (for a batch-managed or serialized item).
-
Quantity in stock at this location.
-
Quantity consumed (only for a «work order» allocation).
-
Quantity already returned (only for a «work order» allocation).
-
Quantity to be entered.
-
Quantity after entry. Enables users to state the total quantity of the item after the entry has been carried out. (Hidden for serialized items).
-
Type of entry. (Hidden if there is only one type of entry)
-
Agent carrying out the entry.
-
Comment.
19.7.3. Actions
Context-sensitive actions available on the form fields
Context-sensitive actions specific to form fields are accessible via the button to the right of the field.
| Field | Button action | ||
|---|---|---|---|
Type of entry |
Displays the list of «Entry» movements.
|
||
Technician |
Displays the list of «active» agents.
|
Actions available on the form for this step
The actions available on the form at this stage correspond to the generic wizard actions (see Actions).
-
The confirmation screen, accessed via the "Save" or "Link" buttons, creates an entry movement for the selected item.
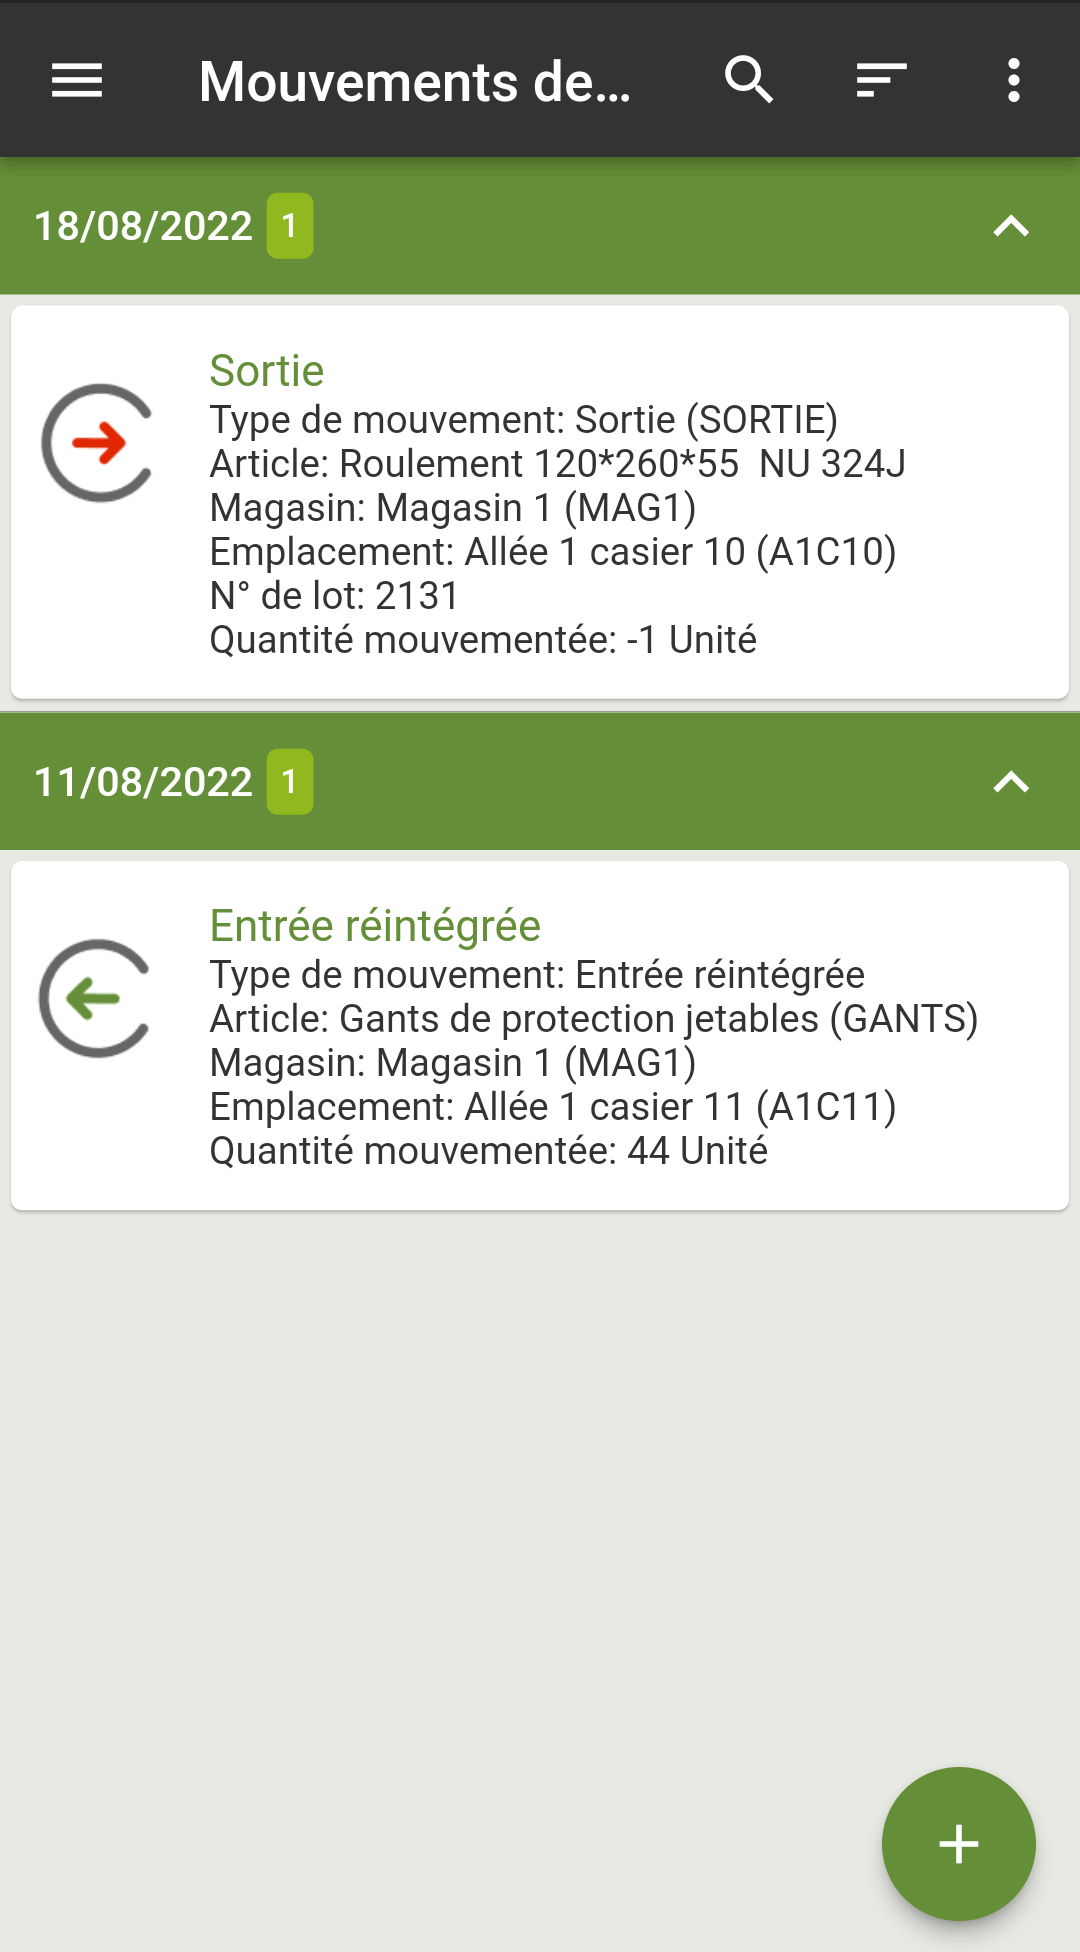
-
The «Cancel» action is used to discard the entry movement data entered (after confirmation).
20. Sub-function: Change of location
20.1. Presentation
The «Change of location» sub-function is associated with the «Stock movements» function and enables users to change the location of an item in stock from CARL Touch.
It is presented in the form of a wizard that guides users step-by-step through the change of location process.
|
|
The operating principles for wizards are set out in section Wizards. |
20.2. Access
This sub-function is associated with the «Stock movements» function.
It is accessible:
-
Either via the « Stock movements » function (click on the
icon and select the « Change of location » option), -
Or directly from the navigation menu (« Change of location").
20.3. Step 1 – Select an item to be moved
20.3.2. Data displayed
This step presents a list of items (the content varies depending on the context).
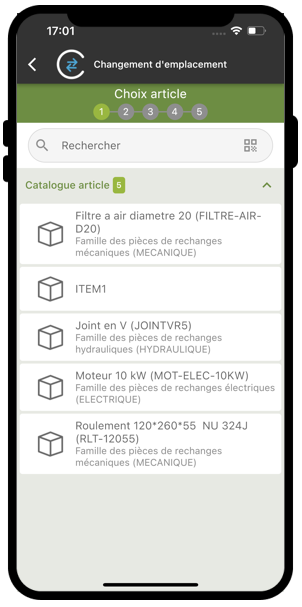
Each line of this list presents the following information:
-
Name and code of the item to be moved.
-
Name and code of the item family.
20.3.3. Actions
Next step in the wizard
-
The wizard moves on to the next step once an item has been selected from the list.
Context-sensitive actions available on an item line
Context-sensitive actions specific to an item line are accessible via the button to the right of the item:
| Button | Button action |
|---|---|
Access to details |
Displays the detail form for the selected item. |
20.4. Step 2 – Select the item location
20.4.1. Presentation
This step enables users to select the location from which the item selected in the previous step will be moved.
20.4.2. Data displayed
This step proposes a list of locations containing the item selected in Step 1.
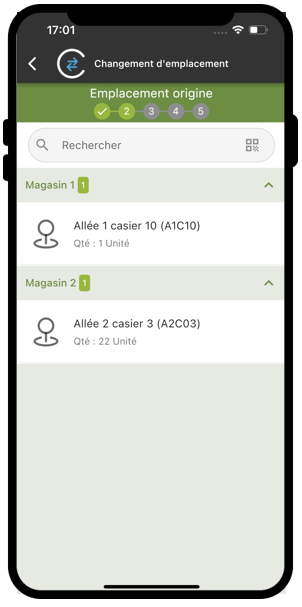
Each line of this list presents the following information:
-
Name and code of the warehouse in which the item is present.
-
Name and code of the location in which the item is present.
-
Batch number (for batch-managed item).
-
Name and code of the asset (for a serialized item).
-
Use-by date (for a batch-managed or serialized item).
-
Quantity in stock at this location.
20.5. Step 3 – Enter the quantity to be moved
20.5.1. Presentation
This step enables users to enter the quantity of the item selected in Step 1 to be moved. The articles will be moved from the location selected in Step 2.
20.5.2. Data displayed
This step presents the following data:
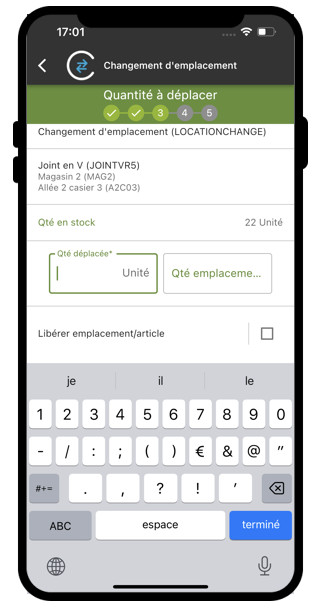
-
Name and code of the item to be moved.
-
Name and code of the warehouse - Name and code of the location from which the item is to be moved.
-
Batch number (for batch-managed item).
-
Name and code of the asset (for a serialized item).
-
Use-by date (for a batch-managed or serialized item).
-
Quantity in stock at this location.
-
Quantity moved: Enter the quantity of the item to be moved from this location.
-
Clear location/item: In the event that the total quantity of an item in the selected location is to be moved, this check box is used to delete the link between the item and the storage location of origin.
-
Remaining quantity in location: This enables users to state the quantity of the item remaining in the location of origin after the stock movement has been completed.
-
Movement: «Change of location» stock movement (hidden if there is only one type of change of location).
-
Technician: Code of the technician carrying out the change of location (as default, that of the connected user).
-
Comment.
20.5.3. Actions
Actions available on the form for this step
The actions available on the form at this stage correspond to the generic wizard actions (see Actions).
-
The validation screen, accessed via the « Save » button, enables users to save the information entered in Step 3 and to proceed to Step 4.
20.6. Step 4 – Enter the destination location
20.6.1. Presentation
This step enables users to enter the destination location for the item movement.
|
|
This step may be « skipped » (i.e. automatically omitted by passing directly to the next step in the wizard – see Principle) if there is only one location to which the selected item can be moved. This applies when the item is stocked in only two locations in the same warehouse. |
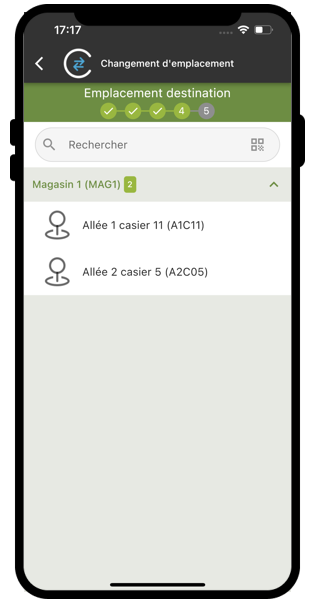
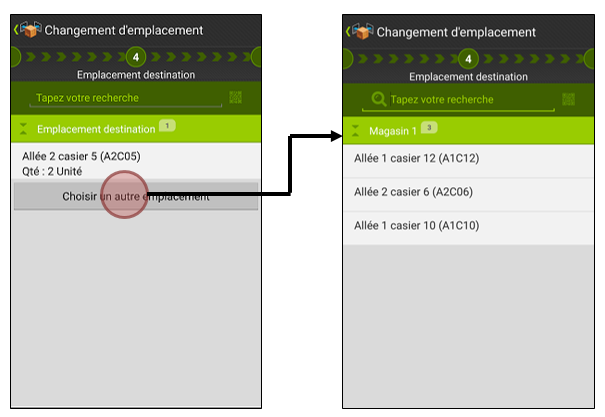
20.7. Step 5 – Confirm the change of location
20.7.1. Presentation
This step presents a summary of the change of location of the item and enables users to save the operation.
20.7.2. Data displayed
This step presents the following data:
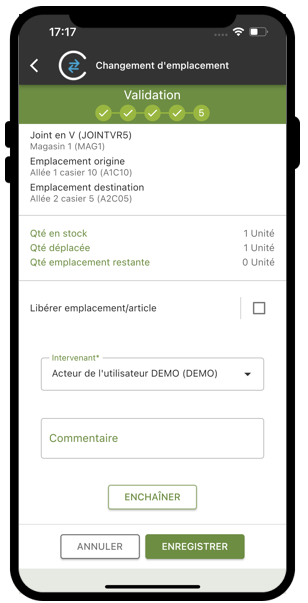
-
Name and code of the item to be moved.
-
Name and code of the warehouse in which the change of location is to take place.
-
Name and code of the location of origin.
-
Remaining quantity of the item in the location of origin.
-
Name and code of the destination location.
-
Quantity moved.
-
Clear location (origin)/item. By checking this box, the link between the item and the storage location of origin will be deleted.
-
Name (or code if name not entered) of the change of location movement.
-
Code of the technician carrying out the change of location of the item.
-
Comment.
20.7.3. Actions
Actions available on the form for this step
The actions available on the form at this stage correspond to the generic wizard actions (see Actions).
-
The validation screen, accessed via the « Save » or « Link » buttons, creates a change of location movement for the selected item.
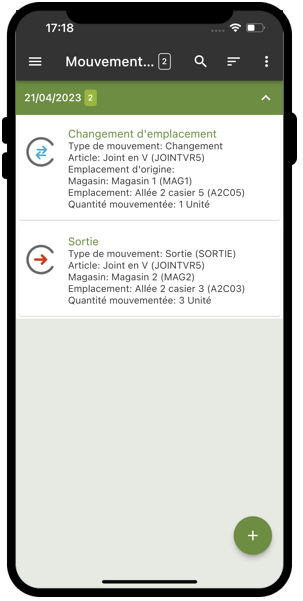
-
The «Cancel» action is used to discard the change of location movement data entered (after confirmation).
21. Sub-function: Spontaneous inventory
21.1. Presentation
The «Spontaneous inventory» sub-function is associated with the «Stock movements» function and enables users to carry out an inventory of an item or a storage location from CARL Touch.
21.2. Access
This sub-function is associated with the «Stock movements» function.
It is accessible:
-
Either via the « Stock movements » function (click on the
icon and select the « Spontaneous inventory » option), -
Or directly from the navigation menu (« Spontaneous inventory").
21.3. Selecting the element to be inventoried
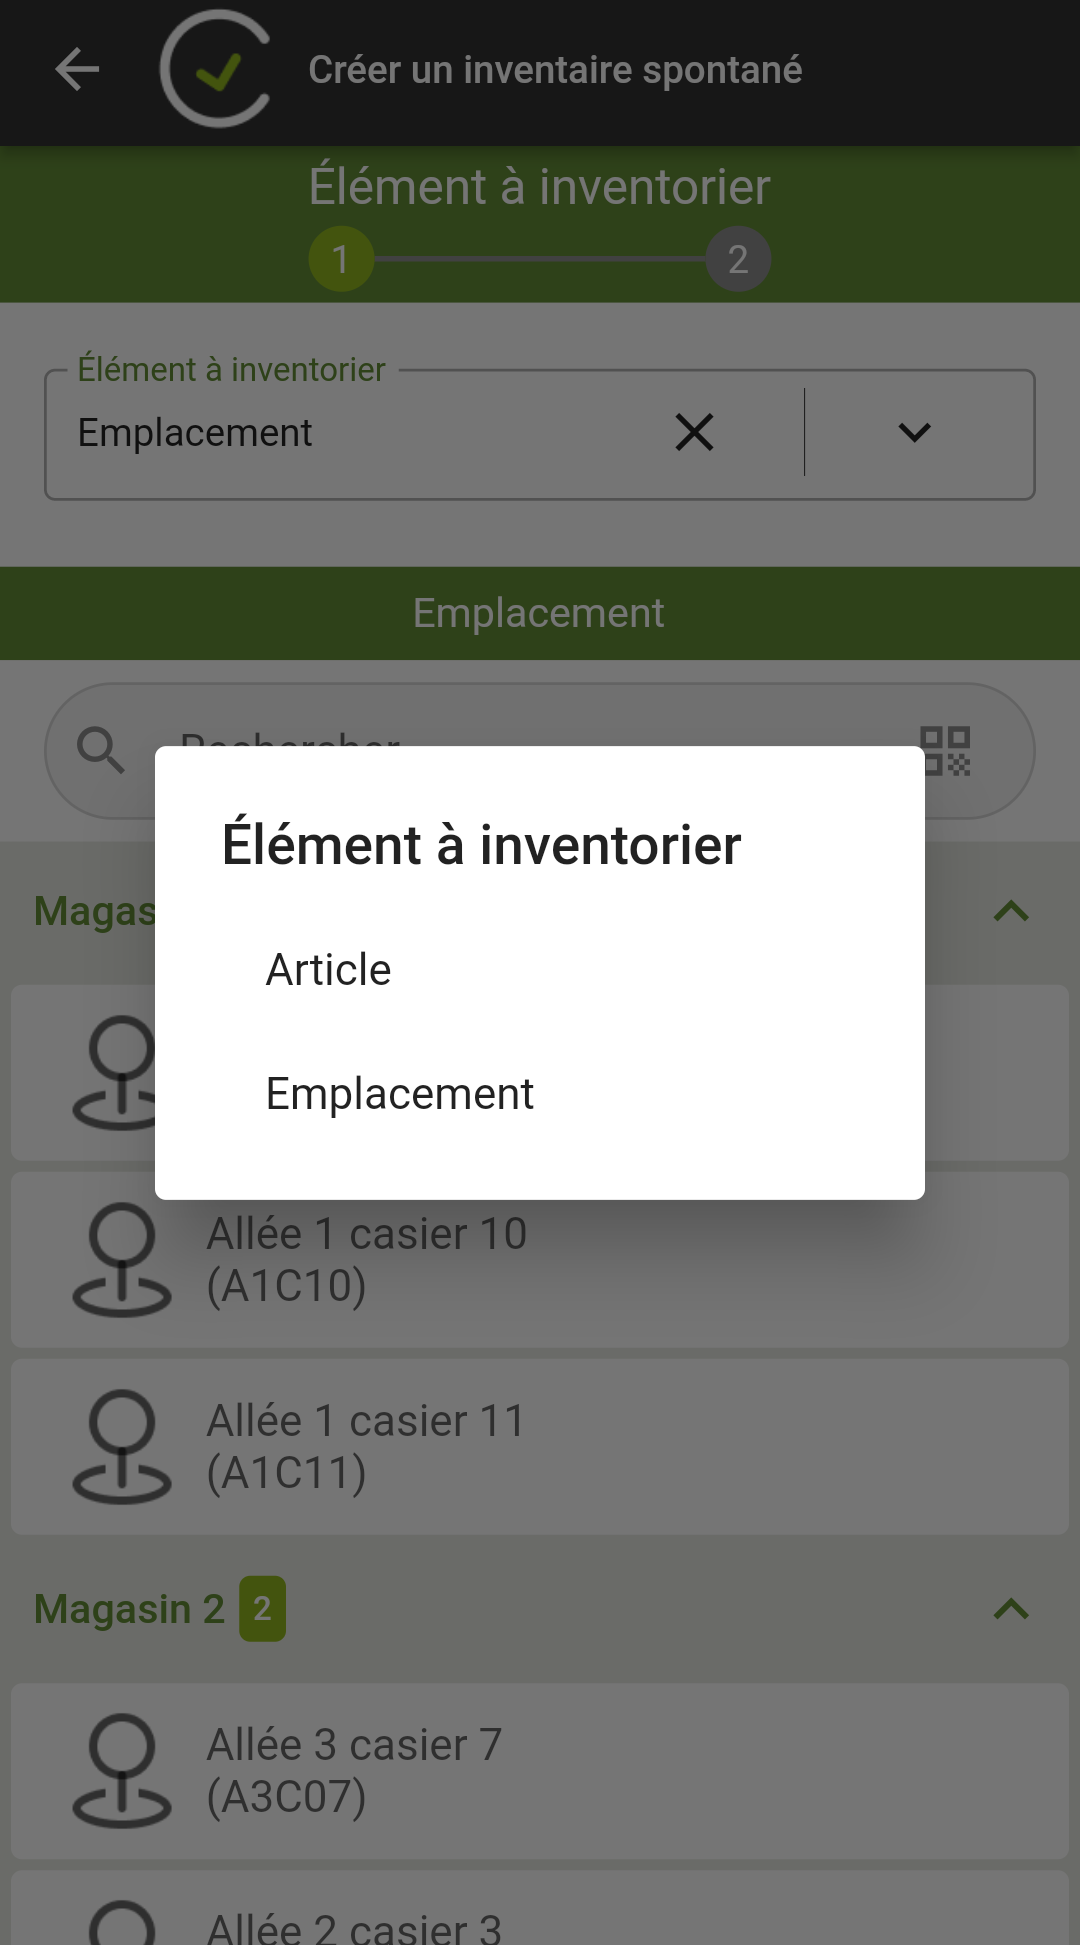
Users must select the inventory method to be implemented:
-
To inventory all locations for a given item, the «Item» option should be selected.
-
To inventory all items in a given location, the «Location» option should be selected.
21.3.1. Taking inventory by location
21.3.1.1. Presentation
This inventory method enables users to select a storage location and to take inventory of its entire contents, i.e. all the items stored in the selected location.
21.3.1.2. Selecting the location to be inventoried
Selecting the «Taking inventory by location» option displays the list of storage locations in each warehouse.
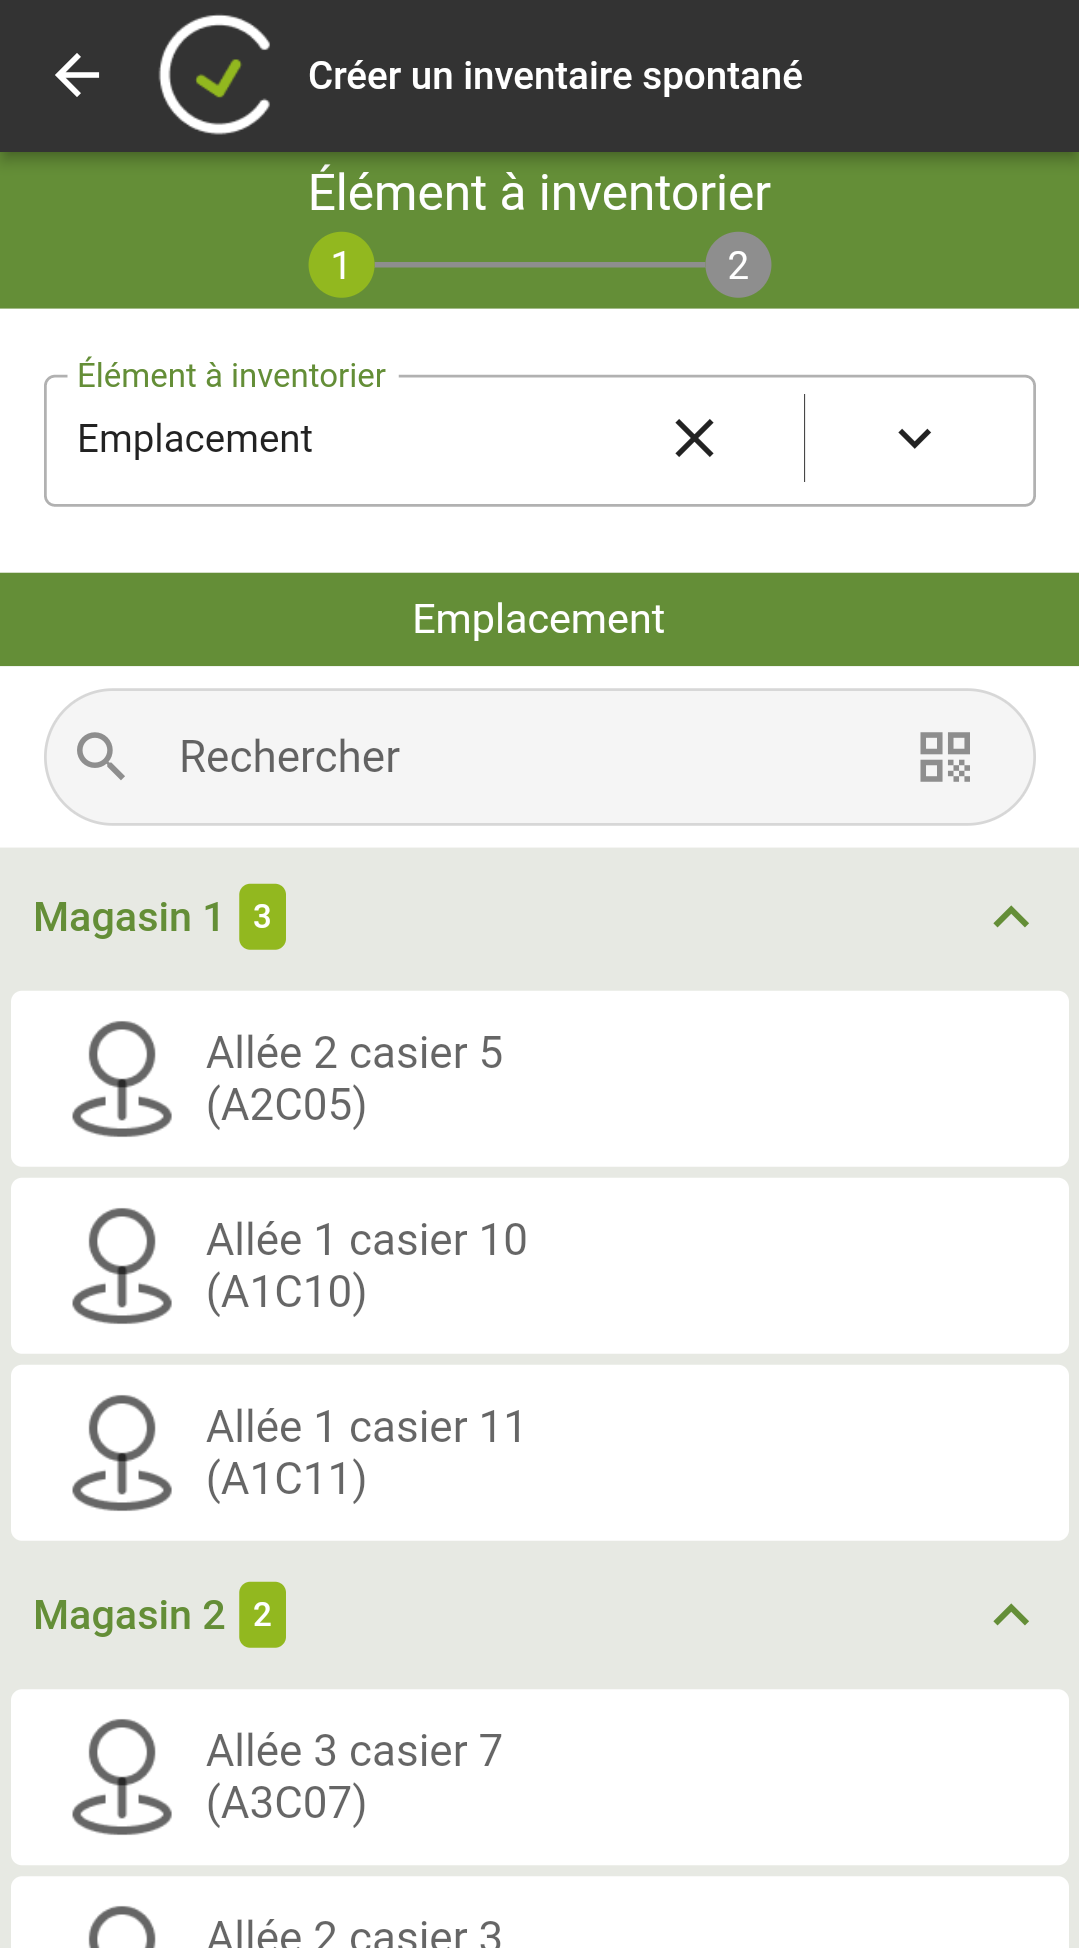
Users should select the storage location in the warehouse of their choice. The inventory will be carried out for the selected storage location.
21.3.1.3. Storage lines to be inventoried
Selecting the location serves to initialise the list of items to be inventoried in the previously selected location.
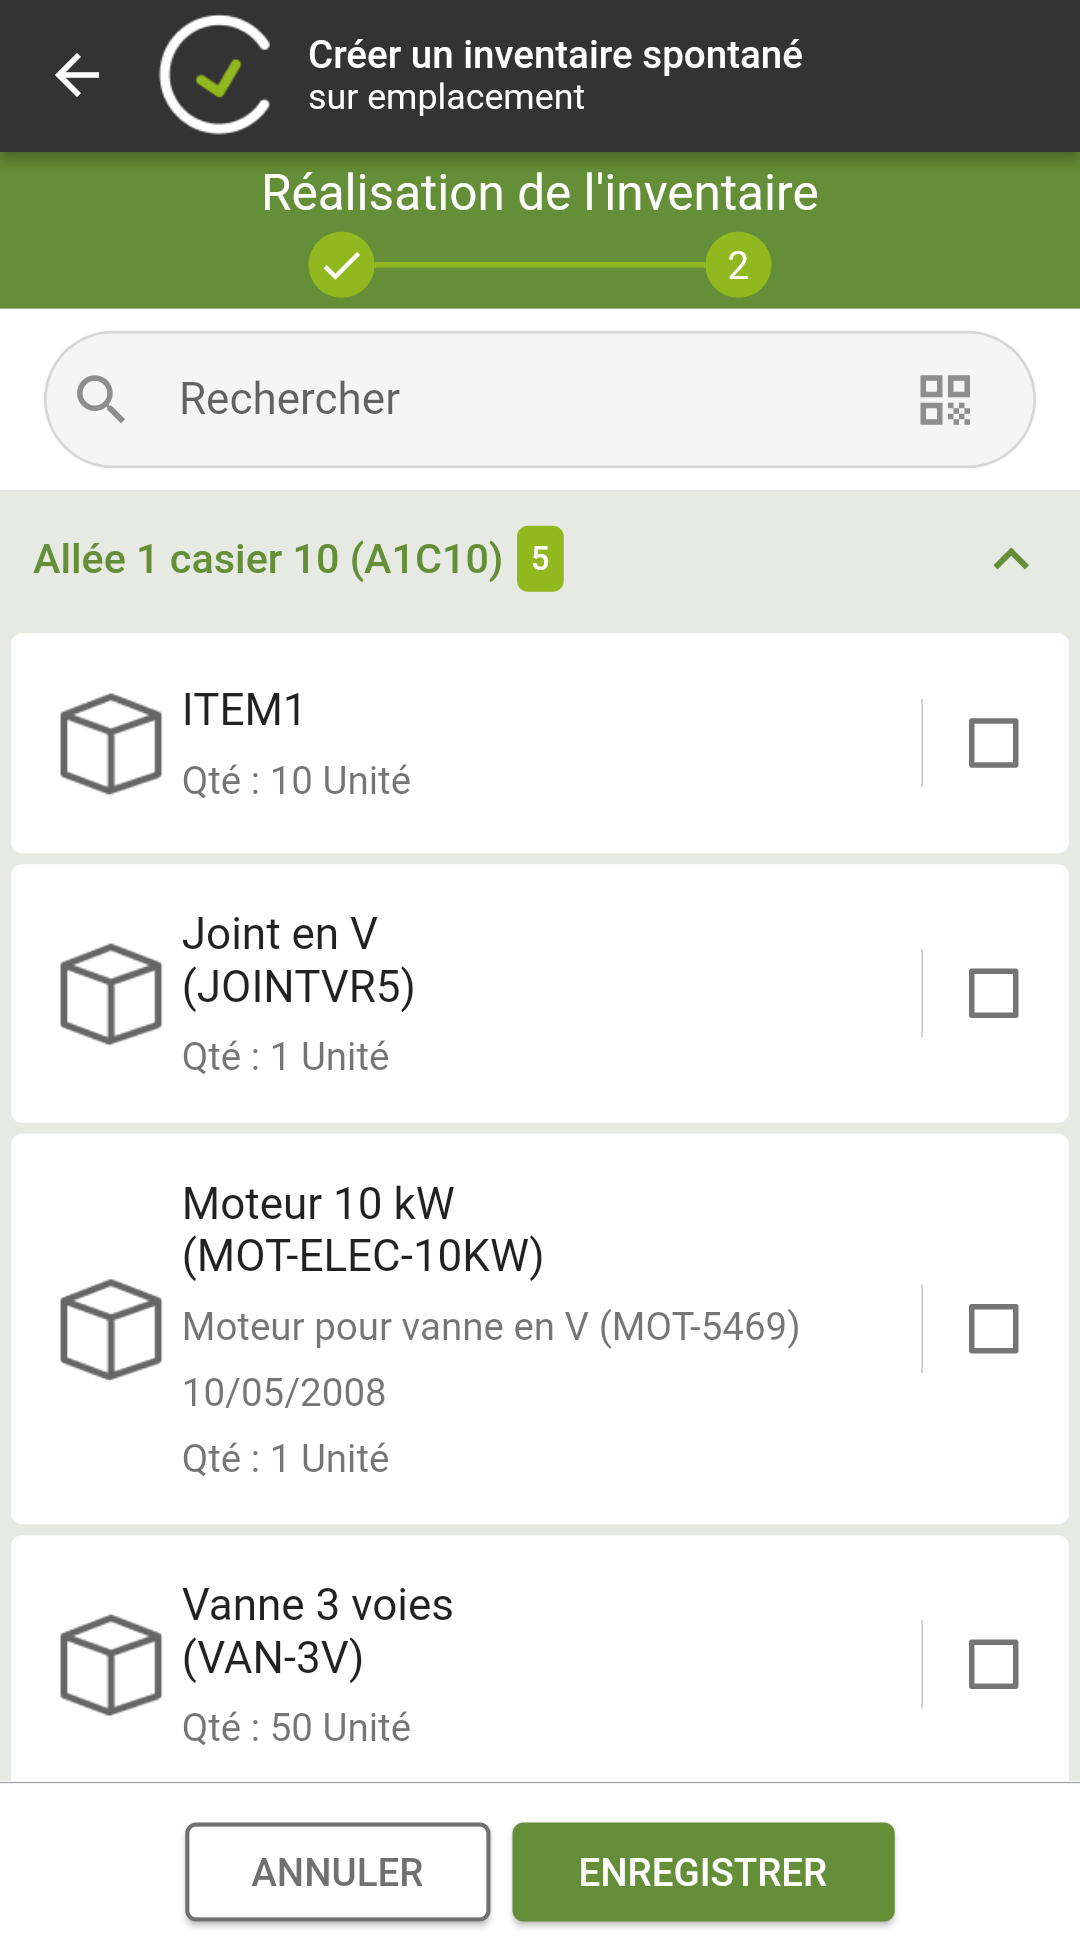
The data displayed on this list is as follows:
-
Name and code of the location of the item to be inventoried (grouping).
-
Name and code of the item to be inventoried.
-
Batch number of the item to be inventoried (only for batch-managed items).
-
Serial number, name, and code of the asset of the item to be inventoried (only for serialized items).
-
Use-by date (for batch-managed or serialized items).
-
Quantity in stock (before inventory).
|
|
The «Add an item» button enables users to take inventory of a new item in the previously selected location. |
21.3.2. Taking inventory by item
21.3.2.1. Presentation
This inventory method enables users to select a stored item and take inventory of it in each of its storage locations.
21.3.2.2. Selecting the item to be inventoried
Selecting the «Taking inventory by item» option displays the list of catalog items.
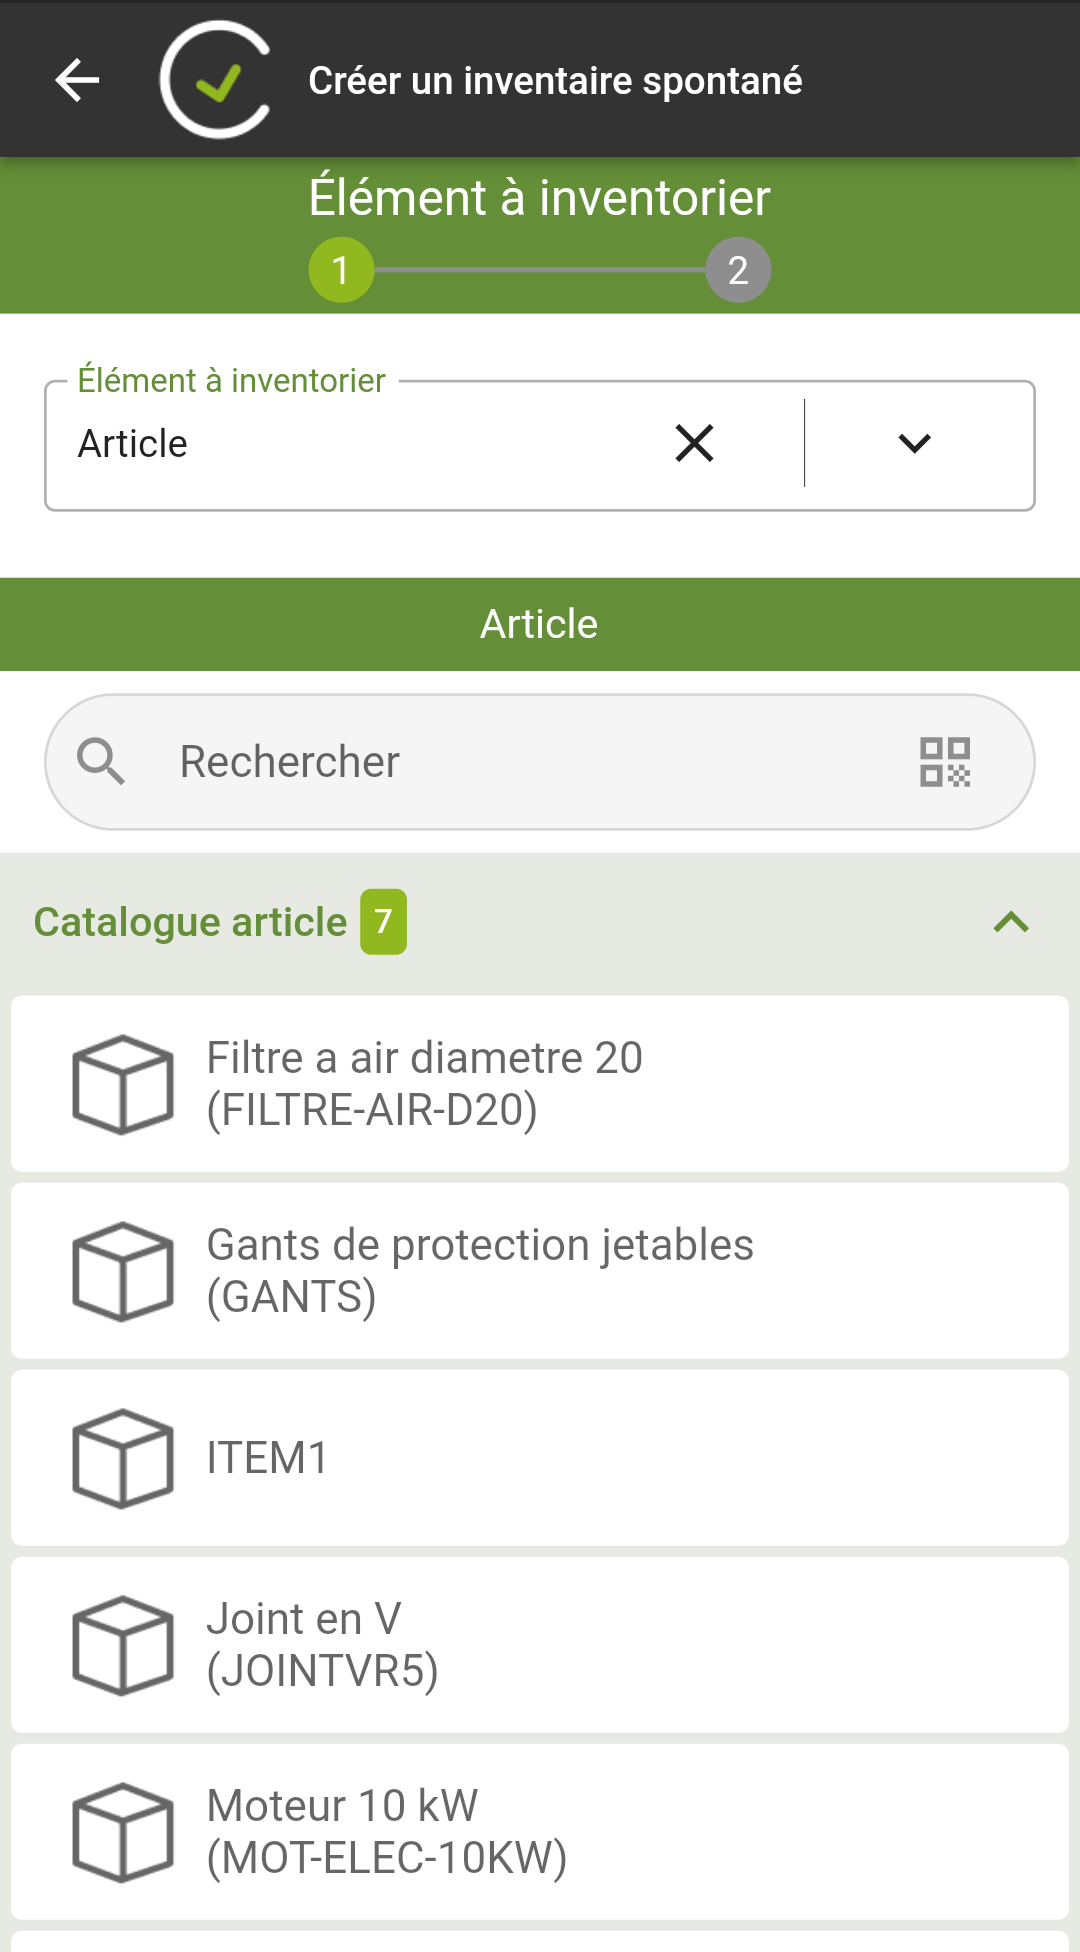
Users should select the storage location in the warehouse of their choice.
The inventory will be carried out for the selected storage location.
21.3.2.3. Storage lines to be inventoried
Selecting the item serves to initialise the list of locations for the item to be inventoried.
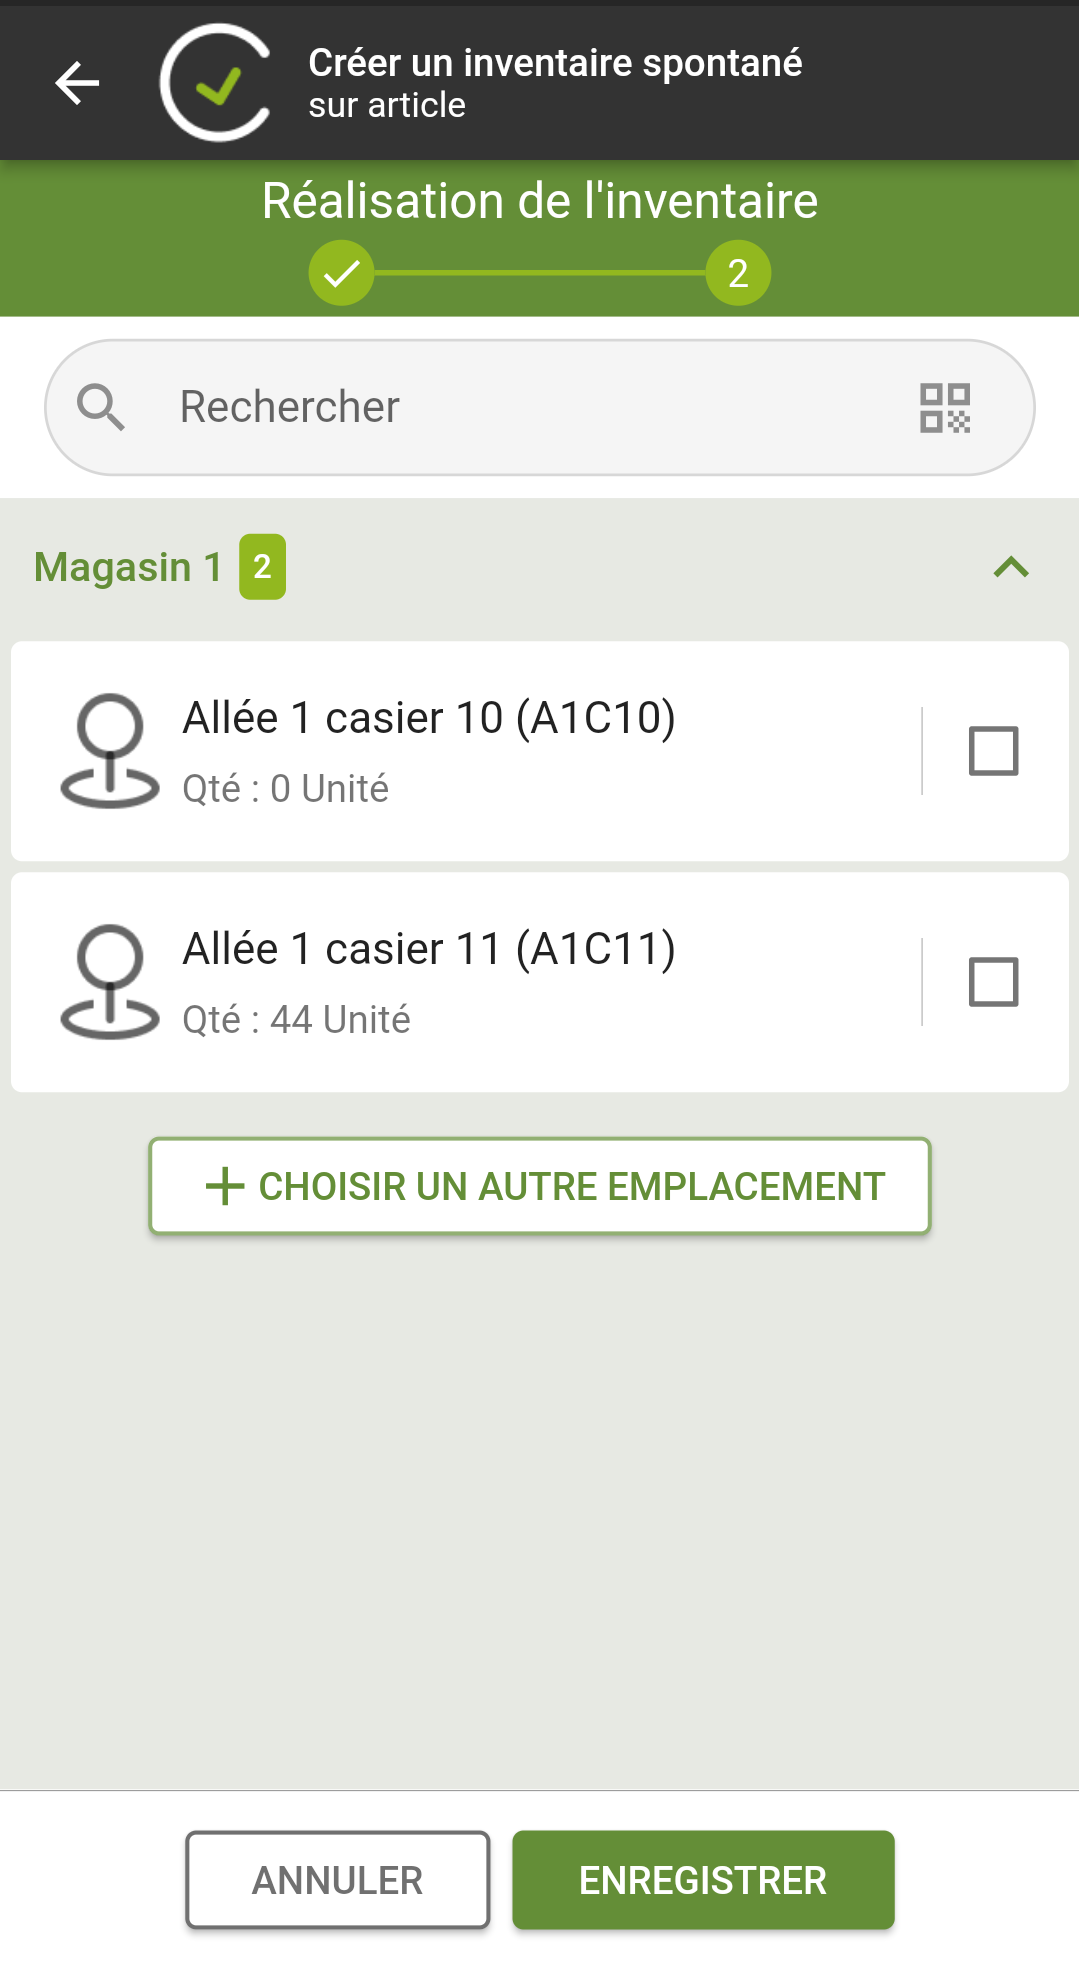
The data displayed on this list is as follows:
-
Name and code of the location of the item to be inventoried (grouping).
-
Name and code of the item to be inventoried.
-
Batch number of the item to be inventoried (only for batch-managed items).
-
Name and code of the asset for the item to be inventoried (only for serialized items).
-
Quantity in stock (before inventory).
21.4. Taking inventory
If the inventoried quantity is equal to the quantity in stock, the user can simply check the box to the right of the «Quantity» button.
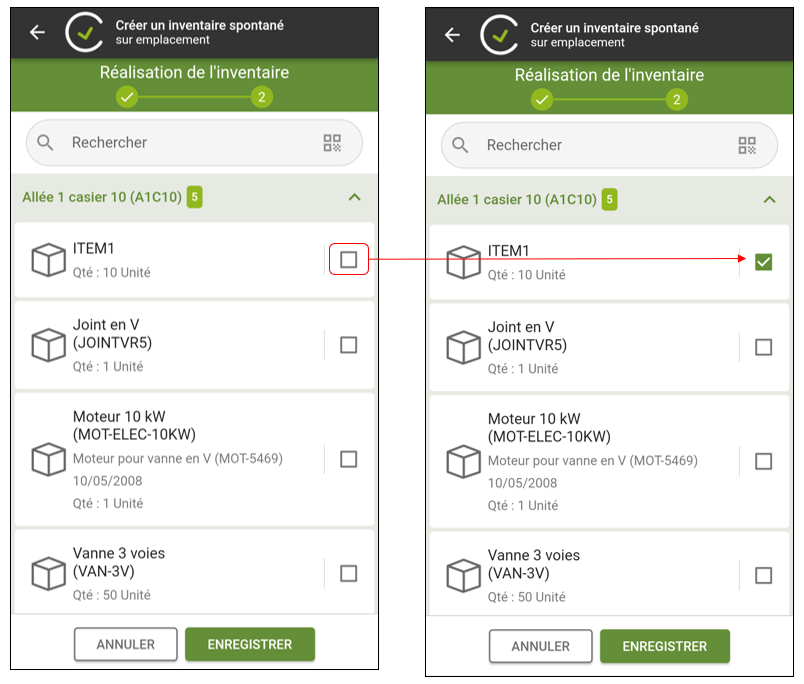
If the inventoried quantity differs from the quantity in stock, the user must access the details of the inventory line by selecting the «Quantity» button.
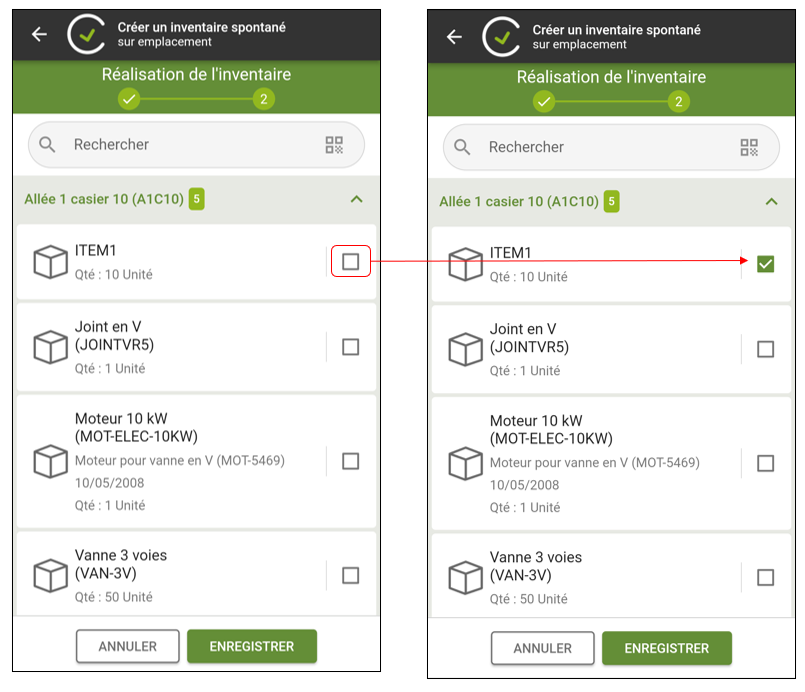
In the details of the inventory line, the following data is displayed:
-
Name and code of the item to be inventoried.
-
Name and code of the inventory warehouse.
-
Name and code of the inventory location.
-
Batch number (for batch-managed item).
-
Name and code of the asset (for serialized items).
-
Use-by date.
-
Expected quantity (quantity of the item in stock at this location).
-
Inventoried quantity (enter the inventoried quantity).
-
Inventory: «Inventory» stock movement (hidden if there is only one inventory movement).
-
Technician: Code of the technician carrying out the inventory (as default, that of the connected user).
-
Comment.
Actions available on the detail form
-
The Save button enables users to save the data entered in the inventory line details and to return to the list of inventory lines.
-
The Next button enables users to save the data entered in the inventory line details and to display the details of the following inventory line.
-
The Cancel button enables users to exit the inventory line without saving the data entered and to return to the list of detailed storage lines.
21.5. Finalizing the inventory
To finalise the inventory, users must Save the list of inventory lines.
Saving the inventory lines makes it possible to create as many inventory «movements» as there are inventory lines in this list.
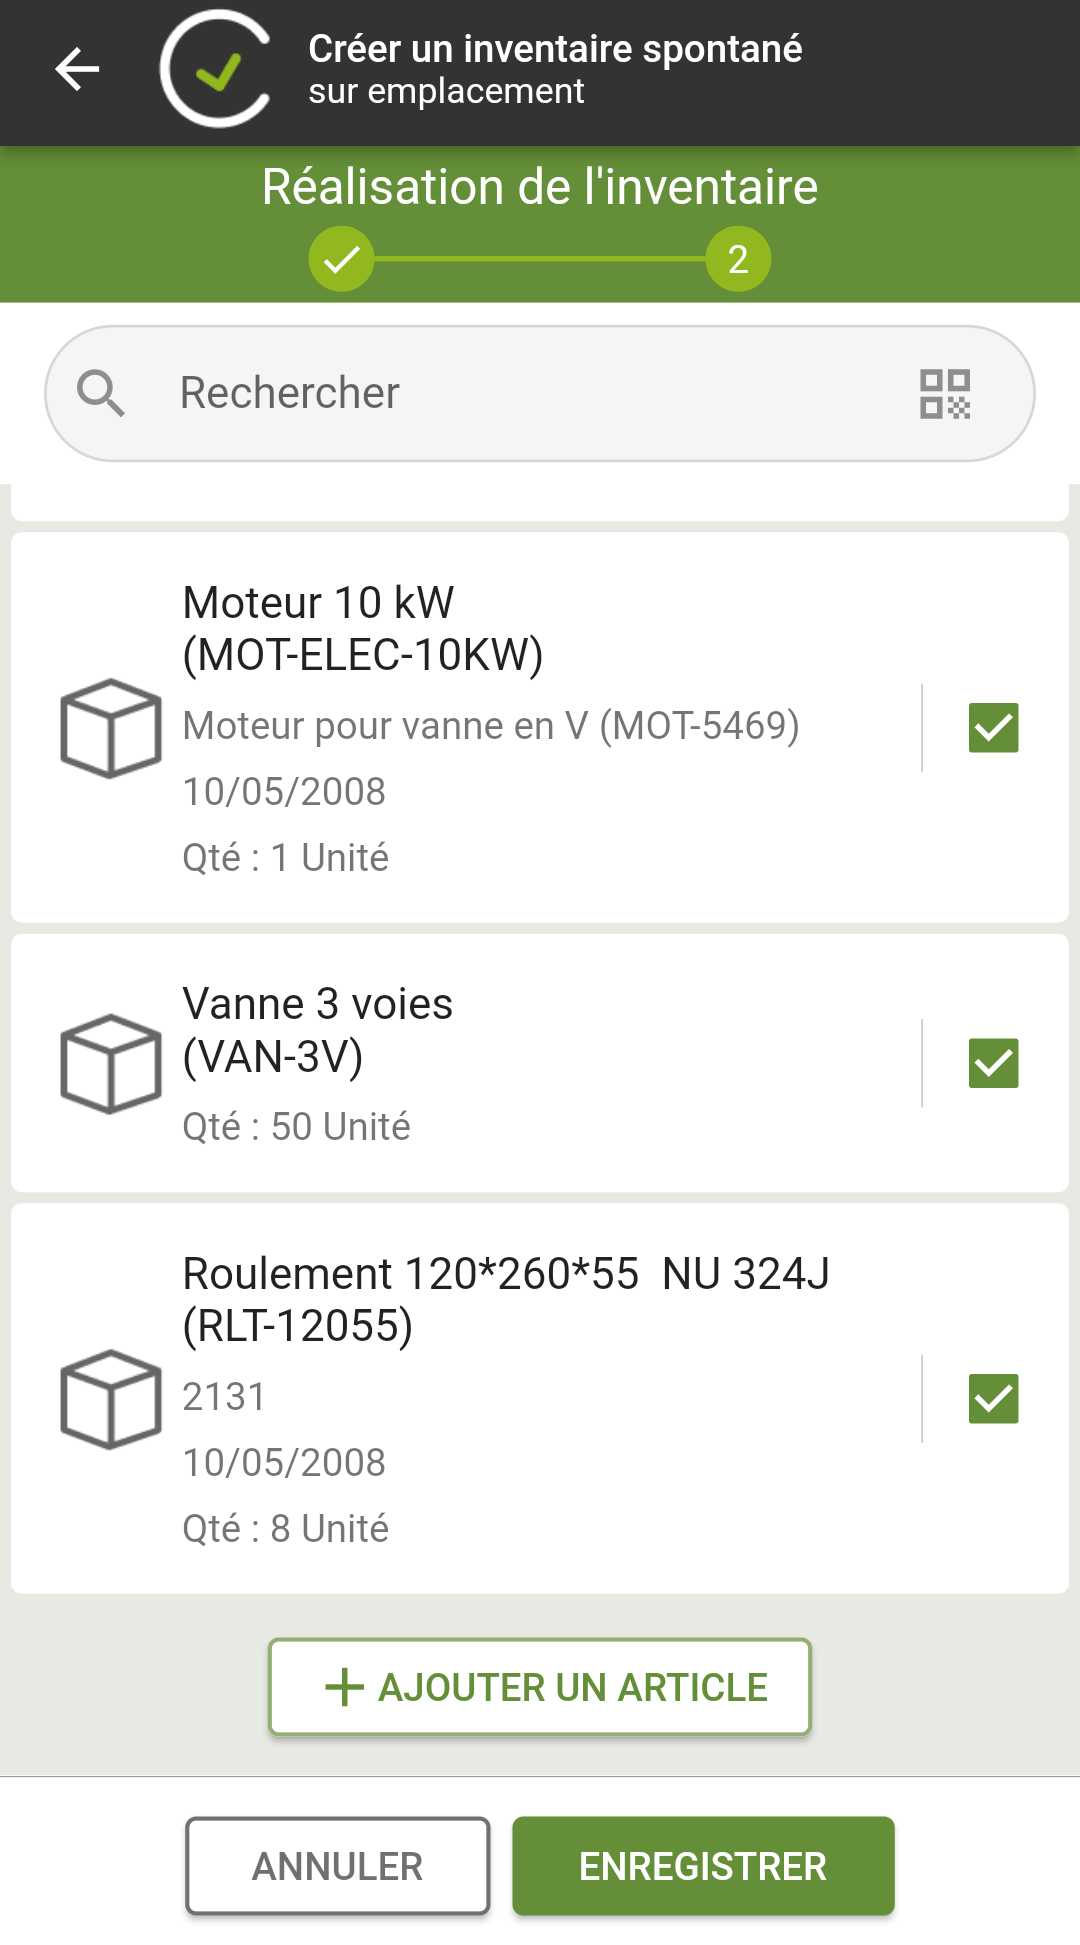
Once the inventory lines have been saved, the inventory movements are created and can be viewed in the «Stock movements» function of CARL Touch.
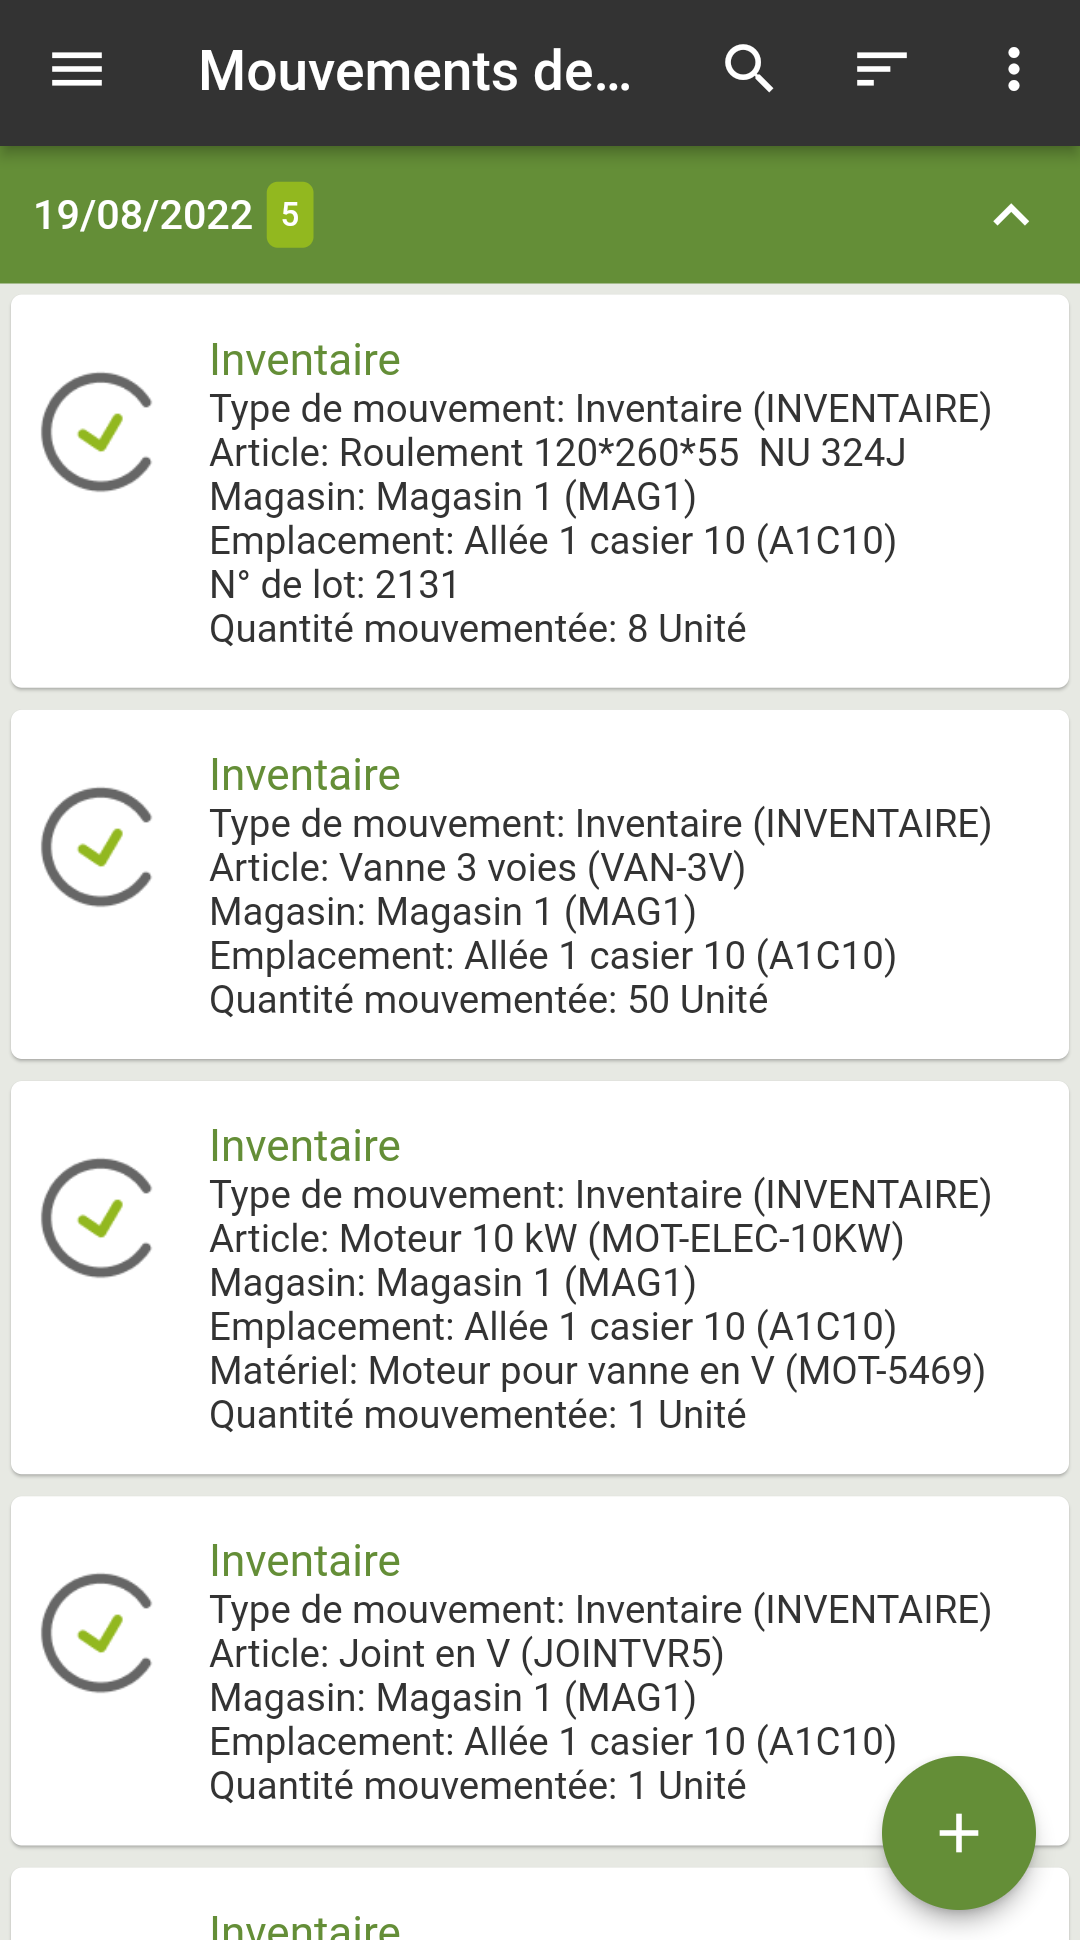
22. Prepared inventories function
22.1. Purpose
The «Prepared inventories» function of CARL Touch provides a comprehensive response to mobile users' requirements in terms of managing prepared inventories: access to information, performance of prepared inventories, allocation transfers, etc.
In order to provide a response to all requirements relating to prepared inventories, CARL Touch offers all the following forms:
List of prepared inventories – main form providing access to both: *
-
Prepared inventory details,
-
and the List of prepared inventory lines
-
enabling access to the details of a prepared inventory line.
-
… with each form providing access to its own specific actions and information.
* depending on the status of the prepared inventory – see rules below.
22.2. List of prepared inventories
The list of prepared inventories enables users to browse and view all prepared inventories that are either «unassigned», shared or assigned to the current user.
These prepared inventories must have been created beforehand in CARL Source (it is not possible to create a prepared inventory from CARL Touch) and appear on the mobile device under «Validated» status.
Depending on the context, selecting a prepared inventory from the list may redirect the user to one of two different forms:
-
If the prepared inventory has «New» or «Taken into account» status: CARL Touch displays the prepared inventory detail form (see Prepared inventory details).
-
Otherwise: CARL Touch displays the list of prepared inventory lines (see List of prepared inventory lines).
22.2.1. Meaning of icons
The following icons may be shown on the list of prepared inventories:
| Icon | Meaning | ||
|---|---|---|---|
|
New prepared inventory. |
||
|
Prepared inventory «Taken into account». |
||
|
Prepared inventory «Rejected». |
||
|
Prepared inventory «Started».
|
||
|
Prepared inventory «Paused». |
||
|
Prepared inventory «Finished». |
||
|
Prepared inventory «With conflict». |


22.2.2. Data displayed
For each prepared inventory on the prepared inventories list, CARL Touch displays the following data subject to availability (i.e. a line is displayed only if the associated data has been entered):
-
Name and code of the prepared inventory.
-
Name and code of the warehouse subject to the prepared inventory.
-
Scheduled performance date for the prepared inventory.
-
Inventory lines: counter of prepared inventory lines presented in the form of [Number of inventory lines already filled in]/[Total number of inventory lines]
|
|
If the prepared inventory relates to several warehouses, the wording "Multiple warehouses" or all codes for the warehouses concerned will be displayed in the Warehouse name and code area (depending on the available space). |
|
|
If the prepared inventory is shared, the following icon is displayed: |

22.2.3. Actions
CARL Touch proposes general actions on the list of prepared inventories form.
|
|
If the available actions for a form cannot all be shown directly on the action bar, additional actions are accessible via the button: |
Actions available on the list of prepared inventories form
| Button | Button action |
|---|---|
|
Search within the list of prepared inventories. |
|
Sort prepared inventories. |

22.2.4. List of prepared inventories tabs
As default, there are no tabs on the list of prepared inventories: the display shows the list of prepared inventories that are «unassigned» or assigned to the user. However, depending on the context, up to three tabs may be displayed:
-
«MY IN-PROGRESS ITEMS» tab: this tab is shown only if another tab («MY HISTORY» or «CONFLICTS») is displayed. The display shows the list of prepared inventories that are «unassigned» or assigned to the user.
-
«MY HISTORY» tab: this tab contains the prepared inventories that have been «Completed» or «Rejected» by the user.
-
«CONFLICTS» tab: this tab contains the prepared inventories for which a conflict has been detected.
|
|
The conflict display mechanism is described in section Managing conflicts. |
22.3. Prepared inventory details
22.3.1. Presentation
The prepared inventory detail form provides quick, structured access to the information comprising a prepared inventory, and enables these fields to be changed if necessary.
22.3.2. Access
The prepared inventory detail form is accessible:
-
from the list of prepared inventories (by selecting a prepared inventory with «New» or «Taken into account» status),
-
from the list of prepared inventory lines (by returning to the previous screen).
22.3.3. Data displayed
|
|
The data listed below corresponds to the structure of the «standard» form. CARL Touch forms are customizable, implying that the form structure may be different in your context. |
The prepared inventory detail form contains the following:
«General» block
-
Issued by: agent who created the prepared inventory.
-
Scheduled performance: scheduled performance date for the prepared inventory.
-
Assigned to: agent appointed to perform the prepared inventory.
-
Note number for the prepared inventory.
«Performance» block
-
Warehouse: name and code of the storage warehouse affected by the prepared inventory.
-
Person in charge of the prepared inventory.
-
Organization of the prepared inventory.
-
Comment associated with the prepared inventory.
-
Performance comment associated with the prepared inventory.
|
|
If the prepared inventory relates to several warehouses, the wording «Multiple warehouses» or all codes for the warehouses concerned will be displayed in the Warehouse area (depending on the available space). |
|
|
The |
«Inventory lines» block
-
Line(s) remaining to be inventoried: number of prepared inventory lines whose « Inventoried quantity » is still to be completed.
-
[x] Location(s) of [y] – Indicators relating to locations, where:
-
[x]: is the number of locations remaining to be checked (i.e. locations for which there is still at least one prepared inventory line to be completed).
-
[y]: is the total number of locations to be checked.
-
|
|
The |
«Documents» block
-
Number of documents relating to the prepared inventory.
|
|
The Further details about document management are given in section Managing linked documents. |
22.3.4. Actions
CARL Touch proposes general actions on the prepared inventory detail form, as well as actions specific to a prepared inventory.
|
|
If the available actions for a form cannot all be shown directly on the action bar, additional actions are accessible via the button: |
Actions available on the prepared inventory detail form
As the actions located at the bottom of the screen are common to those on another form, they are described in section Available actions.
22.4. List of prepared inventory lines
22.4.1. Presentation
The list of prepared inventory lines enables users to browse the prepared inventory lines and to perform this inventory by entering the quantity inventoried as being physically in stock for each line.
22.4.2. Access
The list of prepared inventory lines is accessible:
-
From the « Inventory lines» block of the prepared inventory detail form,
-
From the list of prepared inventories (by selecting a prepared inventory with «Started» or «Paused» status).
22.4.3. Data displayed
For each prepared inventory line on the list of prepared inventory lines, CARL Touch displays the following data subject to availability (i.e. information is displayed only if the associated data has been entered):
-
Item: name and code of the item to be inventoried.
-
Warehouse: name and code of the warehouse affected by the prepared inventory line.
-
Batch: batch number (for a batch-managed item).
-
Asset: name and code of the asset.
-
Serial number of the asset of the item to be inventoried (only for serialized items).
-
Use-by date (for a batch-managed or serialized item).
In addition to this data, the two buttons described below are also displayed.
22.4.4. «Quantity» and «Check» buttons, and performance dynamic
The "Quantity" and "Check" buttons play a central role in carrying out a prepared inventory: they signify the checking of each prepared inventory line.
22.4.4.1. Function of the «Quantity» button
-
As default, this button displays the «expected» quantity in stock in the inventoried location (information originates from CARL Source).
-
This button is clickable only if the current prepared inventory is « Started ».
-
A single click on the button displays the detail form for a prepared inventory line and enables the data to be changed (see Details of a prepared inventory line).
If the user manually changes the contents of the « Quantity inventoried » field of the detail form for the prepared inventory line and confirms the change:
-
CARL Touch returns to the list of prepared inventory lines,
-
The quantity entered by the user is displayed on the « Quantity » button of the prepared inventory line.
-
The
«Check» button icon for the line turns green, indicating that the line has been checked (see details below).
22.4.4.2. Function of the «Check» button
-
This button is clickable only if the current prepared inventory is « Started ».
-
The icon associated with this button is used to visually determine whether the «Quantity inventoried» has already been checked/entered for the current prepared inventory line:
-
If the «Quantity inventoried» has not yet been checked:
icon (grey). -
If the «Quantity inventoried» has been checked:
icon (green).
-
-
During the performance of the prepared inventory:
-
As default, this button appears with a
icon (grey). -
If the quantity found by the user to be physically in stock corresponds to the «expected» quantity as per CARL Touch, the user can click directly on the
button:-
CARL Touch then automatically initialises the « Quantity inventoried » value using the « Expected quantity ».
-
The « Check » button turns green
, -
and the line is considered to have been checked.
-
-
Conversely, the user can invalidate a checked line by clicking on the
button:-
CARL Touch automatically reinitialises the « Quantity inventoried » to [zero].
-
CARL Touch again displays the "Expected Qty" on the "Quantity" button (reminder: The this information originates from CARL Source),
-
The « Check » button turns grey again
. -
And the line is no longer considered to have been checked.
-
-
22.4.4.3. Performance help: adapting grouping blocks
Once all prepared inventory lines contained within a grouping block have been checked/inventoried (i.e. when all these lines have been ticked ), the grouping block collapses automatically and turns grey.
|
|
This mechanism results in a clearer display and it is therefore easier for users to see the work remaining to be completed. |
If the prepared inventory lines are sorted by location, this «collapse block» mechanism enables users to see at a glance that the work for one location is complete and that they can move on to another location.
|
|
The sort and grouping blocks mechanism is described in section Sort criteria and grouping blocks. |
22.4.5. Actions
CARL Touch proposes general actions on the detail form for prepared inventory lines, as well as actions specific to a prepared inventory line.
|
|
If the available actions for a form cannot all be shown directly on the action bar, additional actions are accessible via the button: |
Actions available on the list of prepared inventory lines form (action bar)
| Button | Button action |
|---|---|
|
Sort prepared inventory lines. |
|
Scan via RFID tag. |
Context-sensitive actions available on a prepared inventory line
The context-sensitive actions associated with a prepared inventory line are accessible via the button located to the right of the prepared inventory line.
| Button | Button action |
|---|---|
Add a batch |
Used to add a batch (for batch-managed items). |
Add an asset |
Used to add an asset (for a serialized item). |
Actions available on the list of prepared inventory lines form
As the actions located at the bottom of the screen are common to those on another form, they are described in section Available actions.
22.4.6. A closer look: Adding a batch (for a batch-managed item)
The « Add a batch» action is one of the context-sensitive actions available for a prepared inventory line, if the line relates to batch-managed items – see Actions.
This action is useful in the following scenario:
A user performs the inventory for a prepared inventory line relating to batch-managed items. During this operation, if the user observes:
-
that the batch number of the inventoried item does not feature on the list of inventory lines,
-
OR that this batch number differs from the batch number indicated on the prepared inventory line for the «Warehouse/Location/Item» combination checked,
… then they must declare the new batch number via CARL Touch.
-
The context-sensitive « Add a batch » action enables the user to enter this batch number.
Selecting this action opens the detail form of the inventory line (see Details of a prepared inventory line) and enables the user to enter:
-
A batch number.
-
A quantity inventoried.
-
A use-by date.
-
And any comments.
Once the user has confirmed the data entered (and on completion of several checks), CARL Touch records the new prepared inventory line and adds it to the list of prepared inventory lines.
If necessary, the user can change their mind and decide to delete the newly added line – see A closer look: Deletion of a prepared inventory line.
22.4.7. A closer look: Adding an asset (for a serialized item)
The « Add an asset » action is one of the context-sensitive actions available for a prepared inventory line, if the line relates to a serialized item – see Actions.
This action is useful in the following scenario:
A user performs the inventory for a prepared inventory line relating to a serialized item. During this operation, if the user observes:
-
that the asset inventoried does not feature on the list of inventory lines,
-
OR that this asset code differs from the asset code indicated on the prepared inventory line for the «Warehouse/Location/Item» combination checked,
… then they must declare the new asset via CARL Touch.
-
The context-sensitive « Add an asset » action enables the user to declare this asset code.
Selecting this action opens the detail form of the inventory line (see Details of a prepared inventory line) and enables the user to enter:
-
An asset (via the "Asset" button),
-
A use-by date.
-
And any comments.
Once the user has confirmed the data entered (and on completion of several checks), CARL Touch records the new prepared inventory line and adds it to the list of prepared inventory lines.
If necessary, the user can change their mind and decide to delete the newly added line – see A closer look: Deletion of a prepared inventory line.
22.4.7.1. Focus: RFID Last inventory
By clicking the RFID scan button, the user initiates bulk last inventory via RFID.
The user can then scan the RFID tags with the reader. With each scan, the status of the scanned asset automatically turns green and is displayed at the top of the list.
22.4.7.2. A closer look: Deletion of a prepared inventory line
If necessary, the user can delete a prepared inventory line added previously via the « Add a batch » or « Add an asset » action (see A closer look: Adding a batch (for a batch-managed item) and A closer look: Adding an asset (for a serialized item)).
To do so, simply slide to the left the prepared inventory line previously added and select the icon: CARL Touch proposes to delete the line and requests confirmation.
If the user confirms the deletion: the prepared inventory line is deleted.
22.5. Details of a prepared inventory line
22.5.1. Presentation
The prepared inventory detail form provides quick, structured access to the information comprising a prepared inventory line, and enables these fields to be changed if necessary.
22.5.2. Access
The detail form for a prepared inventory line is accessible from the list of prepared inventory lines, and only for a prepared inventory with « Started » status:
-
From the «Quantity» button of a prepared inventory line (see Function of the «Quantity» button),
-
From the «Add a batch» action (see A closer look: Adding a batch (for a batch-managed item)).
-
From the «Add an asset» action (see A closer look: Adding an asset (for a serialized item)).
22.5.3. Data displayed
|
|
The data listed below corresponds to the structure of the «standard» form. CARL Touch forms are customizable, implying that the form structure may be different in your context. |
The prepared inventory line detail form contains the following:
-
Item: name and code of the item to be inventoried.
-
Warehouse: name and code of the warehouse affected by the prepared inventory line.
-
Location: name and code of the location affected by the prepared inventory line.
-
Batch *: batch number.
-
Asset *: name and code of the asset.
-
Expiration *: use-by date.
-
Expected quantity: «expected» quantity in stock at the inventoried location.
-
Qty recorded: quantity actually found to be in stock at the inventoried location.
-
«Copy quantity» button
 : automatically copies the value in the « Expected quantity » field to the « Quantity inventoried » field.
 -
Agent affected by the stock movement.
-
Comment associated with the prepared inventory line.
|
|
|
|
|
* This data can be entered only in the event of «Add a batch» (see A closer look: Adding an asset (for a serialized item)) or «Add an asset» (see A closer look: Adding an asset (for a serialized item)) actions. |
22.5.4. Actions
CARL Touch proposes general actions on the detail form for prepared inventory lines, as well as actions specific to the fields of a prepared inventory line.
Actions available on the prepared inventory line detail form
The actions below are shown at the bottom of the screen when the prepared inventory line detail form is displayed:
| Button | Button action | ||
|---|---|---|---|
|
Cancel the data entered. |
||
|
Save the data entered. |
||
|
Save the data entered and immediately continue with the detailed information of the following prepared inventory line (without having to return to the list of prepared inventory lines).
|
22.6. Available actions
The actions below are located at the bottom of the screen and are available:
-
for the detail form of an unshared prepared inventory,
-
and for the list of lines of an unshared prepared inventory.
| Button | Name | Button action | ||
|---|---|---|---|---|
|
«I accept» |
The prepared inventory is «Taken into account» by the user.
|
||
|
«Reject» |
The prepared inventory is «Rejected» by the user.
|
||
|
«Start» |
The prepared inventory is «Started».
|
||
|
«Pause» |
The prepared inventory is «Paused».
|
||
|
«Transfer» |
The prepared inventory is transferred to another user.
|
||
|
«Finish» |
The prepared inventory is «Finished».
|
The actions below are located at the bottom of the screen and are available:
-
for the detail form of an unshared prepared inventory,
-
and for the list of lines of a shared prepared inventory.
| Button | Name | Button action | ||
|---|---|---|---|---|
|
«Start» |
The prepared inventory is «Started».
|
||
|
«Pause» |
The prepared inventory is «Paused».
|
||
|
«Transfer» |
The prepared inventory is transferred to another user.
|
||
|
«Finish» |
The prepared inventory is «Finished».
|
22.7. Rules for distributing prepared inventories between users
When a new prepared inventory is created in CARL Source, it is distributed to CARL Touch users. The following rules determine which user(s) receive the new prepared inventory on their mobile device:
When a new prepared inventory is created in CARL Source, it is dispatched in the following order of priority:
-
To the « mobility » agent specified in the « Assigned to » field of the prepared inventory.
OR if not (i.e. if there are no «mobility» agents entered in the «Assigned to» field of the prepared inventory):
-
to the «mobility» agent entered in the «Scheduled assignments» table of the prepared inventory.
OR if not (i.e. if there are no «mobility» agents entered in the «Scheduled assignments» table of the prepared inventory):
-
to all "mobility" actors if the "Assigned to all" checkbox of the prepared inventory is checked
OR if not (i.e. if the «Assigned to all» checkbox of the prepared inventory is not checked):
-
To the « mobility » agent entered in the « Person in charge » field of the prepared inventory.
OR if not (i.e. if no «mobility» agent is specified in the «Assigned to» field of the prepared inventory and no mobility manager is specified):
-
To « mobility » agents whose manager is the «non-mobile» agent in charge of the prepared inventory.
OR if not (i.e. if none of the above conditions can be met):
-
To all « mobility » agents whose profile authorizes the transmission of non-assigned prepared inventories. *
* A «mobility» agent is an agent that is linked to a user and for which the «Mobility» box is checked. We assume here that each user has at least the right to change the prepared inventory.
22.8. Usage case – Creating a prepared inventory
A prepared inventory is created in several steps, as described below:
1. The CARL Touch user receives prepared inventories that have been assigned to him or that have not been assigned to anyone.
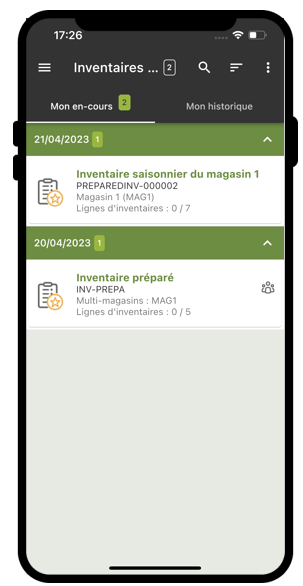
2. The user accesses the details of the prepared inventory to view the content. For an unshared prepared inventory, the user can then accept or reject the prepared inventory by selecting the «I accept» or «Reject» actions.
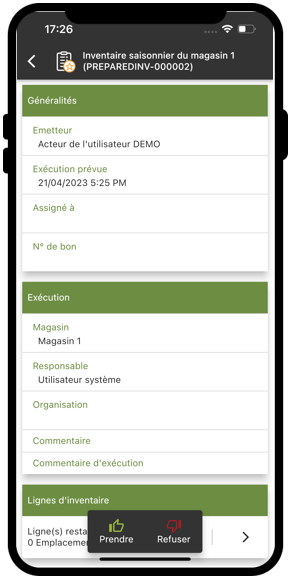
3. When the user takes the unshared prepared inventory into account, the inventory is assigned to the user and it is no longer shown on the list for other CARL Touch users. If the prepared inventory is shared, it always appears in the list of other users.
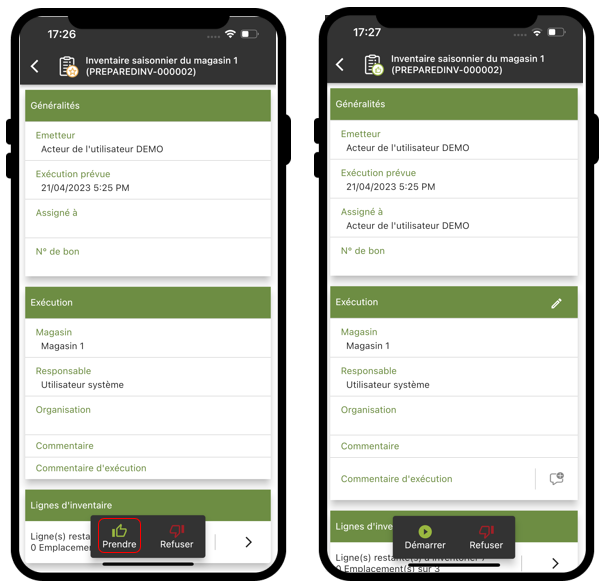
4. When the user is ready to take inventory of the first item, they must select « start ». CARL Touch automatically opens the list of prepared inventory lines remaining to be inventoried.
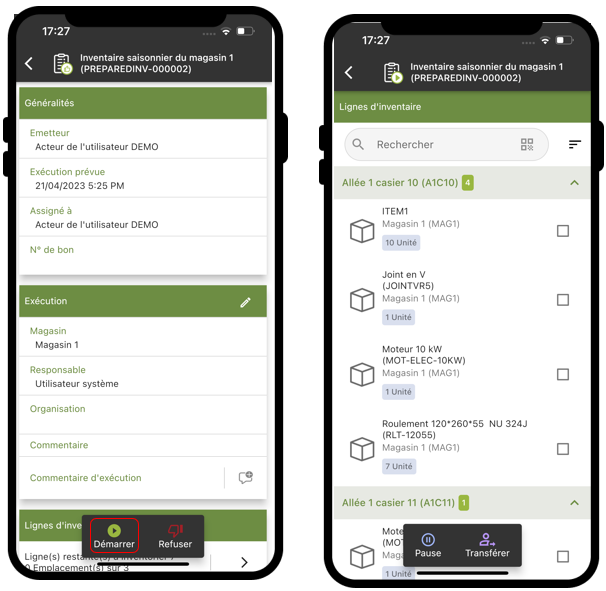
The inventory lines are grouped by storage location.
5. The user starts to take inventory of each prepared inventory line.
If the quantity inventoried is equal to the quantity in stock proposed in italics on the «Quantity» button, the user can simply tick the line.
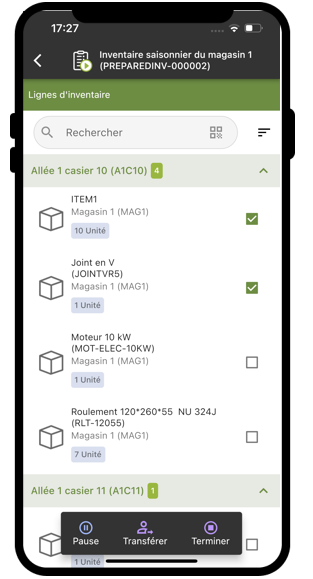
If the quantity inventoried differs from the quantity in stock proposed in italics on the «Quantity» button, the user must access the details of the inventory line.
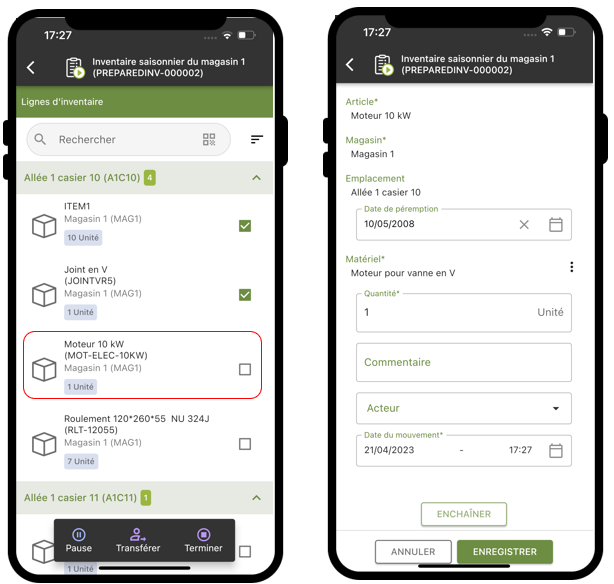
In the prepared inventory detail form, the user can complete the «Quantity inventoried» field.
From this inventory line detail screen, the user can choose from the following three actions:
-
"Save": This action saves the data entered for the inventory line, closes the inventory line detail form, and redisplays the list of inventory lines.
-
"Next »: This action saves the data entered for the inventory line and displays the detail form for the next inventory line.
-
"Cancel »: This action, which requires confirmation, enables the user to return to the list of inventory lines without saving the data entered.
6. The user can pause the prepared inventory by specifying a reason for pausing (option defined in the user profile).
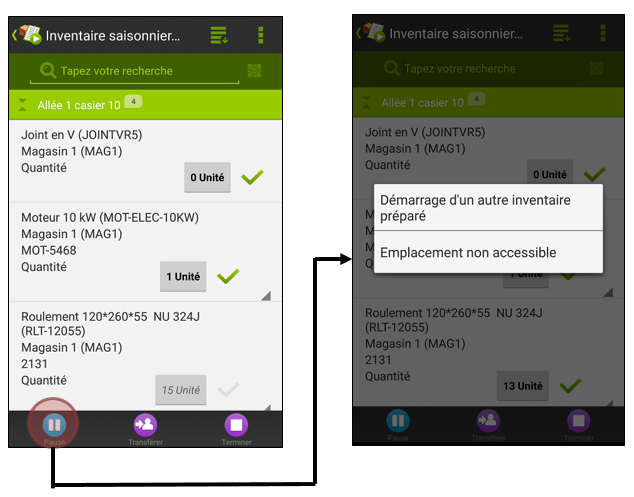
7. The user can transfer the prepared inventory to another user. To do so, the « Transfer » action must be selected.
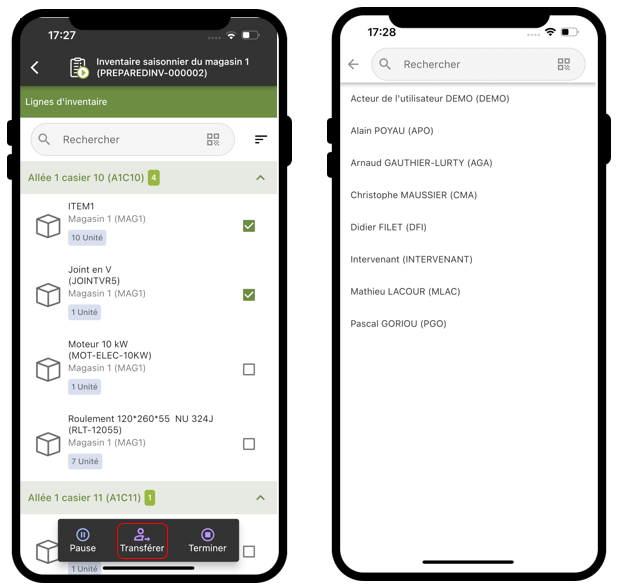
8. The user completes the prepared inventory by selecting the "Finish" action. The «Finish» action is available even if some prepared inventory lines have not been checked.
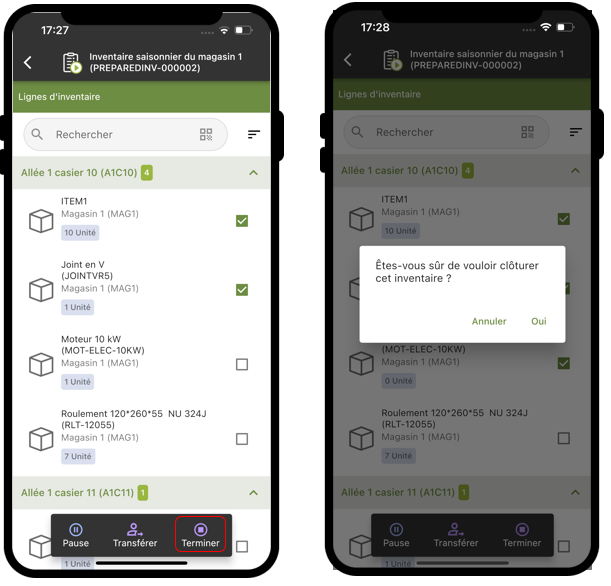
This action closes the unshared prepared inventory. Shared prepared inventories are not closed in CARL Touch. This action will be performed in CARL Source.
The terminated inventory is displayed in the "My History" tab.
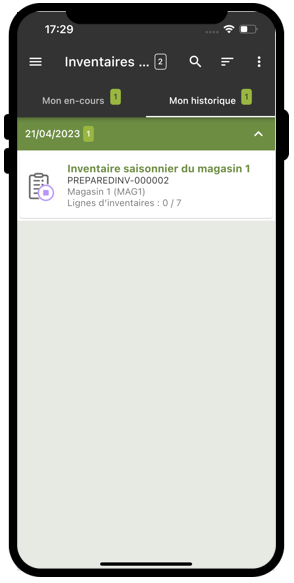
23. Receiving function
23.1. Purpose
The "Receiving" function is used to manage receiving and purchase entries from CARL Touch.
23.2. List of delivery notes
This screen displays the list of delivery notes generated from the mobile terminal since the last synchronization.
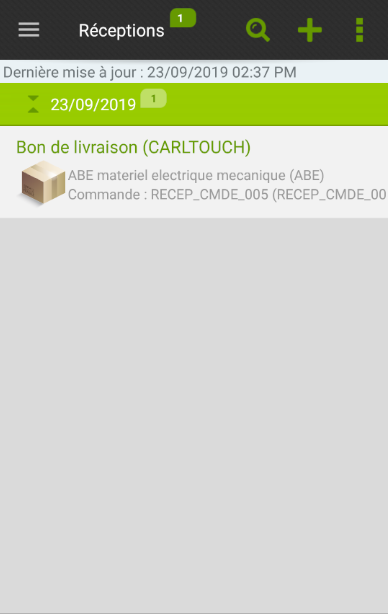
23.2.1. Data displayed
For each delivery note, CARL Touch displays the following data subject to availability (i.e. a line is displayed only if the associated data has been entered):
-
Delivery note number.
-
Name and code of the supplier associated with the delivery note.
-
Order code or PR or WR associated wit the delivery note.
23.2.2. Actions
CARL Touch proposes general actions on the form for the list of delivery notes.
Actions available on the form for the list of delivery notes
| Button | Button action |
|---|---|
|
Search within the list of delivery notes. |
|
Creation of a delivery note |
23.2.3. Tabs of the list of delivery notes
As default, there are no tabs on the list of delivery notes: it displays the list of current delivery notes. However, depending on the context, up to two tabs may be displayed:
-
«MY IN-PROGRESS ITEMS» tab: This tab is shown only if another tab is displayed. It contains the list of current delivery notes.
-
«CONFLICTS» tab: this tab contains the delivery notes for which a conflict has been detected.
|
|
The conflict display mechanism is described in section Managing conflicts. |
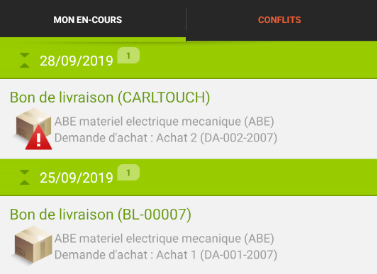
23.3. Details of a delivery note
23.3.1. Presentation
The detail form of a delivery note can be accessed from the list of delivery notes. It does not allow the data to be changed.
23.3.2. Data displayed
|
|
The data listed below corresponds to the structure of the «standard» form. CARL Touch forms are customizable, implying that the form structure may be different in your context. |
The delivery note detail form contains the following:
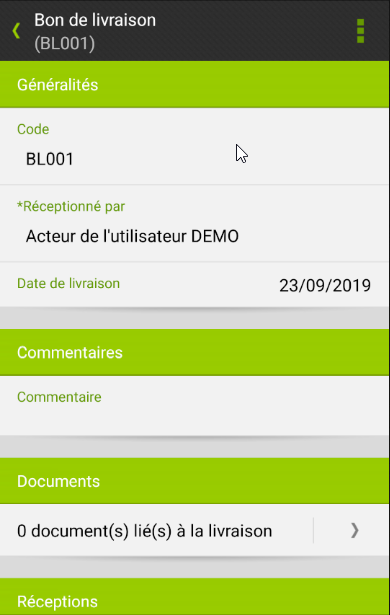
«General» block
-
Delivery note Number.
-
Received by the technician.
-
Delivery date.
«Comments» block
-
Comment.
«Documents» block
-
Number of documents linked to delivery note.
|
|
The Further details about document management are given in section Managing linked documents. |
"Received" block
-
Number of lines received for the delivery note.
|
|
The |
23.4. Creation of a delivery note
23.4.1. Receiving search criterion
The receiving search criterion is a prerequisite step for starting the "Receiving" wizard. This step requires the user to choose the origin of the receiving from those offered by CARL Touch:
-
Purchase order.
-
Purchase request.
-
Transfer request.
-
Supplier.
The user’s choice leads to the next step in the wizard.
23.5. Step 1 – Choice of order, purchase request, transfer request, supplier
23.5.1. Presentation
This step allows users to choose where it was received from: purchase order, PR, WR or supplier.
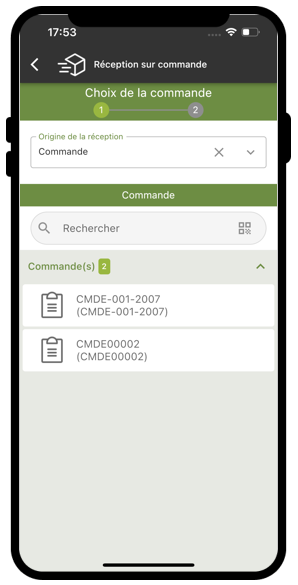
This choice is made from a list offered by CARL Touch (the contents of the list depend on the selected criterion):
| Selected criterion | Information displayed by CARL Touch |
|---|---|
Purchase order |
CARL Touch displays list of orders with a status of Issued, Partially Received, accessible to the user. |
Purchase request |
CARL Touch displays the list of purchase requests with a status of To be Processed and Receipt, accessible to the user. |
Transfer request |
CARL Touch displays the list of transfer requests with at least one shipment in progress. |
Supplier |
CARL Touch displays the list of suppliers with orders and PRs having the status mentioned above, accessible to the user. |
23.6. Step 2 – Receiving
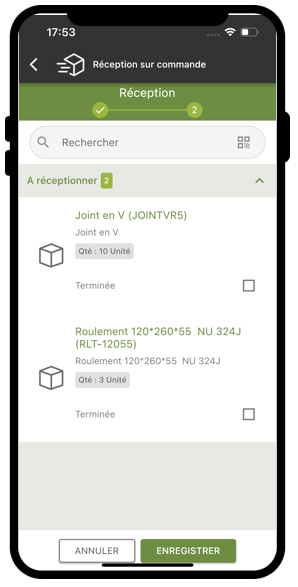
23.6.2. Data displayed
This step presents the lines associated with the entity selected in step 1.
Only lines to be received or with partial receipt are shown.
Each line of this list presents the following information:
-
Name and code of the item
-
Supplier reference
-
Quantity received and Expected (or ordered) quantity
23.6.3. Actions
Accessing details
Selecting a line gives access to the line’s details.
An enabled Completed box  also leads to the details if the item is managed in inventory and if the item is not in delivery check.
RFID Receiving
By clicking on the RFID icon, the user can (if an RFID reader has been paired with the mobile device) scan an RFID tag directly.
Receipt of the asset identified with this label will be processed. The checkbox will be selected, and the item entry wizard will open.
Delivery note access
The  button gives access to delivery note information.
23.7. Receipt line details
23.7.2. Data displayed
This step presents details on the lines received.
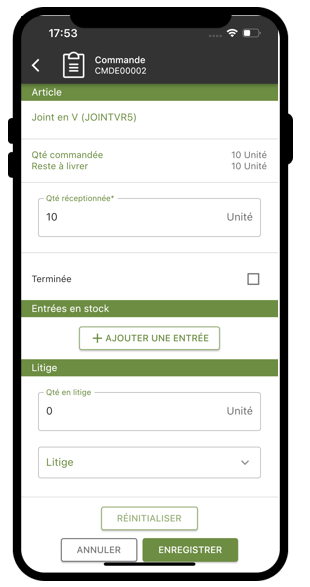
The detail form of a received line contains the following:
-
Name and code of the item
-
Quantity ordered
-
Remaining to be delivered
-
Quantity received
-
Completed allowing for notification that the line has been completely received
23.7.2.1. Stock Entry block
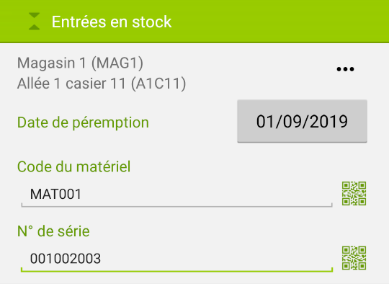
For a stock-managed, batch-managed, or serialized item, a Stock Entry block is displayed:
-
Name and code of the warehouse
-
Name and code of the location
-
Qty to enter
-
Batch (for a batch-managed item)
-
Use-by date (for a batch-managed or serialized item)
-
Asset code (for a serialized item)
-
Serial number (for a serialized item)
-
Adding an entry button
|
|
If there is a single warehouse location defined for the item, the warehouse code and location are initialized to those values. However, it may be changed. |
|
|
If the purchase unit is different from the stock unit, an orange band giving the purchase coefficient is displayed. |

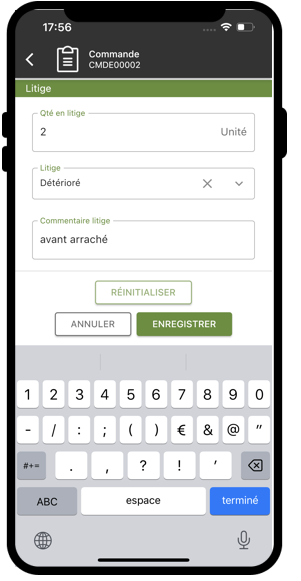
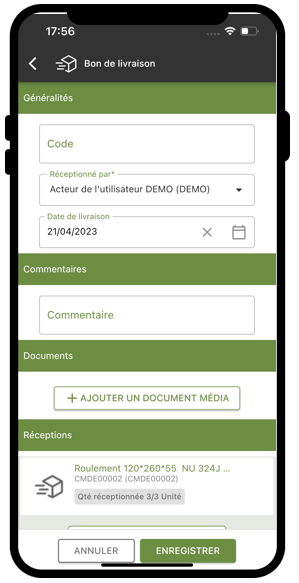
24. Managing conflicts
The detection of a conflict in a task is handled in various ways in CARL Touch:
-
Changed icon for the element with a conflict:
| Icon | Meaning |
|---|---|
|
Task «With conflict». |
|
Task with WR origin «With conflict». |
|
Asset «With conflict». |
|
Location «With conflict». |
|
Item «With conflict". |
|
Withdrawal movement «With conflict». |
|
Entry movement «With conflict». |
|
Change of location movement «With conflict». |
|
Spontaneous inventory movement «With conflict». |
|
Prepared inventory «With conflict». |
|
Delivery note «With conflict». |


-
«CONFLICTS» tab on the current function: this tab groups all elements on which a conflict has been detected.
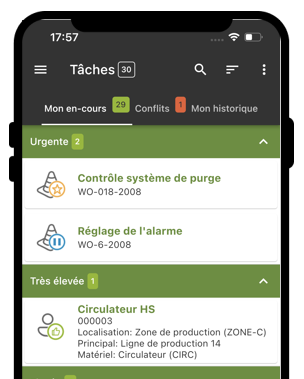
-
On the detail form, the field with errors is highlighted and an explanatory message displayed to enable the user to identify the origin of the conflict:
-
The field with errors is displayed on a red background.
-
An explanatory message displayed in red sets out the origin of the conflict.
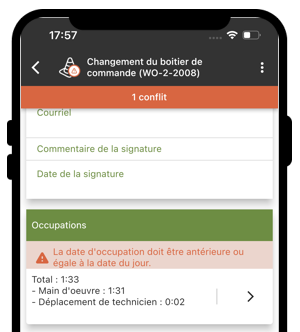
-
25. Settings
The «Settings» menu, accessible via the general menu, enables the user to view and change the CARL Touch application settings via various forms.
25.1. Connection
The «Connection settings» form, accessible via the «Connection» option, enables the user to:
-
view or set various settings for connecting to the CARL Source server,
-
Manually reinitialise the data.
«Connection settings» section
-
Log-on username: view and enter the username used to log on to the CARL Source server.
-
Access token: used to find out whether an authentication token has been assigned to the CARL Touch user.
-
CARL Source server *: public URL of the CARL Source server.
-
CARL Source User *: Carl Source user identifier.
-
Last synchronization *: Shows the date and time of the last synchronization with the CARL Source server – e.g. « Last update: 01/09/2013 09:15:00".
If the terminal is on line, this field shows the value: "Connected." -
Synchronization of documents *: Shows whether documents will be synchronized «regardless of the network connection type» (Yes/No).
* Read-only fields: values are set via CARL Source.
«Reinitialization» section
-
Reinitialise data: used to manually reinitialize the application data.
25.2. RFID device pairing
The list of RFID readers detected via Bluetooth is displayed.
The user can select the reader they want to pair with the mobile device.
25.3. Bluetooth pairing
The list of devices detected via Bluetooth is displayed.
The user can select the reader they want to pair with the mobile device.
25.4. Outstanding actions
The «Actions pending» form shows all actions waiting to be transferred from the CARL Touch mobile device to the CARL Source server.
The actions relate to all elements that may be created, changed or deleted via CARL Touch.
The «Pending actions» screen is organized as follows:
-
The header shows the number of actions pending transmission.
-
Pending actions are grouped by function, in specific blocks:
-
Pending actions relating to Tasks,
-
-
Each message is displayed in a block showing:
-
The identifier of the element affected (e.g. task code).
-
The type of action taken on the element (e.g. task started).
-
The date and time at which the message was generated.
-
25.5. Date format
This option allows users to choose the date format used in CARL Touch.
This form shows the user the formats available: when the user selects a format, it will be used for all dates in the CARL Touch application.
Users can also change their time zone.
The application provides the various time zones defined in CARL Source.
25.6. «About»
The «About CARL Touch» form shows the following information:
-
Version installed: Version of the CARL Touch application currently installed on the mobile device.
-
Installation identifier
-
General conditions for use: Allows you to read the general conditions of use, and accept or refuse them.
-
Support website: selecting this button opens a browser window with the «Support» website; the URL for this site can be defined by the administrator via the CARL Source vocabulary.
26. Profile rights for CARL Touch
The behaviour of CARL Touch depends partly on the user profile settings set in CARL Source.
26.1. Synchronization options
CARL Touch enables the synchronization of certain functions to be disabled. This is done in CARL Source in the user profile under the CARL Touch option, General.
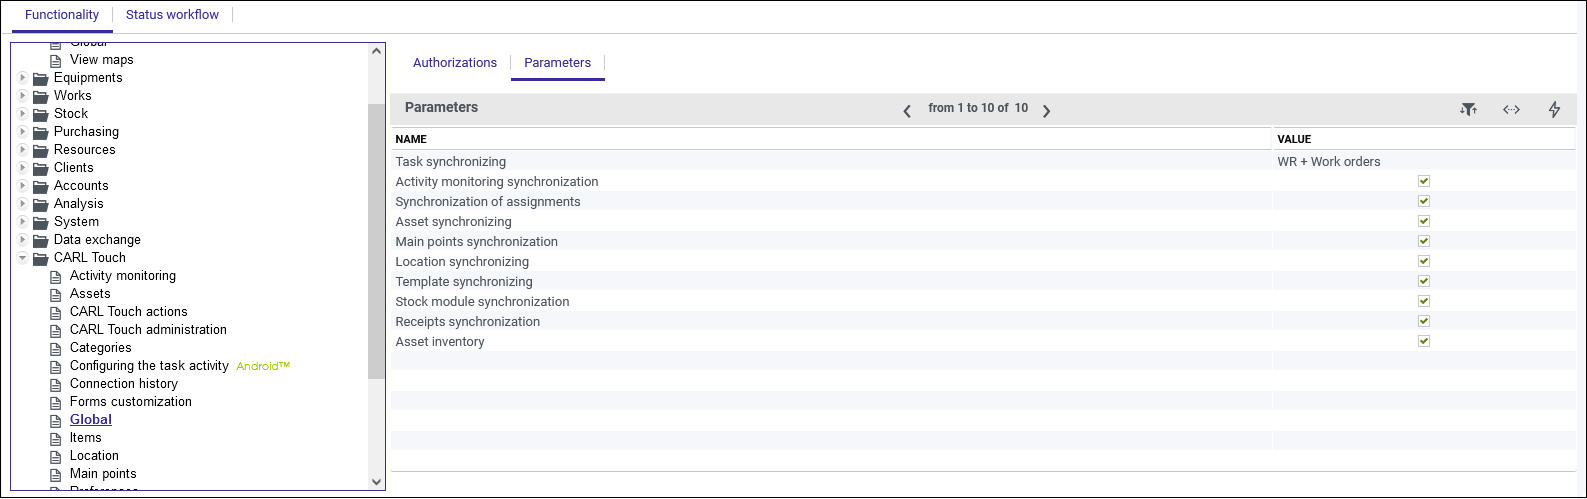
|
|
The modification of one of these synchronization settings results in a mandatory reinitialization message being sent to all CARL Touch users with the changed profile. |
26.1.1. Synchronization of tasks
CARL Touch can synchronise work requests (WRs) and/or work orders (WOs) with CARL Source.
A synchronization option defines which objects are pushed to CARL Touch users associated with the profile.
There are four possible options:
-
None: No work requests (WRs) or work orders (WOs) are sent to CARL Touch users associated with this profile.
-
WRs: Only work requests waiting to be taken into account and validated work orders (WOs) originating from WRs are transmitted to CARL Touch.
-
WOs: Only validated work orders are transmitted to CARL Touch.
-
WRs + WOs: Work requests and work orders are transmitted to CARL Touch.
26.1.2. Synchronization of activity tracking
CARL Touch makes it possible to synchronise labor types for various CARL Source work orders and labor types. If this option is enabled, activity tracking will be available in CARL Touch with or without a network connection.
26.1.3. Assignment synchronizing
CARL Touch enables the synchronization of work order assignments. If this option is enabled, the scheduling will be available in CARL Touch with or without a network connection.
26.1.4. Synchronization of assets
CARL Touch enables the synchronization of CARL Source assets. If this option is enabled, the assets and their characteristics will be available in CARL Touch with or without a network connection.
26.1.5. Synchronization of main points
CARL Touch enables the synchronization of CARL Source main points. If this option is enabled, the main points and their characteristics will be available in CARL Touch with or without a network connection.
26.1.6. Synchronization of locations
CARL Touch enables the synchronization of CARL Source location points. If this option is enabled, the locations and their characteristics will be available in CARL Touch with or without a network connection.
26.1.7. Synchronization of models
CARL Touch enables the synchronization of CARL Source models. If this option is enabled, the models and their characteristics will be available in CARL Touch with or without a network connection.
26.1.8. Synchronization of stock module
CARL Touch enables the synchronization of CARL Source items. If this option is enabled, the items and their storage details will be available in CARL Touch with or without a network connection.
26.2. Tasks
The CARL Touch «Tasks» function can be configured by means of the profile settings below:
Authorizations
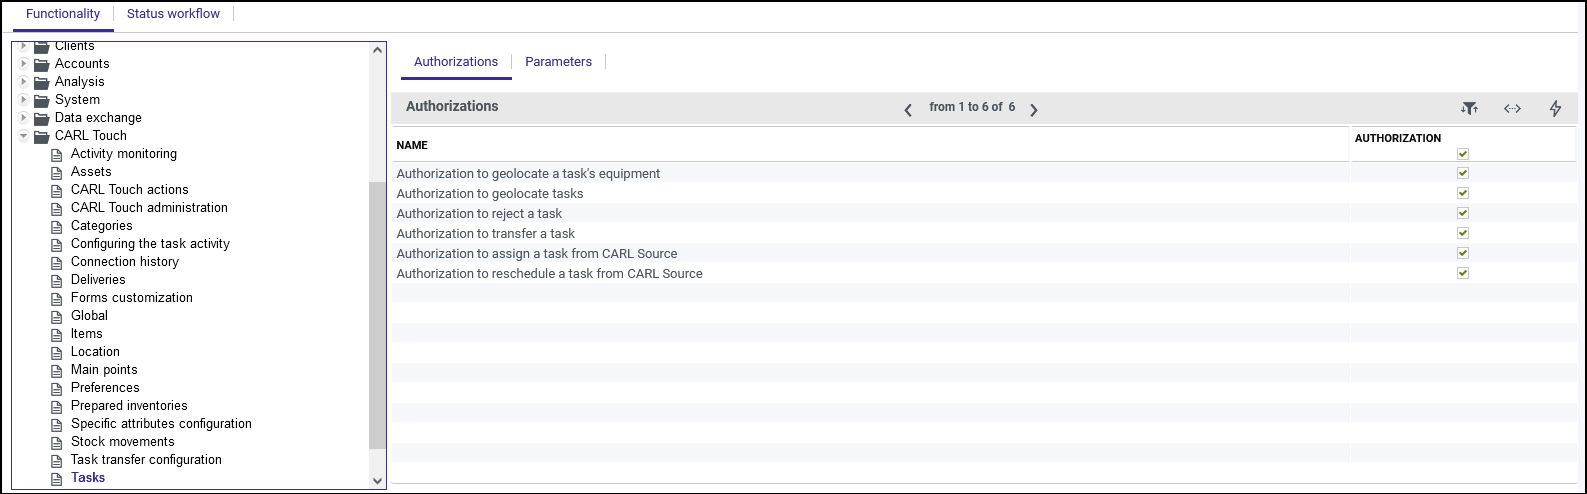
Settings
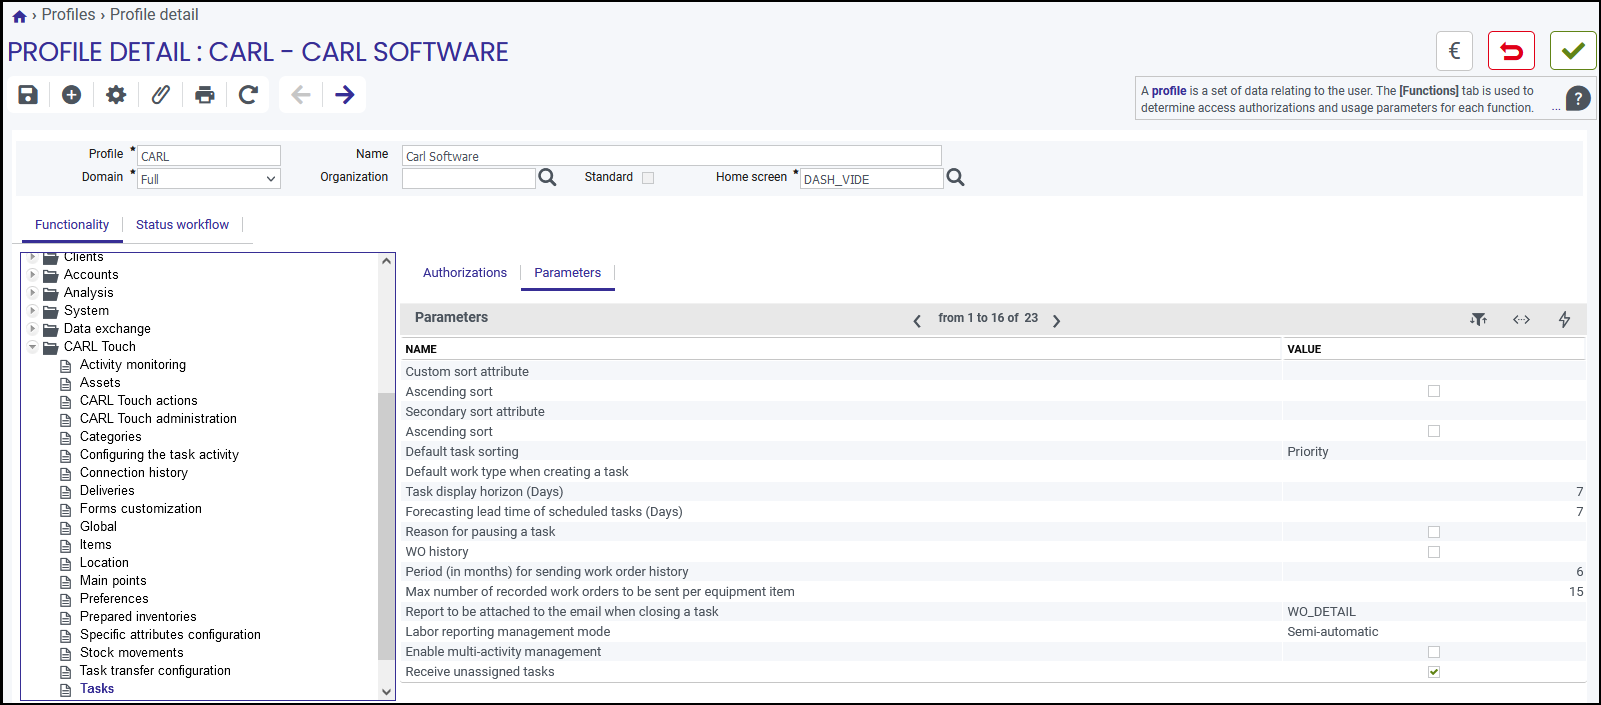
26.2.1. Geolocation of equipment
All CARL Touch users can geolocate tasks in CARL Touch provided that their smartphone knows its GPS position.
A profile option enables equipment associated with each task to be geolocated. If the profile allows, the user can geolocate structure points and assets for a task. This data is transmitted to CARL Source and used to initialise or update the GPS coordinates of the equipment.
26.2.2. Geolocation of tasks
Provided that the smartphone knows its GPS position, this authorization gives access to the «Geolocate a task» action.
26.2.3. Authorization to reject a task
This authorization entitles a CARL Touch user to reject tasks on their list of current tasks.
If this authorization is not enabled, the Reject button will not be available in CARL Touch.
26.2.4. Authorization to transfer a task
This authorization allows CARL Touch users to transfer a task to another user. To do this, they access the Transfer button in the task details.
If this authorization is not enabled, the Transfer button will not be available in CARL Touch.
26.2.5. Customized sorting
The «Settings» sub-tab in the Tasks function is used to set task management settings in CARL Touch.
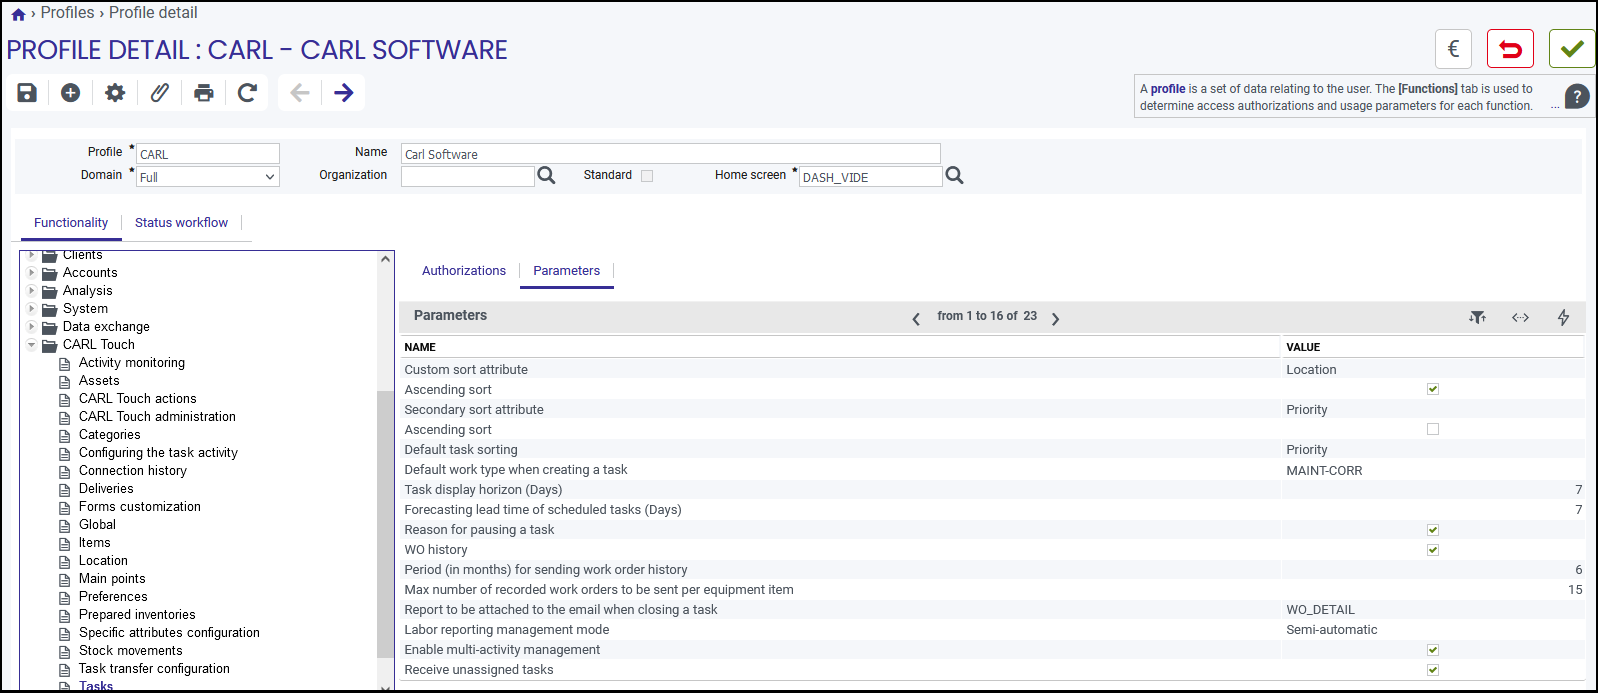
The tasks list in CARL Touch is ordered using one of three standard sorting options: priority, proximity and occurrence date.
It is possible, however, to add another sorting option. To do so, simply select the attribute to be used as the additional sorting option for the tasks list. This attribute is selected using the list of values associated with the «Custom sorting attribute» setting.
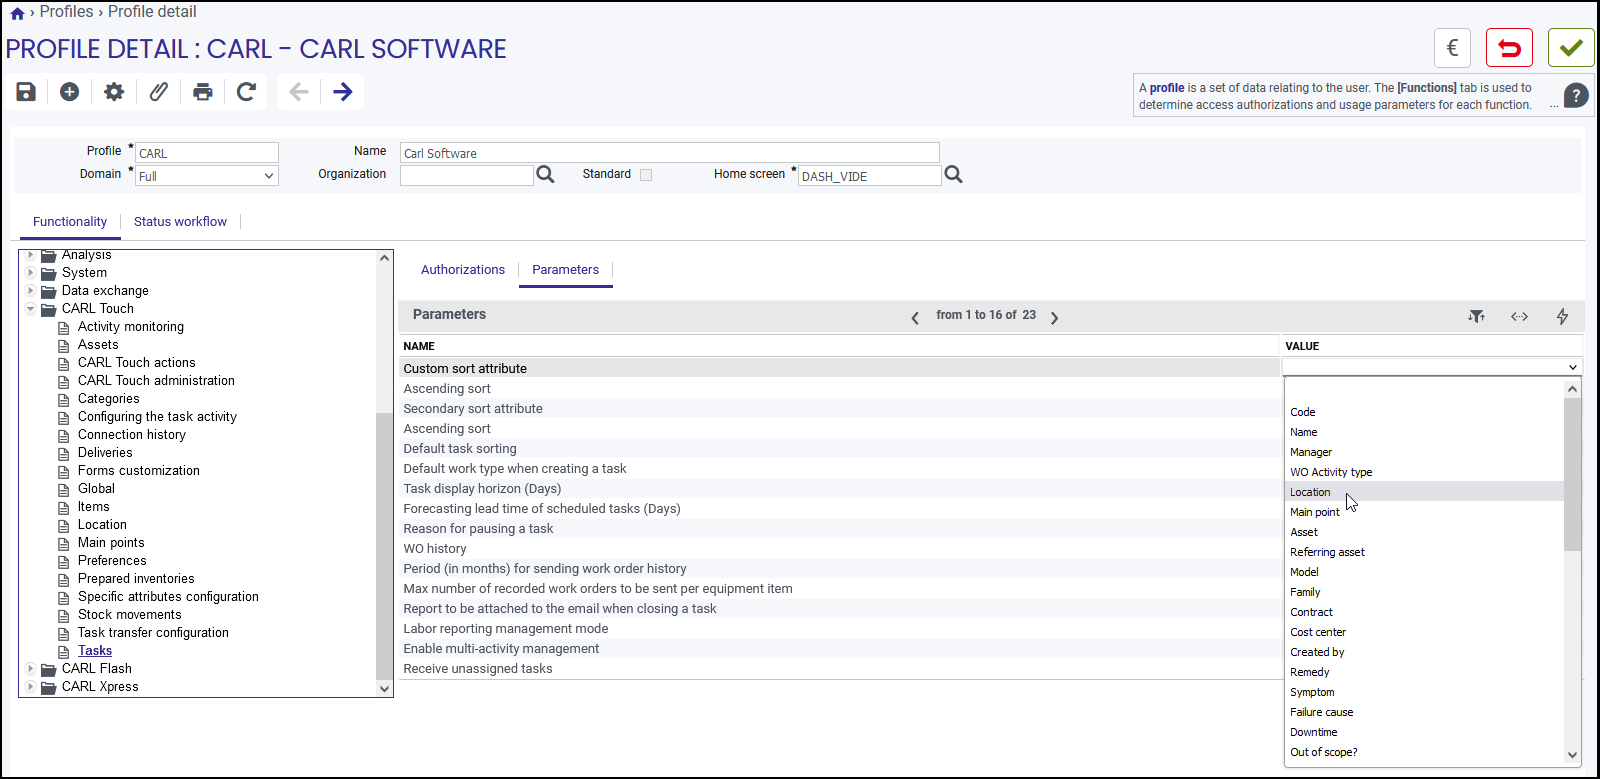
|
|
Note on custom sort attributes: |
After selecting the custom sorting attribute, the order (ascending or descending) can be selected by checking or unchecking the «Ascending order» check box.

26.2.6. Secondary sort
In addition to the main sort (by priority, proximity, occurrence date or custom sort), a second sort key can be defined. This key is applied after the first sort criterion selected.
To select the attribute to be used as a second sort key, simply call up the list of values associated with the «Secondary sorting attribute» setting and define the sort order.

26.2.7. Default sort
The default sort used to order the tasks list in CARL Touch is defined in CARL Source for the user profile.
The list of values associated with this setting offers four possible choices. This selection is to be made among the 3 standard sorts: Priority, Date of appearance, Proximity, as well as any previously selected Custom sort.

|
|
The «Custom» default sort requires a custom sorting attribute to be selected beforehand. If no attribute has been selected and custom sort is selected as default, tasks will be sorted by priority. |
26.2.8. Default type of work
The default type of work will be initialized whenever a task is created in CARL Touch. This attribute is mandatory when creating tasks of work order origin. Entering a default value is recommended.
26.2.9. Task display horizon (days)
This setting is used to restrict tasks displayed in CARL Touch to those whose start date is earlier than the specified horizon. This setting is a horizon expressed in days.
Only tasks with a start date earlier than the system date + horizon (days) will be displayed in the tasks list. This avoids overloading the list with tasks that are not due to start before n day(s).
As default, this setting is set to 7 (days).
26.2.10. Reason for pausing a task
If this setting is enabled, the CARL Touch user will have to select a reason whenever they pause a task. The reason for pausing is selected from the values on the TOUCHTASKREASON values list. The Value List function in the System module of CARL Source can be used to add values to the list.
26.2.11. Work order history
Three settings control the equipment work order history.
If the Work order history setting is enabled, the equipment work order history is available in off-line mode.
If not, the equipment work order history is not downloaded into CARL Touch and the user must have a network connection to the CARL Source server to view it in CARL Touch.
The other two settings are used to limit the number of work orders (Completed, Closed or Archived) stored in the history for each element.
This limit is expressed as a period (in months), i.e. the work order history is searched over the past n months.
There is also a limit to the maximum number of work orders retrieved for the period defined above.

In the example above, only the 15 most recent work orders over the last 6 months will be available in the work order history.
26.2.12. Version of work order sent by e-mail
This setting is used to specify which version of the work order will be attached to the e-mail sent when the work order is closed.

The principle is as follows: If the CARL Touch task has been signed and one or more e-mail addresses have been entered, an e-mail will be sent to the addressees with this version (in PDF format) attached.
The message template used for this e-mail is defined in the work order status workflow, when the work order status is changed to «Closed».
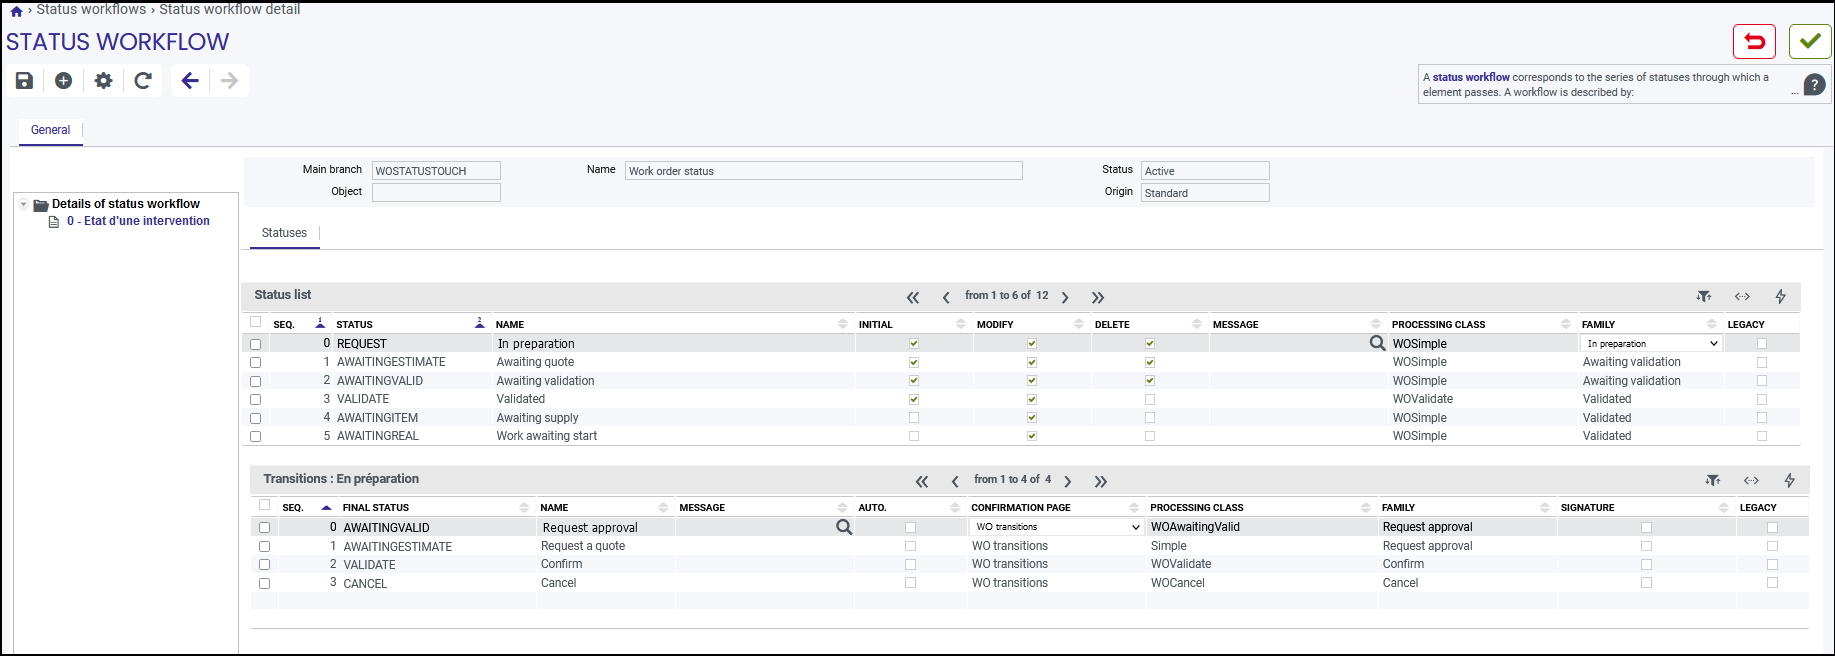
The sending of the e-mail is triggered when the work order is closed.
Message template content: TMPL_EDITTASK, can be changed in the Message templates feature (CARL Source System module)
26.2.13. Labor management mode
This setting is used to select the labor type management mode in CARL Touch.

CARL Touch offers two labor type management modes.
-
Automatic mode
Labor types are calculated automatically by Carl Touch by deducting the date/time that the task was paused or closed from the date/time of starting (or restarting) the task. The labor is automatically sent to CARL Source and is assigned to the CARL Touch technician’s default time type. -
Semi-automatic mode
This mode enables labor types calculated by CARL Touch to be added, changed or deleted prior to being sent to CARL Source. When a task is paused or closed, CARL Touch displays a labor type pre-validation form. This form is used to declare several technicians on the same task. -
Manual mode
This mode enables CARL Touch users to enter labor types for a task themselves.
26.2.14. Enable multiple-activity management
At the same time as a task, you may be required to work on other activities (e.g. Tool preparation, Lockout from service, Travel, etc.). This setting is used to manage the time spent on those various activities in CARL Touch. By identifying the start and end of the activity, you will generate a labor type with the labor type selected in Configuring the activities of a task.

26.2.15. Receive unassigned tasks
If this setting is enabled, CARL Touch users with this profile will receive unassigned tasks, i.e. tasks that are not assigned to anyone.
If not, work orders and/or work requests with no addressee, manager, scheduled resource, etc., are not sent to CARL Touch.
26.2.16. Presence check
This setting is used to activate presence checks on tasks. These checks may be optional, mandatory, or disabled.

26.2.17. Status of WRs being created
This setting defines the status of work requests when they are created in CARL Touch.
The possible values are «In preparation» and «Not yet taken into account».
26.2.18. Status of linked tasks being created
This setting defines the status of linked tasks when they are created in CARL Touch.
The possible values are «In preparation», «Awaiting supplies», «Awaiting start of work» and «Validated».

26.2.19. Synchronization of documents
Three settings are used to manage the synchronization of documents related to tasks.
If the Synchronize documents for current tasks setting is enabled, the documents related to the current tasks will be synchronized in CARL Touch.
If the Synchronize documents for logged tasks setting is enabled, the documents related to logged tasks will be synchronized in CARL Touch.
The Maximum Size of sent documents setting allows you to define the maximum size of documents that will be synchronized in CARL Touch.
If this setting is not defined, the size of synchronized documents will no be controlled.


26.3. Main points
The CARL Touch «Main points» function can be configured by means of the profile settings below:
Authorizations
Settings
26.3.1. Geolocation of main points
Provided that the smartphone knows its GPS position, this authorization gives access to the «Geolocate a main point» action.
26.3.2. NFC pairing
If the smartphone has NFC circuitry, this authorization allows a main point to be paired with an NFC label.
26.3.3. Status of main points being created
This setting defines the status of main points when they are created in CARL Touch.
The possible values are «In preparation» and «Validated».

26.3.4. Custom sort
The list of main points in CARL Touch is ordered using one of four standard sorting options: Proximity, Equipment type, Organization and Location.
It is possible to add a custom sort. To do this, the attribute of a main point that is to be used for the custom sort needs to be selected.
The order of the custom sort (ascending or descending) can be selected.

26.3.5. Secondary sort
In addition to the main sort (by Proximity, Equipment type, Organization or customized sort), a second sort key can be defined. This key is applied after the first sort criterion selected.
To select the attribute to be used as a second sort key, simply call up the list of values associated with the «Secondary sorting attribute» setting and define the sort order.

26.3.6. Default sort
The default sort used to order the list of main points in CARL Touch is defined in CARL Source for the user profile.
The list of values associated with this setting offers four possible choices. This selection is to be made among the 4 standard sorts: Type, Proximity, Organization as well as any previously selected custom sort.

|
|
The «Custom» default sort requires a custom sorting attribute to be selected beforehand. If no attribute has been selected and custom sort is selected as default, main points will be sorted by Equipment type. |
26.3.7. Synchronization of documents
If the Synchronize documents setting is enabled, the documents related to the main points will be synchronized in CARL Touch.
The Maximum Size of sent documents setting allows you to define the maximum size of documents that will be synchronized in CARL Touch.
If this setting is not defined, the size of synchronized documents will no be controlled.

26.4. Locations
The CARL Touch «Locations» function can be configured by means of the profile settings below:
Authorizations
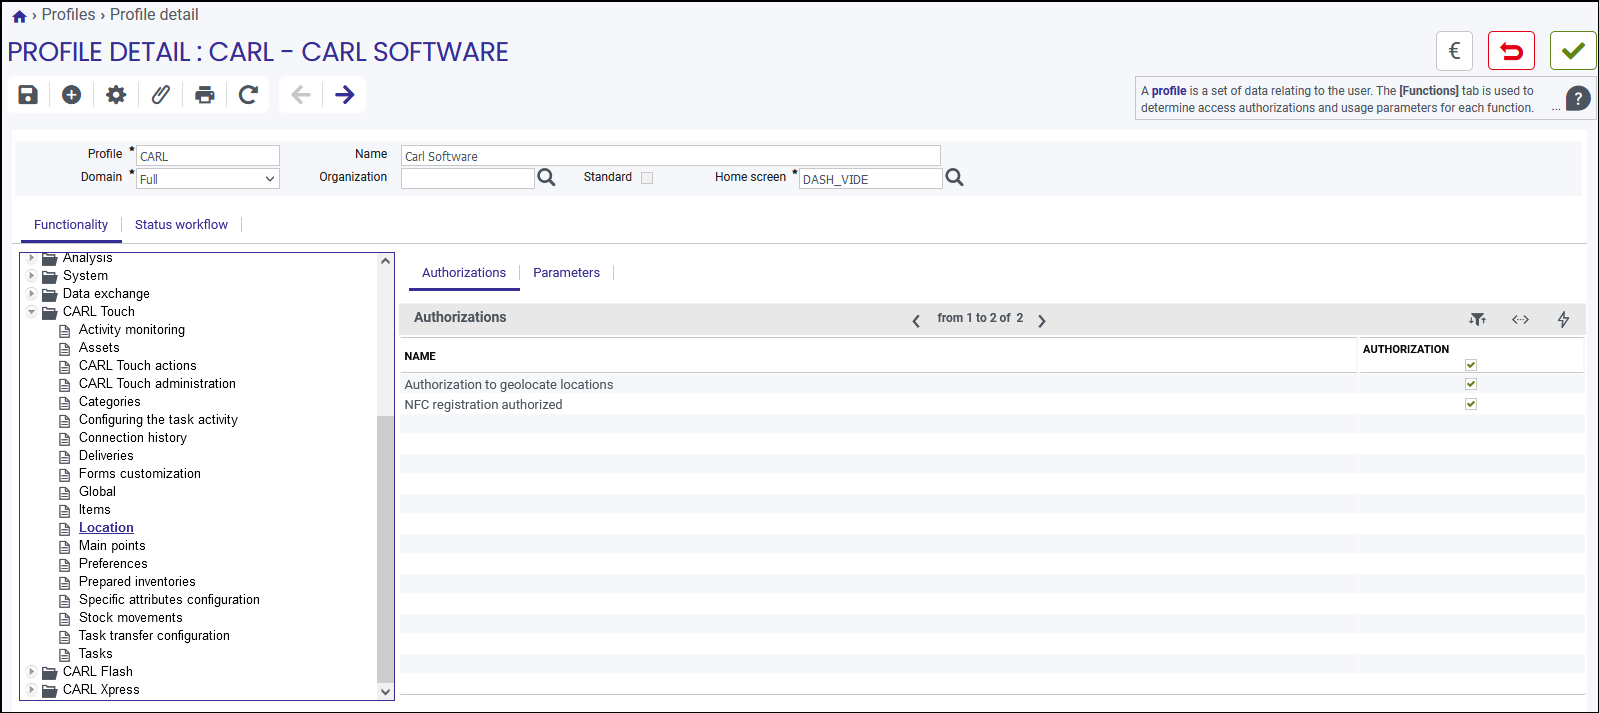
Settings
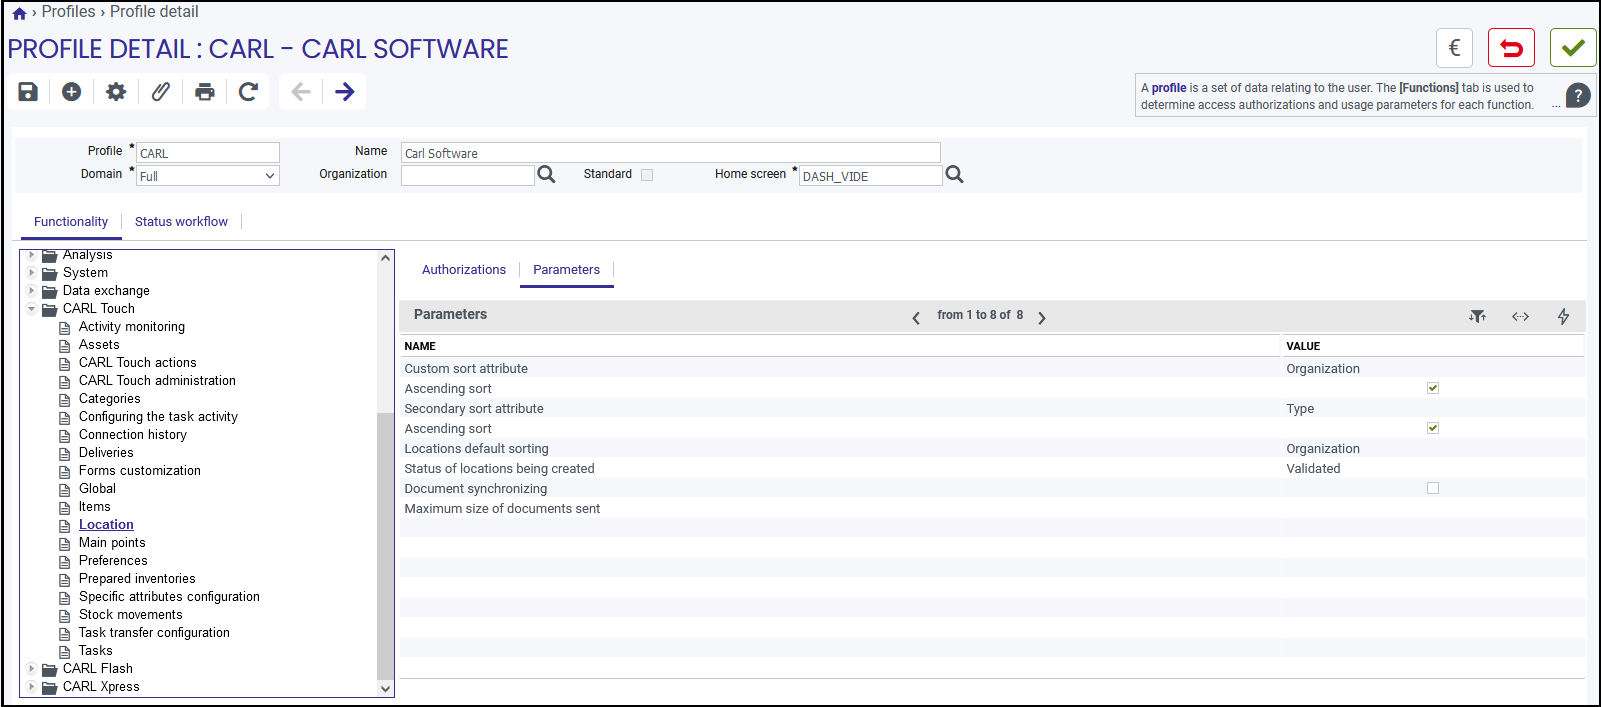
26.4.1. Geolocation of locations
Provided that the smartphone knows its GPS position, this authorization gives access to the «Geolocate a location» action.
26.4.2. NFC pairing
If the smartphone has NFC circuitry, this authorization allows a location to be paired with an NFC label.
26.4.3. Report of locations being created
This setting defines the status of location points when they are created in CARL Touch.
The possible values are «In preparation» and «Validated».

26.4.4. Custom sort
The list of locations in CARL Touch is ordered using one of three standard sorting options: Proximity, Equipment type and Organization.
It is possible to add a custom sort. To do this, the attribute of a location to be used for the custom sort needs to be selected.
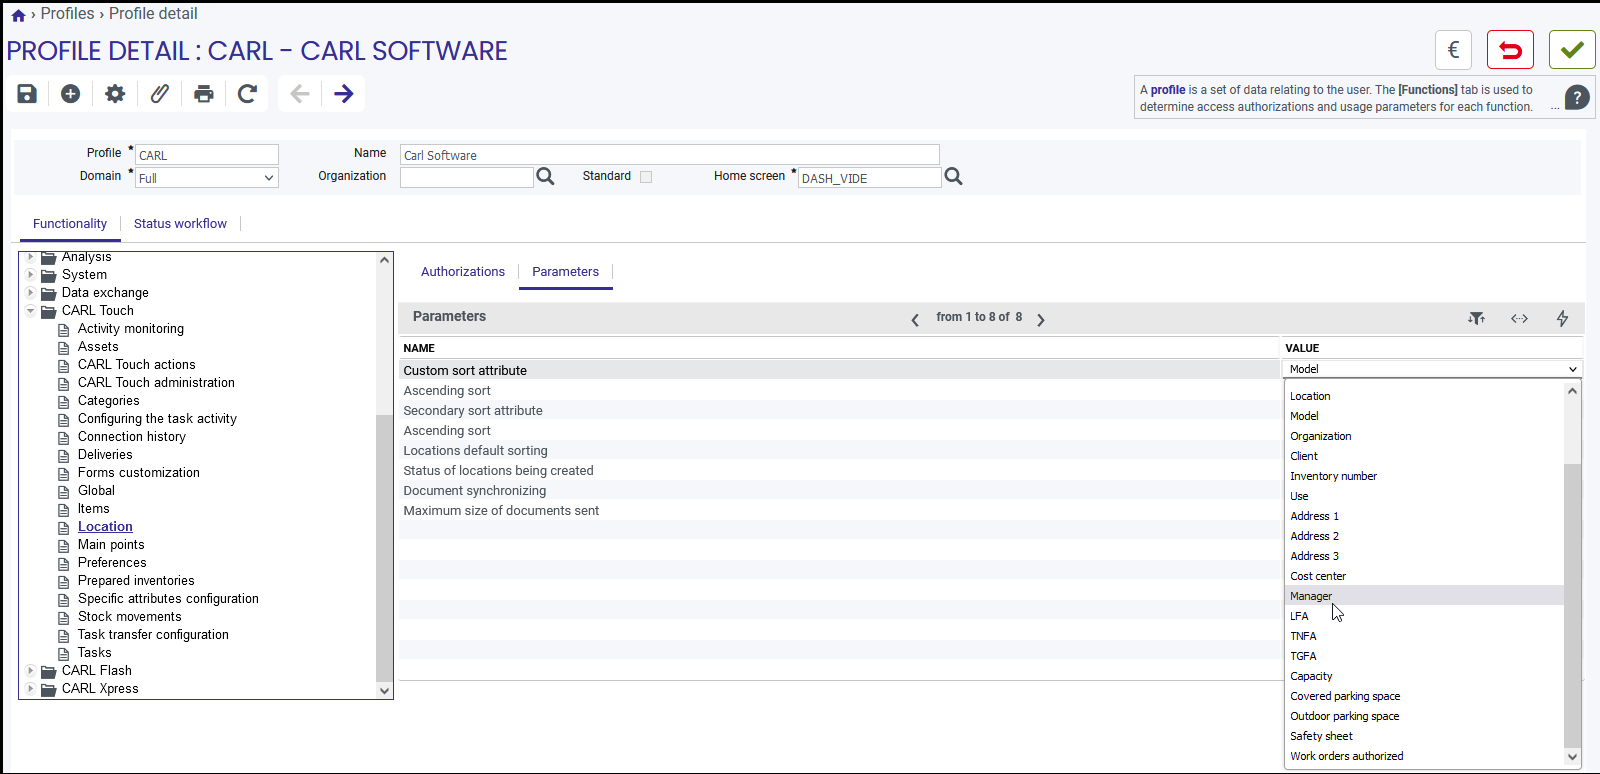
The order of the custom sort (ascending or descending) can be selected.

26.4.5. Secondary sort
In addition to the main sort (by Proximity, Equipment type, Organization or customized sort), a second sort key can be defined. This key is applied after the first sort criterion selected.
To select the attribute to be used as a second sort key, simply call up the list of values associated with the «Secondary sorting attribute» setting and define the sort order.

26.4.6. Default sort
The default sort used to order the list of locations in CARL Touch is defined in CARL Source for the user profile.
The list of values associated with this setting offers four possible choices. This selection is to be made among the 3 standard sorts: Type, Proximity, Organization as well as any previously selected Custom sort.

|
|
The «Custom» default sort requires a custom sorting attribute to be selected beforehand. If no attribute has been selected and customized sort is selected as default, locations will be sorted by Organization. |
26.4.7. Synchronization of documents
If the Synchronize documents setting is enabled, the documents related to locations will be synchronized in CARL Touch.
The Maximum Size of sent documents setting allows you to define the maximum size of documents that will be synchronized in CARL Touch.
If this setting is not defined, the size of synchronized documents will no be controlled.
26.5. Assets
The CARL Touch «Assets» function can be configured by means of the following authorizations and profile settings.
Authorizations
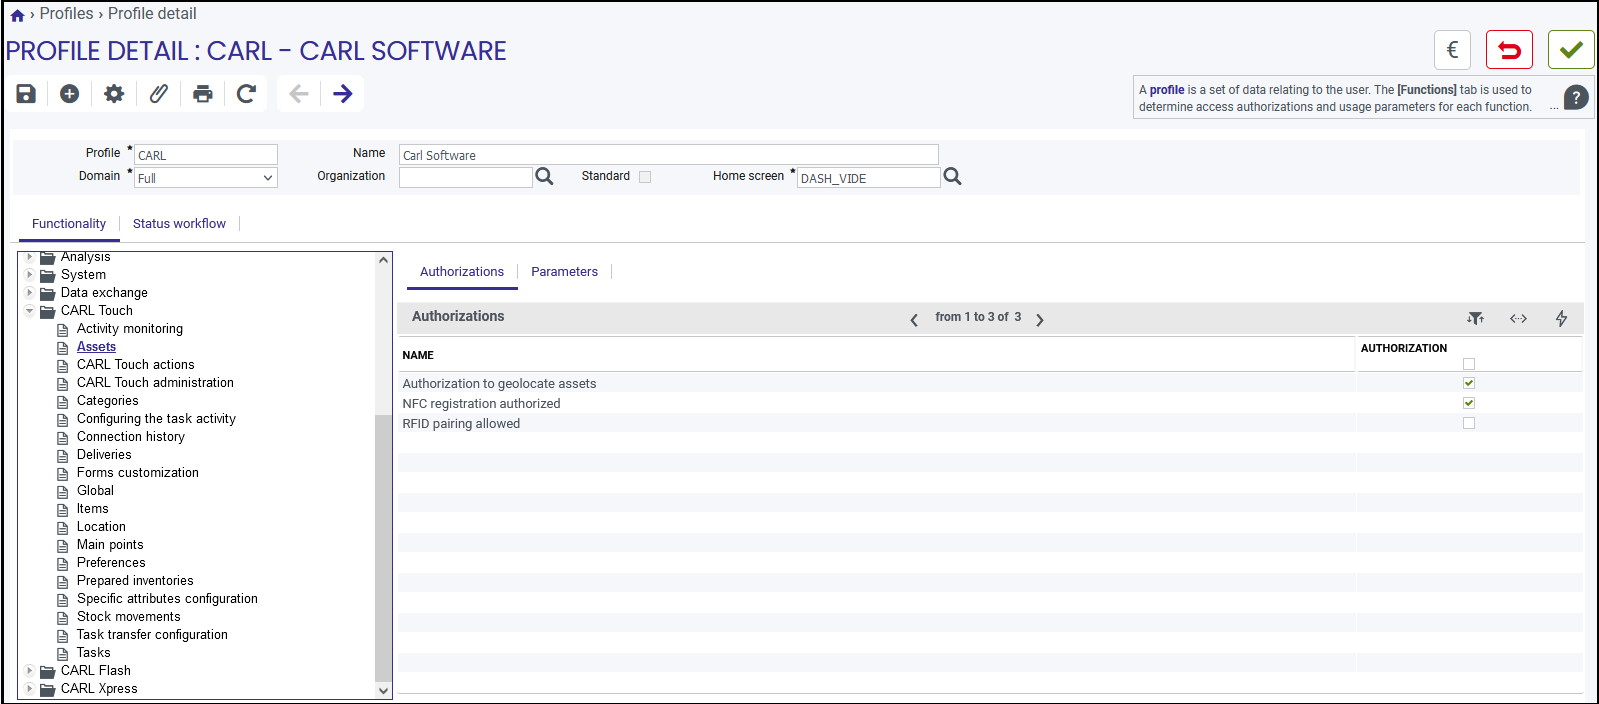
Settings
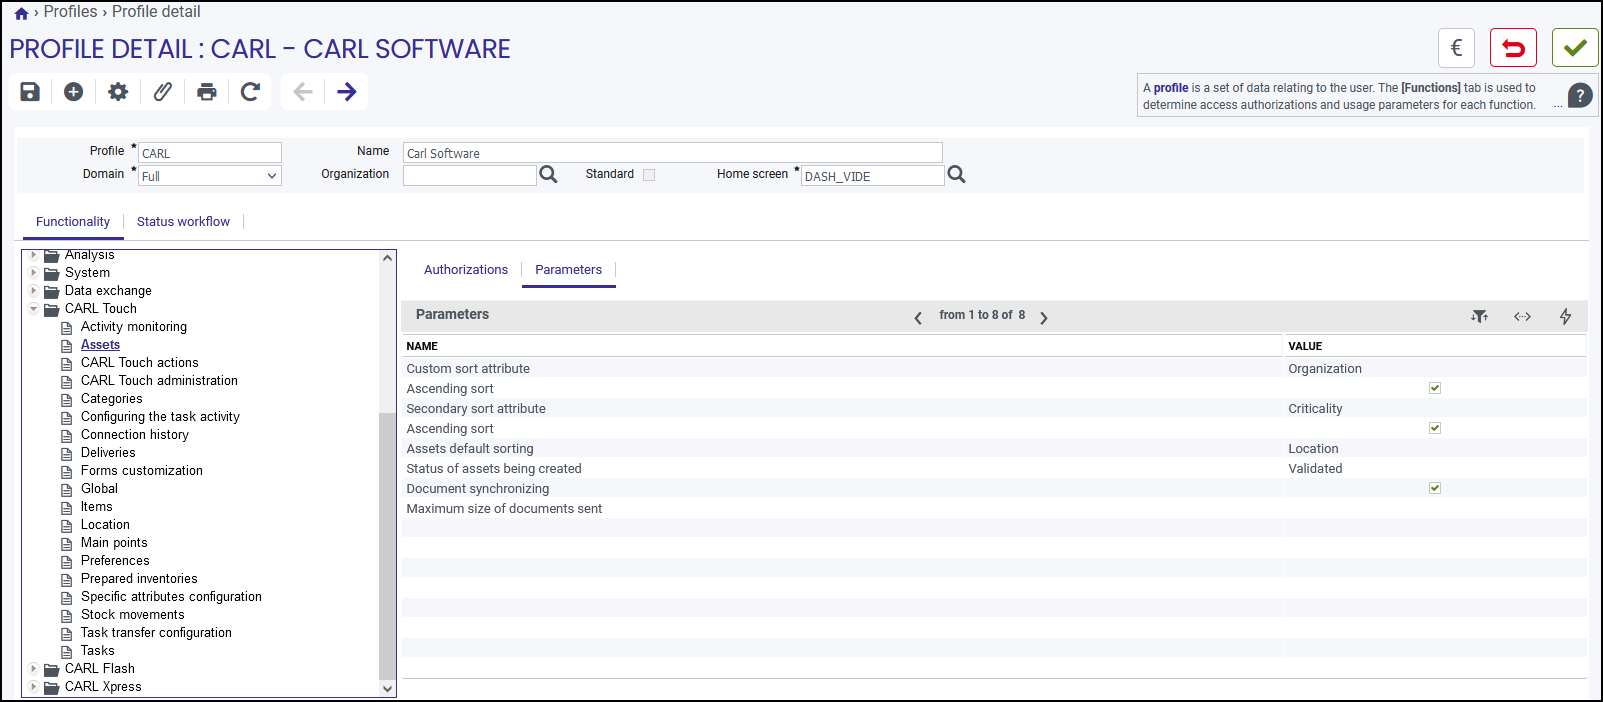
26.5.1. Asset geolocation
Provided that the smartphone knows its GPS position, this authorization gives access to the «Geolocate an asset» action.
26.5.2. NFC pairing
If the smartphone has an NFC chip, this authorization allows an asset to be paired with an NFC label.
26.5.3. RFID pairing
If the smartphone is paired with an RFID reader, this authorization allows an asset to be paired with an RFID tag.
26.5.4. Status of assets being created
This setting defines the status of assets when they are created in CARL Touch.
The possible values are «In preparation» and «Validated».

26.5.5. Custom sort
The list of assets in CARL Touch is ordered using one of four standard sorting options: Proximity, Location, Equipment type and Model.
It is possible to add a custom sort. To do this, the attribute of the asset to be used for this custom sort needs to be selected.
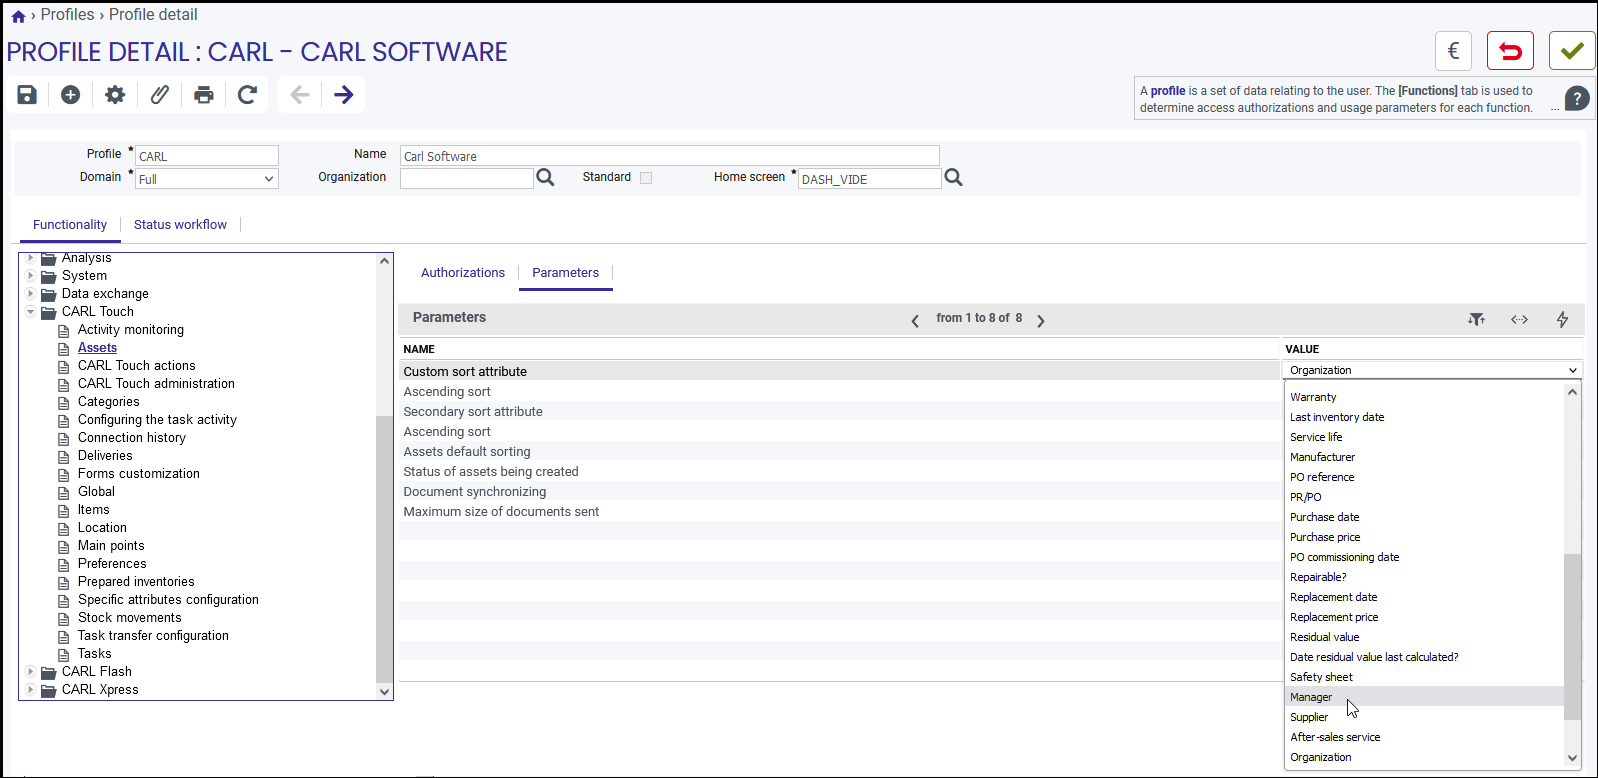
The order of the custom sort (ascending or descending) can be selected.

26.5.6. Secondary sort
In addition to the main sort (by proximity, location, equipment type, model or custom sort), a second sort key can be defined. This key is applied after the first sort criterion selected.
To select the attribute to be used as a second sort key, simply call up the list of values associated with the «Secondary sorting attribute» setting and define the sort order.

26.5.7. Default sort
The default sort used to order the list of assets in CARL Touch is defined in CARL Source for the user profile.
The list of values associated with this setting offers four possible choices. This selection is to be made among the 4 standard sorts: Location, Proximity, Equipment type, Model, and any previously selected Custom sort.

|
|
The «Custom» default sort requires a custom sorting attribute to be selected beforehand. If no attribute has been selected and custom sort is selected as default, assets will be sorted by location. |
26.5.8. Synchronization of documents
If the Synchronize documents setting is enabled, the documents related to assets will be synchronized in CARL Touch.
The Maximum Size of sent documents setting allows you to define the maximum size of documents that will be synchronized in CARL Touch.
If this setting is not defined, the size of synchronized documents will no be controlled.
26.6. Prepared inventories
The CARL Touch «Prepared inventories» function can be configured by means of the following profile settings:
Authorizations
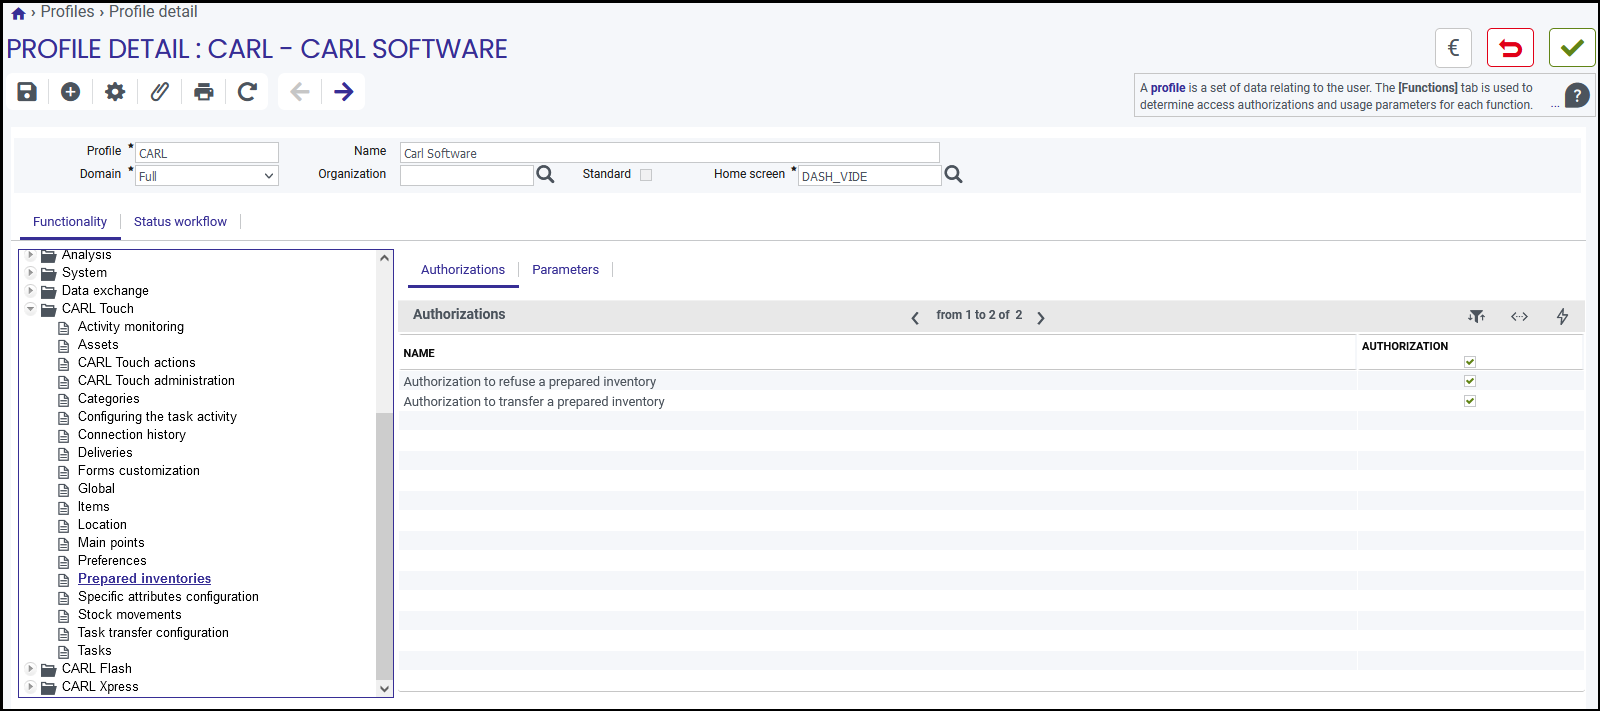
Settings
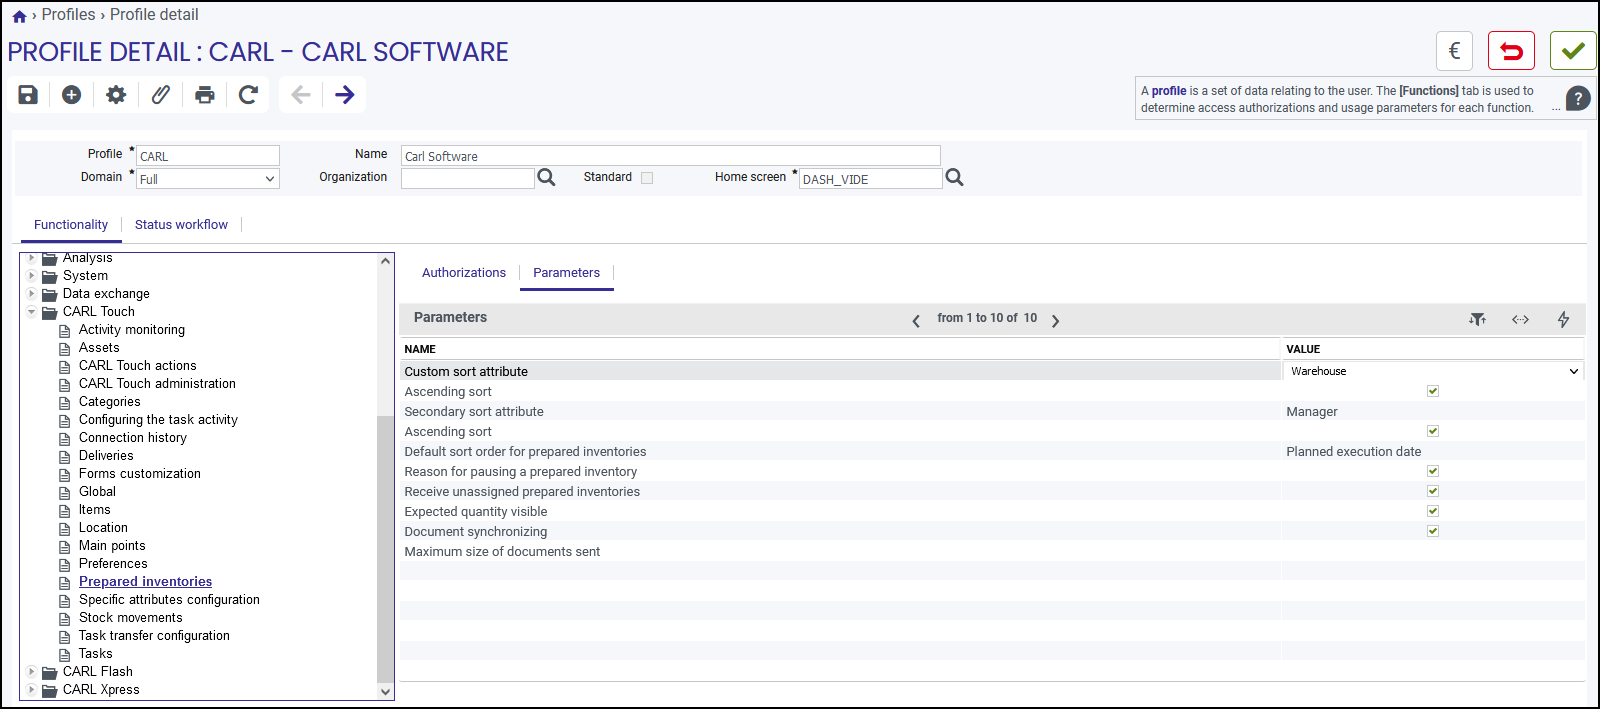
26.6.1. Authorization to refuse a prepared inventory
This authorization entitles a CARL Touch user to reject prepared inventories on their list of in-progress items.
If this authorization is not enabled, the Reject button will not be available in CARL Touch.

26.6.2. Authorization to transfer a prepared inventory
This authorization allows a CARL Touch user to transfer a prepared inventory to another user. To do this, the user accesses the Transfer button in the prepared inventory details.
If this authorization is not enabled, the Transfer button will not be available in CARL Touch.

26.6.3. Custom sort
The list of prepared inventories in CARL Touch is ordered using one of two standard sorting options: «Scheduled performance date» and «Warehouse».
It is possible to add a custom sort. To do this, the attribute of the prepared inventory to be used for the custom sort needs to be selected.
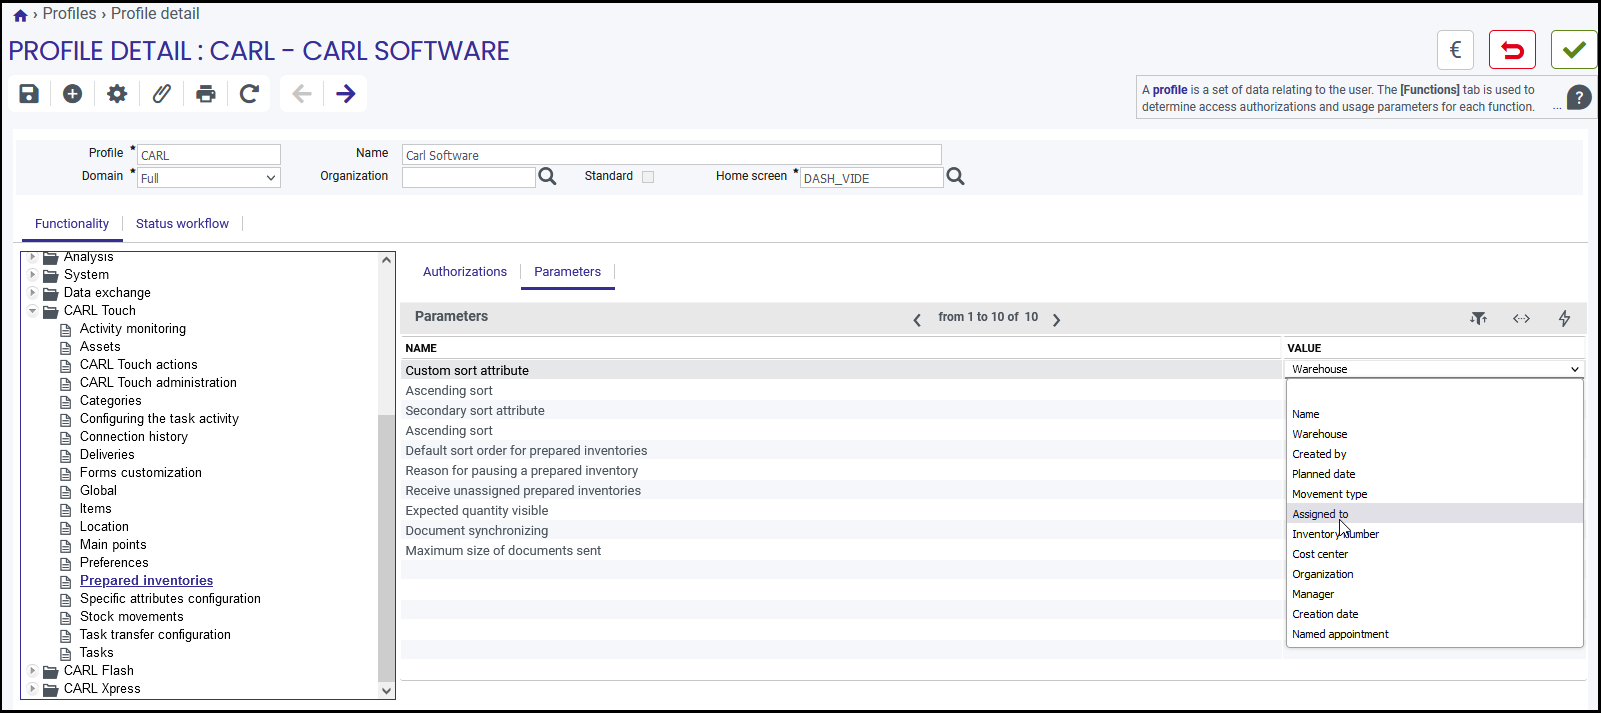
The order of the custom sort (ascending or descending) can be selected.

26.6.4. Secondary sort
In addition to the main sort (by Performance date or Warehouse), a second sort key can be defined. This key is applied after the first sort criterion selected.
To select the attribute to be used as a second sort key, simply call up the list of values associated with the «Secondary sorting attribute» setting and define the sort order.

26.6.5. Default sort
The default sort used to order the list of prepared inventories in CARL Touch is defined in CARL Source for the user profile.
The list of values associated with this setting offers three possible choices. This selection is to be made among the 2 standard sorts: Performance date, Warehouse, and any previously selected Custom sort.

|
|
The «Custom» default sort requires a custom sorting attribute to be selected beforehand. If no attribute has been selected and custom sort is selected as default, prepared inventories will be sorted by Performance date. |
26.6.6. Reason for pausing a prepared inventory.
If this setting is enabled, the CARL Touch user will have to select a reason for pausing whenever a prepared inventory is paused. The reason for pausing is selected from the values on the TOUCHTASKREASON value list. The Value List function in the System module of CARL Source can be used to add values to the list.

26.6.7. Receiving unassigned prepared inventories.
If this setting is enabled, CARL Touch users with this profile will receive unassigned prepared inventories, i.e. not assigned to anyone.
Otherwise, prepared inventories without an assigned responsible person will not be sent to CARL Touch.

26.6.8. Expected quantity visible.
When enabled, this setting allows the quantity in stock of an item to be consulted before the prepared inventory is completed. By unchecking this setting, the user will not have any information on the expected quantity of the item.

26.6.9. Synchronization of documents
If the Synchronize documents setting is enabled, the documents related to prepared inventories will be synchronized in CARL Touch.
The Maximum Size of sent documents setting allows you to define the maximum size of documents that will be synchronized in CARL Touch.
If this setting is not defined, the size of synchronized documents will no be controlled.
26.7. Stock movements
The CARL Touch «Stock movements» function can be configured by means of seven profile settings.
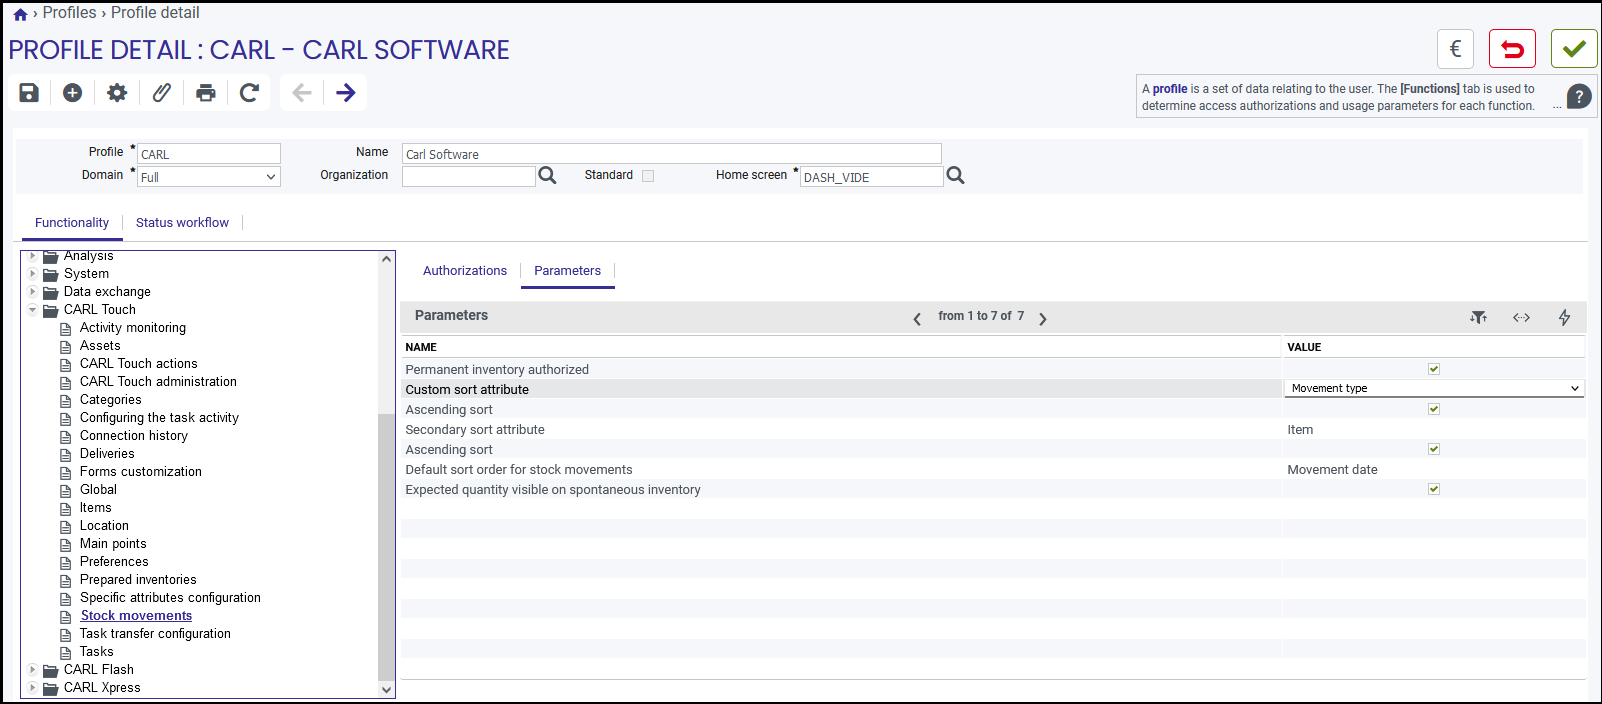
26.7.1. Permanent inventory
This setting, when enabled, allows an inventory movement to be performed at the same time as a withdrawal, entry or change of location movement.

This permanent inventory is accessible from Step 3 of the wizard for entry, withdrawal and change of location movements, for non-serialized items.
26.7.2. Custom sort
The list of stock movements in CARL Touch is ordered using one of three standard sorting options: Date of movement, type of movement and item.
It is possible to add a custom sort. To do this, the attribute of the stock movement to be used for this custom sort needs to be selected.
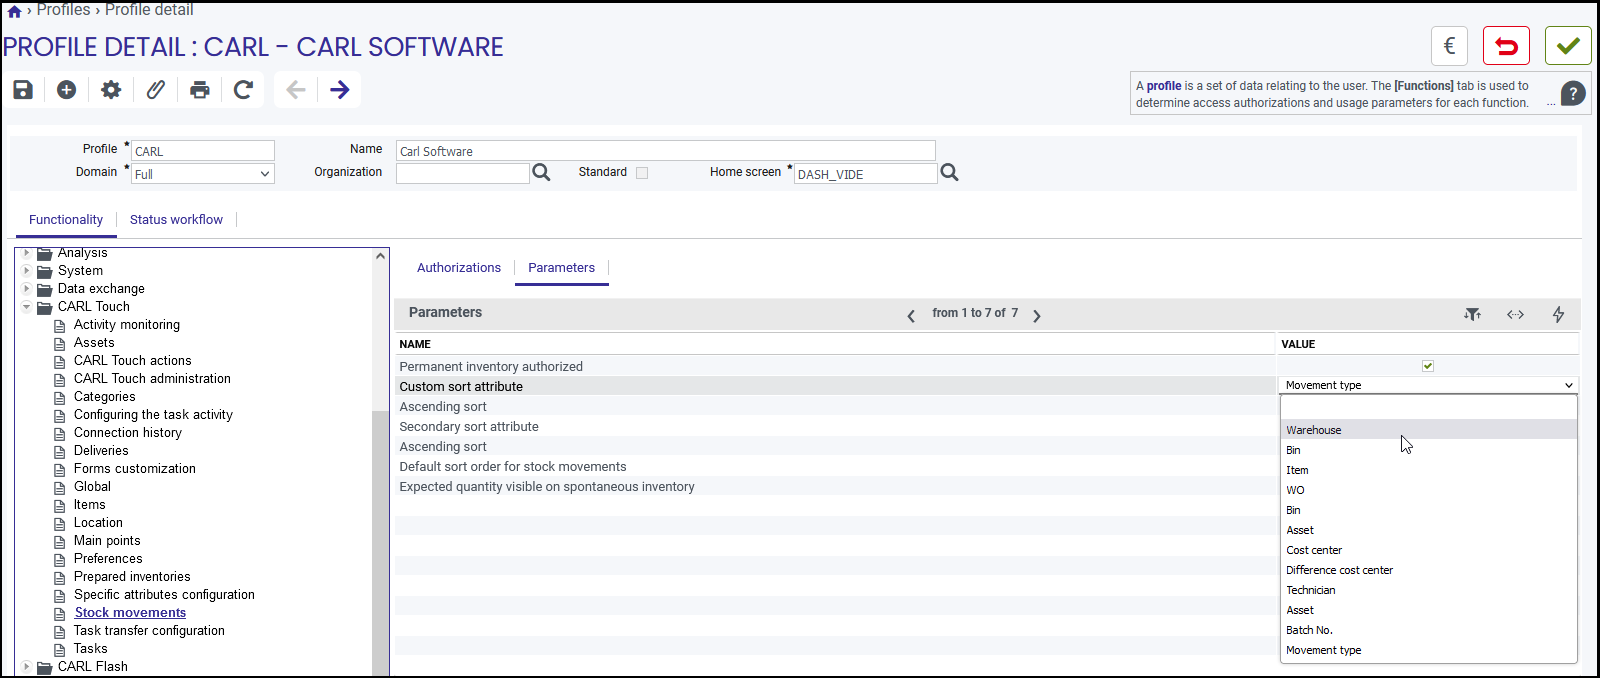
The order of the custom sort (ascending or descending) can be selected.

26.7.3. Secondary sort
In addition to the main sort (by Date of movement, Type of movement or Item), a second sort key can be defined. This key is applied after the first sort criterion selected.
To select the attribute to be used as a second sort key, simply call up the list of values associated with the «Secondary sorting attribute» setting and define the sort order.

26.7.4. Default sort
The default sort used to order the list of stock movements in CARL Touch is defined in CARL Source for the user profile.
The list of values associated with this setting offers four possible choices. This selection is to be made among the 3 standard sorts: Movement date, Movement type or Item as well as any previously selected Custom sort.

|
|
The «Custom» default sort requires a custom sorting attribute to be selected beforehand. If no attribute has been selected and customized sort is selected as default, stock movements will be sorted by Date of movement. |

26.8. Preferences
Five CARL Touch user preferences can be controlled from the CARL Source profile. To set these settings, simply select the Preferences function (CARL Touch module).
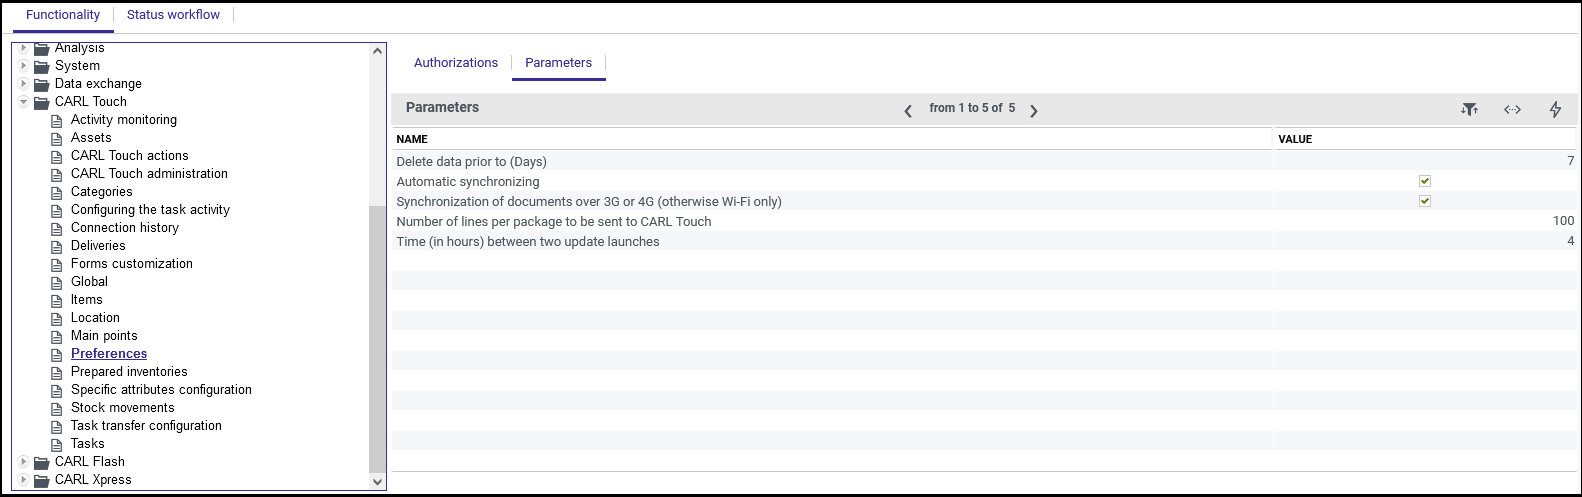
26.8.1. Delete data older than (Days)
Used to delete tasks from the CARL Touch task history if they were completed or rejected more than n days ago.
As default, seven days of task history are kept.
26.8.2. Automatic synchronization
Enabling this setting turns on Push mode. If CARL Touch is running in this mode, a permanent connection is established with the CARL Source application server. CARL Touch receives and sends information to CARL Source in real time (subject to 3G/4G or WiFi network coverage).
This setting is enabled as default.
|
|
Starting with Android™ version 6.0, a Doze function saves battery power of the mobile device when in Doze mode. To continue to receive CARL Touch notifications when your device is in doze mode, the Doze function needs to be disabled for the CARL Touch application using the following procedure:
|
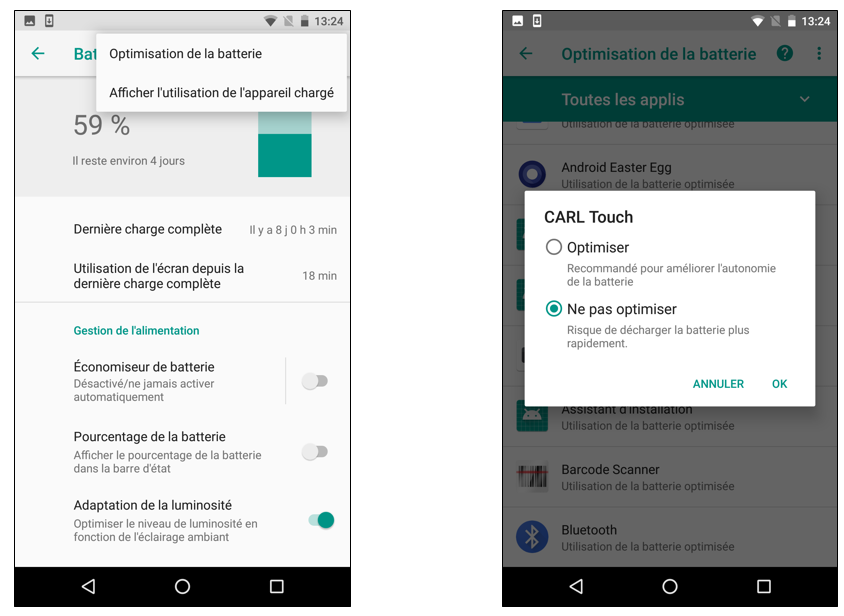
26.8.3. Synchronization of documents over 3G/4G
This setting determines whether documents linked to CARL Touch tasks can be transferred over a 3G/4G network, or only over WiFi. Transferring documents over 3G/4G ensures that they are always available in CARL Touch with their associated task.
If this setting is disabled, documents linked to CARL Touch tasks will not be available unless the smartphone is connected to a WiFi network.
|
|
Enabling this option will affect the volume of data downloaded and may result in higher charges depending on the users» mobile data plans. |
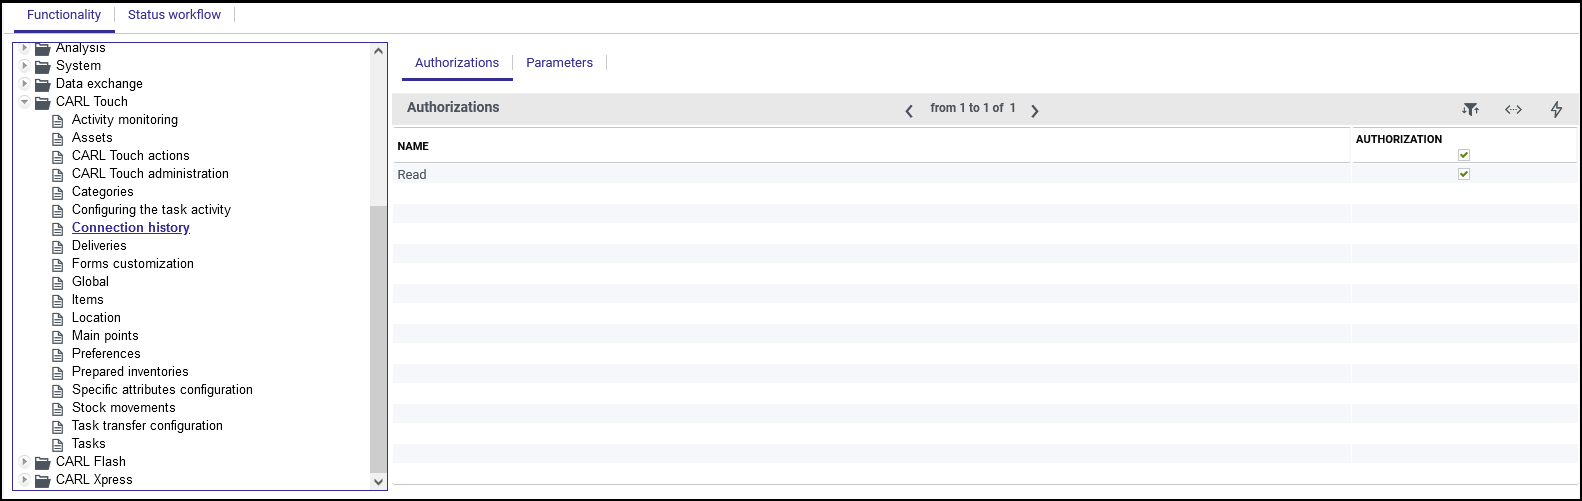
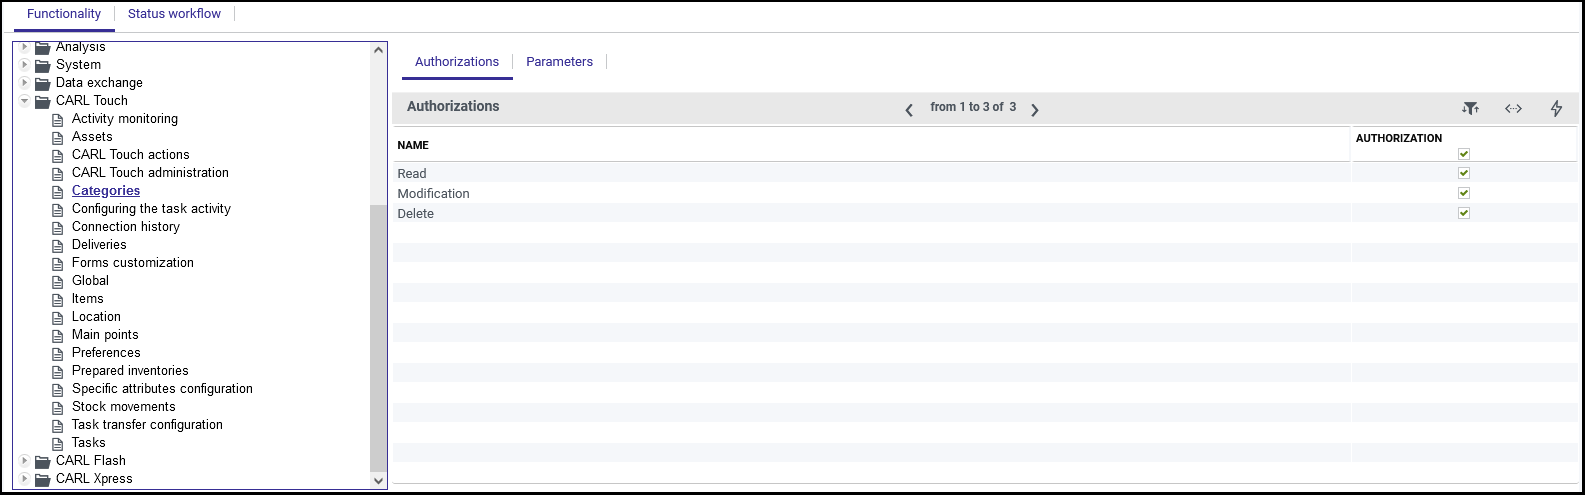
27. CARL Touch system settings
CARL Touch offers two settings making it possible to limit the size of photos and videos taken in CARL Touch.
These settings are accessible from CARL Source, System Module, System Configuration function.
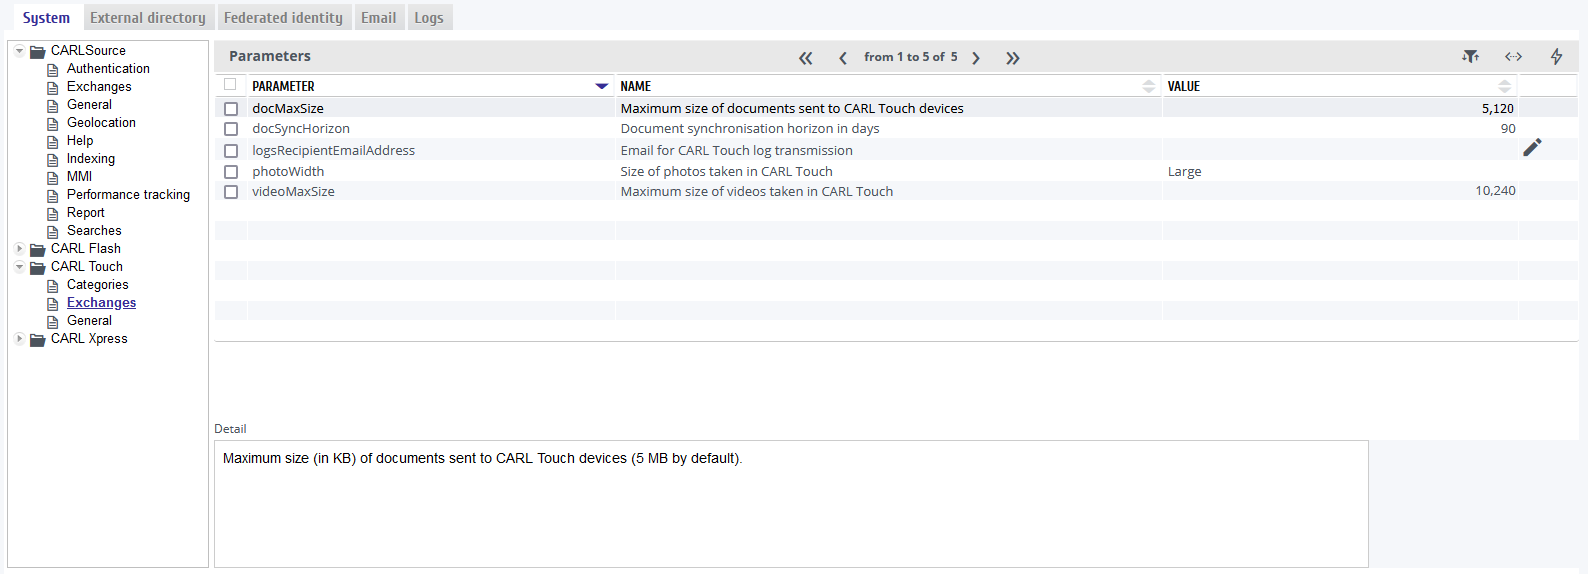
27.1. Document transfer
This setting can be used to inhibit the transfer of linked documents whose size is greater than the value entered) (expressed in kB). As default, there are no restrictions.
Linked documents which exceed the limit can be viewed only in CARL Source, though the link remains visible in CARL Touch. A message informs the user when a document is not available in CARL Touch.
|
|
This limit does not apply for photos and videos taken by the CARL Touch user. |
27.2. Photo resizing
CARL Touch makes it possible to limit the size of photos taken as documents linked to tasks, assets, locations and prepared inventories.
Four photo sizes are available:

-
Small: photo resized to a width of 240 pixels (approximately 45 kB).
-
Medium: photo resized to a width of 480 pixels (approximately 200 kB).
-
Large: photo resized to a width of 1224 pixels (approximately 1600 kB).
-
Actual size: No resizing - the photo will be sent at its original resolution.
This setting will be applied to all CARL Touch users connected to the same instance of CARL Source.
27.3. Video compression
CARL Touch makes it possible to limit the size of videos taken as documents linked to tasks, assets, locations and prepared inventories.
As default, this value is set at 10240 kB. In CARL Touch, when the video recording reaches this limit, it is automatically stopped, saved and sent to CARL Source.
28. Administration of CARL Touch devices
CARL Touch mobile terminals are administered via CARL Source.
For information on administering CARL Touch devices: refer to the "CARL Touch Administration" documentation.
28.1. Presentation
CARL Source offers a CARL Touch administration function. This function offers an at-a-glance view of the status of CARL Touch devices in use.
This CARL Touch administration function is available in the CARL Touch module of CARL Source.
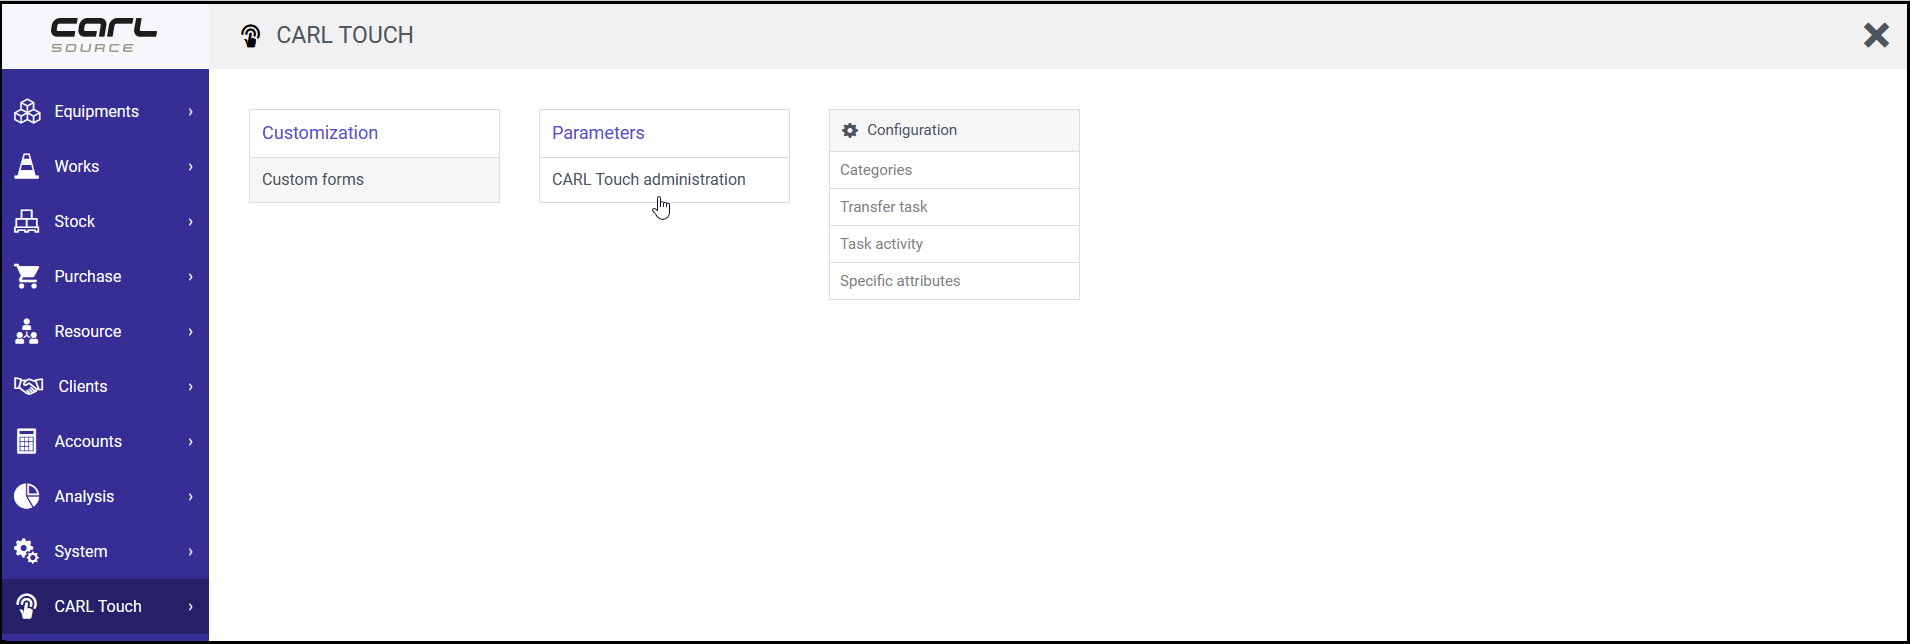
28.2. Search form
28.2.1. Search tab
The «Search» tab is used to supervise CARL Touch devices and have an overview of all CARL Touch devices.
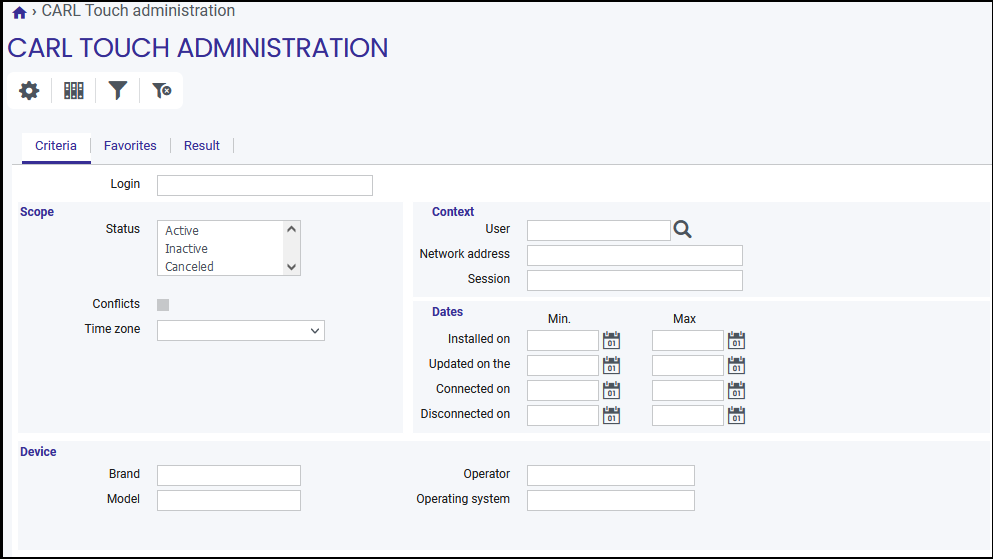
The following search criteria can be specified on this screen:
-
Identifier: Device identification number.
-
Status: Status of the device: Enabled, Disabled or Canceled.
-
Conflicts: Search criterion for devices on which CARL Touch conflicts have been detected.
-
Current version: Search criterion for selecting devices with an up-to-date CARL Touch version (or not up to date).
-
User: CARL Touch user.
-
Network address: Network address of device.
-
Session: CARL Touch session identifier (DBId) for the device.
-
Installed on: Search criterion for selecting devices based on their CARL Touch installation date.
-
Connected on: Search criterion for selecting devices based on the date of the last CARL Touch user log-on.
-
Installed on: Search criterion for selecting devices based on the date of the last CARL Touch user log-off.
-
Updated on: Search criterion for selecting devices based on the date of the last CARL Touch update.
-
Brand name: Manufacturer of the device.
-
Model: Model of the device.
-
Operating system: Version of the operating system installed on the peripheral.
-
Operator: Operator (SIM) used by the device.
-
Connection: Type of device connection (GPRS, EDGE, 3G, 4G, etc.).
28.2.2. Results tab

The «Results» tab displays a list of CARL Touch devices matching the search criteria entered.
The list of results shows exactly which CARL Touch version is installed on each device as well as any conflicts and pending messages.
The «Online» column shows in real time whether each device is connected to the server.
28.3. Detail form
The detail form shows the information specific to each CARL Touch device, along with the list of conflicts and pending messages.
28.3.1. General tab
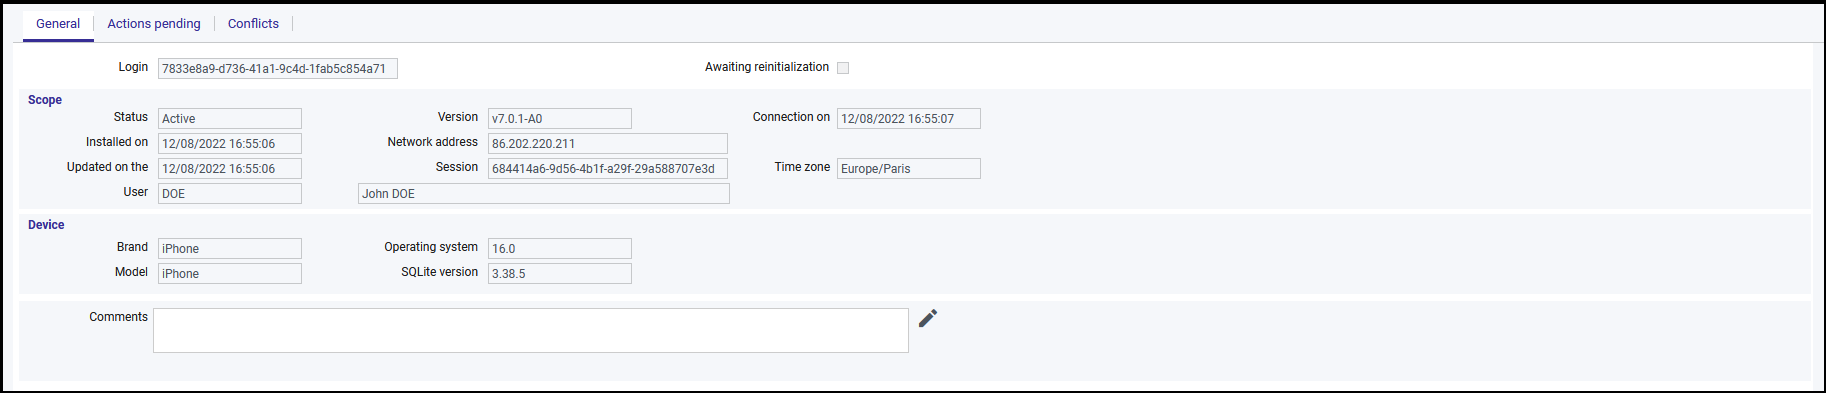
The comment field can be used to enter additional information about the device.
The status of a CARL Touch device may be Enabled, Disabled or Canceled.
The device can connect and receive messages only if its status is Enabled.
Setting a device’s status to Disabled temporarily stops messages being transferred to the device. Actions destined for a disabled device are stored in CARL Source and are sent to the device when it returns to «Enabled» status.
Setting a device’s status to «Canceled» permanently suspends the creation and transmission of messages to it. The device can no longer connect to the server and no more messages will be transferred to it. This status is irreversible and enables the device to be deleted via the delete action  .
.
28.3.2. Pending actions tab
This tab displays the list of actions pending for the current device. If there are pending actions, either the device is not connected or there are actions that have not yet been acknowledged by the device.
As default, the actions are sorted in chronological order.
The list displays:
-
The action creation date.
-
The type of action: (creation, modification, deletion).
-
The object affected by the action.
-
The entity or instance of the object affected by the action (e.g. a work order or WR code).
-
The message itself, as it will be sent to the device.
Each message can be viewed in full by clicking on the message details access button  .
.
The formatted message is then displayed.
28.3.3. «Conflicts» tab
The «Conflicts» tab shows any outstanding conflicts on the device. This list of conflicts can be displayed in the CARL Touch device administration function, but also on the device itself.
A conflict is generated following an erroneous data entry in CARL Touch. Reference to a non-existent or unauthorized entity will generate a conflict.
28.4. Data reinitialization actions
CARL Source enables the remote reinitialization of CARL Touch data.
Two actions are available to this end, accessible either from the detail form for a device, or from the «Results» tab of the CARL Touch administration function.
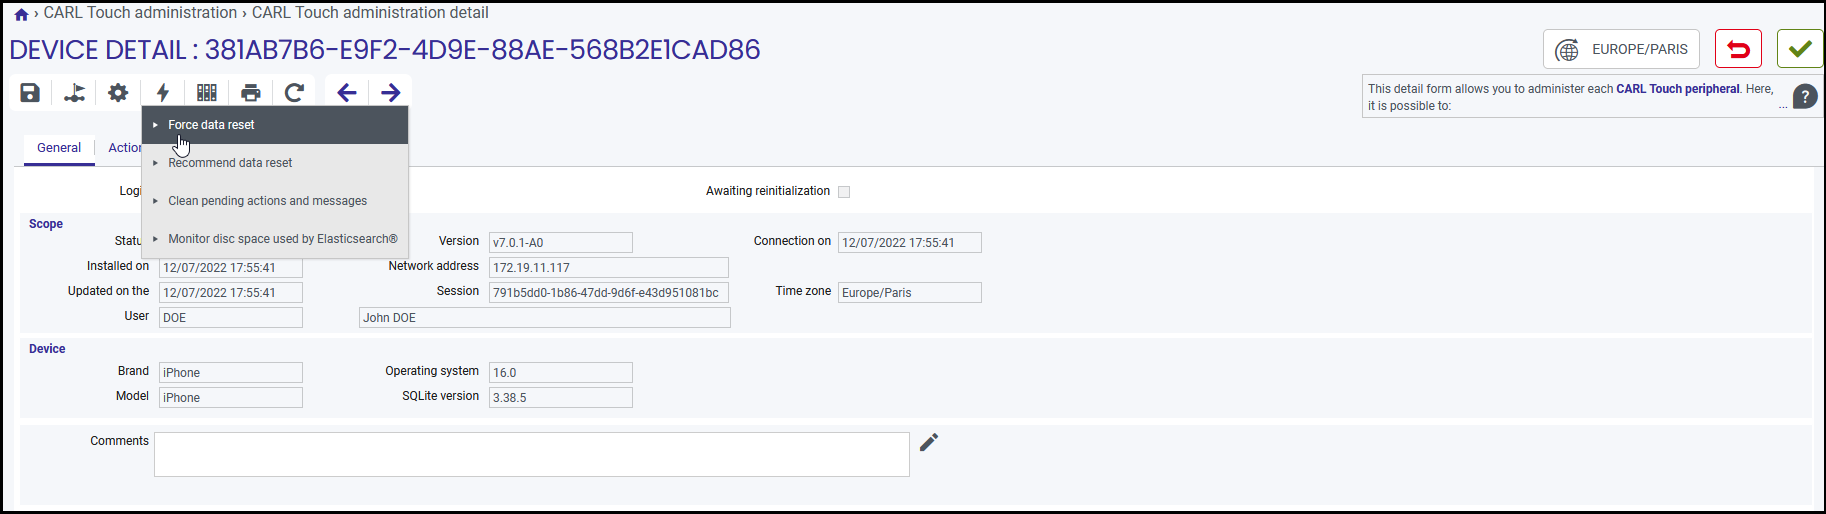
28.4.1. Forcing a reinitialization of data
This action enables users to force the remote reinitialization of CARL Touch. For the current device, this action will trigger the following processes:
-
Deletion of all pending actions
-
Creation of a reinitialization order action

|
Reinitialization is mandatory for the CARL Touch user. |
29. Form customization
The «Form customization» function, accessible via the CARL Touch module in CARL Source, can be used to create customized versions of the following forms:
-
Detail form of a delivery,
-
Detail form of an item,
-
Detail form of a location,
-
Detail form of a main point,
-
Detail form of an asset,
-
Search form of an asset,
-
Detail form of a labor type.
-
Detail form of a model,
-
Detail form of a prepared inventory,
-
Detail form of a task,
-
Detail form of a WR task.
|
|
CARL Source provides «Standard» versions of these forms. |
Starting from a «Standard» form, various possibilities are available:
-
display or hide certain data fields,
-
change the order in which data appears on the form,
-
for each data field, define whether or not it is «Mandatory» and whether or not it is «Changeable.»
|
|
When a form is changed in CARL Source, the data on the mobile device must be reinitialized to apply the change in CARL Touch. |
29.1. Selecting a customization attribute
The CARL Touch application can display a detail form that is customized and tailored for a value found on a displayed entity. For example, a specific customized form can be displayed for certain types of equipment.
To achieve this, a discriminating attribute for the entity, which will be used to select the form to be displayed, must be selected. This setting is included in the dictionary and applicable for CARL Touch for the task, asset, location, item and prepared inventory entities.
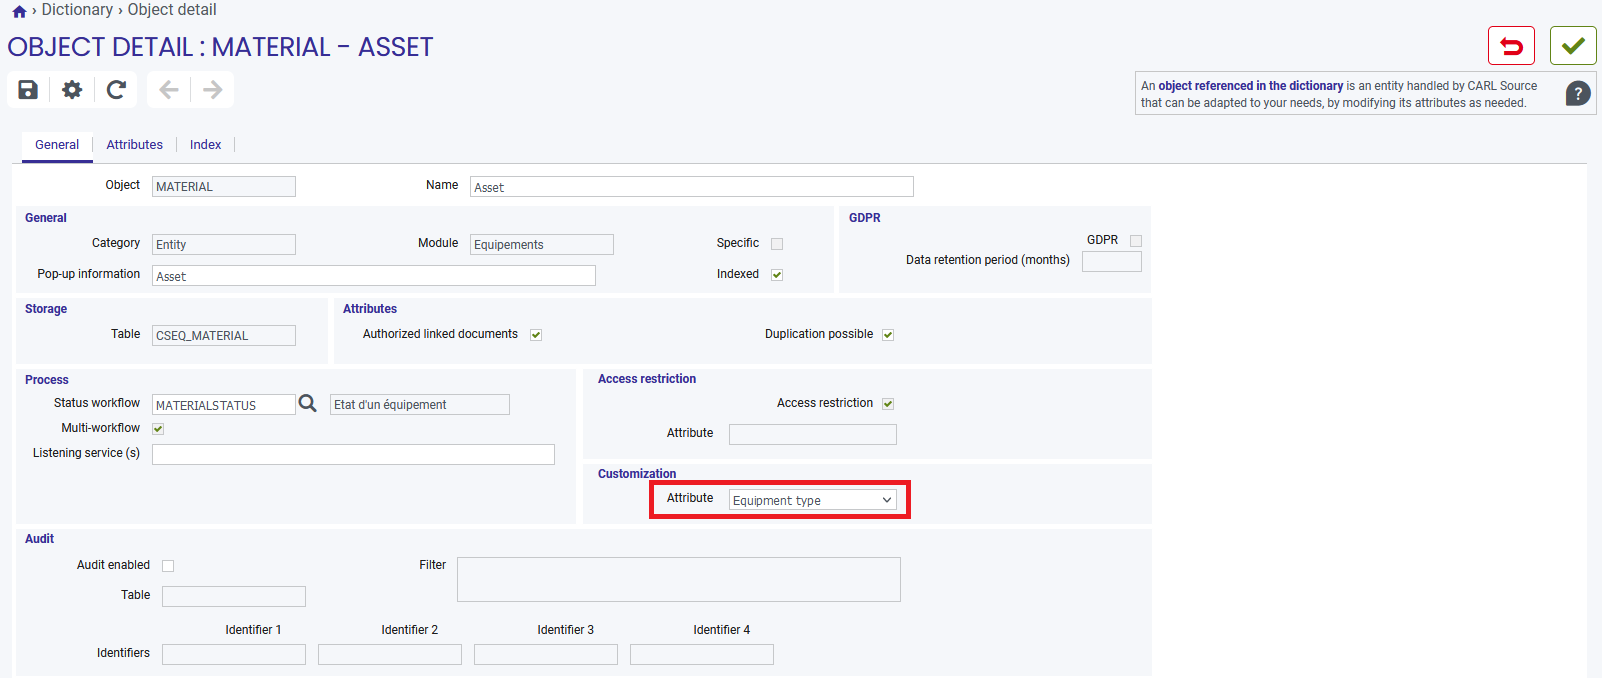
When the detail of an entity with a value set for the customization attribute is displayed in CARL Touch, the application determines whether there is a custom form with the same corresponding application value.
If a form corresponds, the form is then displayed. If not, the form defined as default is displayed.
The form customization values can be adjusted in the CARL Touch forms customization detail (see below).
|
|
For operation forms, as default the user can configure custom forms to be displayed only with particular operation codes. |
29.2. Search form
29.2.1. Search tab
This tab is used to search through existing CARL Touch forms.
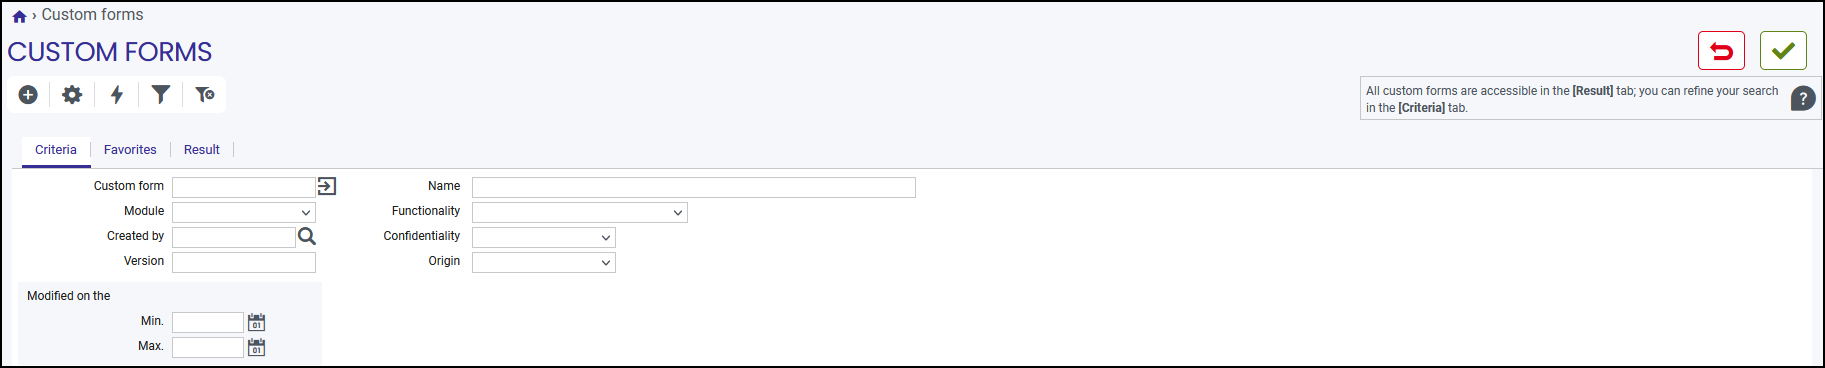
The following search criteria can be specified on this screen:
-
Code: Form code.
-
Description: Description of the form.
-
Form: Type of form (e.g. «Task detail», «Asset detail»).
-
Function: Function to which the form relates (e.g. «Locations», «Items», «Models»).
-
Standard: «Standard form» indicator
-
As default: «Default form» indicator.
-
Platform: Platform’s name.
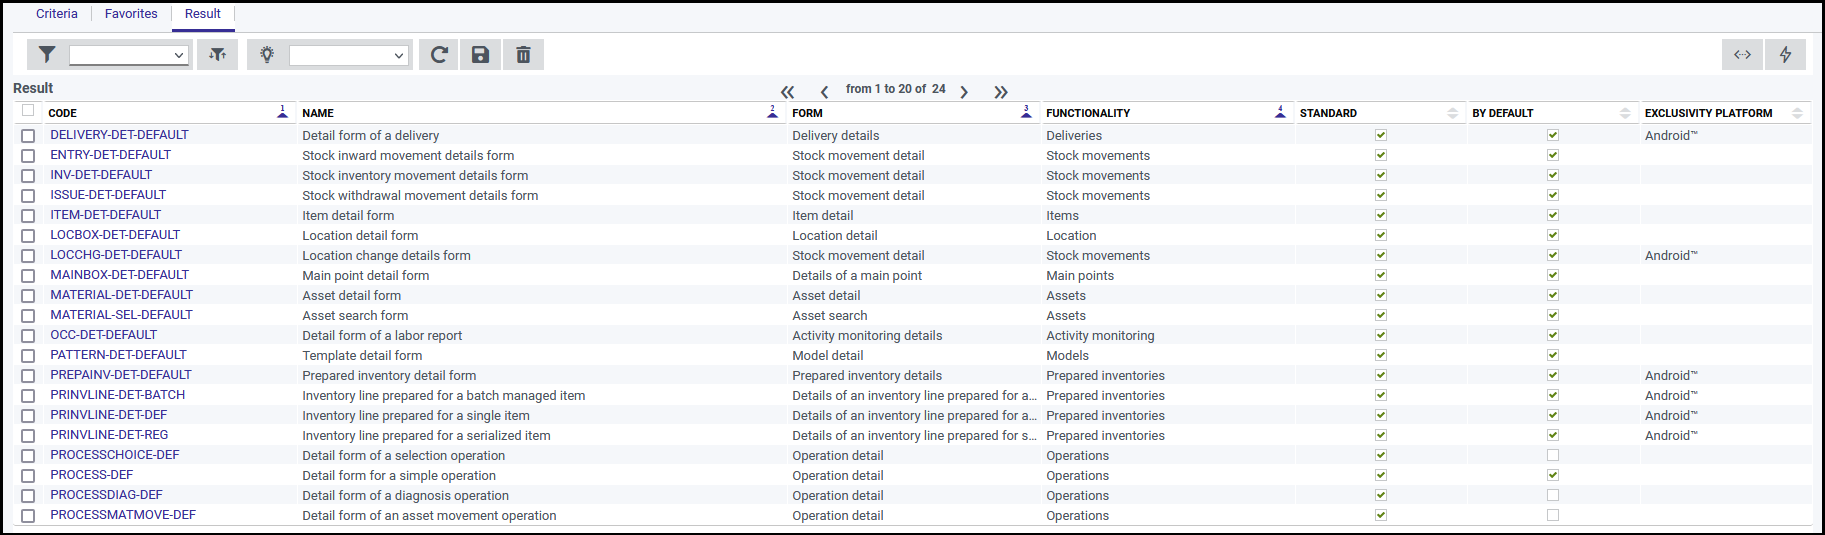
29.3. Detail form
The detail form presents general information about a CARL Touch form, as well as all attributes available for the form.
The platform Exclusivity indication identifies fields that can only be used with Android™.
29.3.1. General tab
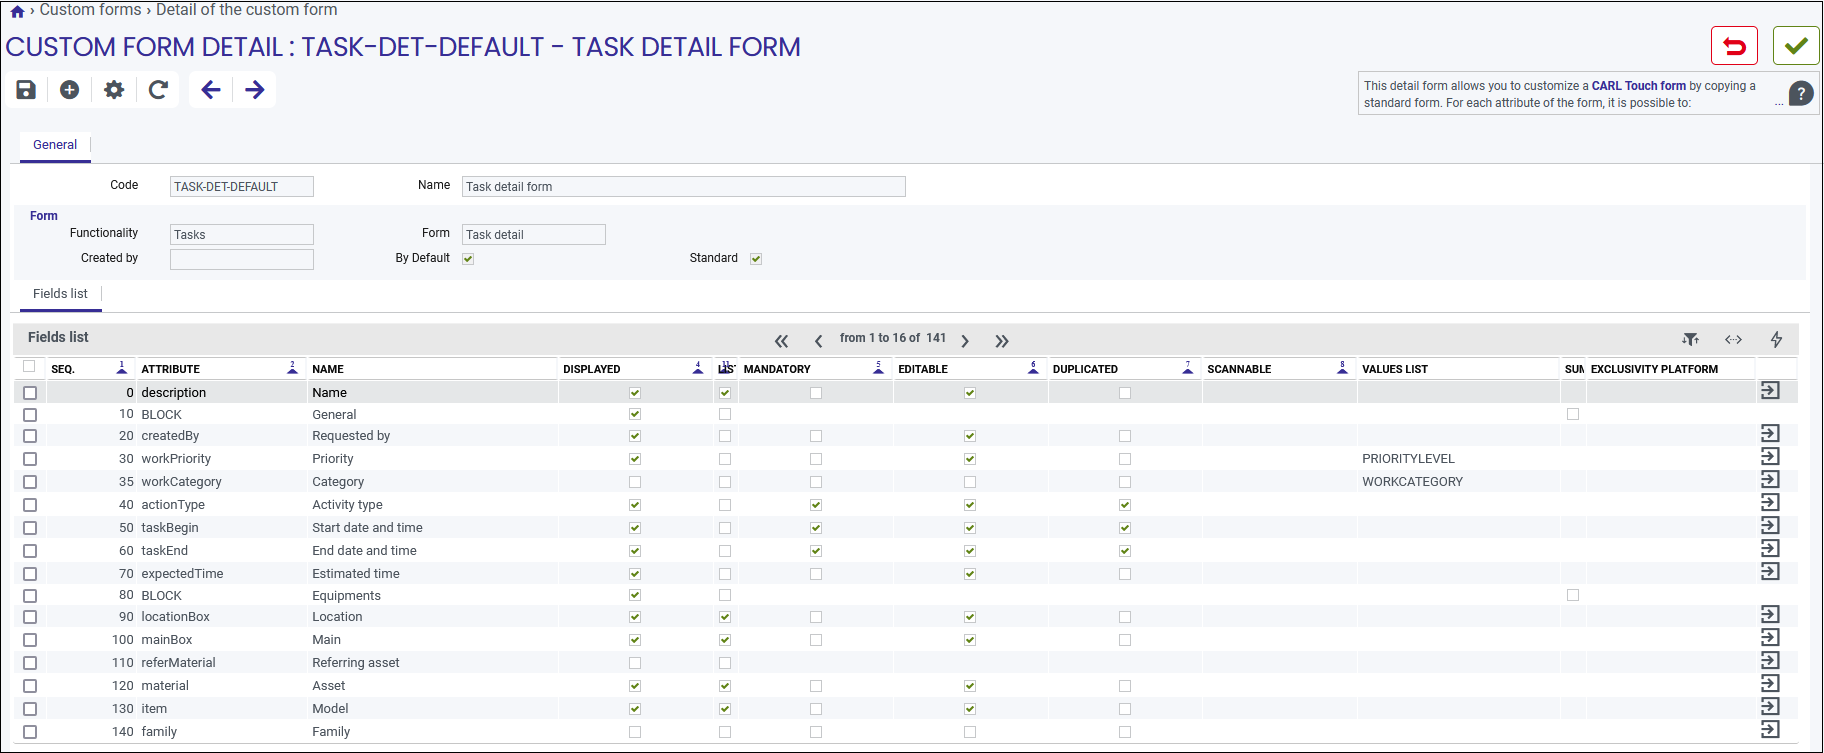
Detail form header
-
Code: Form code.
-
Description: Description of the form.
«Form» section
-
Function: Function to which the form relates (e.g. «Locations», «Items», «Models»).
-
Form: Type of form (e.g. «Task detail», «Asset detail»).
-
Created by: The CARL Source agent who created the form.
-
As default: Shows whether the form is considered as the «Default form» for the current function (Yes/No).
-
Standard: Shows whether the form is a «Standard» (box checked) or customized (box not checked) form.
|
|
|
«List of fields» tab
This sub-tab lists all attributes available for the form, and enables the user to customise the final form.
Possibilities include:
-
specifying which attributes will be visible on the form on the mobile device,
-
specifying which attributes are «Mandatory» and which are «Changeable»,
-
associating values lists with attributes,
-
And so on.
Each line in the table shows an attribute on the form with its associated properties.
The table is organized as follows:
-
Sequence: Attribute sequence number. By changing this number the user can change the order in which fields appear on the form.
-
Attribute: Attribute identifier (read only).
-
Description: Attribute description (read only).
-
Displayed: Determines whether the attribute is displayed in the form on the mobile device.
-
List *: Determines whether the attribute is displayed on the list of the function associated with the form.
-
Required: Determines whether entering this attribute is required.
-
Changeable: Determines whether the value of this attribute can be changed.
-
Duplicated: Determines whether the value of this attribute is to be duplicated from one creation to the next.
-
Scannable: Used to add the possibility of scanning a QR Code on a field, via a QR Code icon displayed alongside the field in CARL Touch.
-
List of values: Used to associate a list of values with the current attribute.
This information can be set only if the current attribute is linked to a values list. If this is not the case, this property is read only. -
Summary: This property can be set only if the current attribute is a «BLOCK» type. It specifies whether or not the current block is displayed as a summary block.
-
Platform: Availability of the attribute for a single platform.
-
 : Information about the attribute in the dictionary.
|
|
* There cannot be more than 10 attributes listed. |
|
|
The data in the table is displayed in ascending order of the sequence number values. |
Application values tab
This sub-tab includes a table showing values of the discriminating attribute for the main form entity, which determine how the form is displayed in CARL Touch.
Users can delete an application value so as to no longer affect the form. They can also add values using the button to add lines to the table. In this case, the CARL Source application will display a table of values of the discriminating attribute that can be added to the form.
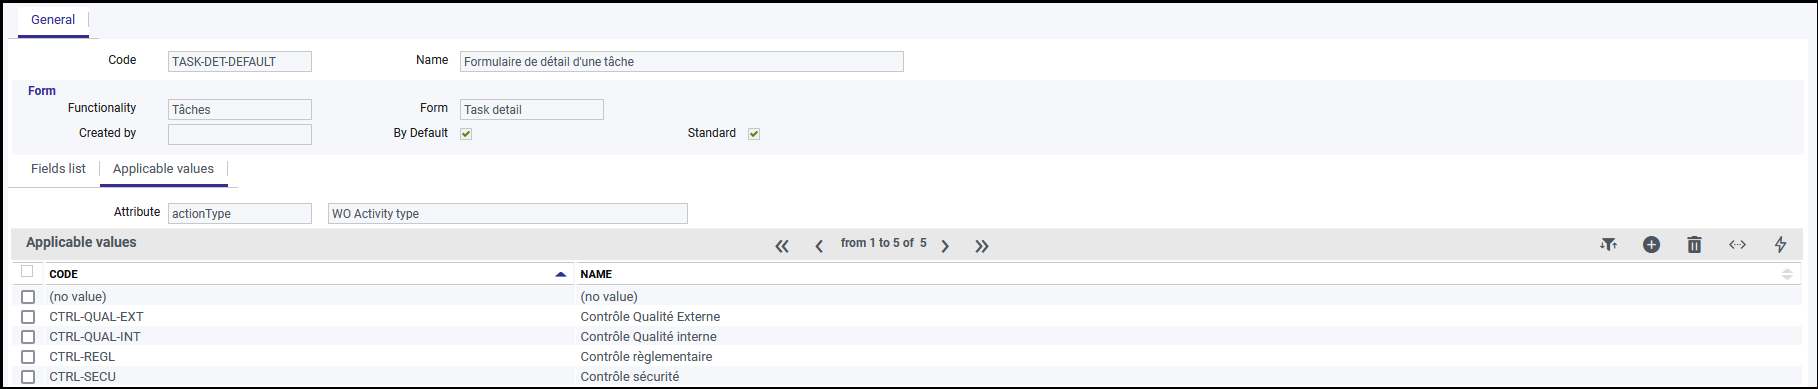
|
|
For detail operation forms, the operation code is the discriminating attribute and the application values may only be existing operation codes. |

Form action: Configuring names
Each CARL Touch custom form can have dozens of attributes and up to 12 configurable blocks.
The names of these attributes and blocks are set on the name configuration screen, not in the «Form customization» function.
=> The « Configure names » action, accessible via the  icon, enables users to navigate directly to the name configuration function and customise the names of fields on the current CARL Touch form by language and/or business domain. The user is taken straight to the correct set of names and can customise them directly.
Sub-list action: Display/hide non-visible attributes
One of the available actions for the list of attributes (accessible via the  icon) is the « Hide non-visible attributes » action: this action re-loads the list of attributes to show only those whose « Displayed » property is set to « Yes".
=> The re-loaded list gives the user a preview of the information that will actually be visible on the CARL Touch form on the mobile device.
To return to a display mode showing all the available attributes, the user can then choose the « Display all attributes » action.
29.4. Duplicating a form
Custom forms are created exclusively by duplicating another form.
The user can choose to duplicate a «Standard» form provided by CARL Source:
-
Detail form of a delivery,
-
Detail form of an item,
-
Detail form of a location,
-
Detail form of a main point,
-
Detail form of an asset,
-
Search form of an asset,
-
Detail form of a labor type.
-
Detail form of a model,
-
Detail form of a prepared inventory,
-
Detail form of a task,
-
Detail form of a WR task.
… or any other customized form created previously.
The « Duplicate » action on an existing form may be initiated in two ways:
-
Either from the list of existing CARL Touch forms, by selecting a form from the list and then clicking on the
 button.
 -
Or from the detail screen for the form to be duplicated, by clicking on the
button.
After duplication, CARL Source displays a detail screen for the new form: this screen shows all attributes of the original form (sorted in the same way by order number) and prompts the user to enter a «Code» to identify the new custom form.
30. Attribute customization
The CARL Touch application can display a customized attribute on a detail form. For example, it is possible to add a "contact" field (agent code) to the detail form of a task.
To do so, a few steps need to be followed:
-
Customizing forms.
-
Complete the dictionary.
-
Update the customization.
-
Configure the specific attributes.
-
Update the form customization.
30.1. Customizing forms
The new attributes are only visible in custom forms.
First, the form of the function in question needs to be customized - See Form customization.
30.2. Completing the dictionary
In order to view a new attribute in a custom form, it must first be added to the associated object via the CARL Source dictionary.
The list of objects in question is as follows:
-
WO: Work order
-
WOPROCESS: Work order process.
-
WODIAGPROCESS: Verification operation.
-
WOEQUIPMENTRELOCATIONPROCESS: Operation of moving an asset upon work order completion.
-
WOCHOICEPROCESS: Selection operation
-
TOUCHWOMEASUREPROCESS: Reading operation of a CARL Touch work order.
-
WR: Work request.
-
BOX: Structure point.
-
MATERIAL: Asset.
-
ITEM: Item, model
-
PREPAREDINVENTORY: Prepared inventory
-
DELIVERY: PR/order receipt
|
|
This means that attributes added to objects other than those above will not be visible in the configuration function of the specific attributes - See Configure the specific attributes. |
To add a new attribute to an object:
-
Go to the "Dictionary" function of the "System" module.
-
Search for the object to be completed via the "Criteria" tab.
-
Open the detail form of the object to be completed.
-
On the "Attributes" tab, add a new line by clicking on the
button of the sub-table.
The fields to be filled in are as follows:
-
Attribute
-
Name
-
Domain
-
Associated entity *
-
List of values *
* Editable field for certain "Domain" values.
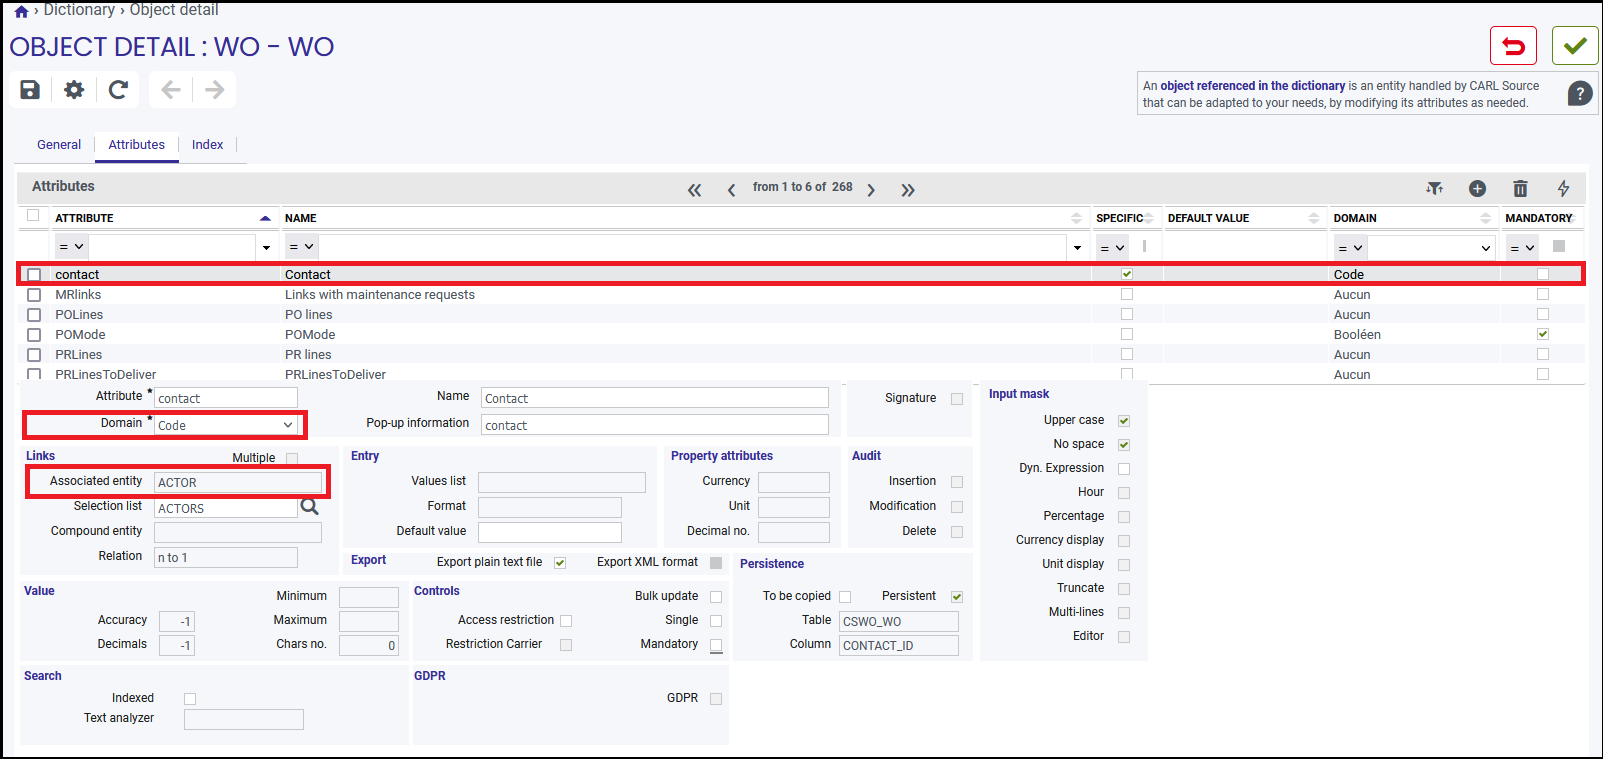
30.3. Update the customization
Once the dictionary is configured, CARL Source Admin must be used to apply the customization.
To do so, the "Customization update" action must be started in the instance in question.
This action will change the database structure and inject the properties into the compiled classes to make them usable in the application.
|
|
The table migration script will require manual execution of SQL commands to update the tables. |
30.4. Configure the specific attributes
Once the customization update has been applied, the new attributes will be available in the "Specific attributes" function of the "CARL Touch" module.
This function makes it possible to determine which customized attributes of the dictionary are to be taken into account in CARL Touch forms.
To choose an attribute:
-
Click on the
button, -
Select the object in question (the value list only offers dictionary objects containing specific attributes),
-
Select the attribute (the value list only offers the specific attributes of the selected object),
-
Confirm the form.

|
|
Adding or deleting a specific attribute on the list will change the custom forms of CARL Touch. |
30.5. Update the form customization.
Once the specific attributes have been configured, form customization needs to be finalized by placing the new attributes in the desired blocks. This is because, as default, new attributes are positioned at -1 and are not displayed.
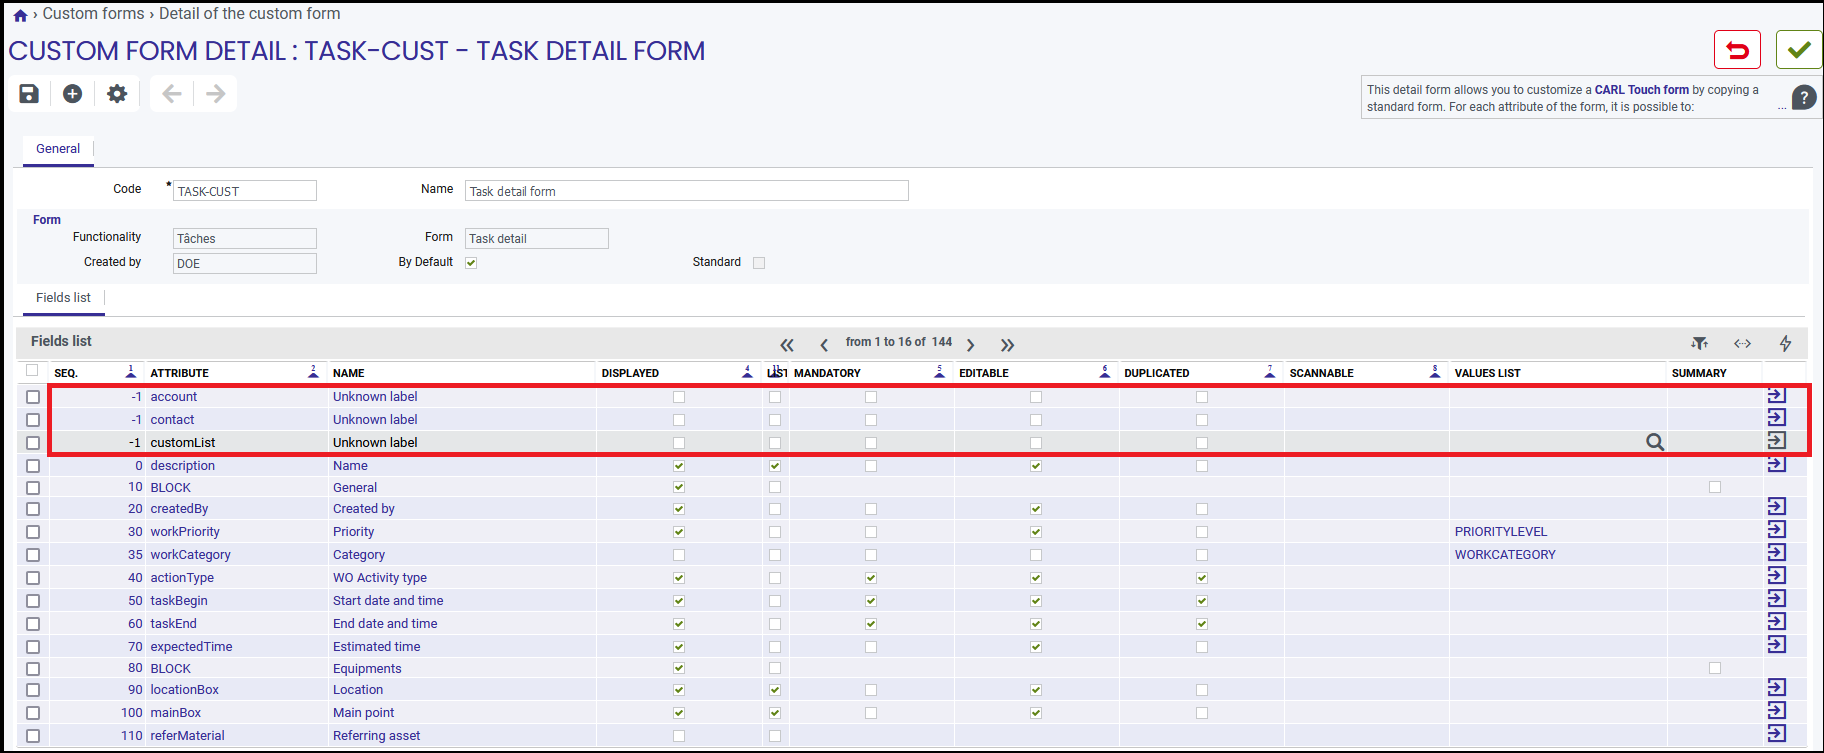
|
|
Upon saving the form, the new attributes will be available in the CARL Touch application. |
31. Customizing the vocabulary
To configure the vocabulary relating to names on CARL Touch forms, the « Configure names » action on the custom form detail screen (as described in section General tab) is used.
To customise the CARL Touch vocabulary more generally, however (e.g. button titles and application messages, etc.), the CARL Source « Dictionary » must be used.
To customize the overall CARL Touch vocabulary via CARL Source, proceed as follows:
-
In CARL Source, go to the « System » -> « Customization » menu.
-
Choose the « Customized names » feature.
-
The « Criteria » tab can be used to set search criteria corresponding to the term to be searched for and changed (Original text, Code, etc.).:
The screen below, for example, shows the « Results » tab with the « Code » criterion set to « TOUCH » (to obtain all vocabulary relating to CARL Touch):
The user then chooses the original message, description or title and associates a customized version using the « Customized text » field:

|
|
To view the changed vocabulary in CARL Touch, the data must be reinitialized on the mobile device. |
32. Customizing the transfer action
When several task transfer types are available, the « Configure transfer action » action should be used.
To customise task transfer in CARL Touch via CARL Source, proceed as follows:
-
In CARL Source, go to the "CARL Touch" -> "Configuration" menu.
-
Choose the "Transfer a task" feature.
-
The « General » tab offers four standard transfer types:

The user can add new transfer types, and thus manage those that are to be «Authorized» in CARL Touch, with or without comments.
33. Configuring the activities of a task
When you conduct other activities at the same time as the task (for example, Lockout from service, Travel, etc.), the Configure the activities of a task needs to be used.
These activities in CARL Touch are customized via CARL Source as follows:
-
In CARL Source, go to the "CARL Touch" -> "Configuration" menu.
-
Choose the "Activities of a task" feature.
-
The « General » tab offers one standard activity:

The user can add new activities and thus manage what he/she wishes to «Authorise» in CARL Touch.
34. Teleassistance Module
The Teleassistance module is an optional licensed module. Its availability depends on your configuration.
34.1. Teleassistance Configuration
This paragraph describes the configuration settings for the Remote assistance module.
34.1.1. Purchasing the Teleassistance Module
Access to the teleassistance module requires a license purchase.
If the customer purchases teleassistance licenses, an XML file is provided to enable teleassistance.
The "Teleassistance Access" parameter is added to the profile permissions.
34.1.2. Access to Teleassistance Features
Users can configure access to teleassistance by enabling the profile parameter "Teleassistance Access".
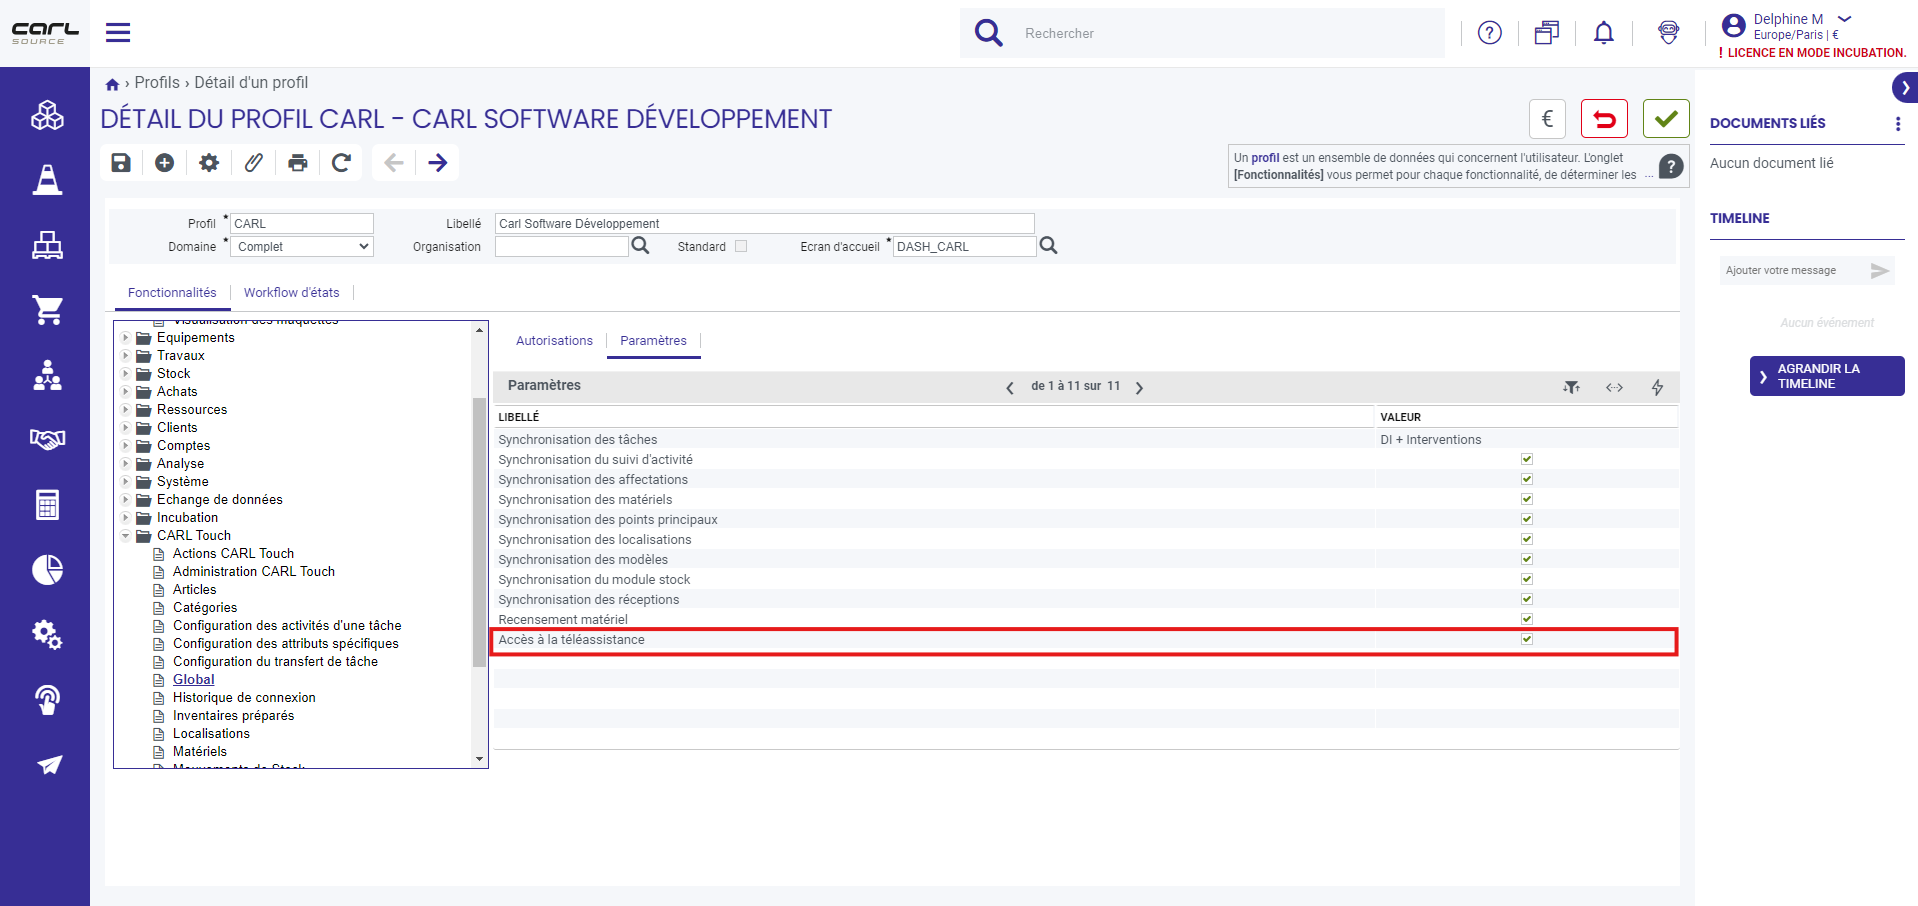
With this parameter, authorized users will have access in CARL Source to:
-
The "Experts" tabs displayed in the Equipment, Model, and Model Family features.
-
The "Expert" checkbox displayed in the Actor feature.
-
The "Teleassistance Call" checkbox displayed in the Technician feature.
-
The "Report History" action available in the Work Order and Equipment features.
And in CARL Touch:
-
The "Teleassistance" button displayed in the task detail view to access the reports.
-
The "Report History" actions for equipment.
34.1.3. Access to Teleassistance Calls
Users can configure teleassistance call authorization by enabling the "Teleassistance Call" checkbox in the Technician feature.
With this parameter, authorized users will have access in CARL Touch to:
-
The "Teleassistance" button displayed in the task detail view to show the list of experts (and initiate a teleassistance call)
34.2. Configuring Experts
In CARL Source, users can configure experts to be contacted for teleassistance calls. These experts may be internal to the company (such as managers, colleagues, etc.) or external (such as suppliers, manufacturers, etc.).
An expert does not need to have an account in CARL Source or CARL Touch. The teleassistance call will be made on their side via a web application.
34.2.1. Declaring an Actor as an Expert
Users can define the list of contacts to be reached through teleassistance in the Actor feature. An actor in Active status, defined as an Expert, will be offered as a contact during the teleassistance call.
Entering an email address is mandatory for actors defined as experts.
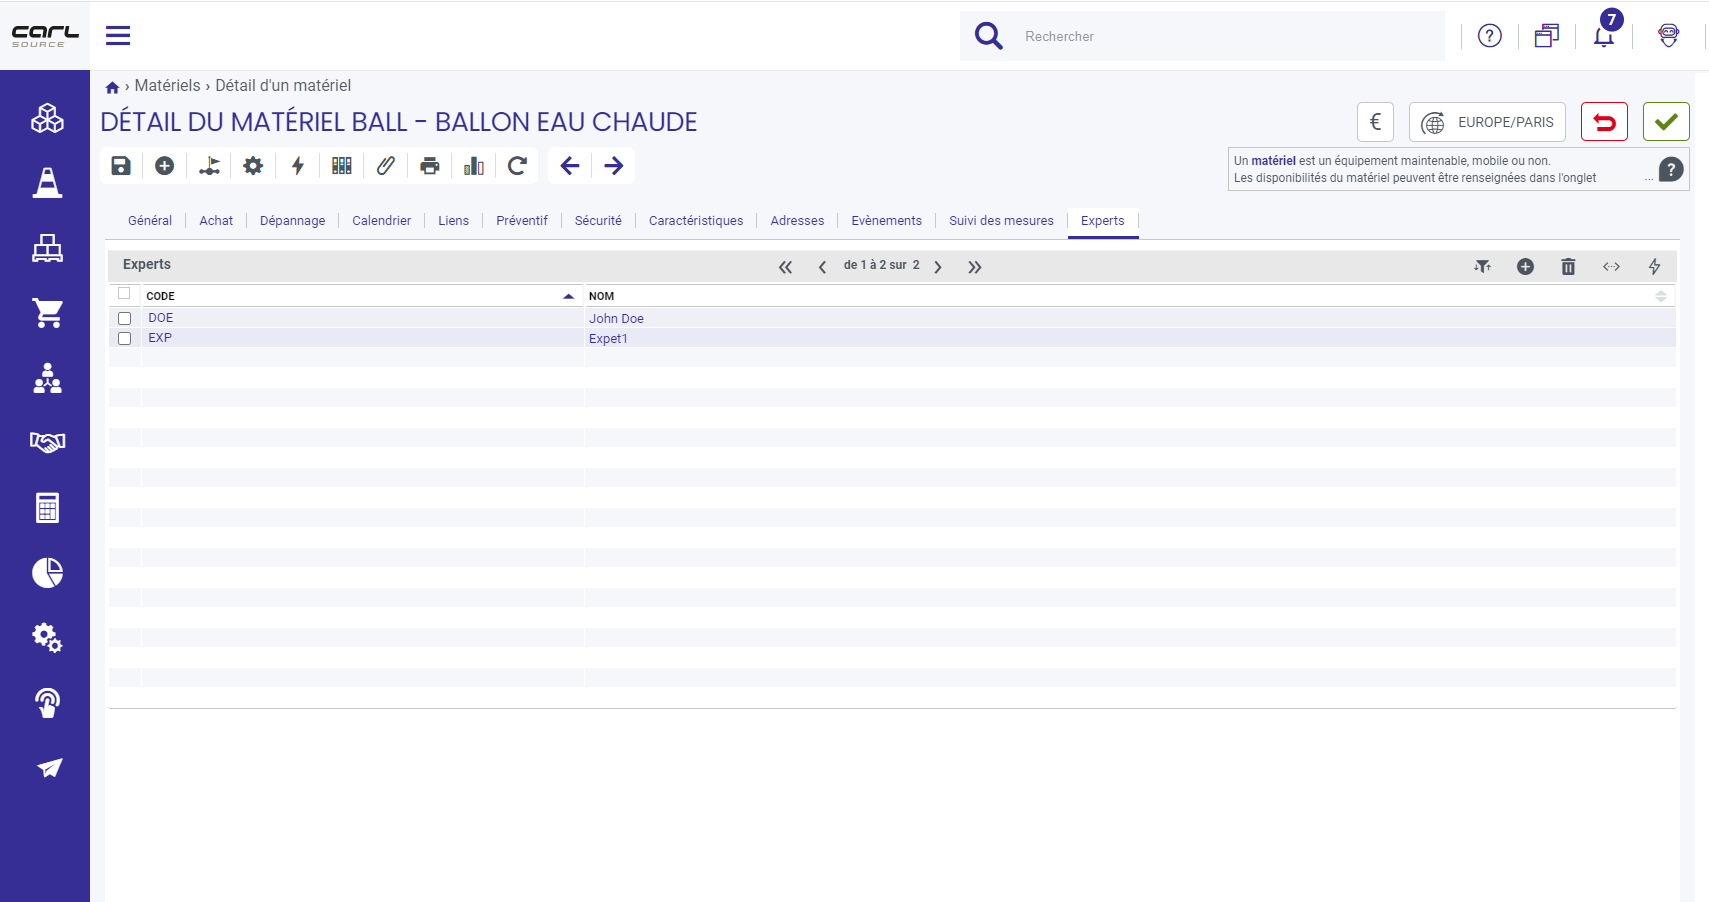
34.3. Teleassistance Call
This chapter explains how the technician can initiate a teleassistance call and how to use the teleassistance module:
-
Permissions
-
Starting the call from CARL Touch
-
Teleassistance module on the technician’s side
-
Viewing the teleassistance report
34.3.1. Access Rights for Teleassistance Call
Access to the teleassistance call is governed by a profile permission (defined in CARL Source).
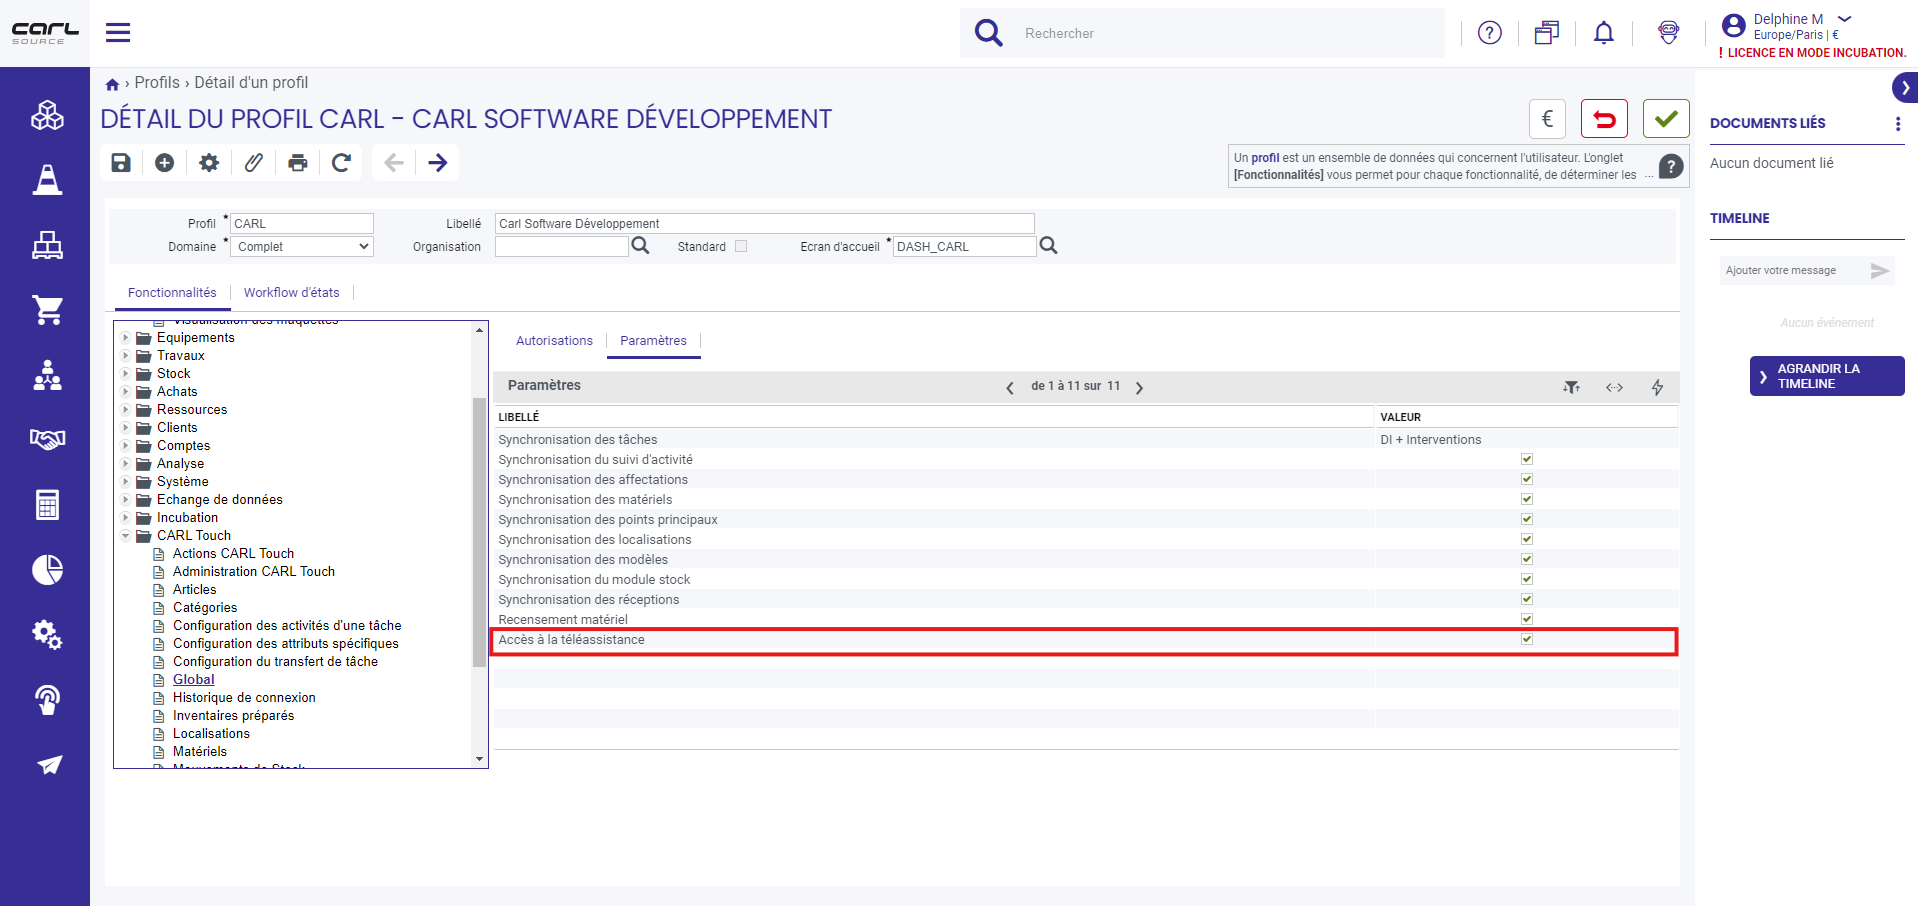
34.3.2. Starting the Call from CARL Touch
From a work order in the Acknowledged or Started status, the teleassistance button is displayed.
When the user presses the Teleassistance button  , the Teleassistance menu appears:
-
List of experts
-
Report history
To initiate a teleassistance call, the user selects the "List of experts" menu.
The screen then shows the list of qualified experts for the work order, meaning:
-
Experts linked to the equipment involved in the work order
-
Experts linked to the location of the equipment
-
Experts linked to the structure node
-
Experts linked to the equipment model
-
Experts linked to the model family
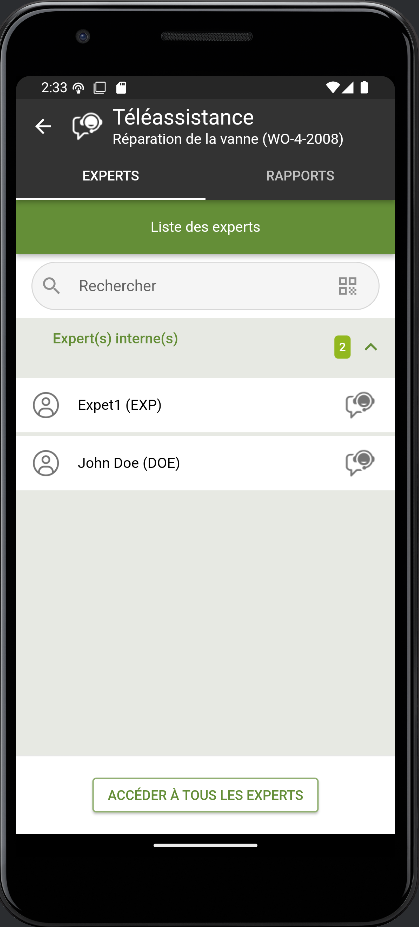
This screen is only shown if competent experts have been defined. Otherwise, the following screen is displayed directly.
If the user presses the "Access all experts" button, the next screen appears, showing the full list of experts defined in CARL Source.
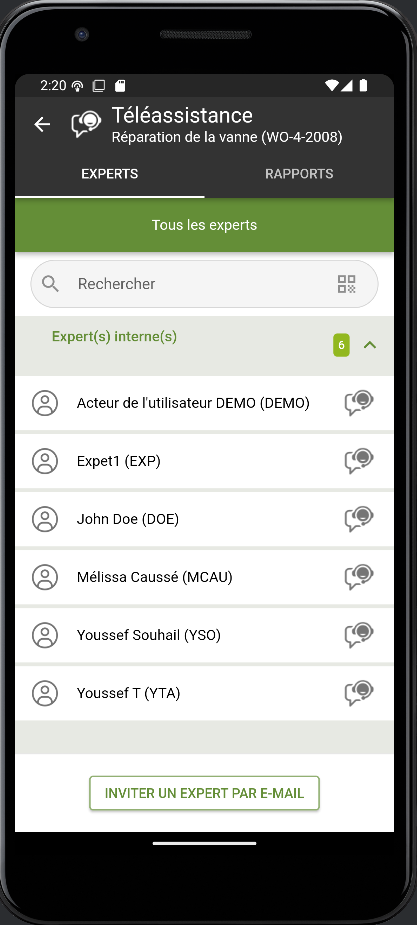
When the user presses the teleassistance icon  , an invitation email is sent to the expert. The body of the message is defined in the message template
 TMPL_RAINVITATION.
If the user presses the "Invite an expert by email" button, they can enter the name and email address of the expert to send the invitation directly (without having to declare the expert in CARL Source).
34.3.3. Teleassistance Module on the Technician’s Side
Login Screen
After selecting the expert, the user arrives on the teleassistance session login screen.
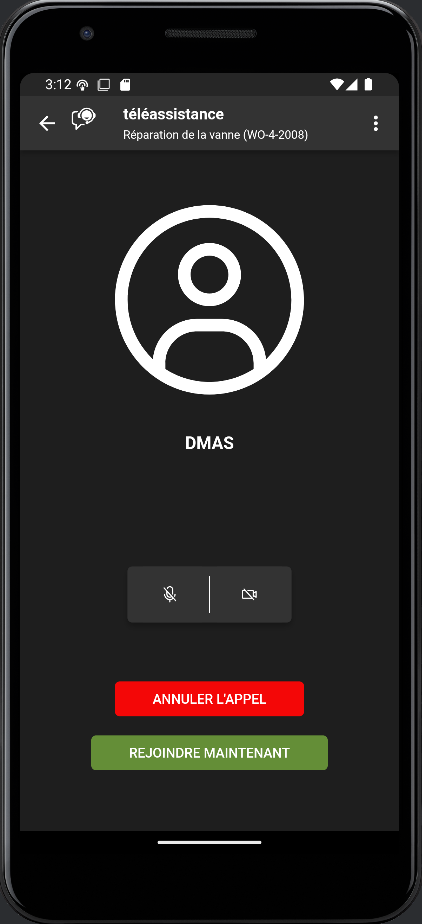
On this screen, the user can:
-
Enable or disable the microphone
-
Enable or disable the camera
-
Cancel the call
-
Join the teleassistance session
When the user presses the "Join Now" button, the teleassistance module opens.
Teleassistance Call Screen
The features available during the call allow the user to:
-
Take a photo
-
Mute/unmute the microphone
-
Mute/unmute the speaker
-
Turn the camera on/off
-
Switch between front and rear camera
-
End the call
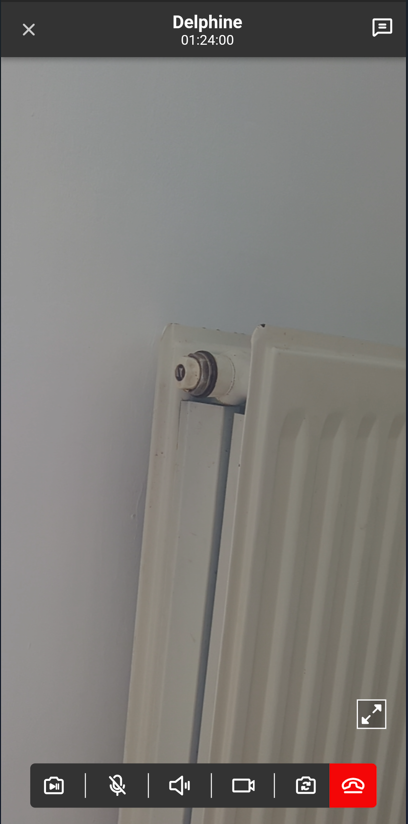
When the user takes a photo, the video feed is frozen for both participants.
Annotation Screen
Annotation features allow the user to:
-
Select the pencil for freehand annotations (with color and stroke thickness options)
-
Select a shape for annotations (with color and stroke thickness options)
-
Delete added annotations
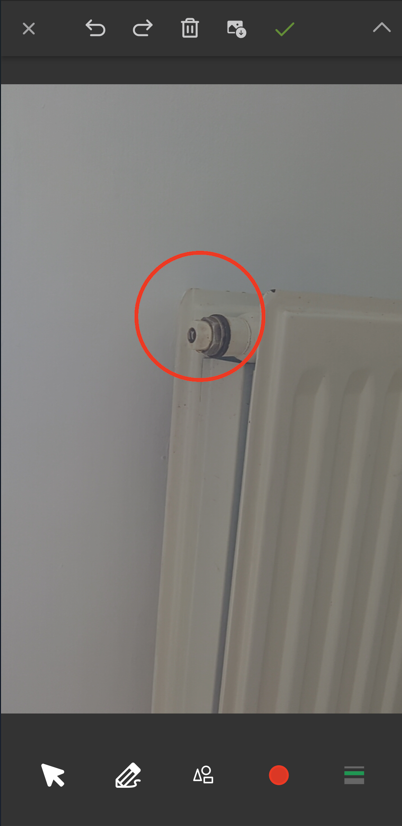
When selecting an annotation, a contextual menu appears allowing the user to modify it.
The annotation menu is only visible in photo mode. Annotation is not possible in video mode.
Chat
The user can also use the chat to communicate in writing using the icon 
In the chat, participants can exchange text messages as well as documents stored on the device or retrieved from CARL Touch (for the technician).
34.3.4. Viewing the Teleassistance Report
At the end of the teleassistance call, the technician can view the teleassistance report, which is saved in CARL Source.
34.3.5. Teleassistance Module on the Expert’s Side
Expert Invitation
The expert receives an invitation email sent by the CARL Touch application. By clicking the link in this email, they can join the teleassistance session.
The expert can select their preferred language from the list in the top right. By default, French is proposed.
Login Screen
When the expert accesses the teleassistance application, a login screen is displayed.
On this screen, they can:
-
Change the language
-
Enable or disable their microphone
-
Enable or disable the speaker
-
Enable or disable the camera
-
Join the teleassistance session
Teleassistance Call Screen
When they press the "Join the session" button, the teleassistance call screen appears:
At the top of the screen, the name of the contacted technician is displayed.
In the bottom menu, the expert can:
-
Take a photo / freeze the image
-
Zoom the image
-
Access the chat
-
Enable or disable the microphone
-
Enable or disable the speaker
-
Enable or disable the camera
-
End the call
The icon  allows the expert’s camera to be displayed.
Annotating a Photo
The expert or technician can freeze the video to take a photo. Only the person who froze the video can exit photo mode.
When the call enters photo mode, the annotation menu appears at the top of the screen:
The annotation menu allows:
-
Selecting an existing annotation (to move or modify it)
-
Drawing freehand with selectable color and stroke size
-
Annotating with shapes by selecting the shape, color, and stroke size
-
Undoing the last annotation
-
Redoing the last undone annotation
-
Deleting all annotations
When the expert selects an existing annotation, a contextual menu appears allowing it to be modified.
Chat
In the chat feature, the expert can:
-
Exchange text messages
-
Share files
-
View annotated photos
34.3.6. Viewing Teleassistance Reports in CARL Touch
Viewing Reports from a Work Order
From a work order in the Acknowledged or Started status, the teleassistance button is available.
When the user presses the Teleassistance button , the Teleassistance menu appears:
-
List of experts
-
Report history
When the user presses the "Report History" label, the following screen is displayed:
It lists all existing teleassistance reports for this intervention. Each call generates a report.
In a teleassistance report, the user can view:
-
The date and time of the teleassistance call
-
The participants of the call
-
The chat messages exchanged
-
The files exchanged via chat
-
The annotated photos shared
The user cannot modify a teleassistance report from CARL Touch.
Viewing Reports from Equipment
From an equipment record, a new action "Report History" is available.
The list of reports related to the equipment is displayed. The user can open the report detail by clicking on a line.
34.3.7. Viewing Teleassistance Reports in CARL Source
Teleassistance Report Feature
In the Interventions / Management menu, a new feature "Teleassistance Reports" is available.
Like other CARL Source features, it includes a "Criteria" tab for entering search filters, and a "Results" tab listing the teleassistance reports.
When the user selects a report, a screen with "General" and "Detail" tabs appears.
In the General tab, all key information about the report is available:
-
Report code and label
-
Work order code and label
-
Technician name
-
Expert name
-
Equipment linked to the report
-
Start and end date and time of the call
-
Call duration
In the Detail tab, information exchanged during the chat is displayed:
-
Text messages
-
Annotated photos
-
Files exchanged
"Teleassistance History" Action from Interventions
In the Work Order feature, via the Follow-up icon, a new action "Teleassistance History" is available.
This action displays the Results tab of teleassistance reports, filtered by the initial work order code.
"Teleassistance History" Action from Equipment, Model and Model Family
In the Equipment, Location, Structure Node, Model and Model Family features, a new "Teleassistance History" action is available via the Follow-up icon.
This action displays the Results tab of teleassistance reports, filtered by the selected entity’s code.
Trademark notice
Every effort has been made to ensure the accuracy of the information at the time of publication of this document.
As CARL Source is constantly evolving, CARL Berger-Levrault cannot be held responsible for any gaps or errors in this document.
If you notice any inconsistencies or errors, please contact CARL Berger-Levrault’s support department.
Any reproduction, in whole or in part, in any form whatsoever, is strictly prohibited without the prior authorization of CARL Berger-Levrault.
All trademarks and product names mentioned in this document are the property of their respective owners as listed below:
-
Android™ and Google Chrome® are registered trademarks of Google LCC.
-
ArcGIS® is a registered trademark of the Environmental Systems Research Institute.
-
Elasticsearch® is a registered trademark of Elasticsearch B.V. in the United States and other countries.
-
Firefox® is a registered trademark of the Mozilla Foundation.
-
Java™ and Oracle® are registered trademarks of Oracle Corporation.
-
PostgreSQL® is a registered trademark of The PostgreSQL Community Association of Canada.
-
Safari® is a trademark of Apple Inc. registered in the U.S. and other countries.
-
Azure®, SQL Server®, Microsoft Edge® and Windows® are registered trademarks of Microsoft Corporation.
-
Tomcat® is a registered trademark of the Apache Software Foundation in the United States and other countries.